Leclanche AlfaBat Pro User manual

V2.0
AlfaBat Pro manual

p1/42
1. TABLE OF CONTENTS
1. Table of Contents.......................................................................................................................................................... 1
2. Introduction .................................................................................................................................................................... 3
2.1. Contents ................................................................................................................................................................. 3
2.2. Top panel of the AlfaBat ..................................................................................................................................... 4
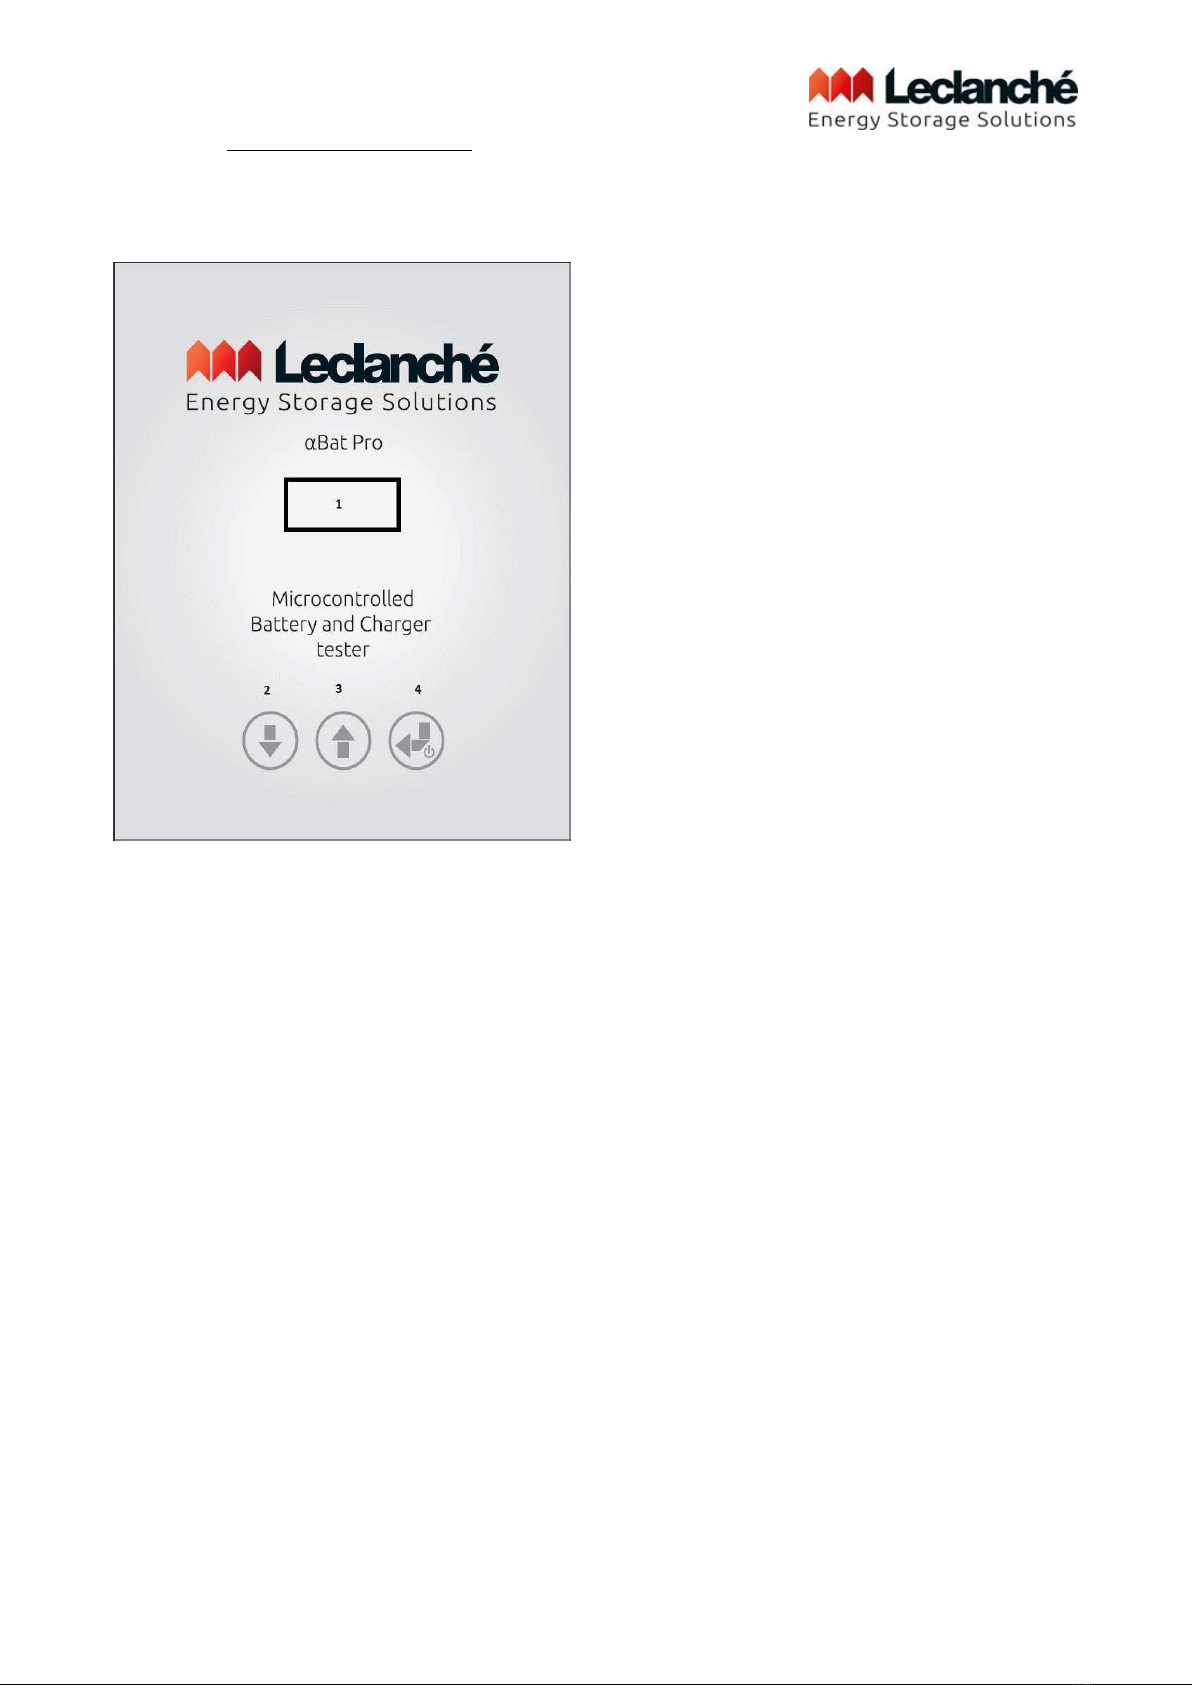
2.3. Panel of the AlfaBat Pro...................................................................................................................................... 5
3. Different Test Setups.................................................................................................................................................... 6
3.1. Capacity Test Setup ............................................................................................................................................. 6
3.2. Charger / Cycle Test Setup................................................................................................................................ 7
3.3. 24V, 36V, 48V Charger Test Setup .................................................................................................................. 7
a. One AlfaBat............................................................................................................................................................ 8
b. An equal amount of AlfaBats and batteries .................................................................................................... 8
3.4. 24V, 36V, 48V charger test with one AlfaBat ................................................................................................ 8
a. Charger test:.......................................................................................................................................................... 8
b. Cycle test:............................................................................................................................................................... 8
3.5. 24V, 36V, 48V charger test with several AlfaBats....................................................................................... 10
3.6. Record Test Setup.............................................................................................................................................. 10
3.7. Only Adaptor....................................................................................................................................................... 11
4. Stand Alone ................................................................................................................................................................... 13
4.1. Simple Capacity test........................................................................................................................................... 13
4.2. How to perform a cycle test?.......................................................................................................................... 14
4.3. Start a Test........................................................................................................................................................... 18
4.4. Test is running..................................................................................................................................................... 19
4.5. Test stopped ........................................................................................................................................................ 20
4.6. How to end a Test?............................................................................................................................................ 20
4.7. Read out results.................................................................................................................................................. 21
4.8. Meaning of results............................................................................................................................................... 22
a. Capacity test ........................................................................................................................................................ 22
b. Charger test......................................................................................................................................................... 23
c. Cycle test.............................................................................................................................................................. 23
d. Record test........................................................................................................................................................... 24
5. Interfacing With PC..................................................................................................................................................... 25
5.1. Use Of Profiles.................................................................................................................................................... 26
a. Battery Voltage Auto Detection..................................................................................................................... 27
b. Voltage (6V / 8V / 12V) ..................................................................................................................................... 27
c. User Preset Mode............................................................................................................................................... 27
d. Preset Mode (Discharge / Charge / Cycle / Record) ................................................................................. 27
e. Save Voltage......................................................................................................................................................... 28
f. Save Current........................................................................................................................................................ 28
g. Capacity Value..................................................................................................................................................... 28
h. Capacity Unit ....................................................................................................................................................... 28
i. Peukert Factor..................................................................................................................................................... 29
j. Peukert Calculation Test .................................................................................................................................. 29
k. Temperature........................................................................................................................................................ 30
l. Temperature Unit (°C / °F).............................................................................................................................. 30
m. Max Charging Time / Recording Time ...................................................................................................... 30
n. Number Of Cycles In Cycle Mode................................................................................................................. 31
o. Offset..................................................................................................................................................................... 31
p. Bad Cell Timer .................................................................................................................................................... 31
q. Bad Cell Voltage High........................................................................................................................................ 32
r. Bad Cell Voltage Low ........................................................................................................................................ 32
s. End Of Test Voltage........................................................................................................................................... 32
t. Needs Charging Voltage.................................................................................................................................... 33
u. Pass / Fail Threshold........................................................................................................................................... 33
v. Max Discharge..................................................................................................................................................... 34
w. Discharge Current.............................................................................................................................................. 34
x. Detect Start of Charge...................................................................................................................................... 34

p2/42
y. Detect End of Charge........................................................................................................................................ 35
6. Trouble Shooting ......................................................................................................................................................... 36
6.1. Self-power down of the AlfaBat...................................................................................................................... 36
6.2. No power up ....................................................................................................................................................... 36
6.3. Error: Over Temperature ................................................................................................................................ 37
6.4. Error: No Adaptor ............................................................................................................................................. 37
6.5. Error: Battery Low............................................................................................................................................. 37
7. Technical specifications .............................................................................................................................................. 38
7.1. Technical specifications of the AlfaBat Pro................................................................................................... 38
8. Safety Instructions........................................................................................................................................................ 39
9. Clarification of symbols .............................................................................................................................................. 40
10. Maintenance .................................................................................................................................................................. 41
11. Warranty........................................................................................................................................................................ 42

p3/42
2. INTRODUCTION
Congratulations on your purchase of the unique battery and charger tester: ‘The AlfaBat Pro’.
The following topics will proof your professionalism when testing batteries and/or chargers:
-With the included BITS software, you can create professional, printed reports
-The AlfaBat is a highly accurate capacity tester
-Different battery technologies can be tested: flooded lead acid batteries, AGM, GEL, …
-Tests both 6V and 12V batteries
-Selectable capacity 0.8 –400 Ah
-Three tests can be recorded in the internal memory
-Microprocessor controlled
-Reliable and qualitative
-24V, 36V, … chargers can also be tested
2.1. CONTENTS
You should find following contents in the cardboard box:
-AlfaBat Pro
-USB stick with BITS software & manuals
-USB connection cable
-Getting started document
-Battery connection cable

p4/42
2.2. TOP PANEL OF THE ALFABAT
Displays information about the test.
Enables you to set the most important parameters (battery capacity, kind of test battery, voltage,)
1. Display screen
2. Down button: decrease number, scroll in menu, etc.
3. Up button: increase number, scroll in menu, etc.
4. Enter/Power Up button: ON/OFF, Confirm a selection.

p5/42
2.3. PANEL OF THE ALFABAT PRO
You can connect the following to the AlfaBat Pro:
-RS 232: interface with Computer or the external printer
-Charger: Charger –connector
-Battery: Battery –connector
-Power Supply: for connecting the power adaptor.
It is also possible to replace the fuse:
-This must be an UL-approved 50A MAXI-fuse.

p6/42
3. DIFFERENT TEST SETUPS
Use one of the following hardware setups:
-Capacity Test Setup
-Charger / Cycle Test Setup
-24V, 36V, 48V Charger Test Setup Record Test Setup
-Printer Connection Only Adaptor
3.1. CAPACITY TEST SETUP
Use this test set-up if you want to perform a Capacity test on a battery or read out the results of a test.
You should connect the clamps properly to the battery (Check polarity! Red = positive, Black = negative).
The other side of this cable should be connected at the ‘battery – connector’ of the AlfaBat.
This set-up can also be used with an adaptor. This has the following advantage: there is no standby current,
thus the battery will not further discharge after the test is finished. A 6V battery with a bad cell can be better
detected because the battery can be discharged to a lower voltage.

p7/42
3.2. CHARGER /CYCLE TEST SETUP
Use this test set-up if you want to perform a Charger-, or a Cycle test on a Battery.
You should connect the clamps properly to the battery (Check polarity! Red is positive, black is negative).
The other side of this cable should be connected at the ‘Battery – INPUT’ of the AlfaBat.
Connect the charger with the ‘Charger – INPUT’ of the AlfaBat (Check polarity! Red is positive, Blue is
negative). This must be a 6V or a 12V charger, corresponding to the battery.
This set-up only works with an adapter; otherwise the test will not start. Without an adaptor, the
consumption of the AlfaBat would disturb the measurements.
3.3. 24V, 36V, 48V CHARGER TEST SETUP
There are two possible ways to perform a ‘Charger Test’ on a battery:
-With one AlfaBat
-An equal amount of AlfaBats and batteries corresponding to the charger voltage.

p8/42
a. One AlfaBat
-Charge current measuring
-Voltage measured on ONE battery
-Max one cycle!
b. An equal amount of AlfaBats and batteries
-Charge current measuring
-Voltage measuring of all batteries
-Multiple cycle test is possible
3.4. 24V, 36V, 48V CHARGER TEST WITH ONE ALFABAT
With only one AlfaBat you can do a charger test on a 24V, 36V, 48V battery.
a. Charger test:
These steps must be followed:
1. Discharge all batteries.
2. Use the connection schematic as showed below.
3. Upload or use the correct Profile in the AlfaBat.
4. Start the test on the discharged batteries.
b. Cycle test:
These steps must be followed:
1. Discharge all batteries, except the battery on which the AlfaBat is connected.
2. Use the connection schematic as showed below.
3. Upload or use a correct Profile in the AlfaBat.
4. Start a test on the batteries.
5. Push the UP-button directly after start-up, so "cycle first charge" will be skipped.
Only one cycle is possible!

p9/42
24V connection example
36V connection example

p10/42
3.5. 24V, 36V, 48V CHARGER TEST WITH SEVERAL ALFABATS
With an equal amount of AlfaBats and batteries, you can do a charger test or a cycle test on a 24V, 36V, 48V
battery.
Upload the correct profile to the AlfaBats. Start a cycle or a charger test on the batteries at the same time.
Use the connection schematic as shown below.
36V Connection example
3.6. RECORD TEST SETUP
Use this test set-up if you want perform a Record test in an electrical Battery System.
A record test gives you the possibility to record voltage and/or current in an electrical battery system (record
current and/or voltage in time). This can be very useful if you want to know the energy balance (positive or
negative).
Example: Charger / Load system. If there is more consumption then charging, you can see the battery voltage
getting lower with the time.

p11/42
You should connect the clamps properly to the battery (Check polarity! Red is positive, Black is negative).
The other side of this cable should be connected at the ‘Battery – INPUT’ of the AlfaBat.
Connect the Load (Light, FAN, Heater, …) and/or the Charger with the ‘Charger –‘ input of the AlfaBat
This set-up only works with the adaptor; otherwise the test will not start. Without the adaptor, the
consumption of the AlfaBat would disturb the measurements.
3.7. ONLY ADAPTOR
Use this test setup if you want to read out the results on the computer or if you want to print-out the results
on a small printer.
After a test is completed, it is still possible to print-out the results. This is only possible if you enabled the
parameter 'Printer Output Enable' in the used profile during test. Follow the procedure 'read-out results'
(you can find this under topic 'Standalone') to print-out the results.

p12/42

p13/42
4. STAND ALONE
The AlfaBat is made for use with a personal computer. However, measurements can be done without the
computer connected. Test results will be saved in the AlfaBats internal memory.
There are four modes where the AlfaBat could work with:
-Battery Capacity Test
-Charger Test
-Cycle Test
-Record
4.1. SIMPLE CAPACITY TEST
The device is standard delivered to start a capacity test in its easiest mode. If you are used to the AlfaBat,
you can use profiles to use all functions.
The next explanation should allow you to start a simple capacity test:
1. Connect the AlfaBat to the battery
Use following test setup: Capacity test setup
Note: charge the battery before starting a capacity test.
2. Switch on the device
Switch on the device with the ENTER - key. This button can be found on the top panel of the AlfaBat.
3. Enter the Capacity
Directly after power up of the AlfaBat, the user has the ability to choose the capacity in the 20-hour rating.
This is often the capacity indicated on the battery by the manufacturer. Remark: check if this value is not the
5-hour rating. The user can change this value with the UP - or DOWN - key. If you hold the key down a long
time, it gives you the possibility to speed up the change in value.
4. Confirm your selection
Confirm this capacity with the ENTER - key. The test will start. Dependent of the state and the capacity of
the battery, the test will take a few minutes to several hours.
5. Read out the results
After the battery is completely discharged, the result is shown on the display. Thirty minutes after test, the
device automatically shuts down. The results can still be read out: see topic read out results. For the meaning
of these results, we refer to following topic in the manual: Meaning of the results.

p14/42
4.2. HOW TO PERFORM A CYCLE TEST?
The device is delivered as standard for performing a capacity test in the simplest way possible. To perform a
cycle test you must use profiles. You can read more about profiles in the Profiles section.
You can start a cycle test by following the simple procedure outlined below:
1. Connect to the battery
Use the following test setup: Charger/Cycle test setup.
NB. The device will not operate without an adapter (see the technical specifications). You must also connect
the AlfaBat to the computer via the serial cable. This is necessary in order to change the settings of the
AlfaBat.
2. Switch on the device
The device must be switched on with the ENTER key. This key is located on the upper panel of the AlfaBat.
3. Start BITS
The use of BITS is necessary in order to set the AlfaBat in the cycle mode.
4. Set BITS in the advanced mode
Set the program in the advanced mode. To do this, go to the ‘Options’ menu and select ‘Program Options’.
Tick the box ‘Enable advanced program options’.

p15/42
Then click OK. The program is now in the advanced mode.
6. Set the AlfaBat to the correct profile
Go to the ‘Device’ menu and select ‘Profiles’.
The profile window is displayed:

p16/42
At the top (A) there are three memory locations for profiles in the AlfaBat. A profile defines how the AlfaBat
has to perform a test. The AlfaBat is set as standard at memory location 1, i.e. for a capacity test. This can
easily be retrieved in ‘C’ (always use memory location 1).
In other words, to perform a cycle test you must always select ‘C’ and set the AlfaBat to start at memory
location 2 (always use memory location 2). After selecting this location, click OK. The AlfaBat is then set to
perform cycle tests.
Note: during this action, the device must be connected up and supplied with power. You can check this by
verifying that ‘Cycle test’ is displayed in the optional field after ‘Memory location 2’.
7. Switch off the device
Disconnect the device from the battery/adapter so that the device is switched off. The device is now set for
a cycle test.
8. Switch the device on again
The device must be switched on with the ENTER key. This key is located on the upper panel of the AlfaBat.
9. Enter the capacity
Immediately after the device is switched on, a command prompt appears on the display to enter the capacity
in 20h. This is the battery capacity as stated by the manufacturer. Note: the capacity may also be stated in
5h. This value can be changed with the ‘up’ or ‘down’ keys. Keeping the key depressed allows the value to be
changed quickly.

p17/42
10. Confirm your choice
Confirm your choice with the ENTER key.
The test will perform the following steps:
-Initial charge:
oThe test will start by charging the battery. Depending upon the condition and capacity of the
battery, this test can take a few minutes to several hours.
-Cycle 1a (discharge cycle):
oThe battery will undergo a capacity test. Depending upon the condition and capacity of the
battery, this phase can take a few minutes to several hours. The battery will be fully
discharged. The AlfaBat will automatically set the cutoff voltage.
-Cycle 1b (charge cycle):
oAt the end of the discharge cycle the battery will be recharged. Depending upon the condition
and capacity of the battery, this phase can take a few minutes to several hours.
-Cycle 2a (discharge cycle):
oSee cycle 1a.
-Cycle 2b (charge cycle):
oSee cycle 1b.
-Cycle 3a (discharge cycle):
oSee cycle 1a.
-Cycle 3b (charge cycle):
oSee cycle 1b.
11. Readout of the test results
At the end of the test the result is shown on the display. Thirty minutes after the end of the test, the device
is automatically switched off. A readout can still be obtained after the device is switched off: see ‘Readout of
the test results’. For the meaning of the results, see under ‘Test results’ in the user guide.
It is recommended that you use the ‘Monitor test’ function for logging the results. This is because the AlfaBat
has a limited memory and is unable to store the full result. See the BITS user guide for more information.
The profile for a cycle test supplied with the device is set at three cycles with maximum discharge per cycle.
However, this can be adjusted by the user with user-configured profiles. See the BITS user guide for more
information (under ‘BITS reference’, subsection ‘Menu and toolbar’, subsection ‘Device menu’, under
‘Profiles’).

p18/42
4.3. START A TEST
Use one of the different hardware set-ups: Capacity Test, Charger / Cycle Test, 24V, 36V, 48V Charger Test,
Record Test.
1. Power-up
Power-up the AlfaBat with the power-up button.
2. Initialize
First the AlfaBat will show the version number on the LCD - screen:
-AlfaBat Pro: ProV1.14
3. Choose Profile (If enabled in the profile)
The AlfaBat will ask which profile you want to load. Use the Up/Down keys to select the preferred Profile.
This option is by default disabled. This option can be enabled/disabled with the software: more information
in the BITS manual.
4. Enter the ambient temperature (If enabled in profile)
The AlfaBat will ask to enter ‘the ambient temperature’. Use the Up/Down keys to select the desired value.
5. Enter the Capacity Unit (If enabled in profile)
The AlfaBat will ask to enter ‘the Capacity Unit’. Use the Up/Down keys to select the desired value.
This is an important parameter, because a battery can deliver less or more energy dependent of the load
current.
Example: a battery has a capacity of 50Ah in 5h or 60Ah in 20h. The battery can deliver 10A during 5 hours
or 3A during 20 hours.
You have to be careful for choosing the correct battery capacity.
6. Enter the Capacity (If enabled in profile)
The AlfaBat will ask to enter ‘the Capacity’. Use the Up/Down keys to select the desired value.
7. Enter the battery voltage 6V, 8V, 10V or 12V (If enabled in profile)
The AlfaBat will ask to enter ‘the Battery voltage’. Use the Up/Down keys to select the desired value.
8. Enter Peukert value (If enabled in profile)
The AlfaBat will ask to enter ‘the Peukert value’. Use the Up/Down keys to select the desired value.

p19/42
9. Enter Timer value used during charging or recording (If enabled in profile)
The AlfaBat will ask to enter ‘the timer value’. Use the Up/Down keys to select the desired value.
10. Enter Max discharge (If enabled in profile)
The AlfaBat will ask to enter ‘the Max discharge value’. Use the Up/Down keys to select the desired value.
11. Enter Mode (If enabled in profile)
The AlfaBat will ask to enter ‘the Mode (discharge / charge / cycle / record)’. Use the Up/Down keys to select
the desired value.
12. Enter Number of cycles (If enabled in profile and mode cycle is selected)
The AlfaBat will ask to enter ‘the Number of cycles’. Use the Up/Down keys to select the desired value.
13. Test is running
4.4. TEST IS RUNNING
The AlfaBat will continuously show the test information. Each item will be on the LCD-screen for 3 seconds.
Item 1:
The LCD-screen shows the working mode:
-Mode Discharge
-Mode Charge
-Mode Record
-Cycle <number> Discharge
-Cycle <number> Charge
Item 2:
The LCD-screen shows the actual current in Amps:
-Current <value> in A
Item 3:
The LCD-screen shows the actual voltage in Volts:
-Voltage <value> in V
Item 4:
The LCD-screen shows the actual result (not available for ‘Record’ mode)
-Capacity <value> in %, for mode discharge and cycle discharge,
-Charge Factor <value>, for mode cycle charge,
Other manuals for AlfaBat Pro
1
Table of contents
Other Leclanche Test Equipment manuals