Lectric eBikes XPedition 1.0 User manual

LECTRICEBIKES.COM | 602.715.0907 1
OWNERS MANUAL
Lectric XPedition 1.0
V 1.0 | 2023
www.lectricebikes.com
602.715.0907
To prevent PROPERTY DAMAGE, SERIOUS INJURY, or DEATH,
you should read, understand, and follow the warnings and
instructions in this manual. Keep for future reference.

LECTRICEBIKES.COM | 602.715.0907 LECTRICEBIKES.COM | 602.715.09072 3
Important Safety Information 4
Getting Started 16
Features 28
Cockpit System 32
Preparing to Ride 43
Your First Ride 47
Battery Pack 49
Storing Your Lectric eBike 64
Transporting Your Lectric eBike 64
Disposal of Your Lectric eBike 64
Troubleshooting 63
Maintenance 67
Legal 70
TABLE OF CONTENTSWELCOME TO THE LECTRIC EBIKES FAMILY
CONTACT INFORMATION
Thank you for purchasing a Lectric eBike.
Please read this Owner’s Manual carefully before setting up your
bicycle and riding. You should become thoroughly familiar with the
proper operation of your Lectric eBike, its features, capabilities, and
limitations. To ensure a long, trouble-free life for your Lectric eBike,
provide it with the proper care and maintenance as described in this
manual. Of course, it is not practical or possible to warn you about all
of the hazards associated with operating or maintaining your Lectric
eBike, for this, you must use your own good judgment.
For replacement parts and accessories, you should always use
Lectric eBikes approved parts, as they have been specially
designed for your bicycle and manufactured to meet Lectric eBikes’
demanding standards.
This manual should be considered a permanent part of your bicycle
and should remain with the bicycle when it is sold.
If you need any assistance, please do not hesitate to reach out to us.
Email: [email protected]
Phone: (602) 715-0907
Website: lectricebikes.com
Lectric Help Center: help.lectricebikes.com
Please record your bicycle’s serial number in the space below. The
serial number is located on the head tube of your bicycle. Refer to
“Serial Number” on page 17 for the location of the serial number.
SERIAL NUMBER
Scan the QR code to nd the
latest version of your manual.
lectricebikes.com/manual

LECTRICEBIKES.COM | 602.715.0907 LECTRICEBIKES.COM | 602.715.09074 5
IMPORTANT SAFETY INFORMATION
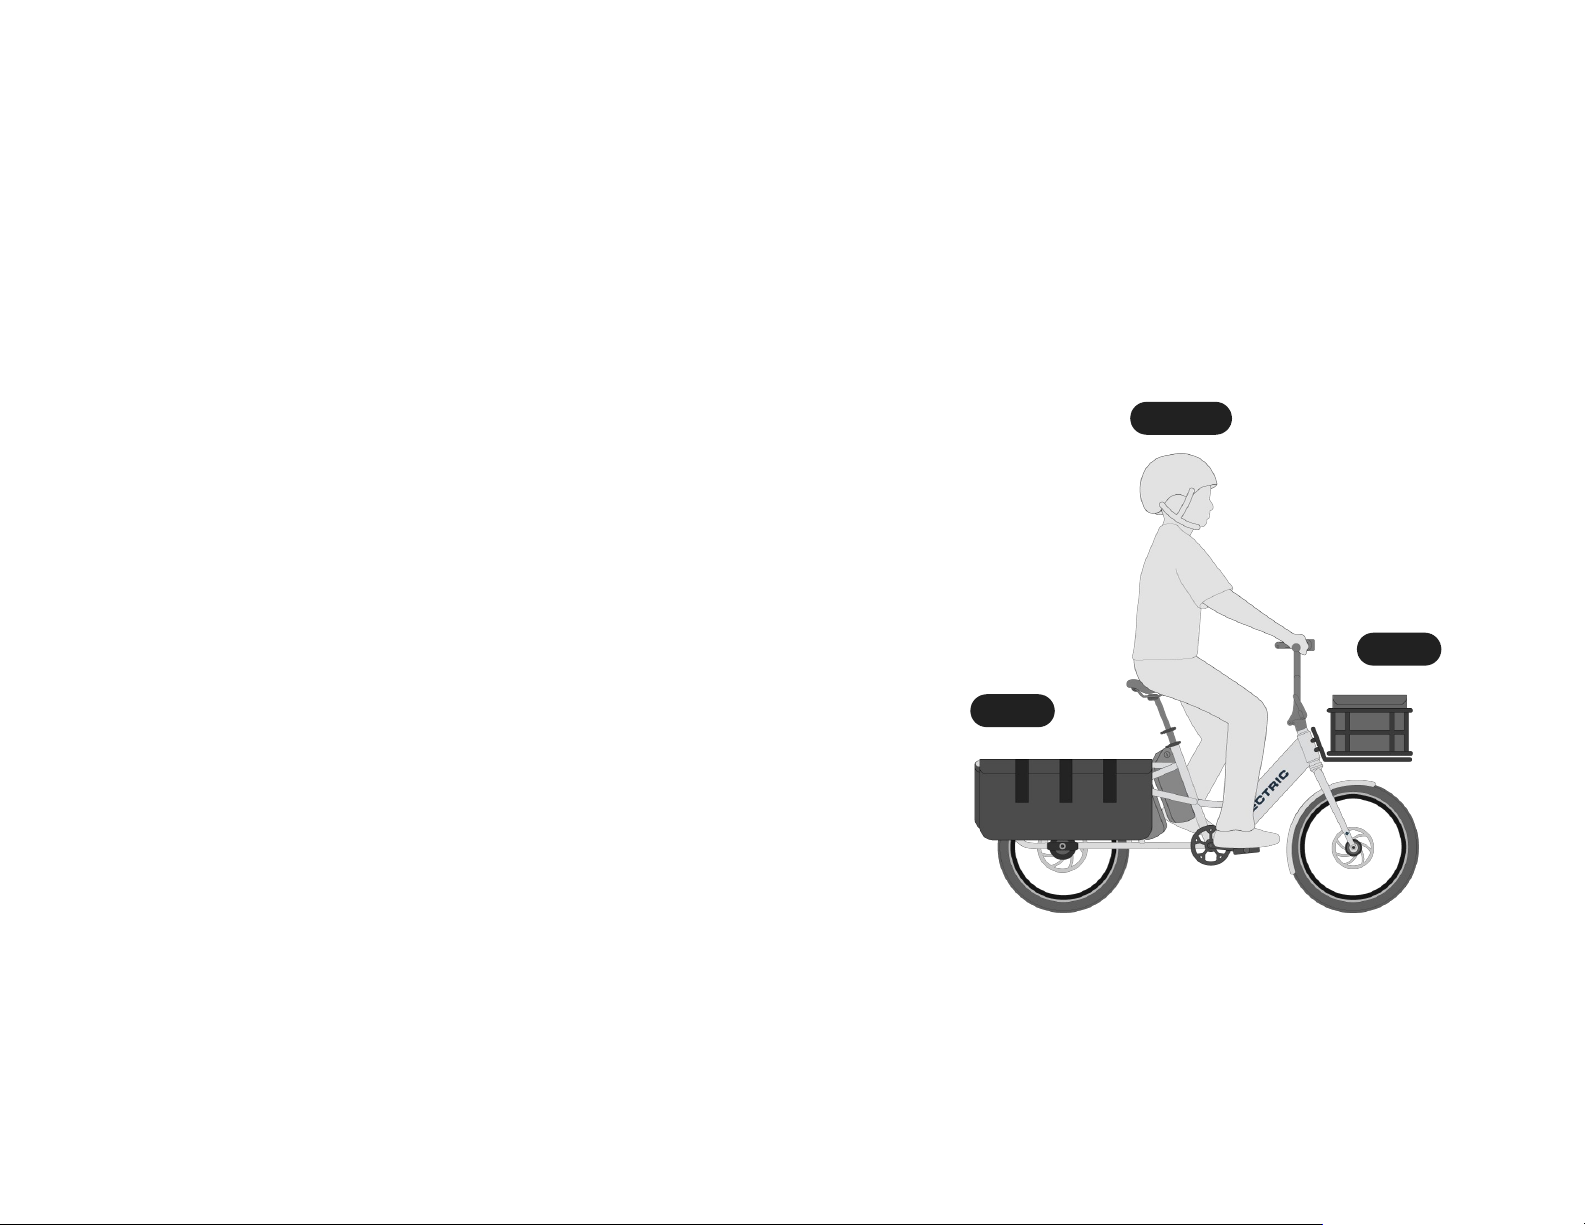
Read and Understand Owner’s Manual Before Riding
Read this entire Owner’s Manual before you take the rst ride on your
new eBike and keep it for reference. This Owner’s Manual contains
important safety, performance, and service information. The latest
version of your manual is available at lectricebikes.com/manual
Like any sport, bicycling involves risk of injury and damage. By
choosing to ride a bicycle, you assume the responsibility of that risk:
you need to know and practice the rules of safe and responsible
riding as well as proper use and maintenance. Proper use and
maintenance of your bicycle reduces the risk of injury. If you have any
questions or do not understand any aspect of using or maintaining
your bike, take responsibility for your safety and consult with your
local bicycle shop, or contact us for assistance.
This manual is not intended as a comprehensive use, service, repair
or maintenance manual. Please see your local bicycle shop for all
service, repairs, or maintenance. Your local bicycle shop may also be
able to refer you to classes, clinics, or books on bicycle use, service,
repair, and maintenance.
Your Lectric eBike is classied as an EPAC (Electrically Power
Assisted Cycle, otherwise known as a Pedelec), and is referred to in
this manual as a bicycle unless otherwise noted.
Rider’s Responsibility Regarding Regulations
It is the rider’s responsibility to obey the regulations that apply to your
Lectric eBike.
The regulations covering the use of your Lectric eBike vary by
state, and even municipality in certain locations. You must comply
with the local regulations related to the minimum age of the rider,
driver’s license, insurance, license plate, trafc, and maximum speed
regulations, and any other regulations. These regulations may change
at any time.
Intended Use
The intended use of your Lectric eBike is to be ridden by one adult
rider (age 18 and up) at an appropriate time and place for general
transportation and/or recreational use. Any other use is prohibited
and may result in SERIOUS INJURY or DEATH.
Your bicycle is NOT INTENDED for off-road or mountain bicycle use,
or for any kind of jumping. Some of these bicycles have suspension
features, but these features are designed only to add comfort, not
off-road capabilities.
Riders should be procient cyclists (ages 18+), riding on paved
surfaces where the tires are always on the ground, on roadways,
or dedicated bicycle-only lanes where permitted by law (not on
pedestrian-use shared lanes or sidewalks). Your bicycle should not be
used to tow another bicycle.For trailer towing, consult this Owner’s
Manual and the trailer owner’s manual for towing instructions and
towing compatibility.
To prevent serious injury or death:
• Read all safety warnings and all instructions.
• Always ride within your limits and the limits of your Lectric eBike.
• Bicycles are only for use by persons 18 years of age and above.
Riders must have the physical coordination, reaction, and mental
capabilities to control a bicycle and manage trafc, in addition to
managing road conditions and sudden situations with respect to
the laws and instructions governing bicycle use. Persons with any
mental or physical conditions that may make them susceptible
to injury, impair their physical dexterity or mental capabilities
to recognize, understand, and follow safety instructions—or
understand the hazards inherent to its use—should not use or be
permitted to use products inappropriate for their abilities.
Safety Messages
WARNING!

LECTRICEBIKES.COM | 602.715.0907 LECTRICEBIKES.COM | 602.715.09076 7
Helmets
• Always wear a helmet. Wearing a helmet properly may reduce the
risk of a severe head injury. When riding, always wear a helmet
that meets or exceeds the standards of the Consumer Product
Safety Commission (CPSC). Check the manual that comes with
your helmet.
• Ensure your helmet ts your head and is properly secured. If you
attach a child’s seat to the bicycle, the child must wear a properly
tted helmet at all times.
• Read your helmet manual to make sure it is adjusted properly
according to the tting instructions provided by the helmet
manufacturer.
• A proper-tting helmet should be comfortable and should neither
rock forward/backward nor side to side.
Follow eBike Regulations On and Off the Road
• Be aware of eBike regulations in your area. Generally, the
regulations for the use of an electric bicycle are the same
as those for a standard bicycle. However, there may be local
differences such as where you can ride, minimum rider age, or
required equipment and license and registration regulations. It is
your responsibility to know the local regulations that apply to an
electric bicycle and to obey them.
Ride at Your Own Risk and Use Common Sense
• Always keep both hands on the handlebar grips and the brake
levers so they are within reach while riding.
• Do not ride distracted. Always remain alert to all riding conditions.
Using the Display or other technology (including your mobile
phone or music player) could distract you from riding. Only adjust
the Display when stationary and in a safe start-up position.
• Never use headphones or a cell phone to talk or text when riding.
• Always ride defensively. Watch out for potential obstacles that
could force you to swerve suddenly or lose control. Braking while
steering may reduce your ability to control your bicycle.
• Never ride under the inuence of drugs and/or alcohol.
• Consult a doctor before using the bicycle if you have any medical
condition or issue that affects your ability to safely perform
physical activities, or if you:
◦are or may be pregnant;
◦have heart, respiratory, back, joint, or other orthopedic
conditions;
◦have high blood pressure;
◦have difculty with physical exercise; or
◦have been instructed to restrict physical activity.
• Always keep small parts away from children. Some eBike
accessories may present a choking hazard to small children.
• Never modify your frame or bicycle in any way. Do not sand, drill,
le, or remove parts from your bicycle. Do not install incompatible
components or hardware.
• Always use proper lifting techniques to prevent injury. Your eBike
may be signicantly heavier than a bicycle without a battery pack
and a motor.
• Take responsibility for your own SAFETY. If you have any
questions or do not understand any aspect of using or maintaining
or call (602) 715-0907.
Riding at Night
• Riding at night comes with more risks than riding during the day
due to decreased visibility; riders are encouraged to exercise
increased caution in nighttime conditions.
• Turn lights ON for safety. For increased visibility, ensure that the
front headlight and rear taillight are turned ON and adjusted such
that other people on the road can see them clearly. Also check
your front and rear wheel reectors.
• Riders should wear reective clothing at night. You may want to
attach additional ashing lights to your clothing or helmet.

LECTRICEBIKES.COM | 602.715.0907 LECTRICEBIKES.COM | 602.715.09078 9
Riding in Wet Conditions
• Use caution when riding in wet conditions as it will take longer
to brake and to stop. Your tires may slip when turning. Risk of a
crash is dramatically increased in wet conditions.
• Your electric bicycle can withstand light rain and small splashes,
but it is not designed to be subjected to inclement weather,
extremely heavy showers, or submersion in water. The electric
bike’s components have an IP rating of 65. Water damage is not
covered under the warranty.
Cargo and Electric Bike Safety
Cargo bikes handle differently than non-cargo bikes. Weight
distribution is most important for a safer experience on cargo bikes.
The payload is the total weight being carried on a cargo bike and
should be distributed across the cargo bike. Generally, positioning
weight as low on the bike as possible is best for handling. Also,
utilizing the front rack for some weight will help balance out large
loads in the rear of the bike and improve handling. The XPedition has
weight carrying capabilities on the rear rack and front headtube rack
mount.
NEVER exceed the maximum total weight limit of 450 lbs (204 kg).
The rear rack can hold a maximum of 300 lbs (136 kg). The front
rack can hold a maximum of 35 lbs (15 kg). And, the rider maximum
weight is 330 lbs (150 kg).
As an example, you can have 70 lbs (18 kg) of cargo, and a 180 lb
(82 kg) rider.
60 lbs
10 lbs
180 lbs
• Look ahead and brake sooner. You may be moving faster on your
eBike, and it may be heavier compared to a bicycle, which means
you may need to react and brake sooner when riding. Other road
users may not expect you to be traveling at higher speeds. Riding
faster may increase your risk of a crash.
• Stop pedaling well before approaching corners to avoid entering
a corner too quickly. You should also pay particular attention to
terrain conditions as you may approach obstacles faster than
expected.

LECTRICEBIKES.COM | 602.715.0907 LECTRICEBIKES.COM | 602.715.090710 11
Before each ride, inspect your eBike for damage. If
damage is found, do not ride.
Verify that the front and rear axles are secure.
Check that the front and rear tire pressure is within
the recommended pressure range printed on the tire
sidewall.
Pull the brake levers to ensure the brakes are working
properly and adjust if necessary.
Visually inspect the bike for damage or anything out of
the ordinary.
Turn on the lights, especially if riding at night.
Make sure all hardware is tightened to the recommended
torque specications found in “Tightening Torque” on
page 27 of the owner’s manual.
Verify that the stem folding latch is securely closed and
locked.
Making sure adjustable stem is closed and locked and
that all hardware is tightened to torque spec found in
“Tightening Torque” on page 27.
Check that the seat post is inserted past the minimum
insertion point. The minimum insertion point is labeled
on the seat post.
Check that the seat post collar and clamp are closed
and tightened to 20 Nm (labeled as Seat Rail Binder in
“Tightening Torque” on page 27) or till it leaves an
impression on your hand.
Check that the seat cannot be twisted out of position,
and set the height to a safe position that makes it easy
to mount and dismount the bike.
Verify the quick-release pedals are locked in place.
Check the condition of the chain to see if it needs
cleaning or lubrication.
Wear a helmet and high visibility clothing.
NEVER exceed the maximum total weight limit of 450 lbs
(204 kg). The rear rack can hold a maximum of 300 lbs
(136 kg). The front rack can hold a maximum of 35 lbs
(15 kg). And, the rider maximum weight is 330 lbs (150
kg). As an example, if you have 40 lbs (18 kg) of cargo,
then the maximum weight of the rider remains 330 lbs
(131 kg).
Only carry the cargo you need. More weight will drain the
battery faster and affect how the bike handles.
Ensure all components are properly secured.
Make sure your battery is fully charged.
Pre-Ride Safety Checklist
Lectric eBikes recommends going through each item on the pre-ride
safety checklist before and after each ride. Spending time to make
sure all of the bike’s components are in good working order before a
ride is a crucial step along the way to a safe and fun ride.
This checklist is not intended to function as a detailed service
manual. Be sure to read your entire owner’s manual before riding
or repairing your bike. If you do not have the expertise required to
perform any of these checks, Lectric eBikes recommends having your
local bike shop mechanic perform a detailed safety check of your
bike in regular intervals. Ensure your local mechanic is experienced
and reputable.

LECTRICEBIKES.COM | 602.715.0907 LECTRICEBIKES.COM | 602.715.090712 13
States that recognize three classes of eBikes require a label to be
placed on the bicycle denoting the class of your Lectric eBike, the
motor’s wattage rating, and the top speed of your Lectric eBike. Your
bicycle comes as a Class 2 bicycle by default and has a label with
this information posted under the carry handle, near the seat post on
the bicycle.
If you change your bicycle’s top speed, you must remove this label
from the bicycle and replace it with a Class 3 label, detailing your
Lectric eBike’s class, top pedal-assisted speed, and motor wattage.
The Class 3 label is located directly under the Class 2 label.
Stem label Class 3 labelClass 2 label
On-Product Warning Labels
There are warning labels on your Lectric eBike for your protection.
If a label is missing or is not legible, contact Lectric eBikes
for a replacement.
Symbol Index
Safety Alert Symbol. This symbol is used to alert
you to potential personal injury hazards. Obey all
safety messages that follow this symbol to avoid
possible serious injury or death.
Safety Alert Symbol. Read, understand, and follow
the warnings and instructions in this manual.
Signal Words, Warnings, and Caution Statements
DANGER
WARNING
CAUTION
NOTICE
Indicates a hazardous situation that, if not
avoided, will result in death or serious injury.
The combination of the safety alert symbol
and the word WARNING indicates a hazardous
situation that, if not avoided, could result in
death or serious injury.
The combination of the safety alert symbol
and the word CAUTION indicates a hazardous
situation that, if not avoided, could result in
minor or moderate injury, or is an alert against
unsafe practices.
Indicates information considered important,
but not hazard-related (e.g. messages relating
to property damage).
WARNING!
The word CAUTION used without the safety
alert symbol indicates a situation which, if not
avoided, could result in serious damage to the
bicycle or the voiding of your warranty.
CAUTION
This Manual contains many “Warnings” and “Cautions” concerning
the consequences of failure to maintain or inspect your bicycle and
of failure to follow safe cycling practices.

14 15
On-Product Warning Tags
There are warning tags on your Lectric eBike for your protection. If a
tag is missing or is not legible, contact Lectric eBikes for a replacement.
WARNING
HELMET WARNING TAG
WARNING: ALWAYS WEAR A HELMET WHILE RIDING A BIKE. FAILURE
TO DO SO COULD RESULTIN SERIOUS INJURY AND/OR DEATH. For
more information, please review the owner’s manual available online at
help.lectricebikes.com
ETIQUETA DE ADVERTENCIA DE CASCO
ADVERTENCIA: USE SIEMPRE UN CASCO MIENTRAS ANDA EN
BICICLETA. SI NO LO HACE, PODRÍAN PRODUCIRSE LESIONES
GRAVES Y/O LA MUERTE. Para obtener más información, consulte el
manual del propietario disponible en línea en help.lectricebikes.com
(Helmet Warning Tag)
WARNING
FRONT WHEEL WARNING TAG
WARNING: BE SURE THE FRONT WHEEL IS PROPERLY INSTALLED BEFORE EACH
RIDE. FAILURE TO DO SO COULD CAUSE THE WHEEL TO COME LOOSE WHILE
RIDING RESULTING IN DAMAGE TO THE BIKE, PROPERTY, OR SERIOUS INJURY
AND/OR DEATH. For more information, please review the owner’s manual available
online at help.lectricebikes.com
ETIQUETA DE ADVERTENCIA DE LA RUEDA DELANTERA
ADVERTENCIA: ASEGÚRESE DE QUE LA RUEDA DELANTERA ESTÉ
CORRECTAMENTE INSTALADA ANTES DE CADA USO. SI NO LO HACE, LA RUEDA
PODRÍA AFLOJARSE MIENTRAS CONDUCE, LO QUE PODRÍA PROVOCAR DAÑOS
A LA BICICLETA, LA PROPIEDAD O LESIONES GRAVES Y/O LA MUERTE. Para
obtener más información, consulte el manual del propietario disponible en línea en
help.lectricebikes.com
(Front Wheel Warning Tag)
WARNING
BATTERY WARNING TAG
WARNING: FAILURE TO FOLLOW THESE AND OTHER WARNINGS AND
INSTRUCTIONS PROVIDED IN THE OWNER’S MANUAL MAY RESULTIN PRODUCT
FAILURE, VOIDING THE WARRANTY, OR SERIOUS INJURY OR DEATH OR
PROPERTY DAMAGE. For more information, please review the owner’s manual
available online at help.lectricebikes.com
ETIQUETA DE ADVERTENCIA DE LA BATERÍA
ADVERTENCIA: EL INCUMPLIMIENTO DE ESTAS Y OTRAS ADVERTENCIAS E
INSTRUCCIONES PROPORCIONADAS EN EL MANUAL DEL PROPIETARIO PUEDE
PROVOCAR LA FALLA DEL PRODUCTO, LA ANULACIÓN DE LA GARANTÍA, O
LESIONES GRAVES O LA MUERTE O DAÑOS A LA PROPIEDAD. Para obtener más
información, consulte el manual del propietario disponible en línea en
help.lectricebikes.com
(Battery Warning Tag)
WARNING
SEAT POST WARNING TAG
WARNING: BE SURE THE SEATHEIGHT IS CORRECTLYSET AND THE SEAT POST IS
SECURED BEFORE EACH RIDE. FAILURE TO DO SO COULD CAUSE THE SEATPOST TO
COME LOOSE RESULTING IN DAMAGE TO THE BIKE, PROPERTY, OR SERIOUS INJURY
AND/OR DEATH. For more information, please review the owner’s manual available
online at help.lectricebikes.com
ETIQUETA DE ADVERTENCIA DEL POSTE DEL ASIENTO
ADVERTENCIA: ASEGÚRESE DE QUE LA ALTURA DEL ASIENTO ESTÉ POSICIONADA
CORRECTAMENTE Y QUE EL TIJA ESTÉ ASEGURANDO ANTES DE CADA USO. SI NO
LO HACE, EL TIJA PODRÍA AFLOJARSE, LO QUE PODRÍA PROVOCAR DAÑOS A LA
BICICLETA, LA PROPIEDAD O LESIONES GRAVES Y/O LA MUERTE. Para obtener
más información, consulte el manual del propietario disponible en línea en
help.lectricebikes.com
(Seat Post Warning Tag)
WARNING
STEM WARNING TAG
WARNING: BE SURE THE FRONT WHEEL AND HANDLEBAR/STEM ARE SECURE
BEFORE EACH RIDE. FAILURE TO DO SO COULD CAUSE THE HANDLEBAR/STEM
TO COME LOOSE RESULTING IN DAMAGE TO THE BIKE, PROPERTY, OR SERIOUS
INJURY AND/OR DEATH. For more information, please review the owner’s manual
available online at help.lectricebikes.com
ETIQUETA DE ADVERTENCIA TIJA DEL MANILLAR
ADVERTENCIA: ASEGÚRESE DE QUE LA RUEDA DELANTERA Y EL TIJA DEL
MANILLAR ESTÉN ASEGURADOS ANTES DE CADA USO. SI NO LO HACE, EL
TIJA DEL MANILLAR PODRÍA AFLOJARSE, LO QUE PODRÍA PROVOCAR DAÑOS
A LA BICICLETA, LA PROPIEDAD O LESIONES GRAVES Y/O LA MUERTE. Para
obtener más información, consulte el manual del propietario disponible en línea
en help.lectricebikes.com
(Stem Warning Tag)
BY REMOVING THIS TAG YOU ARE
RECOGNIZING THAT YOU AGREE
NOT TO CARRY MORE THAN THE
RECOMMENDED PAYLOAD ON THE
REAR RACK OF YOUR EBIKE. DOING
SO MAY RESULTIN SERIOUS
INJURY AND/OR DEATH.
For more information, please review
the owner’s manual available online
at help.lectricebikes.com
DO NOT EXCEED THE
MAXIMUM PAYLOAD
ON THE REAR RACK
(Rear Rack Warning Tag)
WARNING
WARNING
(
R
e
a
r
W
h
e
e
l
)
Y
o
u
r
c
a
b
l
e
s
,
s
p
o
k
e
s
,
a
n
d
c
h
a
i
n
w
i
l
l
s
t
r
e
t
c
h
a
f
t
e
r
a
n
i
n
i
t
i
a
l
b
r
e
a
k
-
i
n
p
e
r
i
o
d
o
f
5
0
-
1
0
0
m
i
o
r
8
0
-
1
6
0
k
m
,
a
n
d
b
o
l
t
e
d
c
o
n
n
e
c
t
i
o
n
s
c
a
n
l
o
o
s
e
n
.
A
l
w
a
y
s
h
a
v
e
a
r
e
p
u
t
a
b
l
e
b
i
k
e
m
e
c
h
a
n
i
c
p
e
r
f
o
r
m
a
t
u
n
e
-
u
p
o
n
y
o
u
r
b
i
k
e
a
f
t
e
r
y
o
u
r
i
n
i
t
i
a
l
b
r
e
a
k
-
i
n
p
e
r
i
o
d
.
R
e
g
u
l
a
r
i
n
s
p
e
c
t
i
o
n
s
a
n
d
t
u
n
e
-
u
p
s
a
r
e
v
e
r
y
i
m
p
o
r
t
a
n
t
t
o
e
n
s
u
r
e
y
o
u
r
b
i
k
e
r
e
m
a
i
n
s
s
a
f
e
a
n
d
f
u
n
t
o
r
i
d
e
.
E
n
s
u
r
e
t
h
e
f
r
o
n
t
w
h
e
e
l
a
x
l
e
n
u
t
s
a
r
e
p
r
o
p
e
r
l
y
i
n
s
t
a
l
l
e
d
:
f
u
l
l
y
s
e
a
t
e
d
i
n
t
h
e
f
o
r
k
d
r
o
p
o
u
t
s
w
i
t
h
t
h
e
l
o
c
k
i
n
g
l
e
v
e
r
p
r
o
p
e
r
l
y
t
e
n
s
i
o
n
e
d
a
n
d
s
e
c
u
r
e
l
y
l
o
c
k
e
d
.
C
h
e
c
k
i
f
t
h
e
a
x
l
e
n
u
t
s
a
r
e
p
r
o
p
e
r
l
y
i
n
s
t
a
l
l
e
d
a
n
d
s
e
c
u
r
e
d
r
e
g
u
l
a
r
l
y
a
n
d
b
e
f
o
r
e
e
a
c
h
r
i
d
e
.
(
F
r
o
n
t
W
h
e
e
l
)

LECTRICEBIKES.COM | 602.715.0907 LECTRICEBIKES.COM | 602.715.090716 17
GETTING STARTED
Your bicycle comes fully assembled. These instructions are intended
to assist you in setting up and getting familiar with your new bicycle.
After you make your rst adjustments and inspect your
bicycle, we recommend seeking professional help from a
reputable and certied bicycle mechanic to check your bicycle
before your rst ride.
Before removing the packaging material from your bicycle, remove all
items from the box and make sure you have the following:
If anything is missing or is damaged, contact Lectric eBikes
immediately for assistance.
For a video about how to setup your bicycle, visit our YouTube page:
Lectric eBikes, youtube.com/LectriceBikes
What’s in the box:
Lectric
XPedition eBike
Lectric XP
eBike Charger
2 Battery Keys
per battery
Serial Number
Setting Up Your eBike
Your serial number is located on the head tube of the bicycle as
shown below. Please write it down inside the front cover of this
manual.
You may be asked for your bicycle’s serial number as part of a
warranty request. You may also be asked to provide this number to
law enforcement if your bicycle is stolen.
NOTE: This manual is not intended to be an extensive reference
book about service, maintenance, and/or repairs. You can
nd more information on our website: lectricebikes.com or
help.lectricebikes.com.

LECTRICEBIKES.COM | 602.715.0907 LECTRICEBIKES.COM | 602.715.090718 19
Removing Pedals
How to Remove and Insert Pedals
Inserting Pedals
1. Pull the spring-loaded sleeve while also pulling the pedal out
from the hex slot.
1. Pull the spring-loaded sleeve
and insert the pedal axle while
aligning the hex pattern.
2. Be sure the sleeve retracts,
and give the pedals a small tug
to ensure they are locked in.
To unfold and secure in riding position:
How to Unfold the Stem
1. Begin with handlebars in the folded down position.
2. Simply unfold the stem upward and press the latch inward until
there is an audible click.
3. Give the latch a tug to ensure it is locked in place.
If the latch does not stay, please contact the Lectric Customer
Service department for adjustment instructions.

LECTRICEBIKES.COM | 602.715.0907 LECTRICEBIKES.COM | 602.715.090720 21
To fold the stem down:
How to Fold the Stem
Folding and Unfolding the Stem
1. Push the red safety tab in while pulling the latch downward.
2. Once the latch is released the stem can be folded to the side of
the bike.
How to Unlock the Stem Lever
How to Lock the Stem Lever
1. Push the stem safety button up, toward the LCD display.
2. Keep the safety button pushed, as you pull the stem lever away
from the stem.
1. To lock, push the stem lever down until you hear an audible click.
Ensure the stem lever is locked, by giving it a small tug.

LECTRICEBIKES.COM | 602.715.0907 LECTRICEBIKES.COM | 602.715.090722 23
Handlebar Adjustments
To adjust your handlebars:
1. Once your stem lever is unlocked, you may adjust the orientation of
the handlebars and adjust the angle of the stem.
2. After you adjust your handlebars into your preferred position, lock
your stem lever back into place.
The adjustable stem is not intended to be ridden in the fully upright
position pictured in the upper left photo. Rotate to a comfortable
position and practice riding to get a feel for the steering in this
position. Riding with the stem in the fully upright position will affect
riding dynamics and comes with an increased risk of serious injury
or death.
Adjust Seat Height
• Always tighten fasteners to the correct torque to prevent serious
injury or death. Bolts that are too tight can stretch and deform.
Bolts that are too loose can move and fatigue. Either condition
can lead to a sudden failure of the bolt and result in a crash. See
“Tightening Torque” on page 27.
• ALWAYS insert seat post past the minimum insertion point
marked on the seat post. A seat post that is positioned too high
can damage the bike and can cause you to lose control and crash.
Correct seat adjustment is an important factor in getting the most
performance and comfort from your bicycle. If the seat position is
not comfortable for you, you may want to go to your local bicycle
shop for assistance.
To achieve correct seat height:
• Sit on the seat;
• Place one heel on a pedal;
• Rotate the crank until the pedal with your heel on it is in the down
position and the crank arm is parallel to the seat tube.
If your leg is not completely straight, your seat height needs to be
adjusted. If your hips must rock for your heel to reach the pedal, the
seat is too high. If your leg is bent at the knee with your heel on the
pedal, the seat is too low.
WARNING!
WARNING!

LECTRICEBIKES.COM | 602.715.0907 LECTRICEBIKES.COM | 602.715.090724 25
To adjust seat height:
• Loosen the seat post clamp. The open and closed positions of the
seat post clamp are shown below (open position on left, closed
position on right);
• Raise or lower the seat post in the seat tube;
• Check that the seat is straight before and after; and
• Re-tighten the seat post clamp to the recommended torque in
“Tightening Torque” on page 27.
Adjust Seat Position
Always tighten fasteners to the correct torque to prevent serious
injury or death. Bolts that are too tight can stretch and deform. Bolts
that are too loose can move and fatigue. Either condition can lead
to a sudden failure of the bolt and result in a crash. See “Tightening
Torque” on page 27.
WARNING!
Adjust Seat Position
Always tighten fasteners to the correct torque to prevent serious
injury or death. Bolts that are too tight can stretch and deform. Bolts
that are too loose can move and fatigue. Either condition can lead
to a sudden failure of the bolt and result in a crash. See “Tightening
Torque” on page 27.
Front and back adjustment: Loosen nuts on both sides of the seat.
Make sure the clamp mechanism is clamping on the straight part
of the seat rails and is not touching the curved part of the rails.
Ensure that you are using the recommended torque on the clamping
fastener(s). See “Tightening Torque” on page 27.
Seat angle adjustment: Most people prefer a horizontal seat; but
you may prefer the seat nose angled slightly up or down. Loosen
the clamp bolt to allow any serrations on the clamp mechanism to
disengage before changing the seat angle, and to fully re-engage the
serrations before you tighten the clamp bolt to the recommended
torque. See “Tightening Torque” on page 27.
WARNING!

LECTRICEBIKES.COM | 602.715.0907 LECTRICEBIKES.COM | 602.715.090726 27
Charge Battery Before First Use
Locate charging port on the side of the battery pack. Use this port to
charge when battery pack is installed or not installed.
Tightening Torque
Part Tool Spec
Bottom Bracket ISIS spline tool (171-00517) 40 Nm
Brake Caliper Mounting Bolts 5mm allen 10 Nm
Brake Lever Clamp Bolts 4mm allen 5 Nm
Crank Bolts 8mm allen 40 Nm
Disc Rotor Mounting Bolts T-25 Torx 5-8 Nm
Fender Mounting Bolts 4mm allen 5 Nm
Headlight Mounting Screw 5mm allen 10 Nm
Headset Compression Bolt 5mm allen ~2-4 Nm
Kickstand Mounting Bolts 8mm allen 25 Nm
Pedals 8mm allen 35 Nm
Rear Derailleur Mounting Bolt 5mm allen 8-10 Nm
Seat Rail Binder 14mm wrench 20 Nm
Shifter Clamp Bolt philips screw driver 4 Nm
Spokes spoke wrench 2 Front Tension
180-200 KGF
Stem Riser 6mm allen 20 Nm
Stem Clamp Bolt 4mm allen 12 Nm
Stem QR Lever Bolt 5mm allen 15 Nm
Torque Arm Bolt 4mm allen 5 Nm
Wheel Axle Nuts Rear: 17mm wrench 35 Nm
Front: 15mm wrench
You should fully charge your battery before your rst ride.
Fire and explosion hazards. Never leave your battery pack
unattended while charging to prevent serious injury or death.
See “Battery Pack” on page 49 for additional information.

LECTRICEBIKES.COM | 602.715.0907 LECTRICEBIKES.COM | 602.715.090728 29
FEATURES
Motor
Never modify your frame or bicycle in any way as this could cause
serious injury or death. Do not sand, drill, le, or remove parts from
your bicycle. Do not install incompatible components or hardware.
To prevent serious injury or death:
• Do not open the drive unit yourself. The drive unit must only be
repaired by qualied personnel using only original parts. This will
ensure that the safety of the drive unit is maintained. Unauthorized
opening of the drive unit will render warranty claims null and void.
• All components tted to the drive unit and all other components
of your Lectric eBike PAS system (e.g. chainring, chainring
receptacle, pedals) must only be replaced with identical
components or components that have been specically approved
by Lectric eBikes. This should help protect the motor from
overloading.
• Always remove the battery pack from your Lectric eBike before
beginning work (e.g. inspection, repair, assembly, maintenance,
work on the chain, etc.), transporting it with a car or on an
airplane, or storing it. Battery pack removal should prevent
unintentional activation of your Lectric eBike.
• Do not make any modications to your Lectric eBike or attach
any other products that might increase the performance of your
Lectric eBike. Doing so will generally reduce the service life of the
system and risks damaging the drive unit and the bicycle. You also
run the risk of losing the guarantee and warranty claims on the
bicycle you have purchased. By handling the system improperly
you are also endangering your safety and that of other road users,
WARNING!
WARNING!
7-Speed Gear System
Your Lectric eBike comes with a 7-speed freewheel. The freewheel is
the cluster of sprockets on the rear wheel of your bicycle.
While pedaling in 1st gear (lowest gear using the largest sprocket),
it will be easier to pedal up hills. In 7th gear (highest gear using the
smallest sprocket), it will be easier to reach higher speeds on at or
downhill terrain.
thus running the risk of high personal liability costs and possibly
even criminal prosecution in the event of accidents that can be
attributed to manipulation of the bicycle.
• Under extreme conditions, such as continuously high loads at low
speed when riding up hills or carrying loads, parts of the motor
can reach high temperatures.
To shift up:
Press the lower button marked with the plus (+) sign.
To shift down:
Push the upper lever marked with the minus (-) away from you
(forward).

LECTRICEBIKES.COM | 602.715.0907 LECTRICEBIKES.COM | 602.715.090730 31
Throttle
The right handlebar features a half-twist throttle.
To operate:
Check that the Pedal Assist (PAS) level is set above 0, then twist the
throttle back slowly to achieve your desired speed and acceleration.
Always turn lights ON for your safety, especially when riding
at night or in low visibility situations.
Front and Rear Lights
Your Lectric eBike comes with integrated front and rear lights.
To turn lights ON: Hold plus (+) button on the display control pad for
about 3 seconds until the lights turn ON.
To turn lights OFF: Hold plus (+) button on the display control pad for
about 3 seconds until the lights turn OFF.
Hydraulic Disc Brakes
Your Lectric XPedition is equipped with hydraulic disc brakes.
To prevent serious injury or death:
• ALWAYS apply right brake lever (rear wheel) before and during
use of the front brake.
• ALWAYS apply even pressure to both brake levers when slowing
down or stopping.
If only the front brake is applied while slowing or stopping quickly,
you may be ejected over the front handlebars.
Before riding, check to ensure brake levers do not touch the
handlebars when fully applied. If either lever touches the handlebars,
screw or unscrew the barrel adjuster to increase tension in the
brake cable. If this does not x the problem, take your bicycle to an
experienced bicycle mechanic for further adjustment.
To brake the rear wheel:
Pull right brake lever to activate rear brake.
To brake the front wheel:
Pull left brake lever to activate front brake.
Disc brake rotors will become hot during use and will stay hot
for a short period after use. To prevent burns, do not touch the
disc rotor right after use.
WARNING!

LECTRICEBIKES.COM | 602.715.0907 LECTRICEBIKES.COM | 602.715.090732 33
COCKPIT SYSTEM
Cockpit Instruments
LCD DISPLAY
CONTROL PAD
GEAR
SHIFTER
LCD
DISPLAY
HALF-TWIST
THROTTLE
BRAKE LEVERS
Display Controls
POWER
BUTTON
PLUS
BUTTON
MINUS
BUTTON
Overview
When does the Pedal Assist activate?
Pedal Assist (PAS) functions only when you are pedaling. If you
do not pedal, the PAS will not activate. The motor output always
depends on your pedaling and the PAS level you have set.
PAS automatically switches off at the maximum speed set for
your Lectric eBike (up to 28 mph). When the speed falls below the
maximum set speed, PAS automatically becomes available again.
You can also use your Lectric eBike as a normal bicycle without
assistance at any time, either by switching the Cockpit System power
button OFF, or by setting PAS to 0. If the battery needs to be charged,
PAS will not function.
When the bicycle has not been used for 10 consecutive minutes, the
display will automatically shut down. The PAS and throttle features
will no longer work when the display is OFF.
Pedal Assist and Shifting Gears
You should shift gears on your Lectric eBike in the same way you
would shift with a normal bicycle.
By selecting the proper gear, you can increase your speed and range
while applying the same amount of force.
You should test the range of your Lectric eBike under different
conditions and terrains before planning longer and more demanding
trips. Refer to the Range Estimates section below to learn about the
factors to consider when planning longer rides.

LECTRICEBIKES.COM | 602.715.0907 LECTRICEBIKES.COM | 602.715.090734 35
To prevent serious injury or death:
• Do not allow yourself to be distracted by the display. If you do not
concentrate on the trafc around you, you risk being involved in a
crash. If you want to change any settings other than the PAS level,
always stop before changing the settings or display.
• Set the display brightness such that you can adequately see
important information like speed or warning symbols. Display
brightness that is incorrectly set can result in dangerous
situations.
• The electrical components on the bicycle are not waterproof. The
electrical components on the bike have an IP rating of 65.
• Check the display and plug. If damage is detected, do not use the
display. A damaged display or cables or plugs increase the risk of
a re, explosion and personal injury.
• Do not disassemble the display. There are no user serviceable
parts inside the display. Incorrect reassembly or damage may
result in re or explosion.
WARNING! Display Functions
1
2
3
4
5
6
1
2
3
6
5
4
7
Walk Mode, Cruise Control, and
Pedal assist (PAS) Level Indicator
Odometer, Trip A, Voltage, Current,
Trip Timer (TM) readouts
Battery level indicator bar
Speedometer in MPH or KM/H
Maximum and Average Speed
Light On/Off Indicator
Mile and kilometer indicators
7

LECTRICEBIKES.COM | 602.715.0907 LECTRICEBIKES.COM | 602.715.090736 37
Battery Level Indicator Bar
The “Energy Bar” near the top of the display is your battery indicator
and shows the estimated charge level remaining in your battery pack.
As the battery charge depletes, the remaining marks will display the
approximate remaining charge in the battery pack.
The battery display will ash when there is no charge remaining.
Operating Cockpit System
Press and hold button
Press and hold the plus (+)
button and button
simultaneously to toggle
between the speedometer, max
speed and average speed
Press button
Press minus (-) button
Press plus (+) button
Press and hold the plus (+)
button for about 3 seconds
or until lights turn ON; repeat
to turn OFF
Turn the bicycle ON/OFF
Max Speed and Average Speed
Decrease PAS Level
Increase PAS Level
Toggle Odometer, Trip A, Voltage,
Current, Trip Timer (TM)
Turn lights ON/OFF
NOTE: The trip meter, as well as maximum and average speed will
reset when the bicycle is powered OFF.
Range Estimates
All tests were performed with:
• Flat ground
• Few bumps
• Little to no wind
• Top speed set to 20 mph
• Lectric 20x3 in. slick tires at ~30 PSI
• Few starts and stops
• No additional cargo
• Temperature ~75°F
• Rider weight ~180 lbs.
• 14 Ah Battery
The range the bicycle can go on a single battery charge can vary
signicantly between riders, terrain, wind conditions, user input, and
additional cargo weight.
Tips to Increase Range
To get the maximum range out of each battery charge, there are
some simple things you can do:
• Ride at a lower PAS level
• Use lower PAS levels and pedal when climbing hills
• Pedal when starting from a standstill
• Little use of throttle
• Mostly PAS level 2
• Pure throttle in PAS level 1
Up to 50 Miles
• Mostly PAS level 5Up to 25 Miles
Up to 75 Miles
Range Estimates: 1 Battery Throttle and PAS Level
• Little use of throttle
• Mostly PAS level 2
• Pure throttle in PAS level 1 Up to 100 Miles
• Mostly PAS level 5
Up to 50 Miles
Up to 150 Miles
Range Estimates: 2 Batteries Throttle and PAS Level

LECTRICEBIKES.COM | 602.715.0907 LECTRICEBIKES.COM | 602.715.090738 39
Settings Menu
To change display settings, hold the plus (+) and the minus (-)
buttons simultaneously to enter into the Settings Menu. Press the
button to toggle between each numbered setting. To adjust the
value of each setting, click the plus (+) and the minus (-) buttons as
needed.
There are 22 settings (P01-P22). You should only change the settings
listed below.
Do not tamper with your bicycle. Tampering is dened as removing
or replacing any original equipment, or modifying your bicycle in
any way that may change its design and/or operation. Such changes
may seriously impair the handling, stability, and other aspects of the
bicycle, making it unsafe to ride. Tampering can void the warranty
and render your bicycle noncompliant with the applicable laws
and regulations. Lectric eBikes is not responsible for any direct,
incidental, or consequential damages, including, without limitation,
damages for personal injury, property damage, or economic losses
due to tampering.
To prevent serious injury or death, DO NOT change settings excluded
from the table. Changing settings not listed in the following table
may cause your bike to stop working properly. If you need the
default value of a setting not listed, contact Lectric eBikes. DO NOT
ride your bicycle until the default settings have been restored.
WARNING!
WARNING!
Setting Function Default
P04 Sleep 10 LCD Display sleep timer. The default setting
will turn the display OFF after it has not been
used for 10 minutes.
P06 Tire Size 19.7 Used to compute speed and
distance traveled.
P09 Throttle Zero
Start
0 0: Throttle active from standstill.
1: Throttle active only when already moving.
P08 Speed Limit 32 32: Class 2
100: Class 3
P10 Mode Toggle 20: PAS Active, Throttle Inactive
1: PAS Inactive, Throttle Active
2: Both PAS and Throttle Active
Explanation
P01 Brightness 2 Backlight display brightness. The darkest
level is 1 and the brightest level is 3.
P02 Distance
Units
10: KM; 1: MILE.
P11 PAS
Sensitivity
11: Low 2: Medium 3: High
When set to higher numbers, it will take
more crank rotations for the motor to turn
ON. Lower numbers will take fewer crank
rotations to turn the motor ON.
P12 PAS Strength 1
When set to higher numbers, the motor will
come on stronger. Lower numbers will be
more gentle.
1-5
Table of contents
Other Lectric eBikes Bicycle manuals