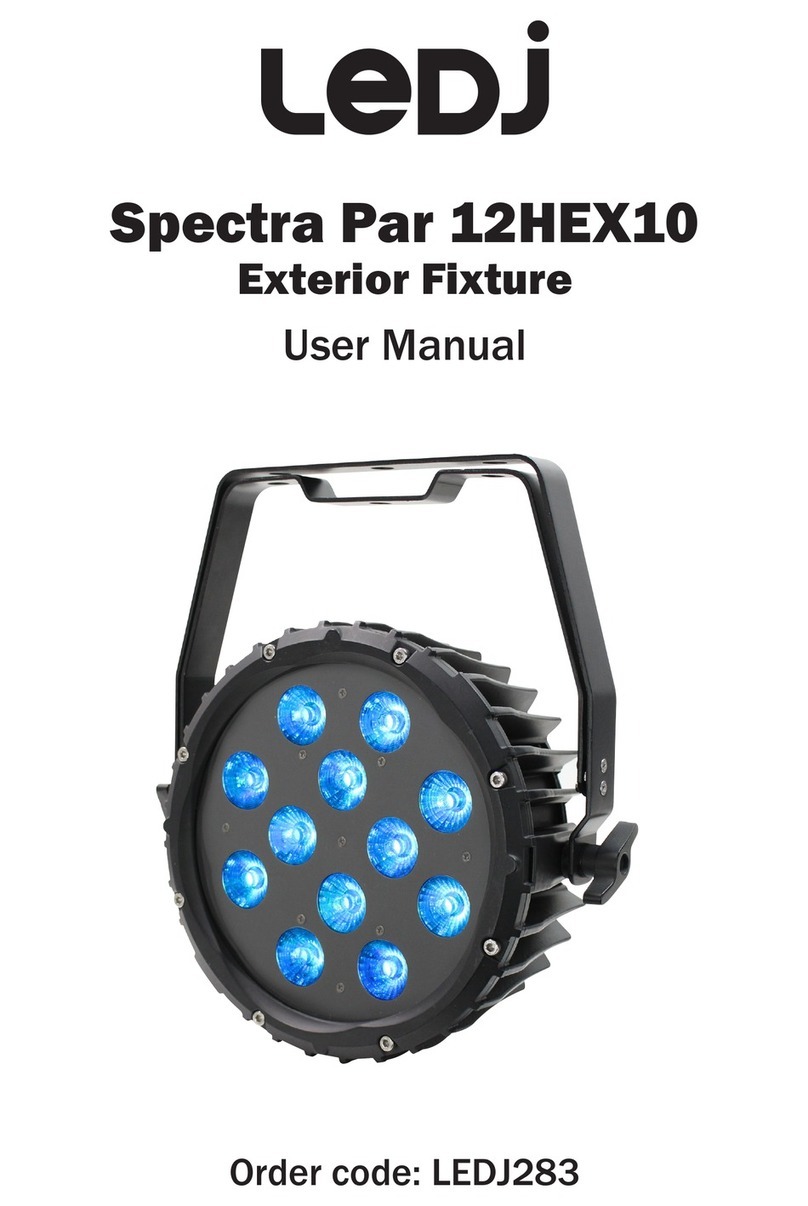
Ledj spectra flood 18T3 User manual

Order code: LEDJ256
Spectra Flood 18T3
Exterior Fixture
User Manual

www.prolight.co.uk Spectra Flood 18T3 User Manual
2
Safety advice
WARNING
FOR YOUR OWN SAFETY, PLEASE READ THIS USER MANUAL
CAREFULLY BEFORE YOUR INITIAL START-UP!
• Beforeyourinitialstart-up,pleasemakesurethatthereisnodamagecausedduringtransportation.
• Shouldtherebeanydamage,consultyourdealeranddonotusetheequipment.
• Tomaintaintheequipmentingoodworkingconditionandtoensuresafeoperation,itisnecessary
fortheusertofollowthesafetyinstructionsandwarningnoteswritteninthismanual.
• Pleasenotethatdamagescausedbyusermodicationstothisequipmentarenotsubjecttowarranty.
IMPORTANT:
The manufacturer will not accept liability for any resulting damages caused by the non-observance
of this manual or any unauthorised modication to the equipment.
OPERATING DETERMINATIONS
Ifthisequipmentisoperatedinanyotherway,thanthosedescribedinthismanual,theproductmaysufferdamageand
thewarrantybecomesvoid.Incorrectoperationmayleadtodangere.g:short-circuit,burnsandelectricshocksetc.
Donotendangeryourownsafetyandthesafetyofothers!
Incorrectinstallationorusecancauseseriousdamagetopeopleand/orproperty.
CAUTION!
TAKE CARE USING
THIS EQUIPMENT!
HIGH VOLTAGE-RISK
OF ELECTRIC SHOCK!!
• Neverletthepowercablecomeintocontactwithother
cables.Handlethepowercableandallmainsvoltage
connectionswithparticularcaution!
• Neverremovewarningorinformativelabelsfromtheunit.
• Donotopentheequipmentanddonotmodifytheunit.
• Donotconnectthisequipmenttoadimmerpack.
• Donotswitchtheequipmentonandoffinshortintervals,
asthiswillreducethesystem’slife.
• Donotexposetoammablesources,liquidsorgases.
• Alwaysdisconnectthepowerfromthemainswhen
equipmentisnotinuseorbeforecleaning!Onlyhandle
thepower-cablebytheplug.Neverpullouttheplugby
pullingthepower-cable.
• Makesurethattheavailablemainssupplyvoltageis
between100~240VAC,50/60Hz.
• Makesurethatthepowercableisnevercrimpedor
damaged.Checktheequipmentandthepowercable
periodically.
• Iftheequipmentisdroppedordamaged,disconnectthe
mainspowersupplyimmediatelyandhaveaqualied
engineerinspecttheequipmentbeforeoperatingagain.
• Ifyourproductfailstofunctioncorrectly,stopuse
immediately.Packtheunitsecurely(preferablyinthe
originalpackingmaterial),andreturnittoyourProLight
dealerforservice.
• Onlyusefusesofsametypeandrating.
• Repairs,servicingandpowerconnectionmustonlybe
carriedoutbyaqualiedtechnician.THISUNITCONTAINS
NOUSERSERVICEABLEPARTS.
• Thislightingxtureisforprofessionaluseonly-itis
notdesignedfororsuitableforhouseholduse.The
productmustbeinstalledbyaqualiedtechnicianin
accordancewithlocalterritoryregulations.Thesafetyof
theinstallationistheresponsibilityoftheinstaller.The
xturepresentsrisksofsevereinjuryordeathduetore
hazards,electricshockandfalls.
• Warning!RiskGroup2LEDproductaccordingto
EN62471.Donotviewthelightoutputwithoptical
instrumentsoranydevicethatmayconcentratethebeam.
• WARRANTY:Oneyearfromdateofpurchase.

www.prolight.co.uk Spectra Flood 18T3 User Manual
3
Product overview & technical specications
LEDJSpectraFloodsareperfectforfeaturelighting,providing
colourwasheffectstotheoutsideofbuildings.Signageandfacade
featurescanalsobeilluminatedalongwithlandscapeapplications.
SimpledaisychainconnectionofpowerandDMXmeansthat
installationtimeandcostisreduced.ThecontroloptionsforLED
wallwashersarenumerousandcanbeusedalongsideourother
productstocreatefullautomation.
•18x3Wtri-colourLEDs(RGB)
•Beamangle:40°
•2150Lux@2m(fullon)
•7.8kHzrefreshrate
•DMXchannels:1/3/4/5
or6selectable
•Staticcolour,colourfade,
colourchange,colourmix,
autoandmaster/slavemodes
•0-100%dimmingand
variablestrobe
•4pushbuttonmenu
withLEDdisplay
•IPratedpowerinput/output
•IPrated3-PinDMXinput/output
•OptionalLEDJ1mSpectra
SeriesInteriortoExteriorDMX
connectioncableavailable
(Ordercode:LEDJ91)
Spectra Par 18T3 Exterior Fixture
Specications Spectra Par 18T3
Powerconsumption 65W
Powersupply 100~240V,50/60Hz
Dimensions 325x225x192mm
Weight 4.5kg
Ordercode LEDJ256
225mm 192mm
325mm
IP66
0m 1m 2m 3m 4m 5m
40° - Lux 6270 2150 1024
40°
614 396

www.prolight.co.uk Spectra Flood 18T3 User Manual
4
01-Hangingbracket
02-Hangingbracket
adjustmentknobs
03-LEDdisplay
04-Functionbuttons
05-IPratedpowerinput
06-IPratedpoweroutput
07-IPratedDMXinput
08-IPratedDMXoutput
09-Safetyeye Inthebox:
1 x xture, 1 x power cable
& 1 x user manual
Technical specications
www.prolight.co.uk
0307 08 09
0405 06
01 01
02 02

www.prolight.co.uk Spectra Flood 18T3 User Manual
5
Operating instructions
DMX mode:
ToselecttheDMXaddress,pressthe“MODE”buttonontherearoftheunittoshowd001onthe
LEDdisplay.Nowusethe“UP”and“DOWN”buttonstoselecttheDMXaddressbetween001-512.
Toexitoutofanyoftheaboveoptions,pressthe“MODE”button.
DMX channel mode:
OperatinginaDMXcontrolmodeenvironmentgivestheuserthegreatestexibilitywhenitcomesto
customisingorcreatingashow.Inthismodeyouwillbeabletocontroleachindividualtraitofthexture
andeachxtureindependently.ToaccesstheDMXchannelmode,pressthe“MODE”buttonontherear
oftheunittoshowd001ontheLEDdisplay.Nowpressthe“ENTER”buttontoshow--CHonthe
LEDdisplayandusethe“UP”and“DOWN”buttonstoselectbetween1,3,4,5and6channels.
Toexitoutofanyoftheaboveoptions,pressthe“MODE”button.
3 channel mode:
Channel Value Function
1 000-255 Red(0-100%)
2000-255 Green(0-100%)
3000-255 Blue(0-100%)
4 channel mode:
Channel Value Function
1 000-255 Red(0-100%)
2000-255 Green(0-100%)
3000-255 Blue(0-100%)
4 000-255 Masterdimmer
(0-100%)
5 channel mode:
Channel Value Function
1 000-255 Red(0-100%)
2000-255 Green(0-100%)
3000-255 Blue(0-100%)
4 000-255 Masterdimmer
(0-100%)
5 000-255 Strobe
(slow-fast)
1 channel mode:
Channel Value Function
1 000 Nofunction
001-022 Red
023-045 Green
046-068 Blue
069-091 Cyan
092-114 Yellow
115-137 Orange
138-160 Pink
161-183 Purple
184-206 DarkBlue
207-229 PaleGreen
230-252 White
253-255 WarmWhite

www.prolight.co.uk Spectra Flood 18T3 User Manual
6
Operating instructions
6 channel mode:
Channel Value Function
1 000-255 Masterdimmer(0-100%)
2000-255 Red(0-100%)(onlywhenchannel6
issetto0)
000-008 Red
Tousestatic
colours
channel6
shouldbe
setbetween
001-025
Channel2
isusedas
program
speed
(0-255
slow-fast)
when
channel6
isset
between
026-255
009-017 Orange
018-026 Yellow
027-035 SpringYellow
036-044 Lime
045-053 LightYellow
054-062 LightGreen
063-071 Green
072-080 PastelGreen
081-089 LightCyan
090-098 Cyan
099-107 LightBlue
108-116 MediumBlue
117-125 Blue
126-134 Violet
135-143 Purple
144-152 Magenta
153-161 Pink
162-170 LightPink
171-179 PastelBlue
180-188 PastelGreen
189-197 PastelYellow
198-206 PastelPurple
207-215 PastelCyan
216-224 Turquoise
225-233 PastelPink
234-242 NeutralWhite
243-251 WarmWhite
252-255 CoolWhite
3000-255 Green(0-100%)
4 000-255 Blue(0-100%)
5 000-009 Nofunction
010-255 Strobe(slow-fast)
6 000-025 Staticcolours Usechannel
2forcolour
selection
026-051 7colourfadein/out
Usechannel
2for
program
speed
(0-255
slow-fast)
052-077 3colourfadein/out
078-103 7colourchange
104-129 3colourchange
130-155 7colourfade
156-181 3colourfade
182-207 Redfadein/out
208-233 Greenfadein/out
234-255 Bluefadein/out

www.prolight.co.uk Spectra Flood 18T3 User Manual
7
Colour mix mode:
Toaccessthecolourmixmodepress“MODE”untilPr01showsontheLEDdisplay.Nowpressthe
“ENTER”buttonandusethe“UP”and“DOWN”buttonstoselect0rgb.Pressthe“ENTER” buttonand
thedisplaywillshowtheredbrightnessbetweenr.000~r.255.Nowusethe“UP”and“DOWN”
buttonstoadjusttheredbrightnessandpressthe“ENTER” button.Repeatforgreen(9)andblue(b).
Value: 000 - 255 (000 = low brightness, 255 = high brightness)
Toexitoutofanyoftheaboveoptions,pressthe“MODE”button.
Built-in programs:
Toaccessthebuilt-inprograms,pressthe“MODE”buttonontherearoftheunittoshowPr--
ontheLEDdisplay.Nowusethe“UP”and“DOWN”buttonstochoosetherequiredprogram
Pr01~Pr10.Pressthe“ENTER”buttontoconrmthesettingandusethe“UP”and“DOWN”
buttonstochoosethespeedSP00~SP99.Pressthe“ENTER”buttonagaintoconrmthesetting
andusethe“UP”and“DOWN”buttonstoselecttheashspeedF500~F599.
Pr01-Pressthe“ENTER”buttonandusethe“UP”and“DOWN”buttonstoselectthestaticcolour
required.Pressthe“ENTER”buttontoconrmthesettingandusethe“UP”and“DOWN”buttonsto
selecttheashspeedF500~F599.
Toexitoutofanyoftheaboveoptions,pressthe“MODE”button.
Auto mode:
Toaccessautomode,pressthe“MODE”buttonontherearoftheunittoshowAutoontheLED
display.Theunitwillnowrunthroughitsbuilt-inprograms.
Toexitoutofanyoftheaboveoptions,pressthe“MODE”button.
Master/slave mode:
ThedefaultsettingforthisxtureisMaster.
Tosettheslaveunit,pressthe“MODE”buttonontherear
ofthemasterunittoshowSLav ontheLEDdisplay.
TheunitisnowinSlavemode.
Toexitoutofanyoftheaboveoptions,pressthe“MODE”button.
Operating instructions
Colourmixmode r.000~r.255R
g.000~g.255G
b.000~b.255B
Built-inprograms Pr01~Pr10
Automode Auto
Master/slavemode SLav
DMXmode 1CH,3CH,4CH,
5CH,6CH
Addresssetting d001~d512
Menusystem
0-White(RGB)
1-Red
2-Orange
3-LightYellow
4-Green
5-Cyan
6-Blue
7-Purple
8-Pink
9-Yellow
10-CoolWhite
11-WarmWhite

www.prolight.co.uk Spectra Flood 18T3 User Manual
8
Setting the DMX address:
TheDMXmodeenablestheuseofauniversalDMXcontroller.Eachxturerequiresa“startaddress”
from1-512.Axturerequiringoneormorechannelsforcontrolbeginstoreadthedataonthechannel
indicatedbythestartaddress.Forexample,axturethatoccupiesoruses7channelsofDMXandwas
addressedtostartonDMXchannel100,wouldreaddatafromchannels:100,101,102,103,104,105
and106.Chooseastartaddresssothatthechannelsuseddonotoverlap.E.g.thenextunitinthe
chainstartsat107.
DMX 512:
DMX(DigitalMultiplex)isauniversalprotocolusedasaformofcommunicationbetweenintelligent
xturesandcontrollers.ADMXcontrollersendsDMXdatainstructionsformthecontrollertothexture.
DMXdataissentasserialdatathattravelsfromxturetoxtureviatheDATA“IN”andDATA“OUT”
XLRterminalslocatedonallDMXxtures(mostcontrollersonlyhaveadata“out”terminal).
DMX linking:
DMXisalanguageallowingallmakesandmodelsofdifferentmanufacturestobelinkedtogether
andoperatefromasinglecontroller,aslongasallxturesandthecontrollerareDMXcompliant.
ToensureproperDMXdatatransmission,whenusingseveralDMXxturestrytousetheshortest
cablepathpossible.TheorderinwhichxturesareconnectedinaDMXlinedoesnotinuencethe
DMXaddressing.Forexample;axtureassignedtoaDMXaddressof1maybeplacedanywherein
aDMXline,atthebeginning,attheend,oranywhereinthemiddle.Whenaxtureisassigneda
DMXaddressof1,theDMXcontrollerknowstosendDATAassignedtoaddress1tothatunit,
nomatterwhereitislocatedintheDMXchain.
Also remember that DMX cable must be daisy chained and cannot be split.
DATA cable (DMX cable) requirements (for DMX operation):
ThisxturecanbecontrolledviaDMX-512protocol.TheDMXaddressissetonthebackoftheunit.
DMX setup
FurtherDMXcablescanbepurchasedfromallgoodsoundandlightingsuppliersorProlightConceptsdealers.
Pleasequote:
LEDJ1mInterior-
ExteriorDMXcable
LEDJ1mExterior
DMXcable
LEDJ2mExterior
DMXcable
LEDJ5mExterior
DMXcable
LEDJ10mExterior
DMXcable
Ordercode:LEDJ91 Ordercode:LEDJ141 Ordercode:LEDJ142 Ordercode:LEDJ143 Ordercode:LEDJ144
LEDJ1mExterior
Powercable
LEDJ2mExterior
Powercable
LEDJ5mExterior
Powercable
LEDJ10mExterior
Powercable
LEDJSpectraSeries
EndCapSet
Ordercode:LEDJ146 Ordercode:LEDJ147 Ordercode:LEDJ148 Ordercode:LEDJ149 Ordercode:LEDJ93

www.prolight.co.uk Spectra Flood 18T3 User Manual
9
Notice:
Besuretofollowthediagramsbelowwhenmakingyourowncables.Donotconnectthecables
shieldconductortothegroundlugorallowtheshieldconductortocomeincontactwiththeXLRs
outercasing.Groundingtheshieldcouldcauseashortcircuitanderraticbehaviour.
Special note:
Line termination:
Whenlongerrunsofcableareused,
youmayneedtouseaterminatoron
thelastunittoavoiderraticbehaviour.
Using a cable terminator will decrease
the possibilities of erratic behaviour.
(3-pin - Order ref: CABL9O, 5-pin - Order ref: CABL89)
5-pin XLR DMX connectors:
Somemanufacturesuse5-pinXLRconnectorsfordatatransmissioninplaceof3-pin.5-pinXLRxtures
maybeimplementedina3-pinXLRDMXline.Wheninsertingstandard5-pinXLRconnectorsintoa
3-pinlineacableadaptormustbeused.Thediagrambelowdetailsthecorrectcableconversion.
Terminationreducessignaltransmission
problemsandinterference.Itisalways
advisabletoconnectaDMXterminal,
(resistance120Ohm1/4W)betweenpin2
(DMX-)andpin3(DMX+)ofthelastxture.
5-pin XLR (socket)
Pin 1: GND (screen)
Pin 2: Signal (-)
Pin 3: Signal (+)
Pin 4: N/C
Pin 5: N/C
3-pin XLR (socket)
Pin 1: GND (screen)
Pin 2: Signal (-)
Pin 3: Signal (+)
3-pin XLR (socket)
Pin 1: GND (screen)
Pin 2: Signal (-)
Pin 3: Signal (+)
5-pin XLR (socket)
Pin 1: GND (screen)
Pin 2: Signal (-)
Pin 3: Signal (+)
Pin 4: N/C
Pin 5: N/C
DMX setup

www.prolight.co.uk Spectra Flood 18T3 User Manual
10
WEEE notice
Correct Disposal of this Product
(Waste Electrical & Electronic Equipment)
(Applicable in the European Union and other European countries
with separate collection systems)
Thismarkingshownontheproductoritsliterature,indicatesthatitshouldnotbedisposedof
withotherhouseholdwastesattheendofitsworkinglife.Topreventpossibleharmtothe
environmentorhumanhealthfromuncontrolledwastedisposal,pleaseseparatethisfromother
typesofwastesandrecycleitresponsiblytopromotethesustainablereuseofmaterialresources.
Householdusersshouldcontacteithertheretailerwheretheypurchasedthisproduct,ortheir
localgovernmentofce,fordetailsofwhereandhowtheycantakethisitemforenvironmentally
saferecycling.
Businessusersshouldcontacttheirsupplierandcheckthetermsandconditionsofthe
purchasecontract.Thisproductshouldnotbemixedwithothercommercialwastesfordisposal.

www.prolight.co.uk Spectra Flood 18T3 User Manual
11

www.prolight.co.uk Spectra Flood 18T3 User Manual
12
Other manuals for spectra flood 18T3
1
Table of contents
Other Ledj Light Fixture manuals
Popular Light Fixture manuals by other brands

Cooper Lighting
Cooper Lighting Metalux RKS/RKD SERIES Specifications

Hoftronic
Hoftronic 4405311 user manual

RUTEC
RUTEC VARDAflex 4inONE-72 quick start guide

Clare Controls
Clare Controls ClareHome CLIQ.PANEL Installation sheet

Modulex
Modulex LINEAR100 installation guide

Kino Flo
Kino Flo Image L40 Retrofit instructions