Lekkie Converted System Summit User manual

WWW.CONVERTED.CO.NZ
1. KIT OVERVIEW 4
1.1 Installation Overview 4
1.2 Kit Contents 5
2.1 Tools required 6
2. TOOLS 6
3. BIKE PREPARATION 7
3.1 Bike /Frame preparation 7
3.2 Cranks/bottom bracket/front derailleur 7
3.3 Handlebars 8
4. KIT INSTALLATION 9
4.1 Bottom Bracket Preparation / Motor Fit 9
4.2 Speed Sensor Fitting 11
4.3 Shift Sensor Fitting 13
4.4 Battery-Mount Fitting 14
4.5 Fitting the Chainring 16
4.6 Fitting the Cranks 17
4.7 Wiring Harness and Handlebars 18
4.8 Cockpit/Handlebars 19
4.9 Cable tidy up and check 20
5. SYSTEM TEST 21
5.1 Powering on and Charging 21
5. SYSTEM TEST 22
6. SAFETY CHECK 22
5.2 Power assist check 22
CONTENTS

WWW.CONVERTED.CO.NZ
INTRODUCTION
Thank you for purchasing a Converted System Summit conversion kit. We are condent you will enjoy
the freedom riding electric brings.
Bike/frame selection - The mid drive unit ts many dierent bike frames however some t better than
others and there are some which unfortunately won’t convert. Generally speaking a basic hard tail(no
rear suspension) bike with a traditional tringle frame will be the easiest conversion.
If you have a bike already and are unsure or if would like to buy a bike for conversion please contact
us and we can give guidance... we have converted hundreds.
We have created printable templates as guides for battery and motor tment. these are available for
download from our website.

WWW.CONVERTED.CO.NZ
1. KIT OVERVIEW
1.1 Installation Overview
Kit Contents
Open your box, get excited, but make sure you keep track of parts. Please see the checklist to make
sure you have everything before you start
Prepare Your bike
Get your bike ready for the motor installation, remove all unecessary parts.
Install the motor
Install the drive unit, battery, and associated wiring.
Tidy up
clip all your cable ties, get everything looking smart
Safety Check
Your bike is going to be fast, so make sure everything is properly installed, all bolts are tight, brakes
function, cables are all secure but allow adequate steering movement but cant get caught etc.
Get riding
While it is still your same beloved bike, it will be faster than ever and it may take a bit of getting used
to.
We advise keeping things slow for starters, leave the top speed at the default 25kph.

WWW.CONVERTED.CO.NZ
1. KIT OVERVIEW
1.2 Kit Contents
Each kit will contain the items shown below in the photograph please note that some
of the items pictured are optional:
If you are missing any items please contact customer support.
Not pictured: Converted System operation manual, shipping boxes.
Battery and keys
Motor unit
Cranks (optional Buzz bars pictured)
Charger with AU/NZ mains cable
Main EU-BUS wiring harness
Mounting hardware (axle plate, mounting bolts, crank bolts)
Converted System 3-button display
Universal throttle
Speed sensor with magnet and small mounting screw
Gear shift sensor
Mechanical brake levers with e-cuto
Chainring (optional 42T Bling-Ring pictured)

WWW.CONVERTED.CO.NZ
2.1 Tools required
Prep Tools-
• Allen Key set
• Bottom Bracket tool + socket wrench
• Screwdrivers (Philips, possibly Flat Head)
• Sidecutters
• Crank puller/extractor tool
• Adjustable spanner / ring spanners / socket set
• Chain breaker
Installation Tools-
as above +
• Converted System lockring socket or external bottom bracket tool + 1/2” socket wrench (ideally a
torque wrench)
• C-spanner or Converted System lock cup socket. 44mm 16 notch.
• Half-round le (potentially, depending on frame)
Consumables/extras- items you may consider
• Extra cable/zip ties - some bikes need more than others
• Shift cable(core) - it can sometimes be dicult to a install shift sensor with an old cable
(especially with frayed end) as you need to slide it onto the cable.
• New chain - We advise ting a new chain. remember you have just added more power to your
ride. A tired old chain may not like it,
• Cable extensions - We’ve tuned the cable lengths to cover most bikes, but if you’ve got a special
build or cargo bike you might need some extensions.
2. TOOLS

WWW.CONVERTED.CO.NZ
3. BIKE PREPARATION
Installing your Converted System Summit kit is not hard, but you do need a certain
level of mechanical knowledge. There are plenty of online video tutorials on youtube
should you get stuck. Otherwise contact us and we can help you out.
3.1 Bike /Frame preparation
The Converted System Summit kit uses a Bafang mid-drive motor which replaces your existing
cranks/Chainring(s)/bottom bracket. The folowing instructions relate to frames with a standard
threaded bottom bracket, which is currently the most commonly found type. The internal diameter
is 34mm and the width between 68-73mm. For other styles of bottom bracket you may require an
additional tting adapters. Please contact Converted System for further info. as required.
3.2 Cranks/bottom bracket/front derailleur
Remove the pedals from the original cranks if you are planning to re-use (generally 15mm spanner
or allen key, Left pedal is reverse thread - turn clockwise to loosen)
Remove cranks,
• Remove the centre crank bolts (normally 8mm Allen Key)
• Using a crank extractor tool remove the cranks, (see manufacturer instructions).
If the bike is tted with a front derailleur, break the chain to allow removal.
Disconnect the front deraileur cable and remove the derailleur bracket (this normally clamps around
the seat tube).
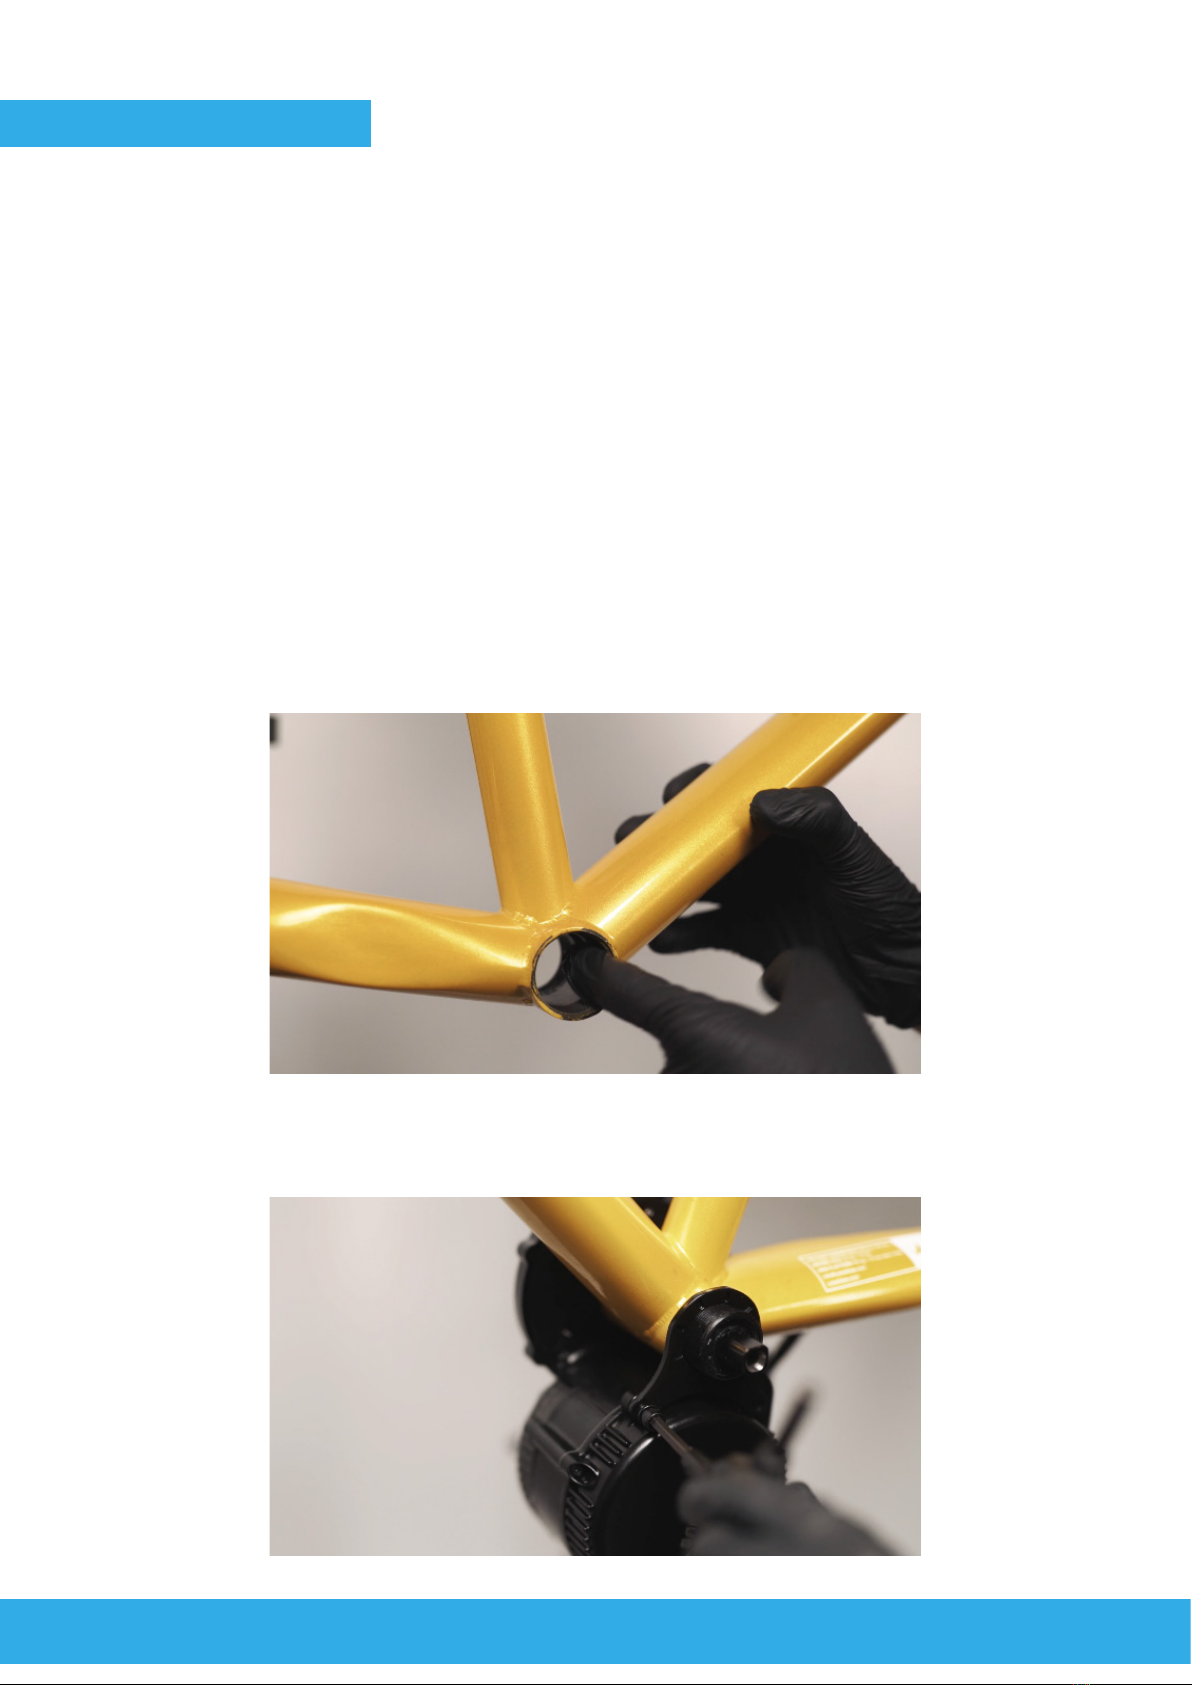
Remove the bottom bracket with a Bottom bracket removal tool. Start on the left(non-drive) side of
the bike. removing the cup completely.
Repeat on the opposite(chainring) side, this will be reverse thread so turn clockwise to loosen.
The bottom bracket should pull out completely.
Remove the front derailleur cables.

WWW.CONVERTED.CO.NZ
3. BIKE PREPARATION
3.3 Handlebars
Some times it is easiest to remove everything o the handlebars before reinstalling in prefered
order. The end setup of the handlebars comes down to personal preference, however you will no
longer be running a front derailleur so the shifter can be completely removed.
If your bike is set up with cable brakes*, it is advised to replace with the included levers which
incorporate cut-out switches which cut motor power when the brake is operated.
*Hydraulic brakes - For bikes with hydraulic brakes you may wish to run your existing brakes without
cut-o. Converted recommends running some form of motor cut-o for safety. We can provide
Tektro E-350 hydraulic E-bike brakes with built-in sensors or a manual cut-o switch. Sensors are
also avabilable however suitability will depend on your individual setup and brake lever design.

WWW.CONVERTED.CO.NZ
4.1 Bottom Bracket Preparation / Motor Fit
The folowing instructions relate to the standard threaded bottom bracket, which is currectly the most
commonly found type. The internal diameter is 33.6mm-33.9mm and the width between 68-73mm.
For other styles/sizes of bottom bracket you may require additional tting adapters and spacers.
Please contact Converted System for further info.
Ensure that the bottom bracket (BB) is clean, free of weld debris (you may need to le to get motor to
slide in). The motor should be able to swing up till it comes in contact with the downtube.
Ensure the motor can be inserted fully and sits with the drive side at against the botom bracket shell
without touching chain stays etc.
For rear suspension bikes, ensure the pivots are clear of the casing for the full range of movement,
else spacers may be required to give adequate clearance.
Fit the BB axle torque plate facing with the teeth facing the frame. Loosely tighten the M6 bolts (nal
tightening will occur in the next step). Use low strength Loctite
4. KIT INSTALLATION

WWW.CONVERTED.CO.NZ
Holding the motor against the downtube, using a lock ring tool or C-spanner (see pic) tighten
both the M33 lockring (33-40Nm torque) and the BB cup over the M33 (20-30Nm torque).
Lock ring socket tools are available to purchase through Converted System.
Tighten the M6 bolts to nal torque (34-40Nm).
4. KIT INSTALLATION

WWW.CONVERTED.CO.NZ
4.2 Speed Sensor Fitting
Install the speed sensor on the rear chainstay. The ideal tting point for the sensor
and magnet is approximately 50mm from the rim. The mount for the sensor has
double-sided tape but fasten further with two zip ties.
Install the magnet on a spoke. For best practice ensure that the magnet passes
within 5mm of the sensor. The small black screw holds the mount in its horizontal
position.
4. KIT INSTALLATION

WWW.CONVERTED.CO.NZ
4.3 Shift Sensor Fitting
Install the shift sensor on your gear-shift cable. Ideal position is on the upper
chainstay. Feed the gear-shift cable through the sensor. There should be only
a small amount of resistance. Secure with zip ties.
Connect the shift sensor to the yellow plug which runs from the bottom of the
controller. The sensor will partially cut the motor power for one second when shifting.
4. KIT INSTALLATION

WWW.CONVERTED.CO.NZ
4. KIT INSTALLATION
4.4 Battery-Mount Fitting
Mount the battery cradle to the downtube ensuring that you have at least 2 bolts
xing the cradle in position.
Before completely tightening the bolts ensure that the battery has enough clearance
from the seat-tube and can be slid forward/upwards on the rails for removal.

WWW.CONVERTED.CO.NZ
IMPORTANT: Before continuing, remove the battery from the cradle to ensure the
system is not powered on.
Plug the battery cable into the correct IP67 loom which runs from the motor controller.
There is only one connector this shape, ensure connectors are pressed together as
far as they can go.
Tidy up the wiring underneath the motor or behind the seat tube using zip ties so it can’t catch
on anything. Routing will depend on frame. With full suspension frames ensure cables do not
get pinched or overly stressed/pulled at any stage of travel.
4. KIT INSTALLATION

WWW.CONVERTED.CO.NZ
4. KIT INSTALLATION
4.5 Fitting the Chainring
Fit the front chainring to the motor. In this image we have used a Converted System BLINGRING
(Summit Pro Kit / optional accessory). Tighten the M5 x 10mm bolts to 25-30nm.
Ensure the chainring is free to turn and does not touch the chainstay, else spacers or a smaller
chainring may be required. see www.Converted System.bike for available options.
Ret the chain (ideally using a new chain). Check chainline is good and there is no frame
interference.

WWW.CONVERTED.CO.NZ
4. KIT INSTALLATION
4.6 Fitting the Cranks
Grease the motors axle using a general lithium based workshop grease.
Fit the cranks (note L and R sides as pedal threads are dierent directions).
Insert and tighten the M8 crank bolts to 40nm. Note that the optional Converted System Buzz
bar cranks which are self-extracting are used in this example.

WWW.CONVERTED.CO.NZ
4. KIT INSTALLATION
4.8 Cockpit/Handlebars
Install the e-brake levers and throttle in the desired orientations. if unsure please contact your
local installer/bike shop for assistance.
The throttle can be installed on either the left or right side of the handlebars. Note: As you may
still have the rear gear shifter located on the right side, this may interfere with easy operation.
Install the display ,close to he left hand grip and plug the cables together. The connectors
are colour coded for your convenience. On the harness side there is one display plug (green
male) 2x ebrake cutos (yellow female) and 1x throttle (yellow male).
BRAKE LEVER BRAKE LEVER
THROTTLE
FRONT LIGHT
DISPLAY

WWW.CONVERTED.CO.NZ
4. KIT INSTALLATION
4.9 Cable tidy up and check
Check over all cables, ensuring no cables interfere with other systems on the bike, use cable
ties as necessary.
Ensure all cable connectors are fully inserted.
Ensure there is adequate length allowed for around moving parts (steering, suspension etc)
and cables are not strained at the full extent of movement.
Ensure cables cannot be caught or pinched between moving parts, suspension, tyres/wheels,
cranks, chain etc.
Table of contents
Other Lekkie Bicycle Accessories manuals