LENCO L-174 User manual

1
USER’S MANUAL
L-174 Glass turntable with USB
connection
www.lenco.com

2
CONTENTS
CONTENTS ............................................................................2
DESCRIPTION........................................................................3
INITIAL STARTING-UP..........................................................4
Mount and adjust...................................................................4
Mains connection..................................................................5
Amplifier connection..............................................................5
Playing a record....................................................................5
Record to PC.........................................................................6
MAINTENANCE......................................................................6
To replace the stylus (FIG.A) ................................................6
To disassemble the cartridge (FIG.B) ...................................6
To install a new cartridge ......................................................6
Important recommendations..................................................6
AUDACITY QUICK GUIDE (PC editing program) ................7
Before Starting the Software.................................................7
To Install Software (PC)........................................................7
To Install Software (MAC).....................................................7
Software Configuration..........................................................7
Toolbars................................................................................9
Audio Control Buttons...........................................................9
Edit Toolbar.........................................................................10
Track Pop-Down Menu .......................................................11
Edit Menu............................................................................14
View Menu ..........................................................................16
Project Menu.......................................................................17
Generate Menu...................................................................19
Effect Menu.........................................................................20
Analyze Menu .....................................................................22
Help Menu...........................................................................23
SERVICE AND SUPPORT ...................................................23

3
DESCRIPTION
1. Counterweight
The counterweight is used for precise adjustment of the stylus’s pressure on
the vinyl, to properly balance the tonearm.
2. Anti-Skating Control
Use this to set the anti-skating function of the tonearm.
3. Tonearm Lever
Use this lever to lower and raise the tonearm.
4. Tonearm Lock (arm rest)
Use this to lock the tonearm in place when it’s not in use.
5. Head shell
This holds the stylus (“needle”) in place and provides protection by means of
its removable stylus protection cap (not shown)
6. Platter:
Place the record here whenplaying.
7. 33/45 RPM Switch (33/off/45):
Select 33 or 45 rpm for playing a vinyl, switch to “OFF” to pause the playing.
Switch to 33or 45 again, to continue playing from the pause point.

4
8. Signal Connectors
Plug in the RCA cable, and connect the cable to an audio amplifier.
9. Pre-Amp ON/OFF selector
*ON: Connect the RCA cable to the LINE-IN terminal of the amplifier.
*OFF: Connect the RCA cable to the PHONO-IN terminal of the amplifier.
Warning: If the selector is in the ON position, never connect the RCA cable to
the PHONO-IN terminal of the amplifier.
10. USB port
Connecting to PC for recording music from your vinyl to a PC.
- With Full-Speed Transceivers
- Fully Compliant With USB 1.1 Specification
11. Auto Stop Switch
When the record heads towards the end, it will automatically stop. The records
sometimes have various ending points. In case the record auto-stops before it
reaches the end of the vinyl record, please switch off the auto-stop function.
12. Power supply jack:
To plug-in DC12V/0.5A switching adaptor for power supply.
13. Power Switch:
During the PAUSE mode (33/off/45 switch is on “OFF” position), the motor is
still activated; to save energy, please switch off the player after using it.
INITIAL STARTING-UP
Mount and adjust
1) Place the aluminum turntable platter. See below, reach into the hole and pull
the rubber drive belt off of the inner ring, and install it over the motor spindle.
Be careful not to twist the rubber drive belt during this step. Check to make
sure the platter rotates uniformly.
2) Insert the counterweight on the end of the tone arm, this locks it into place.
3) Adjusting the stylus pressure
i. Turn the anti-skating knob counter-clockwise to “0”.
ii. Pull down the protective cover of the stylus.
iii. Place the lever for the tone arm lift in the front position.
iv. Open the tone arm lock. Seize the handle of the tone arm and lead it to just
before the turntable platter so that it can be moved upwards and downwards.
(Be careful not to hit the stylus against anything.)
4) Turn the counterweight until the tone arm remains in a horizontal position and

5
does not move upwards or downwards. If the tone arm moves upwards: Turn
the counterweight counter-clockwise. If the tone arm moves downwards: Turn
the counterweight clockwise.
5) Put the tone arm back onto the arm rest and lock it.
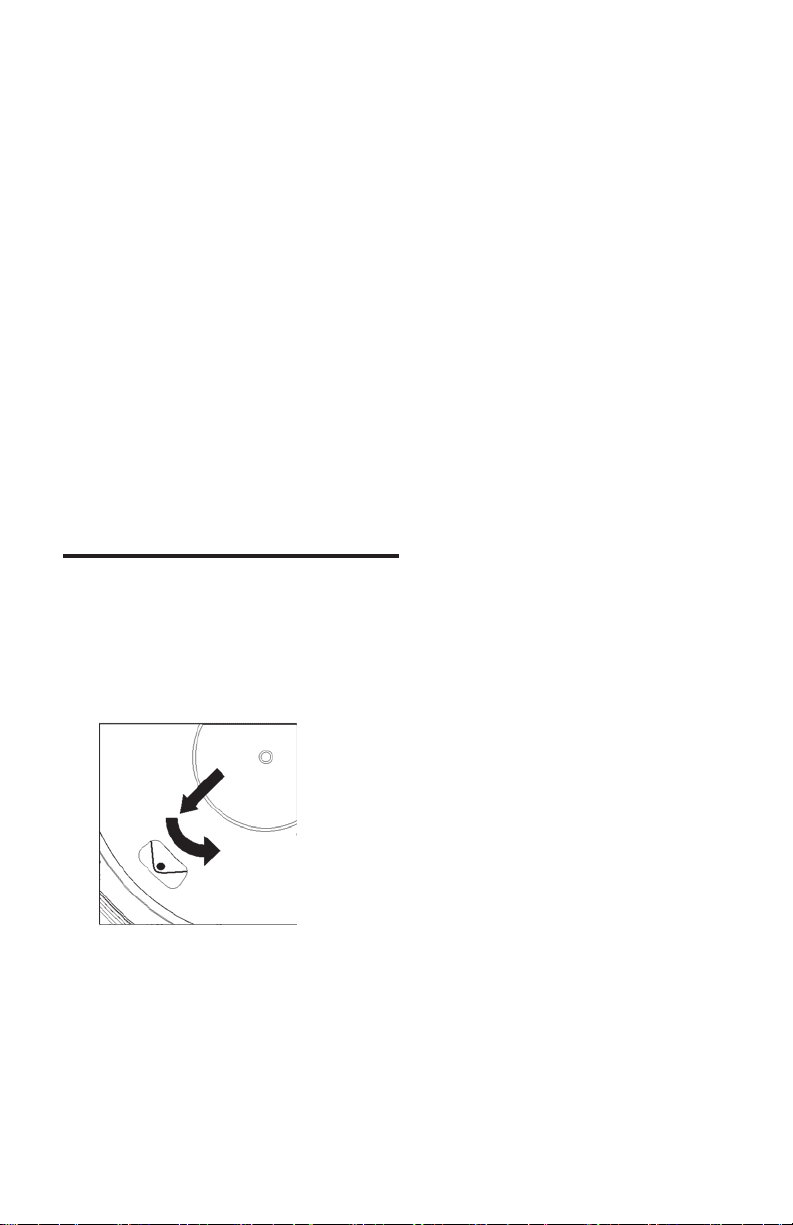
6) The counterweight is with a rotary ring and with a scale. The white line on the
tone arm points to a value on this scale. Without turning the counterweight,
only turn the ring to “0”.
7) The scale indicates the stylus pressure in grams. The pressure of the stylus
supplied with this turntable is 2.5 g, turn the counterweight counter-clockwise
to “2.5”. If another stylus is used, adjust the stylus pressure indicated in the
corresponding specifications of the stylus.
8) Adjusting the anti-skating facility
When playing a record, forces occur on the stylus which are compensated by
the anti-skating facility. For this purpose, adjust the anti-skating knob from “0”
to the value equal to the stylus’s pressure, for the supplied stylus system, it’s
“1.8”.
Mains connection
An external switching power adaptor (DC12V/0.5A) is supplied with this turntable.
Your unit is readyto be connected to a mains voltage of 110V/60Hz or 230V/50Hz.
Power supply adaptor
Manufacturer: GOLDEN PROFIT
Model number: GPE053A-120050-Z
Use only the original AC adaptor
Use only the power supply listed in the user instructions.
Amplifier connection
There is a Phono/Line selector next to the RCA jack on the rear panel of
the turntable.
If your amplifier has a “PHONO” input, switch the selector to “PHONO”,
and connect the RCA plug to the PHONO INPUT of your amplifier.
If your amplifier doesn’t have a “PHONO” input, switch the selector to
“LINE”, and connect the RCA plug to the “LINE” input of your amplifier.
Warning: If the selector is in the LINE position, never connect the RCA plug to
the PHONO INPUT of your amplifier.
Red plug into R channel input, White plug into L channel input.
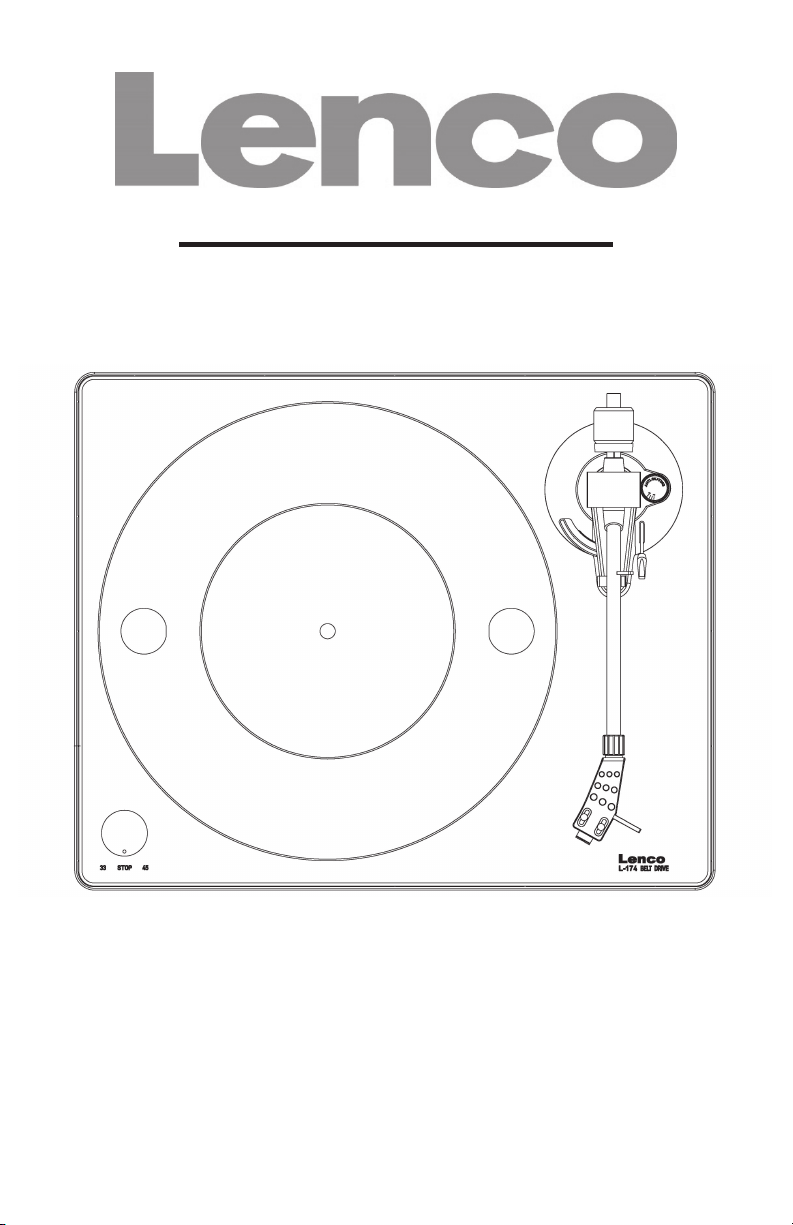
Playing a record
1) Place the record on the turntable. If it is a 45 rpm, you need to place
the adaptor on the record spindle.
2) Choose the playing speed.
3) Release the pick-up arm clip.
4) Place the cartridge vertically over the first track of the record; the
turntable starts turning.
5) When the end of the record has been reached, the platter will
automatically stop. Push the lift lever to lift the tone arm and lead it
back to the arm rest.

6
6) If you want to pause the playing, switch the knob on the left side to
“off”, and switch it to 33 or 45 to continue the playing.
7) After finish the playing, please switch off the power to save energy.
Record to PC
Connect USB to PC for editing the music with your favorite digital editing software.
With this unit, we offer you a disc with PC music editing program, please refer to
the instructions attached to this manual for the operation.
MAINTENANCE
To replace the stylus (FIG.A)
•Secure the tone arm in place using the
tone arm lock.
•Pull the orange stylus unit forward in the
direction of arrow (A) and remove it.
•Put in the new stylus following the
reverse procedure.
To disassemble the cartridge
(FIG.B)
•Secure the tone arm in place using the
tone arm lock.
•Remove the stylus (see section above).
•Release the screws, nuts and washer
and then the headshell and cartridge
can be disassembled.
•Disconnect the four link wires at the
level of the pick-up head.
To install a new cartridge
•Connect the four colored wires as
shown in figure B.
•Push the cartridge up into the headshell.
•Reinstall the stylus.
Important recommendations
We advise you to clean your records using an impregnated rag with an anti-static
fluid in order to enjoy your records maximally and also to make them last longer.
We would also like to point out that for the same reasons your stylus should be
replaced periodically (approximately every 250 hours)
Dust the stylus from time to time using a very soft brush dipped in alcohol (brushing
from back to front of the cartridge)
FIG A
FIG B
BACK VIEW OF HEADSHELL WIRING
WHITE
BLUE
RED
GREEN

7
WHEN TRANSPORTING YOUR RECORD PLAYER DO NOT FORGET TO:
Place the protective cap on the stylus.
Put the rest clip into the pick-up arm.
AUDACITY QUICK GUIDE (PC editing
program)
Before Starting the Software
Make sure that your USB turntable is plugged into the computer and both
the computer and the turntable are plugged in and are switched on.
To Install Software (PC)
1. Plug in your turntable to an AC outlet and connect the USB port
on the Turntable to the USB port of your computer.
2. Turn on the power switch of your turntable.
3. The Windows system will detect a new device and note that it is
available to use.
4. Insert the CD that came with your USB turntable.
5. Run the file “install audacity-win-2.1.1.exe” to install A udacity
software. Once installed, run the Audacity program.
To Install Software (MAC)
1. Insert the included CD.
2. Open the CD icon on the desktop.
3. Drag the installation folder for audacity to your hard drive. We
recommend that you move the folder to your “Applications” folder.
4. A window will come up which shows the files copying.
5. EJECT the CD.
6. Open “Audacity” from where you moved it to on your hard drive.
Software Configuration
1. Click on Microphone in the drop down menu and select “Stereo Mix”
Figure 1: Select Stereo Mix
2. Select the “Edit” menu and then “Preferences”

8
Select the USB audio device under the “Recording” selection as shown.
Select “Software Playthrough” to hear the audio while recording.
Note: The USB Turntable may show up with a different name in Windows
system.. This may depend on your computer model and operating system.
99% of the time it will contain “USB” in the Name.
Figure 2: Select USB Audio Device from Preferences
After completed the above settings, you are ready for recording.
If you are still having difficulties finding the USB Turntable, try to check
your system settings or control panel to adjust the audio input settings from
the sound control panel.
Note:
i. The attached Audacity software is for reference only. Please download the
latest version from the following website:
http://www.audacity.com
ii. Please check the following website and download the trial software for
more sound editing software.
http://www.bias-inc.com/

9
Toolbars
Selection tool - for selecting the range of audio you want to edit or
listen to.
Envelope tool - for changing the volume over time.
Draw tool - for modifying individual samples.
Zoom tool - for zooming in and out.
Time shift tool - for sliding tracks left or right.
Multi tool - lets you access all of these tools at once depending on the
location of the mouse and the keys you are holding down.
Audio Control Buttons
Skip to Start - moves the cursor to time 0. If you press Play at this
point, your project will play from the beginning.
Play - starts playing audio at the cursor position. If some audio is
selected, only the selection is played.
Loop - if you hold down the Shift key, the Play button changes to a
Loop button, which lets you keep playing the selection over and
over again.
Record - starts recording audio at the project sample rate (the
sample rate in the lower-left corner of the window). The new track
will begin at the current cursor position, so click the "Skip to Start"
button first if you want the track to begin at time 0.
Pause - temporarily stops playback or recording until you press
pause again.
Stop - stops recording or playing. You must do this before
applying effects, saving or exporting.
Skip to End - moves the cursor to the end of the last track.

10
Edit Toolbar
All of the buttons on this toolbar perform actions - and with a couple of
exceptions, they're all just shortcuts of existing menu items to save you
time. Holding the mouse over a tool will show a "tooltip" in case you forget
which one is which.
Cut
Copy
Paste
Trim away the audio outside the selection
Silence the selected audio
Undo
Redo (repeat last command).
Zoom In
Zoom Out
Fit selection in window - zooms until the selection just fits inside the
window.
Fit project in window - zooms until all of the audio just fits inside the
window.

11
Track Pop-Down Menu
The Track Pop-Down Menu appears when you click in a track's title. This
lets you access a few special commands that apply to individual tracks.
Name... - lets you change the name of the track.
Move Track Up - exchange places with the track above this one.
Move Track Down - exchange places with the track below this one.
Waveform - sets the display to Waveform - this is the default way of
visualizing audio.
Waveform (dB) - similar to Waveform, but on a logarithmic scale,
measured in decibels (dB).
Spectrum - display the track as a spectrogram, showing the amount of
energy in different frequency bands.
Pitch (EAC) - highlights the contour of the fundamental frequency (musical
pitch) of the audio, using the Enhanced Autocorrelation (EAC) algorithm.
Mono- makes this track a mono track, meaning it is played out of just one
speaker, or played out of the left and right speakers equally.
Left Channel - makes this track come out of only the left speaker.
Right Channel - makes this track come out of only the right speaker.
Make Stereo Track - if there is another track below this one, it joins them
to make a single stereo track, with the top track representing the left
speaker, and the bottom track representing the right speaker. When tracks
are joined into a stereo pair, all edits automatically apply to both the left
and right channel.

12
Split Stereo Track - if the selected track is a stereo track (a pair of left and
right tracks joined together as a single track), this operation splits them into
two separate tracks that you can modify and edit independently.
Set Sample Format - this determines the quality of the audio data and the
amount of space it takes up. 16-bit is the quality used by audio CDs and is
the minimum quality that Audacity uses internally (8-bit audio files are
automatically converted when you open them). 24-bit is used in higher-end
audio hardware. 32-bit float is the highest quality that Audacity supports,
and it is recommended that you use 32-bit float unless you have a slow
computer or are running out of disk space.
Set Rate - sets the number of samples per second of the track. 44100 Hz
is used by audio CDs. Tracks can have different sample rates in Audacity;
they are automatically resampled to the project sample rate (in the lower-
left corner of the window).
[MENU]
File Menu
New - creates a new empty window
Open... - opens an audio file or an Audacity project in a new window
(unless the current window is empty). To add audio files to an existing
project window, use one of the Import commands in the Project menu.
Close - closes the current window, asking you if you want to save the
changes. On Windows and Unix, closing the last window will quit Audacity,
unless you modify this behavior in the Interface Preferences.
Save Project - saves everything in the window into an Audacity-specific
format so that you can save and quickly continue your work later. An
Audacity project consists of a project file, ending in ".aup", and a project
data folder, ending in "_data". For example, if you name your project
"Composition", then Audacity will create a file called "Composition.aup"
and a folder called Composition_data. Audacity project files are not meant
to be shared with other programs - use one of the Export commands
(below) when you are finished editing a file.

13
Save Project As... - same as Save Project (above), but lets you save a
project as a new name.
Recent Files ... - brings up a list of files you have recently opened in
audacity to be re-opened quickly.
Export As WAV... - exports all of the audio in your project as a WAV file,
an industry-standard format for uncompressed audio. You can change the
standard file format used for exporting from Audacity by opening the File
Format Preferences. Note that exporting will automatically mix and
resample if you have more than one track, or varying sample rates. See
also File Formats.
Export Selection As WAV... - same as above, but only exports the current
selection.
Export as MP3... - exports all of the audio as an MP3 file. MP3 files are
compressed and therefore take up much less disk space, but they lose
some audio quality. Another compressed alternative is Ogg Vorbis (below).
You can set the quality of MP3 compression in the File Format Preferences.
See alsoMP3 Exporting.
Export Selection As MP3... - same as above, but only exports the current
selection.
Export as Ogg Vorbis... - exports all of the audio as an Ogg Vorbis file.
Ogg Vorbis files are compressed and therefore take up much less disk
space, but they lose some audio quality. Ogg Vorbis files tend to take up a
little less disk space than MP3 for similar compression quality, and Ogg
Vorbis is free from patents and licensing restrictions, but Ogg Vorbis files
are not as widespread. You can set the quality of Ogg compression in the
File Format Preferences.
Export Selection As Ogg Vorbis... - same as above, but only exports the
current selection.
Export Labels... - if you have a Label Track in your project, this will let you
export the labels as a text file. You can import labels in the same text
format using the "Import Labels..." command in the Project Menu.
Export Multiple... - lets you split your project into multiple files all in one
step. You can either split them vertically (one new file per track), or

14
horizontally (using labels in a Label Track to indicate the breaks between
exported files.
Page Setup - configure how Audacity will print out the track waveforms
using the Print option, and what printer to use.
Print - Print out the main window view from audacity showing the tracks
and waveforms.
Exit (Quit) - closes all windows and exits Audacity, prompting you to save
any unsaved changes first.
Edit Menu
Undo - This will undo the last editing operation you performed to your
project. Audacity supports full unlimited undo - meaning you can undo
every editing operation back to when you opened the window.
Redo - This will redo any editing operations that were just undone. After
you perform a new editing operation, you can no longer redo the
operations that were undone.
Cut - Removes the selected audio data and places it on the clipboard.
Only one "thing" can be put on the clipboard at a time, but it may contain
multiple tracks.
Copy - Copies the selected audio data to the clipboard without removing it
from the project.
Paste - Inserts whatever is on the clipboard at the position of the selection
or cursor in the project, replacing whatever audio data is currently selected,
if any.
Trim - Removes everything to the left and right of the selection.
Delete - Removes the audio data that is currently selected without copying
it to the clipboard.
Silence - Erases the audio data currently selected, replacing it with silence
instead of removing it.

15
Split - Moves the selected region into its own track or tracks, replacing the
affected portion of the original track with silence. See the figure below:
Duplicate -Makes a copy of all or parts of a track or set of tracks into new
tracks. See the figure below:
Select ... > All - Selects all of the audio in all of the tracks in the project.
Select ... > Start to Cursor - Selects from the beginning of the selected
tracks to the cursor position.
Select ... > Cursor to End - Selects from the cursor position to the end of
the selected tracks.
Find Zero Crossings- Modifies the selection slightly so that both the left
and right edge of the selection appear on a positive-slope zero crossing.
This makes it easier to cut and paste audio without resulting in an audible
clicking sound.
Selection Save - Remembers the current selection (or cursor position),
allowing you to restore it later.
Selection Restore - Restores the cursor position to the last position saved
by "Selection Save".
Move Cursor ... > to Track Start - Moves the cursor to the start of the
current track.
Move Cursor ... > to Track End - Move the cursor to the end of the
currently selected track.
Move Cursor ... > to Selection Start - Moves the cursor to the start of the
current selection.

16
Move Cursor ... > to Selection End - Moves the cursor to the end of the
current selection.
Snap-To ... > Snap On - Enable Snap-To mode. When Snap-To mode is
enabled, the selection will be constrained to the nearest interval on the
time scale, by default the nearest second. So if you click and drag from 4.2
seconds to 9.8 seconds, it will result in a selection from 4 seconds to 10
seconds, exactly. You can change the units that are snapped to using the
"Set Selection Format" option in the View Menu.
Snap-To ... > Snap Off - Turns Snap-To mode off letting you select
arbitrary ranges of time
Preferences... - opens the Preferences dialog.
View Menu
Zoom In - Zooms in on the horizontal axis of the audio, displaying more
details about less time. You can also use the zoom tool to zoom in on a
particular part of the window.
Zoom Normal - Zooms to the default view, which displays about one inch
per second.
Zoom Out - Zooms out, displaying less details about more time.
Fit in Window- Zooms out until the entire project just fits in the window.
Fit Vertically - Resizes all of the tracks vertically so they all fit inside of the
window (if possible).
Zoom to Selection - Zooms in or out so that the selection fills the window.
Set Selection Format - lets you choose the formatting that is displayed at
the bottom of the window indicating the current selection time. Options
include film, video, and audio CD frames, seconds + samples, or purely
time. If you turn on the Snap-To mode in the Edit Menu, the selection will
snap to the frames or other quantization you have selected in this menu.
History... - Brings up the history window. It shows all the actions you have
performed during the current session, including importing. The right-hand

17
column shows the amount of hard disk space your operations used. You
can jump back and forth between editing steps quite easily by simply
clicking on the entries in the window, the same as selecting Undo or Redo
many times in a row. You can also discard Undo history to save disk space.
The history window can be kept open while you work.
Float Control Toolbar - moves the Control Toolbar out of the window and
into its own floating window, so you can position it wherever you want. The
menu item changes to Dock Control Toolbar, which you can use to put
the toolbar back into the main window.
Float Edit Toolbar - moves the Edit Toolbarout of the window and into its
own floating window, so you can position it wherever you want. The menu
item changes to Dock Edit Toolbar, which you can use to put the toolbar
back into the main window.
Float Meter Toolbar -does the same thing for audacity's VU meters that
you use to set recording levels and adjust playback.
Float Mixer Toolbar - moves the Mixer Toolbar out of the window and into
its own floating window as above.
Project Menu
Import Audio... - This command is used to import audio from a standard
audio format into your project. Use this command if you already have a
couple of tracks and you want to add another track to the same project,
maybe to mix them together. You cannot use this option to import Audacity
Projects. The only way to combine two Audacity Projects is to open them in
separate windows and then copy and paste the tracks.
Import Labels... - This command takes a text file which contains time
codes and labels, and turns them into a Label Track.
Import MIDI... - This menu command imports MIDI files and puts them into
a MIDI Track. Audacity can display MIDI files, but cannot play, edit, or save
them yet.
Import Raw Data... - This menu command allows you to open a file in
virtually any uncompressed format. When you select the file, Audacity will
analyze it and try to guess its format. It will guess about 90% of the time
correctly, so you can try just pressing "OK" and listening to the result. If it is

18
not correct, however, you can use the options in the dialog to try some
other possible encodings.
At the beginning of your imported track(s), you may notice a little bit of
noise. This is probably the file's header, which Audacity was not able to
parse. Just zoom in and select the noise with the Selection Tool, and then
choose Delete from the Edit Menu.
Edit ID3 Tags... - Opens a dialog allowing you to edit the ID3 tags
associated with a project, for MP3 exporting.
Quick Mix - This command mixes all of the selected tracks together. If you
are mixing stereo tracks, or mixing tracks that are marked as Left or Right
channel, the result will be a stereo track (two channels), otherwise the
result will be mono.
Your tracks are implicitly mixed whenever you hit the Play button and
whenever you export. This command offers a way to do it permanently and
save the results to disk, saving on playback resources.
Note that if you try to mix two very loud tracks together, you may get
clipping (it will sound like pops, clicks, and noise). To avoid this, drag the
gain slider on the tracks down to reduce their volume before mixing.
New Audio Track - This creates a new empty Audio Track. This command
is rarely needed, since importing, recording, and mixing automatically
create new tracks as needed. But you can use this to cut or copy data from
an existing track and paste it into a blank track. If that track was at a non-
default rate then you may need to use Set Rate from the Track Pop-Down
menu to set the correct sample rate.
New Stereo Track - same as above, but creates a stereo track. You can
also create a stereo track by joining two tracks using the track pop-down
menu.
New Label Track - This creates a new Label Track, which can be very
useful for textual annotation.
New Time Track - This creates a new Time Track, which is used to vary
the speed of playback over time.
Remove Tracks - This command removes the selected track or tracks
from the project. Even if only part of a track is selected, the entire track is
removed. You can also delete a track by clicking the X in its upper-left
corner. To cut out only part of the audio in a track, use Delete or Silence.

19
Align Tracks... - All the Align functions work on whole tracks or groups of
tracks, not on selections, even if they span across multiple tracks. They all
operate by time-shifting tracks (moving them left or right), making it easier
to synchronize tracks or get rid of silence at the beginning. The cursor or
selection stays in the same place unless you use "Align and move
cursor...", below:
Align and move cursor... - same as the functions above, except that the
cursor or selection is moved along with the tracks. That allows you to shift
the tracks without losing your relative place.
Add Label at Selection - This menu item lets you create a new label at
the current selection. You can title the label by typing with the keyboard
and then hitting "Enter" when you're done.
Add Label at Playback Position - This menu item lets you create a new
label at the current location where you are playing or recording. Do this if
you want to mark a certain passage while you're listening to it. You can title
the label by typing with the keyboard and then hitting "Enter" or "Return"
when you're done. Only available whilst audacity is playing.
Generate Menu
If you choose an item from the Generate menu when there are no tracks in
a project, a new track is created. Otherwise, the current track is used.
If a track is selected and the cursor is placed in a single place in the track
audio is inserted at the cursor position. The default duration is 30 seconds.
The audio created will replace any selection, otherwise it is inserted into
the track, shifting up later parts of the track.
Silence - inserts silence
Tone... - you can create a Sine wave, Square wave, or Saw tooth wave.
White Noise - inserts random audio samples, which sounds like pure static.
Any items which appear after these three built-ins are VST, Ladspa, or
Nyquist plug-ins. It is possible for a poorly written plug-in to crash Audacity,
so always save your work before using a plug-in. Note that any effect that

20
doesn't take any audio as input will automatically be placed in the
Generate menu.
Effect Menu
The items in this menu only work when you have audio selected. Audacity
does not have any real-time effects; you must select the audio, apply the
effect, and then listen to the results.
Most effects have a Preview button. Clicking on this button plays up to
three seconds of audio, allowing you to hear what it will sound like after the
effect is applied. This is useful for fine-tuning the effect parameters.
Repeat Last Effect- selecting this command is a shortcut to applying the
most recent effect with the same settings. This is a convenient way to
quickly apply the same effect to many different parts of a file.
Amplify - changes the volume of the selected audio. If you click the "Allow
clipping" checkbox, it will let you amplify so much that the audio ends up
beyond the range of the waveform, and is clipped (distorted). The default
value when you open the effect is to amplify so that the loudest part of the
selection is as loud as possible without distortion.
Bass Boost - enhances the bass frequencies in the audio.
Change Pitch - changes the pitch/frequency of the selected audio without
changing the tempo. When you open the dialog, the starting frequency is
set to Audacity's best guess as to the frequency of the selection. This
works well for recordings of singing or musical instruments without
background noise. You can specify the pitch change in one of four different
ways: musical note, semitones, frequency, or percent change.
Change Speed- changes the speed of the audio by resampling. Making
the speed higher will also increase the pitch, and vice versa. This will
change the length of the selection.
Change Tempo - changes the tempo (speed) of the audio without
changing the pitch. This will change the length of the selection.
Table of contents
Languages:
Other LENCO Turntable manuals

LENCO
LENCO Classic Phono TT-10BN User manual

LENCO
LENCO L-82 User manual

LENCO
LENCO LS-500OK User manual

LENCO
LENCO DJ-1000 User manual

LENCO
LENCO L-85 User manual

LENCO
LENCO L3809 User manual

LENCO
LENCO L-86 User manual

LENCO
LENCO L-82 User manual

LENCO
LENCO L-3808 User manual

LENCO
LENCO 8711902065067 User manual

LENCO
LENCO LS-50LED User manual

LENCO
LENCO LBT-120 User manual

LENCO
LENCO L-78 USB - User manual

LENCO
LENCO LS-430BK User manual

LENCO
LENCO LS-430 User manual

LENCO
LENCO LS-500BK User manual

LENCO
LENCO LBT-188 User manual

LENCO
LENCO LS-10WD User manual

LENCO
LENCO L-78 User manual

LENCO
LENCO Classic Phono TT-115 User manual