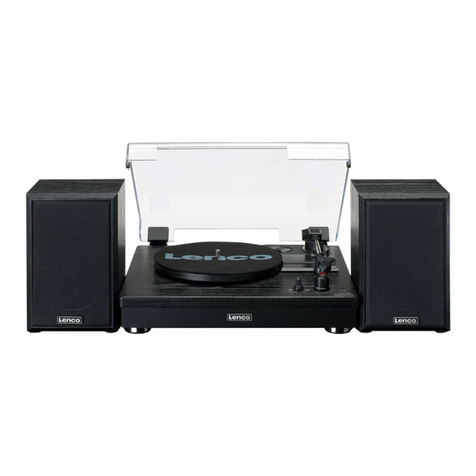
LENCO LBT-120BK User manual

1
Model: LBT-120BK
User manual - Turntable with Bluetooth and USB direct encoding
Gebruikshandleiding - Platenspeler met Bluetooth en USB voor directe codering
Benutzerhandbuch –Plattenspieler mit Bluetooth und direkter USB-Aufnahme
Mode d'emploi - Tourne-disque avec Bluetooth et encodage direct en USB
Manual de usuario - Tocadiscos con Bluetooth y codificación directa USB

2
Index
Eglish..............................................................................................................................................
Nedelads ....................................................................................................................................
Deutsh..........................................................................................................................................
Façais..........................................................................................................................................
Español ..........................................................................................................................................
Version 1.0

3
English
LBT-BK
CAUTION:
Usage of otols o adjustets o pefoae of poedues othe tha those speified heei
a esult i hazadous adiatio eposue.
This uit should ot e adjusted o epaied aoe eept ualified seie pesoel.
PRECAUTIONS BEFORE USE
KEEP THESE INSTRUCTIONS IN MIND:
. Do ot use this deie ea ate.
. Clea ol ith a slightl dap loth.
. Do ot oe o lok a etilatio opeigs. Whe plaig the deie o a shelf, leae
” fee spae aoud the hole deie.
. Istall i aodae ith the supplied use aual.
. * Do’t step o o pih the poe adapto. Be e aeful, patiulal ea the plugs ad the
ale’s eit poit. Do ot plae hea ites o the poe adapto, hih a daage it. Keep
the etie deie out of hilde’s eah! Whe plaig ith the poe ale, the a seiousl
ijue theseles.
. * Uplug this deie duig lightig stos o he uused fo a log peiod.
. Keep the deie aa fo heat soues suh as adiatos, heates, stoes, adles ad othe
heat-geeatig poduts o aked flae.
. Aoid usig the deie ea stog ageti fields.
. Eletostati dishage a distu oal usage of this deie. If so, sipl eset ad estat
the deie folloig the istutio aual. Duig file tasissio, please hadle ith ae
ad opeate i a stati-fee eioet.
. Waig! Nee iset a ojet ito the podut though the ets o opeigs. High oltage
flos though the podut ad isetig a ojet a ause eleti shok ad/o shot iuit
iteal pats. Fo the sae easo, do ot spill ate o liuid o the podut.
. Do ot use i et o oist aeas suh as athoos, stea kithes o ea siig pools.
. Do ot use this deie he odesatio a ou.
. Although this deie is aufatued ith the utost ae ad heked seeal ties efoe
leaig the fato, it is still possile that poles a ou, as ith all eletial appliaes. If
ou otie soke, a eessie uild-up of heat o a othe uepeted pheoea, ou
should disoet the plug fo the ai poe soket iediatel.
. This deie ust opeate o a poe soue as speified o the speifiatio lael. If ou ae
ot sue of the tpe of poe suppl used i ou hoe, osult ou deale o loal poe
opa.
. * The soket outlet ust e istalled ea the euipet ad ust e easil aessile.
. * Do ot oeload a outlets o etesio ods. Oeloadig a ause fie o eleti shok.
. * Deies ith lass ostutio should e oeted to a ai soket outlet ith a
potetie eathed oetio.
. * Deies ith lass ostutio do ot euie a eathed oetio.
. Keep aa fo odets. Rodets ejo itig o poe ods.
. * Alas hold the plug he pullig it out of the ai suppl soket. Do ot pull the poe
od. This a ause a shot iuit.
. Aoid plaig the deie o a sufaes that a e sujet to iatios o shoks.
. To lea the deie, use a soft d loth. Do ot use solets o petol ased fluids. To eoe
seee stais, ou a use a dap loth ith dilute deteget.
. The supplie is ot esposile fo daage o lost data aused alfutio, isuse,
odifiatio of the deie o atte eplaeet.
. Do ot iteupt the oetio he the deie is foattig o tasfeig files. Otheise,
data a e oupted o lost.
. If the uit has USB plaak futio, the us eo stik should e plugged ito the uit
dietl. Do’t use a us etesio ale eause it a ause itefeee esultig i failig
of data.
. The appaatus shall ot e eposed to dippig o splashig ad ake sue that o ojets
filled ith liuids, suh as ases, ae plaed o o ea the appaatus.

4
. * To opletel disoet the poe iput, the ais plug of the appaatus shall e
disoeted fo the ais, as the disoet deie is the ais plug of appaatus.
. If the uit oks ith atte, Batte shall ot e eposed to eessie heat suh as sushie,
fie o the like.
. Attetio should e da to the eioetal aspets of atte disposal.
. The appaatus a ol e used i odeate eteel old o liates a eioets
should e aoided.
. The atig lael has ee aked o the otto o ak pael of the appaatus.
. This deie is ot iteded fo use people iludig hilde ith phsial, seso o
etal disailities, o a lak of epeiee ad koledge, uless the’e ude supeisio o
hae eeied istutios aout the oet use of the deie the peso ho is esposile
fo thei safet.
. This podut is iteded fo o pofessioal use ol ad ot fo oeial o idustial use.
. Make sue the uit is adjusted to a stale positio. Daage aused usig this podut i a
ustale positio o failue to follo a othe aig o peautio otaied ithi this
use aual ill ot e oeed aat.
. Nee eoe the asig of this appaatus.
. Nee plae this appaatus o othe eletial euipet.
. Do ot use o stoe this podut i a plae hee it is sujet to diet sulight, heat, eessie
dust o iatio.
. Do ot allo hilde aess to plasti ags.
. Ol use attahets/aessoies speified the aufatue.
. Refe all seiig to ualified seie pesoel. Seiig is euied he the appaatus has
ee daaged i a a, suh as the poe suppl od o the plug, he liuid has ee
spilled o ojets hae falle ito the appaatus, he the appaatus has ee eposed to ai
o oistue, does ot opeate oall, o has ee dopped.
. * Do ot use a daaged poe od o plug o a loose outlet. Doig so a esult i fie o
eleti shok.
. Pologed eposue to loud souds fo pesoal usi plaes a lead to tepoa o
peaet heaig loss.
INSTALLATION
•Upak all pats ad eoe potetie ateial.
•* Do ot oet the uit to the ais efoe hekig the ais oltage ad efoe all othe
oetios hae ee ade.
*Those istutio ae elated ol to poduts usig poe ale o AC poe adapto.

5
Information for power adaptor
Power supply adaptor
- Manufacturer: Blue Iron
- Model number: BI12T-120100-I
- Adaptor type: External AC adaptor
- Use only the power supply listed in the user instructions
Assembly
Drive belt:
The belt and turntable platter have been installed properly at factory, but the belt may be loose
during transportation. If so, the following procedures will be taken for belt installation by yourself.
A. Remove the rubber mat from the turntable platter and the E ring from the turntable shaft,
then release the turntable platter from the shaft
B. Put the drive belt on the inner rim of the turntable platter and pull it through the hole
C. Hold the belt with your fingers and place the belt onto the motor pulley as shown in the drawing.
EN
EN
BELT
BELT
MOTOR PULLEY
MOTOR PULLEY
D. Clip the E ring on the shaft and place the rubber mat onto the turntable platter.
Caution:
1. Make sure that the drive belt is not twisted or distorted.
2. Avoid oil. Oil splashes will make the belt slippery.
Auto Return Reset:
Always do the reset for Auto Return once you move this product. The mechanism of Auto
Return will rotate irregularly when moving and it will cause the malfunction of Auto Return. The
following steps will reset the mechanism to normal.
1. Place a record on the platter and play it.
2. Manually lever the tone arm and place it to the blank part of the end of the record.
3. The mechanism of Auto Return function will be adjusted properly and the tone arm will
automatically return to the arm rest.

6
Desiptio
1. Adaptor:
Use this adaptor when playing 45 RPM records.
2. Platter: Place a record here to play.
3. 33/45 RPM Switch:
Switch 33 or 45 rpm for playing a record at a correct speed.

7
4. REC:
Press it to enter into record mode.
5. SPLIT/PAIR (BLUETOOTH)
Split function: For stopping the current recording, forming a record file manually and then going
on recording the next track.
Pair function: Press this button until the LED indicator starts flashing blue, then put your
Bluetooth speaker or headphone into pairing mode. Then this turntable will connect with the
Bluetooth speaker or headphone automatically and the LED indicator will be blue without
flashing after the connection is made. The wireless music playback can start. You can start
streaming the music wirelessly!
Press this button till the LED indicator becomes blue flashing and the Bluetooth connection is
disconnected.
Remark: When you try to pair the turntable, better close the Bluetooth function of the
Bluetooth products within 10 meter that you do not want to pair.
6. Pick-up arm stand
7. Pick-up Arm Lift Stick:
To raise up and down the Pick-up Arm and cue at a proper place of a vinyl.
8. Pick-up Arm Lock:
Use this to lock the Pick-up Arm when not in use or for transportation.
9. Dust Cover:
Use this to protect the turntable from exposure to dust. The cover may be opened or removed
during use, but should remain closed when the turntable is not in use.
10. RCA Line Out Cable
Connect the RCA line out to a mixer or an amplifier in your sound system.
11. Power Switch:
For turning the power on or off through this switch. Please switch off the unit after finishing the
playing to save the energy..
12. Power Adaptor
Connect this adaptor to an AC outlet of the proper voltage.
13. USB Port Input:
Plug in a USB Pen Drive for recording the music from a record.
* The design is only for USB Flash Drive. To prevent the power supply is not sufficient and
overheated of the circuit(IC), always get the external power supply if using a hard drive.
14. Reject
Press it to force the arm to return directly to the arm rest
15. LED
- USB Record Operation and LED Signal Indication
- USB storage device is not plugged. -> LED light is off
- USB storage device is plugged in -> LED flashes
- When the system is ready to record. -> LED light is on
- Press REC button to start recording. -> LED blinks slowly.
- Press SPLIT button to create new file in the recording.

8
- Press REC button again to stop recording. -> LED is flashing for a short time, then LED light is
on again.
Note: Do not remove the USB storage device if the LED is flashing.
Mains connection
Ensure that the mains voltage of your home corresponds to the operating voltage of the unit.
Your unit is ready to be connected to a correct voltage of your location.
Amplifier connection
Connect RCA line out cable (10) to the AUX input on your amplifier:
- Red plug into R channel input.
- White plug into L channel input.
- Place the record of your choice on the turntable. If it is a 45 rpm, do not forget to place the
adaptor (1) on the record spindle.
- Choose the desired playing speed:
33 rpm -> button unlocked
45 rpm-> button locked.
- Release the pick-up arm clip.
- Place the cartridge vertically over the first track of the record, the turntable starts turning.
- When the record is over, the pick-up arm returns to its rest, the turntable stops turning
Take care that the pick-up lift stick is in down position, close pick-up arm lock to secure pick-up
arm.
Technical specification
Power Supply: AC100-240 60/50HZ
Power Consumption: 12W
Wow & Flutter: 0.3%
Distortion: 3%~4%
S/N: 50 dB
Audio Output Voltage: 500mV ±200mV
USB: 5V/500 mA
* IMPORTANT RECOMMENDATIONS
We advise you to clean your records using an impregnated rag with an antistatic product for
maximum enjoyment of your records and also to make them last.
We would also point out that for the same reason your stylus should be replaced periodically
(approximately every 250 hours).
Dust the stylus from time to time using a very soft brush dipped in alcohol (brushing from the
back to the front of the cartridge).

9
Guaatee
Leo offes seie ad aat i aodae to Euopea la, hih eas that i ase of
epais oth duig ad afte the aat peiod ou should otat ou loal deale.
Ipotat ote: It is ot possile to sed poduts that eed epais to Leo dietl.
Ipotat ote: If this uit is opeed o aessed a o-offiial seie ete i a a, the
aat epies.
This deie is ot suitale fo pofessioal use. I ase of pofessioal use, all aat
oligatios of the aufatue ill e oided.
Dislaie
Updates to Fiae ad/o hadae opoets ae ade egulal. Theefoe soe of the
istutio, speifiatios ad pitues i this douetatio a diffe slightl fo ou
patiula situatio. All ites desied i this guide fo illustatio puposes ol ad a ot
appl to patiula situatio. No legal ight o etitleets a e otaied fo the desiptio
ade i this aual.
Disposal of the Old Deie
This sol idiates that the eleat eletial podut o atte should
ot e disposed of as geeal household aste i Euope. To esue the
oet aste teatet of the podut ad atte, please dispose the i
aodae to a appliale loal las of euieet fo disposal of
eletial euipet o atteies. I so doig, ou ill help to osee
atual esoues ad ipoe stadads of eioetal potetio i
teatet ad disposal of eletial aste Waste Eletial ad Eletoi
Euipet Dietie.
Seie
For more information and helpdesk support, please visit www.lenco.com
Lenco Benelux BV, Thermiekstraat 1a, 6361 HB Nuth, The Netherlands.

10
Nederlands
LBT-BK
LET OP:
Geuik a edieige of afstellige of uitoe a poedues ades da gespeifieed i deze
douetatie ka leide tot lootstellig aa shadelijke stalig.
Dit appaaat diet uitsluited te ode aagepast of geepaeed doo gekalifieed
odehoudspesoeel.
VOORZORGSMAATREGELEN VOOR GEBRUIK
ONTHOUD DE VOLGENDE INSTRUCTIES:
. Geuik dit appaaat iet i de uut a ate.
. Reiig het uitsluited et ee liht ohtige doek.
. Bedek of lokkee de etilatie-opeige iet. Waee u het appaaat op ee shap plaatst,
diet u ” ije uite odo het gehele appaaat te ehoude.
. Istallee het podut olges de eegeleede geuikeshadleidig.
. *Nooit op de stooadapte stappe of deze idukke. Wees ooaelijk oozihtig i de
uut a de stekkes e het put aa de kael uit het appaaat kot. Plaats gee zae
ooepe op de stooadapte, o eshadigig ea te ookoe. Houd het gehele
appaaat uite eeik a kidee! Waee kidee et de oedigskael spele, kue
zij estig letsel oplope.
. *Haal de stekke uit het stopotat tijdes oee of aee u deze lagee tijd iet
geuikt.
. Houd het appaaat uit de uut a hitteoe, zoals adiatoe, eaige, kahels,
kaase e adee hittegeeeede podute of aakte la.
. Geuik dit appaaat iet i de uut a kahtige agetishe elde.
. Elektostatishe otladig ka oaal geuik a dit appaaat estoe. U hoeft het
appaaat i dit geal slehts te esette e opieu op te state olges de
geuikeshadleidig. Wees oozihtig tijdes estadsoedaht e doe dat i ee
ogeig zode statishe estoige.
. Waashuig! Steek ooit ee ooep ia de etilatie- of adee opeige i het podut.
E is hoogspaig i het podut aaezig e als u e ee ojet isteekt, ka dat ee
elektishe shok eoozake e/of kotsluitig i de itee odedele. Mos o dezelfde
ede gee ate of loeistof op het podut.
. Geuik het toestel iet i ohtige uites, zoals adkaes, stoede keukes of i de uut
a zeade.
. Geuik dit appaaat iet aee odesatie ka optede.
. Alhoeel dit appaaat et gote zog gefaieed e eshillede kee geïspeteed is
oodat het de faiek elaat, is het og steeds ogelijk dat e polee optede, zoals et
alle elektishe appaate. Als u ook, ee oeatige hitteotikkelig of eig ade
oeaht eshijsel opekt, oet u oiddellijk de stekke a het etsoe uit het
stopotat hale.
. Dit appaaat oet aagedee ode doo ee oedigso, zoals aagegee op het
speifiatieplaatje. Als u tijfelt oe het tpe oedig dat geuikt odt i u huis, aadpleeg
da a.u.. u deale of plaatselijk eegieedijf.
. *Het stopotat oet i de uut a de appaatuu zij geïstalleed e eeoudig te
eeike zij.
. *Oeelast stopotate of elegsoee iet. Oeelastig ka ad of ee elektishe
shok eoozake.
. *Appaate et ee Klasse stutuu diee te ode aageslote op ee stopotat et
ee esheede aadeidig.
. *Appaate et ee Klasse stutuu eeise gee aadeidig.
. Houd ze uit de uut a kaagdiee. Kaagdiee kaue gaag aa oedigskaels.
. *Houd altijd de stekke ast aee u deze uit het stopotat tekt. Tek ooit aa de
oedigskael. Dit ka tot ee kotsluitig leide.
. Veijd o het toestel te plaatse op ee odegod die lootgesteld ka ode aa
tillige of shokke.

11
. Geuik ee zaht, doog doekje o het appaaat te eiige. Geuik gee oplosiddele of
op ezie geaseede loeistoffe. U kut ee ohtig doekje et edud
shooaakiddel geuike o hadekkige lekke te eijdee.
. De leeaie is iet eatoodelijk oo shade of eloe gegees eoozaakt doo
stoig, isuik, odifiatie a het appaaat of atteijeagig.
. Odeeek ooit de eidig aee het appaaat foatteet of estade oedaagt.
De gegees kue ades oupt of eloe ake.
. Idie het appaaat ee USB-afspeelfutie heeft, oet de USB-geheugestik ehtsteeks op
het appaaat ode aageslote. Geuik gee USB-elegkael, odat die ka leide tot
stoige et foutiee gegees als geolg.
. Het appaaat ag iet ode lootgesteld aa duppels of spatte e zog eoo dat e gee
et loeistof geulde ooepe, zoals aze, op of aij het appaaat zij geplaatst.
. *O de eidig et de stooaasluitig olledig te eeke, oet de stekke a het
appaaat uit het stopotat ode gehaald, odat de stekke a het appaaat de
hoofdshakelaa is.
. Idie het appaaat op atteije ka eke, da oge de atteije iet aa oeatige
hitte, zoals zoliht, ope uu e.d. ode lootgesteld.
. Aadaht oo het ilieu is odig ij het eijdee a de atteije.
. Het appaaat ka allee ode geuikt i geatigde kliate. Etee koude of ae
ogeige oete ode eede.
. Het oiale speifiatielael is te ide op het paeel aa de ode- of ahtekat a het
appaaat.
. Dit appaaat is iet ested oo geuik doo ese ilusief kidee et fsieke,
zituiglijke of geestelijke geeke of geek aa keis e eaig, tezij zij ode toeziht
staa of istuties hee oe het juiste geuik a het appaaat hee gekege a de
pesoo die eatoodelijk is oo hu eiligheid.
. Dit podut is allee oo iet-pofessioeel geuik edoeld e iet oo oeieel of
idustieel geuik.
. Vezeke u ea dat het appaaat i ee staiele positie staat opgesteld. Shade, eoozaakt
doo het geuik a dit podut i ee ostaiele positie, of doo het iet alee a
aashuige of oozogsaategele geoed i deze hadleidig, alt iet ode de
gaatie.
. Veijde ooit de ehuizig a dit appaaat.
. Plaats dit appaaat ooit op adee elektishe appaatuu.
. Dit podut iet geuike of opslaa op plaatse aa het odt lootgesteld aa diet
zoliht, hitte, uitespoig eel stof of tillige.
. Geef kidee gee gelegeheid i aaakig et plasti zakke te koe.
. Geuik uitsluited uiteidige/aessoies gespeifieed doo de faikat.
. Laat alle epaaties oe aa gekalifieed odehoudspesoeel. Odehoud is eeist als het
toestel hoe da ook is eshadigd, zoals ijooeeld het etsoe of de stekke, aee e
loeistof of ee ooep i het appaaat is teehtgekoe, aee het appaaat is
lootgesteld aa ege of oht, als het iet oaal ekt of is gealle.
. *Geuik ooit ee eshadigde oedigskael of stekke of ee los stopotat. Dit ot
aelijk ee isio op ad of elektishe shokke.
. Lagduige lootstellig aa luid geluid a pesoolijke uziekspeles ka leide tot tijdelijke
of peaete gehooeshadigig.
INSTALLATIE
•Pak alle odedele uit e eijde de esheede ateiale.
•*Sluit het appaaat iet aa op het stopotat, oodat u de etspaig het geotoleed e
oodat alle adee aasluitige zij geaakt.
*deze istuties zij ekel a toepassig oo podute et ee oedigskael of ee AC
oedigsadapte.

12
Informatie over de voedingsadapter
Voedingsadapter
- Fabrikant: Blue Iron
- Modelnummer: BI12T-120100-I
- Soort adapter: Externe AC-adapter
- Gebruik uitsluitend de lichtnetdapter die in de gebruiksaanwijzing wordt vermeld
Montage
Aandrijfriem:
De riem en het draaiplateau zijn in de fabriek juist geïnstalleerd, maar de riem kan tijdens het
transport losraken. In dat geval moet u de volgende procedures volgen voor de installatie van de
riem.
A. Verwijder de rubberen mat van het draaiplateau en de E-ring van de as van het draaiplateau
en haal vervolgens het draaiplateau los van de as
B. Plaats de aandrijfriem op de binnenrand van het draaiplateau en trek deze door het gat
C. Houd de riem met uw vingers vast en plaats de riem op de motorpoelie zoals getoond in de
tekening.
EN
NL
BELT
RIEM
MOTOR PULLEY
MOTORPOELIE
D. Klem de E-ring op de as en plaats de rubberen mat op het draaiplateau.
Let op:
1. Zorg ervoor dat de aandrijfriem niet gedraaid of vervormd is.
2. Vermijd olie. Oliespatten maken de riem glibberig.
Auto Return resetten:
Voer altijd de reset uit voor Auto Return zodra u dit product verplaatst. Het mechanisme van
Auto Return roteert onregelmatig tijdens het verplaatsen en het veroorzaakt een storing van
Auto Return. Met de volgende stappen wordt het mechanisme naar normaal teruggezet.
1. Plaats een plaat op het draaiplateau en speel deze af.

13
2. Til de toonarm handmatig op en plaats deze op het lege gedeelte aan het einde van de
langspeelplaat.
3. Het mechanisme van de functie Auto Return zal juist worden aangepast en de toonarm
keert automatisch terug naar de armsteun.
Oshijig

14
1. Adapter:
Gebruik deze adapter voor het afspelen van 45-toerenplaten.
2. Plateau: Plaats hier een plaat om af te spelen.
3. 33/45 TPM-schakelaar:
Schakel naar 33 of 45-toeren voor het afspelen van een plaat met de juiste snelheid.
4. OPNAME/MP3 codering:
Druk erop om naar de opnamemodus te gaan.
5. SPLITSEN/KOPPELEN (BLUETOOTH)
Splits-functie: Voor het stoppen van de huidige opname, het handmatig vormen van een
opnamebestand en vervolgens doorgaan met het opnemen van de volgende track.
Koppel-functie: Druk op deze knop tot dat de LED-indicator blauw begint te knipperen en zet
vervolgens uw Bluetooth-luidspreker of -hoofdtelefoon in de koppelmodus. Vervolgens maakt
deze platenspeler automatisch verbinding met de Bluetooth-luidspreker of -hoofdtelefoon en de
LED-indicator brandt blauw zonder te knipperen na dat de verbinding is gemaakt. Het draadloos
afspelen van muziek kan starten. U kunt starten met het draadloos streamen van de muziek!
Druk op deze knop tot dat de LED-indicator blauw gaat knipperen en de Bluetooth-verbinding is
verbroken.
Opmerking: Als u probeert de platenspeler te koppelen, dan kunt u beter de Bluetooth-functie
van Bluetooth-producten binnen 10 meter sluiten die u niet wilt koppelen.
6. Houder voor arm
7. Hefboom van de arm:
Om de hefboom van de arm op en neer te bewegen en op een juiste plaats op een vinylplaat te
richten.
8. Slot voor arm:
Gebruik dit om de arm te vergrendelen wanneer deze niet in gebruik is of voor transport.
9. Stofkap:
Gebruik dit om de platenspeler te beschermen tegen blootstelling aan stof. De kap kan tijdens
gebruik worden geopend of verwijderd, maar moet gesloten blijven wanneer de platenspeler
niet in gebruik is.
10. RCA-uitgang voor kabel
Verbind de RCA-uitgang met een mixer of een versterker in uw geluidsinstallatie.
11. Aan/uit-schakelaar:
Voor het aan- en uitzetten via deze schakelaar. Zet het apparaat uit nadat u klaar bent met het
afspelen om energie te besparen.
12. Voedingsadapter
Sluit deze adapter aan op een stopcontact met de juiste spanning.
13. Ingang USB-poort:
Sluit een USB-stick aan om de muziek van een plaat op te nemen.
* Het ontwerp is alleen voor een USB-stick. Om te voorkomen dat de voeding niet voldoende is
en de schakeling (IC) oververhit raakt, moet u altijd de externe voeding gebruiken als u een
harde schijf gebruikt.
14. Reject
Druk erop om de arm te forceren direct terug te keren naar de armsteun

15
15. LED
- USB-opname en LED-signaalindicatie
- USB-opslagapparaat is niet aangesloten. -> LED-lampje is uit
- USB-opslagapparaat is aangesloten -> LED knippert
- Als het systeem gereed is om op te nemen. -> LED-lampje is aan
- Druk op de knop REC om de opname te starten. -> LED knippert langzaam.
- Druk op de knop SPLIT om een nieuw bestand te maken in de opname.
- Druk nogmaals op de knop REC om het opnemen te stoppen. -> LED knippert korte tijd en
vervolgens brandt het LED-lampje weer.
Opmerking: Verwijder het USB-opslagapparaat niet als de LED knippert.
Netaansluiting
Zorg ervoor dat de netspanning bij u thuis overeenkomt met de bedrijfsspanning van het
apparaat. Uw apparaat is gereed om te worden aangesloten op de juiste spanning van uw locatie.
Versterkeraansluiting
Sluit de kabel aan op de RCA-uitgang (10) en op de AUX-ingang van uw versterker:
- Rode stekker in de ingang van het R-kanaal.
- Witte stekker in de ingang van het L-kanaal.
- Leg een plaat op het plateau. Als het een 45-toerenplaat is, vergeet dan niet om de adapter (1)
op de as van het plateau te plaatsen.
- Kies de gewenste afspeelsnelheid:
33-toeren -> knop ontgrendeld
45-toeren -> knop vergrendeld
- Laat de toonarmvergrendeling los.
- Plaats de naaldkop verticaal over de eerste track van de plaat; de platenspeler begint te draaien.
- Nadat de plaat gereed is met afspelen, keert de arm terug naar de armsteun en het plateau
stopt met draaien
Zorg ervoor dat de hefboom van de arm in de laagste positie staat, sluit het slot om de arm vast
te zetten.
Technische specificaties
Stroomvoorziening: AC100-240 60/50 Hz
Opgenomen vermogen: 12 W
Wow & Flutter: 0.3%
Vervorming: 3%~4%
Signaal/ruis: 50 dB
Spanning audio-uitgang: 500 mV ±200 mV
USB: 5V/500 mA
* BELANGRIJKE AANBEVELINGEN
Om maximaal van uw platen te genieten en deze lange tijd te kunnen gebruiken, adviseren wij u
uw platen te reinigen met een geïmpregneerde doek met een antistatisch product.
Wij wijzen u er om dezelfde redenen op dat ook uw naald regelmatig dient te worden vervangen
(ca. elke 250 uur).

16
Stof de naald van tijd tot tijd af met een zeer fijn borsteltje en een klein beetje alcohol (borstel
van achter naar voren over het patroon).
Gaatie
Leo iedt seie e gaatie aa oeeekostig et de Euopese etgeig. Dit houdt i
dat u, i het geal a epaaties zoel tijdes als a de gaatiepeiode, u lokale hadelaa
oet otatee.
Belagijke opekig: het is iet ogelijk o podute die oete ode geepaeed
ehtsteeks aa Leo te stue.
Belagijke opekig: De gaatie eloopt als ee ooffiieel seieete het appaaat op
at oo aie da ook heeft geoped, of e toegag toe heeft gekege.
Het appaaat is iet geshikt oo pofessioeel geuik. I het geal a pofessioeel geuik
ode alle gaatieeplihtige a de faikat ietig eklaad.
Dislaie
E ode egelatig updates i de fiae e/of hadaeopoete geaakt. Daadoo
kue gedeelte a de istutie, de speifiaties e afeeldige i deze douetatie
eigszis eshille a u eige situatie. Alle odeepe die staa eshee i deze
hadleidig zij edoeld als illustatie e zij iet a toepassig op speifieke situaties. Aa de
eshijig i dit douet kue gee ehte ode otleed.
Afoe a het oude appaaat
Dit sool geeft aa dat het eteffede elektishe podut of de
au/atteij iet ag ode eijded als algeee huishoudelijk afal i
Euopa. Zog oo ee juiste afaleekig doo het podut e de
au/atteij i oeeesteig et alle a toepassig zijde lokale
ette oo het eijdee a elektishe appaatuu of au's/atteije
te eijdee. Als u dit doet, helpt u de atuulijke hulpoe te
ehoude e de stadaad a ilieuesheig te eetee ij de
ehadelig e eijdeig a elektish afal Afgedakte Elektishe e
Elektoishe Appaatuu.
Seie
Bezoek voor meer informatie en helpdeskondersteuning www.lenco.com
Lenco Benelux BV, Thermiekstraat 1a, 6361 HB, Nuth, Nederland.

17
Deutsch
LBT-BK
ACHTUNG:
Die zeketfedete Bedieug, Beutzug ode Eistellug de Pozedue ka zu gefählihe
Ufälle duh Stahle fühe.
Dieses Geät daf auße o ualifiziete Fahleute o iead adee epaiet ode
eigestellt ede.
VORSICHTSMASSNAHMEN VOR DER BENUTZUNG
BEFOLGEN SIE IMMER FOLGENDE ANWEISUNGEN:
. Beutze Sie das Geät iht i de Nähe o Wasse.
. Beutze Sie zu Reiigug ei u leiht efeuhtetes Tuh.
. Blokiee Sie keie Lüftugsöffuge. We Sie das Geät auf ei Regal stelle, lasse Sie u
das gesate Geät ” feie Platz.
. Stelle Sie das Geät etspehed de Aeisuge de itgeliefete Bedieugsaleitug
auf.
. *Tete Sie iht auf das Netzteil ud klee Sie es auh iht ei. Seie Sie i ähee
Beeih des Stekes ud de Heausfühuge des Kaels esodes osihtig. Stelle Sie
keie shee Gegestäde auf das Netzteil, eil es daduh eshädigt ede köte.
Halte Sie das gesate Geät außehal de Reiheite o Kide! Duh Spiele it de
Netzkael köe sie sih esthafte Veletzuge zuziehe.
. *Tee Sie das Geät ähed eies Geittes ode ei lägee Nihteutzug o Netz.
. Halte Sie das Geät o Hitzeuelle ie Radiatoe, Heize, Öfe, Keze ode adee
hitzeezeugede Podukte ode offee Flae fe.
. Meide Sie ei de Nutzug des Podukts die Nähe stake Magetfelde.
. Elektostatishe Etladuge köe die oale Veedug o diese Geät stöe. Sollte
dies geshehe, fühe Sie eifah eie Reset aus ud state Sie da das Geät
etspehed de Aeisuge diese Bedieugsaleitug eu. Gehe Sie esodes ei
Dateüetaguge it de Geät osihtig u ud fühe Sie diese u i eie
atielektostatishe Ugeug aus.
. Waug! Nieals Gegestäde duh die Lüftugsshlitze ode Öffuge i das Geät
steke. I Geät sid hohe Spauge ohade ud das Eifühe o Gegestäde ka
zu Stoshlag z. zu Kuzshlüsse de itee Teile fühe. Aus de gleihe Gud kei
Wasse ode Flüssigkeite i das Geät gee.
. Beutze Sie das Geät iht i asse ode feuhte Ugeug ie Bad, Dapfkühe ode i
de Nähe o Shieke.
. Beutze Sie das Geät iht ei Kodesatiosgefah.
. Oohl dieses Geät ute gößte Sogfalt ud o Ausliefeug ehals üepüft ude,
köe totzde ie ei jede adee elektishe Geät auh Polee auftauhe.
Tee Sie das Geät i Falle eie Rauhetiklug, stake Hitzeetiklug ode jede
adee uatülihe Esheiug sofot o Netz.
. Dieses Geät ist duh eie Stouelle ie auf de Tpeshild agegee zu eteie.
Halte Sie ei Usiheheite üe die At Ihe Stoesogug i Ihe Wohug
Rükspahe it Ihe Hädle ode Ihe Stozuliefeefia.
. *Die Wadstekdose uss sih i de Nähe des Geäts efide ud eifah zu eeihe sei.
. *Stekdose ud Velägeugsleituge iht üelaste. Eie Üelastug ka zu
Badgefah z. Stoshläge fühe.
. *Geäte de Shutzklasse sid a eie Netzstekdose it Shutzleite azushließe.
. *Geäte de Shutzklasse eötige keie Shutzleiteashluss.
. Halte Sie Nagetiee o Geät fe. Nagetiee liee es, a Netzkael zu age.
. *Halte Sie de Netzsteke i de Had, e Sie ih aus de Netzstekdose ziehe. Ziehe Sie
ih iht duh Zee a Kael heaus. Das ka zu eie Kuzshluss fühe.
. Veeide Sie es, das Geät auf Oeflähe aufzustelle, die zu Shiguge ode Stoß
eige.
. Veede Sie eie tokee, sauee Lappe fü die Reiigug. Beutze Sie ieals
Lösugsittel ode Flüssigkeite auf Ölasis. Beutze Sie zu Etfee hatäkige Fleke
ei feuhtes Tuh it ilde Reiigugsittel.

18
. De Hestelle haftet iht fü Shäde ode Veluste duh Fehlfuktio, Zeketfedug
ode Modifikatio des Geäts ode duh Wehsel de Batteie.
. Uteehe Sie die Veidug iht ähed eie Foatieug ode eie
Dateüetagug. Bei Uteehug dohe Dateelust ud Dateeshädigug.
. We das Geät eie USB-Wiedegaefuktio esitzt, da steke Sie de USB-Stik diekt i
das Geät. Veede Sie kei USB-Velägeugskael, eil die ehöhte Stöafälligkeit zu
Dateelust fühe köte.
. Das Geät daf ede Topf- oh Spitzasse ausgesetzt ede ud es düfe keie it
Flüssigkeit gefüllte Behälte ie z.B. Vase auf das Geät ode i de Nähe des Geätes gestellt
ede.
. *U das Geät ollstädig o Netz zu tee, uss de Netzsteke des Geätes o
Stoetz getet ede, oei die zu teede Eiheit de Netzsteke des Geätes
ezeihet.
. We das Geät üe Batteie etiee id, da sid diese o üeäßige Wäe ie
Soeeistahlug, Feue ode ählihe zu shütze.
. Bei de Batteieetsogug sid die Etsogugsoshifte eizuhalte.
. Das Geät ka u ei odeate Tepeatue eedet ede. Eie Nutzug i ete
kalte ode heiße Ugeuge sollte eiede ede.
. Das Tpeshild efidet sih a de Ute- ode Rükseite des Geätes.
. Dieses Geät ist iht zu Beutzug duh Pesoe auh Kide it phsishe, sesoishe
ode etale Beeitähtiguge ode ohe auseihede Efahug ogesehe, es sei de,
sie ede duh eie eatotlihe Peso eaufsihtigt ode ude i die
odugsgeäße Bedieug des Geätes duh eie fü ihe Siheheit eatotlihe
Peso eigeiese.
. Dieses Podukt ist u fü de iht-pofessioelle Geauh ud iht fü geelihe ode
idustielle Zeke estit.
. Stelle Sie sihe, dass das Geät i eie staile Positio aufgestellt ist. Shäde, die duh
Veedug dieses Podukts i eie istaile Positio ode duh Nihteahtug de
adee i diese Haduh ethaltee Wauge ud Voaug etstehe, ede
iht duh die Gaatie agedekt.
. Etfee Sie ieals das Gehäuse dieses Geäts.
. Stelle Sie dieses Geät ieals auf adee elektishe Geäte.
. Veede ode eahe Sie dieses Podukt iht a Ote auf, i dee es diekte
Soeeistahlug, Hitze, üeäßige Stau ode Viatio ausgesetzt ist.
. Eöglihe Sie Kide iht de Zugiff auf Plastiktüte.
. Beutze Sie u o Hestelle epfohlee Eeiteuge/Zuehöteile.
. Spehe Sie alle Eigiffe it ualifiziete Fahpesoal a. Eigiffe ede otedig,
e das Geät i igedeie Weise eshädigt ude, eispielseise a Netzkael ode a
Netzsteke ode e Flüssigkeit i das Geät gelagt ist z. Gegestäde i das Geät
gefalle sid, das Geät Rege ode Feuhtigkeit ausgesetzt a, es heutegefalle ist ode
iht odugsgeäß fuktioiet.
. *Veede Sie ede ei eshädigtes Netzkael oh eie eshädigte Steke ode eie
lokee Stekdose. Es esteht Bad- ud Stoshlaggefah.
. Lägees Höe laute Töe aus eie Musikgeät ka zu zeiteilige ode peaete
Höelust fühe.
AUFBAU
•Pake Sie alle Teile aus ud etfee Sie daah die Shutzateialie.
•*Shließe Sie das Geät iht ehe a das Netz a, eo Sie die Netzspaug üepüft hae
ud alle adee otedige Veiduge hegestellt sid.
*Diese Aleitug gilt u fü Podukte, die üe ei Netzkael ode eie Netzadapte efüge.

19
Daten des Netzadapters
Netzteiladapter
- Hersteller: Blue Iron
- Modellnummer: BI12T-120100-I
- Adaptertyp: Externes Steckernetzteil
- Verwenden Sie nur die im Handbuch angegebene Stromversorgung
Zusammenbau
Antriebsriemen:
Der Riemen und der Plattenteller wurden werksseitig ordnungsgemäß installiert, aber der
Riemen kann sich beim Transport lockern. Falls dies der Fall ist, führen Sie mit folgenden
Verfahren die Installation des Riemens selbst durch.
A. Entfernen Sie die Gummimatte vom Plattenteller und den E-Ring von der Plattentellerwelle.
Ziehen Sie anschließend den Plattenteller von der Welle.
B. Legen Sie den Antriebsriemen auf den Innenrand des Plattentellers und ziehen Sie ihn durch
das Loch.
C. Halten Sie den Riemen mit den Fingern und legen Sie den Riemen auf die
Motorantriebswelle, wie in der Abbildung dargestellt.
EN
DE
BELT
RIEMEN
MOTOR PULLEY
MOTORANTRIEBSWELLE
D. Stecken Sie den E-Ring auf die Welle und legen Sie die Gummimatte auf den Plattenteller.
Achtung:
1. Achten Sie darauf, dass der Antriebsriemen nicht verdreht oder verzogen ist.
2. Vermeiden Sie Ölspritzer. Ölspritzer lassen den Gurt durchrutschen.
Automatische Tonarmrückkehr zurücksetzen:
Wenn Sie dieses Produkt umgesetzt haben, führen Sie stets das Zurücksetzen der automatischen
Tonarmrückkehr durch. Der Mechanismus der automatischen Rückkehr dreht sich bei Umsetzen
unregelmäßig und das führt zu einer Störung der automatischen Tonarmrückkehr. Mit den
folgenden Schritten wird der Mechanismus auf die normale Funktion zurückgesetzt.

20
1. Legen Sie eine Schallplatte auf den Plattenteller und geben Sie sie wieder.
2. Heben Sie den Tonarm mit dem Tonarmlift manuell an und senken Sie im leeren Bereich am
Ende der Schallplatte ab.
3. Der Mechanismus der automatischen Rückkehrfunktion wird ordnungsgemäß eingestellt
und der Tonarm kehrt automatisch zur Tonarmstütze zurück.
Besheiug
Other manuals for LBT-120BK
1
Table of contents
Languages:
Other LENCO Turntable manuals

LENCO
LENCO LS-480(V2) User manual

LENCO
LENCO LBT-188 User manual

LENCO
LENCO ClassicPhono WS-501 User manual

LENCO
LENCO DJ-1000 User manual

LENCO
LENCO L-3867 USB User manual

LENCO
LENCO L-3810 User manual

LENCO
LENCO L-78 User manual

LENCO
LENCO L-78 USB - User manual

LENCO
LENCO Classic Phono TT-115 User manual

LENCO
LENCO TCD-990 User manual

LENCO
LENCO L 75 User manual

LENCO
LENCO L-90 User manual

LENCO
LENCO TT-13 User manual

LENCO
LENCO LS-10 User manual

LENCO
LENCO LS-300(V2) User manual

LENCO
LENCO LS-410WA User manual

LENCO
LENCO L-174 User manual

LENCO
LENCO 8711902040958 User manual

LENCO
LENCO Classic Phono TT-10 User manual

LENCO
LENCO TT-13 User manual