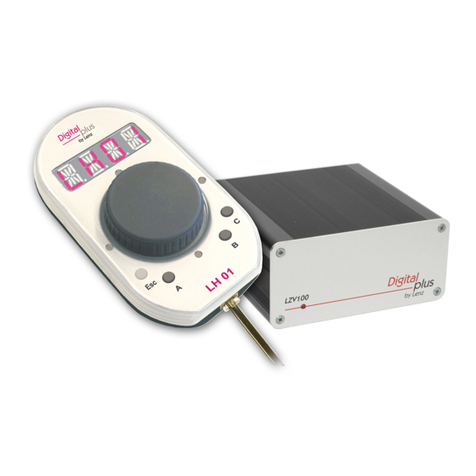
Lenz Digital Plus SET101 User manual

1
B.B.10.0064
Erste Schritte
First Steps
Premier démarrage
SET101
Art. Nr. / art. no. / Art. n° 60101
1. Auflage / 1st edition / 1eédition, 0319

2 Erste Schritte SET101
Willkommen!
Diese Betriebsanleitung soll Ihnen die ersten Schritte mit dem SET101
erklären.
Ausführliche Informationen zum Anschluss der Komponenten des
SET101 und deren Bedienung finden Sie in den Betriebsanleitungen
der einzelnen Geräte.
Wenn Sie Fragen haben, auf die Sie auch nach Durcharbeit dieser
Informationen keine Antwort finden, so helfen wir Ihnen gerne weiter.
Auf vier verschiedene Arten können Sie mit der Lenz Elektronik GmbH
Kontakt aufnehmen:
Postanschrift:
Lenz Elektronik GmbH
Vogelsang 14
D-35398 Giessen
Telefon:
++49 (0) 6403 900 133
Wann Sie uns hier
erreichen, erfahren Sie aus
der Ansage
Fax:
++49 (0) 6403 900 155
Email:
support@lenz-elektronik.de
Alles da?
Bitte prüfen Sie, ob alles in der Verpackung enthalten ist:
LZV200 Gerät
Update-Stick für LZV200
Handregler LH101
Information LH101
Information LZV200
Info "Erste Schritte SET101 (dieses Heft)
Sollte ein Teil fehlen, so bitten Sie Ihren Fachhändler um
Nachlieferung.

3
D
1 Wichtige Hinweise, zuerst durchlesen!
Die Komponenten des SET101 des
Digital plus by Lenz®
Systems
wurden vor Auslieferung einem intensiven Test unterzogen. Lenz
Elektronik GmbH garantiert für einen fehlerfreien Betrieb, wenn Sie die
folgenden Hinweise beachten:
Die Komponenten des SET101 dürfen nur mit anderen Komponenten
des
Digital plus by Lenz®
Systems zusammen verwendet werden. Eine
andere Verwendung, als die in den Betriebsanleitungen dieser
Komponenten beschriebene, ist nicht zulässig und führt zu Verlust der
Gewährleistung. Verwenden Sie die im SET101 enthaltenen Geräte
nur entsprechend den in den Betriebsanleitungen gemachten
Angaben.
Wenn Sie bei Problemen mit uns Kontakt aufnehmen möchten, sollten
Sie uns neben der Problembeschreibung folgende Informationen
mitteilen:
Versions- und Servicenummer des Handreglers LH101
Versions- und Servicenummer der LZV200
Bezeichnung, Versions- und Servicenummer der weiteren
Komponenten mit denen das Problem auftritt.
Dies hilft unserem Service bei der Problembehebung, vielen Dank.

4 Erste Schritte SET101
2 Funktionsumfang des SET101
Mit dem SET101 können Sie unter anderem:
bis zu 9999 Digitalloks und
eine konventionelle Lok steuern,
bis zu 29 Funktionen in Lokdecodern schalten,
Funktionen in Lokdecodern auf Dauer- oder Momentbetrieb
einstellen,
Fahrstufenmodus zu den Lokadressen einstellen,
Mehrfach- und Doppeltraktionen zusammenstellen, steuern und
wieder auflösen,
Programmieren während des Betriebs,
Programmieren auf dem Programmiergleis,
Bis zu 2048 Weichen und andere Magnetartikel schalten,
Rückmeldungen abfragen
mit Hilfe der USB-Schnittstelle und einer geeigneten Software Ihre
Modellbahn mit dem PC steuern,
konstante Zugbeleuchtung nutzen,
bis zu 30 weitere Bediengeräte anschließen,
und vieles mehr.
Genaue Informationen finden Sie in den Betriebsanleitungen zur
LZV200 sowie zum LH101.

5
D
3 Systemaufbau
Diese Grafik zeigt den einfachen Systemaufbau des
Digital plus by Lenz ®Systems.

6 Erste Schritte SET101
4 Anschluss
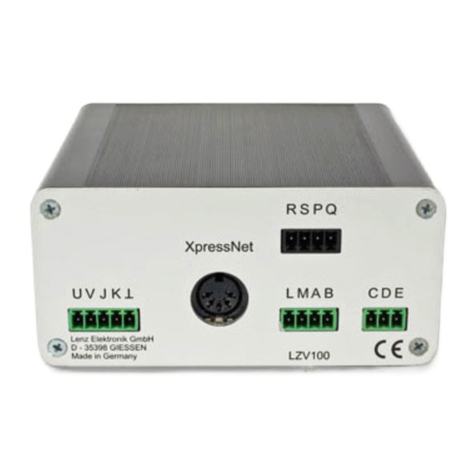
Die Anschlüsse an der LZV200 sind als steckbare Schraubklemmen
ausgeführt.
4.1 Anschluss der LZV200 an die Gleise
Verbinden Sie die Klemmen J und K der
LZV200 mit dem Anschlussgleis Ihrer
Modellbahn:
Anschluss 2-Leiter-Gleise
Gleisanschluss der LZV200
Anschluss Gleis mit
Mittelleiter
Es dürfen keine Kondensatoren zur Funkentstörung in der Gleisanlage
eingebaut sein. Diese Kondensatoren sind nur beim konventionellen
Betrieb zur Funkentstörung notwendig. Beim Digital plus System
verfälschen sie jedoch das Datenformat und die einwandfreie
Datenübertragung wird beeinträchtigt.

7
D
4.2 Anschluss des Handreglers LH101 an die LZV200
Den 5-poligen DIN-Stecker des Anschlusskabels stecken Sie in die 5-
polige DIN-Buchse an der Rückseite Ihrer LZV200:
4.3 Anschluss der LZV200 an den Transformator
Verbinden Sie die Klemmen U und V der LZV200 mit den
Anschlussklemmen des Transformators TR150.
Die Anschlüsse U,V zur Stromversorgung der LZV200

8 Erste Schritte SET101
5 Inbetriebnahme
Stecken Sie den Netzstecker des Transformators in die Steckdose.
5.1 Ihre erste Fahrt
Wir gehen in diesem Beispiel davon aus, dass Sie eine Lok mit der
Adresse 3 (Adresse eines Decoders in Werkseinstellung) einsetzen.
5.1.1 Lokadresse aufrufen:
Bei der ersten Inbetriebnahme des LH101 wird die Lokadresse
"L0001" angezeigt.
Geben Sie zuerst die Adresse der Lok 3 ein:
Aktion
Display
Erläuterung
Drücken Sie die 'Lok' - Taste. Danach
können Sie unmittelbar mit der Eingabe der
neuen Lokadresse beginnen.
Die eingetippte Zahl wird angezeigt. Sollten
Sie sich vertippt haben, so können sie die
jeweils letzte eingetippte Zahl mit '<=' wieder
löschen.
Mit Druck auf die 'Lok' - Taste schliessen Sie
die Eingabe ab. Es werden Fahrtrichtung und
Fahrstufe angezeigt.
In diesem Beispiel ist die Fahrtrichtung vorwärts (Pfeil links zeigt nach
oben).
5.1.2 Lok steuern:
Die Geschwindigkeit und Fahrtrichtung der Lokomotive steuern Sie mit
dem Drehknopf.
Aktion
Display
Erläuterung
Drehen im Uhrzeigersinn erhöht die Fahrstufe
Drehen gegen den Uhrzeigersinn vermindert
die Fahrstufe, …

9
D
… ggf. bis zum Stillstand.
5.1.3 Fahrtrichtung ändern:
Bringen Sie zum Wechseln der Fahrtrichtung die Fahrstufe auf 0"
Danach können Sie die Richtung der Lok ändern:
Aktion
Display
Erläuterung
Der Druck auf den Drehknopf ändert die
Richtung der Lokomotive. Die geänderte
Richtung wird im Display angezeigt.
Die Fahrtrichtung ist lokbezogen, d.h. vorwärts bedeutet bei einer
Dampflok z.B. 'Schlot voraus fahren', egal, in welcher Richtung Sie
diese Lokomotive auf das Gleis gestellt haben. Hat die Lokomotive die
Fahrstufe 0, wird bei jedem Druck auf den Drehknopf die Fahrtrichtung
geändert.
5.1.4 Notaus:
Aktion
Display
Erläuterung
Drücken Sie auf den Drehknopf und halten
Sie ihn gedrückt bis "AUS" im Display
erscheint. Die Gleisspannung ist nun
ausgeschaltet.
Um die Gleisspannung wieder einzuschalten,
drücken Sie erneut auf die Mitte des
Drehknopfs …
… bis die Lokadresse wieder angezeigt wird.

10 Erste Schritte SET101
5.1.5 Lichtfunktion im Lokdecoder schalten:
Aktion
Display
Erläuterung
Mit der Taste '0' schalten Sie die Funktion 0
(im allgemeinen die richtungsabhängige
Stirnbeleuchtung der Lokomotive) ein und
auch wieder aus. Ist die Funktion
eingeschaltet, so wird dies im Display in der
unteren Zeile angezeigt.
Nun haben Sie in Kürze erfahren, wie Sie mit dem LH101 eine
Lokomotive steuern können.

11
E
Welcome!
This operating manual is to explain your first steps with 100.
You will find detailed information on how to connect and use the
components of the SET101 in the operating manuals of the respective
devices.
If you still have unanswered questions even after reading this
operating manual, then please contact us. There are four different
ways of contacting Lenz Elektronik GmbH:
Postal
address:
Lenz Elektronik GmbH
Vogelsang 14
D-35398 Giessen
Telephone:
++49 (0) 6403 900 133
The recorded message
will inform you of times
when we are available
for consultation.
Fax:
++49 (0) 6403 900 155
E-mail:
support@lenz-elektronik.de
All present?
Please check whether all the components have been delivered:
LZV200 device
Update-Stick for LZV200
Manual control LH101
Information LH101
Information LZV200
Info "First Steps SET101" (this booklet)
If any component is missing, please ask your specialist supplier for a
supplementary delivery.

12 First Steps SET101
1 Important advice, please read first!
The components of the SET101 of the
Digital plus by Lenz®
system
were submitted to intensive testing before delivery. Lenz Elektronik
GmbH guarantees fault-free operation if you follow the advice given
below:
The components of the SET101 are authorised for operation only with
other components of the
Digital plus by Lenz®
system. Any use other
than the one described in these operating manuals is not permitted
and all guarantees become invalid if the SET101 is used in an
inappropriate way. Only use the devices contained in the SET101 in
accordance with the information given in the operating manuals.
If you have any problems, just contact us, stating the following
information together with a description of the problem:
Version and service number of the manual control LH101.
Version and service number of the LZV200.
Designation, version and service number of other components
with which you experience the same problem.
This will help our service department to resolve the problem. Thank
you.
2 Range of functions of the SET101
With the SET101 you may:
control up to 9999 digital locomotives and
1 conventional locomotive
switch up to 28 functions in locomotive decoders
set functions in locomotive decoders to continuous or
instantaneous operation
set the running notches mode to the locomotive addresses
assemble, control and delete multiple and double tractions
program in operational mode
program on the programming track
switch up to 1024 points and other magnetic articles
query and display feedbacks
using the integrated computer-Interface

13
E
use constant train lighting
connect up to 30 other operating devices
and much more. You will find more detailed information in the LZV200,
LH101 (SET101).
3 System design
This graphic presentation shows the simple system design of the
Digital plus by Lenz ®system.

14 First Steps SET101
4 Connection and initial operation
All the LZV200 connections are designed as pluggable terminal
screws.
4.1 Connecting the LZV200 to the tracks
Connect terminals J and K of the LZV200 to
the siding track of your model railway:
Connection: 2-wire tracks
The LZV200 track connection
Connection: track with
neutral wire
No radio interference suppression capacitors may be installed in the
track system. These capacitors are necessary only for the interference
suppression in conventional operation. If used with the Digital plus
system, however, they would only distort the data format and interfere
with the fault-free transmission of data.

15
E
4.2 Connecting the manual control LH101 to the
LZV200
Plug the 5-pole DIN-plug of the connecting cable into the 5-pole DIN-
plug at the rear of your LZV200:
4.3 Connecting the LZV200 to the transformer
Connect terminals U and V of the LZV200 to the connecting terminals
of the transformer TR100 (or TR200)
Connections U,V to the power supply of the LZV200

16 First Steps SET101
5 Initial operation
Plug the mains plug of the transformer into the mains plug socket.
5.1 Operating your first train
In this example we assume that you are using a locomotive with the
address 3 (ex-factory address of a decoder).
5.1.1 Calling up a locomotive address:
During initial operation, locomotive address "L0001" is displayed.
First, enter the address of locomotive 3:
Action
Display
Explanation
Press the 'locomotive' key. You can now start
to enter the new locomotive address.
The number entered is displayed. If you
entered the wrong number, you can delete
the entered digits using the '<=' key.
Press the 'locomotive' key to complete the
entry process. The direction of travel and the
speed step are displayed.
In this example, the direction of travel is forward (left arrow points up).
5.1.2 Controlling a locomotive:
Use the rotary knob to control the speed and the direction of the
locomotive.
Action
Display
Explanation
A clockwise turn increases the speed step.
A counter clockwise turn decreases the
speed step ….

17
E
… down to a standstill.
5.1.3 Changing the direction of travel:
To change the direction of travel, first set the speed step to “0”. You can
now change the direction of travel:
Action
Display
Explanation
Press the rotary knob to change the direction
of travel of the locomotive. The changed
direction is shown on the display.
The direction of travel is dependent upon the locomotive, i. e.: For a
steam engine, “forward” means “smokestack forward”, regardless of
the direction in which you have placed this locomotive on the track. If
the locomotive is set to speed step 0, each pressing of the rotary
knob will change the direction of travel.
5.1.4 Emergency off:
Action
Display
Explanation
Press the rotary knob and keep it pressed
until "AUS"/"OFF" is displayed. The track
voltage is now turned off.
To turn the track voltage back on, press the
centre of the rotary knob again …
… until the locomotive address is displayed
again.

18 First Steps SET101
5.1.5 Switching the light function of the locomotive decoder:
Action
Display
Explanation
Use the '0' key to switch function 0 (usually
the direction-dependent head light of the
locomotive) on and off. If this function is
enabled, this is shown in the bottom line of
the display.
This was a summary of how to control a locomotive using the
SET101.

19
F
Bienvenue !
Ce mode d'emploi doit vous permettre d'effectuer aisément votre
premier démarrage avec le SET.
Vous trouverez d'autres informations détaillées concernant le
raccordement et le maniement des composants du SET101 dans le
mode d'emploi accompagnant ces appareils.
Si vous désirez poser des questions à propos de sujets sur lesquels
ces modes d'emploi ne vous donnent pas de réponse, veuillez nous
contacter. Il existe différentes possibilités de contacter la firme Lenz
Elektronik GmbH.
Adresse
postale :
Lenz Elektronik GmbH
Vogelsang 14
D-35398 Giessen
Téléphone :
++49 (0) 6403 900 133
Si vous nous téléphonez,
veuillez suivre les
indications données au
téléphone.
Fax :
++49 (0) 6403 900 155
Email :
support@lenz-elektronik.de
Tout est-il là ?
Veuillez vérifier si tous les composants sont présents :
Centrale-amplificateur LZV200
Update-Stick pour LZV200
Régulateur LH101
Information LH101
Information LZV200
Information "Premier démarrage SET101" (cette brochure)
Si un des composants était absent, consultez votre détaillant
spécialisé.

20 Premier démarrage SET101
1 Remarque importante, à lire avant toute chose !
Les composants du SET101 du système
Digital plus by Lenz®
ont subi
un test intensif avant leur mise sur le marché. Lenz Elektronik GmbH
garantit un fonctionnement impeccable si vous respectez les règles
suivantes.
Les composants du SET101 ne peuvent être utilisés qu’avec les
autres composants du système
Digital plus by Lenz®
. Toute autre
utilisation que celle qui est décrite dans cette information n'est pas
permise et entraînera de facto l'annulation de la garantie. N'utilisez les
appareils du SET101 que selon les données décrites dans les modes
d'emploi correspondants.
Si vous nous contactez à propos de problèmes rencontrés avec les
appareils, veuillez nous communiquer les renseignements suivants en
sus de la description des problèmes :
Numéros de version et de service du régulateur LH101 ;
Numéros de version et de service de la LZV200 ;
Désignation exacte, numéros de version et de service des autres
composants avec lesquels vous rencontrez des problèmes.
Ceci aidera nos services à résoudre les problèmes. Merci.
This manual suits for next models
1
Table of contents
Languages:
Other Lenz Control System manuals
Popular Control System manuals by other brands

Böhnke + Partner
Böhnke + Partner Schmersal bp408 operating instructions

De Haardt
De Haardt XTRA.BLACK BOX user manual

Syncronorm
Syncronorm VNANO 512 operating instructions

NPI
NPI TMR-02M Operating instructions and system description

ONEFINITY
ONEFINITY QCW Frame Installation and operation instructions

ABB
ABB Relion 615 series manual