INSTRUCTIONS
FOR
USE
HOTLINE®
WARMER
Table
of
Contents
ABOUT
THIS
MANUAL
K
K
tte
3
REFERENCES
eus
sucer
3
MESSAGES
...............
rr
итак
3
INDICATIONS
2...
K
erent
es
3
PRINCIPLES
OF
OPERATION
2.0...
cece
cee
eee
teen
ro
3
INFUSATE
DELIVERY
TEMPERATURES
,,,
aa
3
DESCRIPTION
.........
eee
4
HOTLINE
WARMER
............
K
arara
4
DISPLAY
PANEL
し
にし
に
に
に
に
に に
に
に に に
に に
に
に
レト
トレ
トト
ト
トト
トト
し
トト
て て
に
し
て し て て
ここ
て
て
て
て
し
て て
て
4
HOTLINE
WARMINGSET
..........
ee
eee
eee
eee
4
SAFETY
ee
K
4
CONTRAINDICAMONS
..............
1...
ear
4
WARNINGS
keen
eee
ere
skeerne
ssnne
5
CAUTIONS
..............
Ene
EEK
E
ee
5
ELECTRICALSAFETY
..............
ete
te
ee
raras
arara
arena
5
POWER
REQUIREMENT
に
に
に
に
rene
5
ELECTRICAL
SAFETY
TESTING
.................
RP
5
STORAGE
..........
e
6
PREPARATION
AND
SET-UP
..........
ete
etree
renee
eee
een
eal
6
INSTRUCTIONS
FOR
USE
........................
本
STEP
1:
HOTLINE
WARMER
SET-UP
νεο
νε
ων
ων
κενο
ον νε
χ
νε ων ον
εως
εν
7
STEP
2:
SET-UP
THE
HOTLINE
WARMING
SET
ων
ον
7
STEP
3:
CONNECT
THE
INTRAVENOUS
ADMINISTRATION
SET
.............
7
STEP
和
USE
ses
ere
resserre
7
STEP
5:
AFTER
USE
.....,.
чеки
0
κ
χε
εν
7
TROUBLESHOOTING
.............,....,..,
4444444
rr
rr
enon
eens
8
MAINTENANCE
K
K
enene
8
TESTING
K
renee
10
TEMPERATURE
VERIFICATION
..
0.0.0.0
erer
11
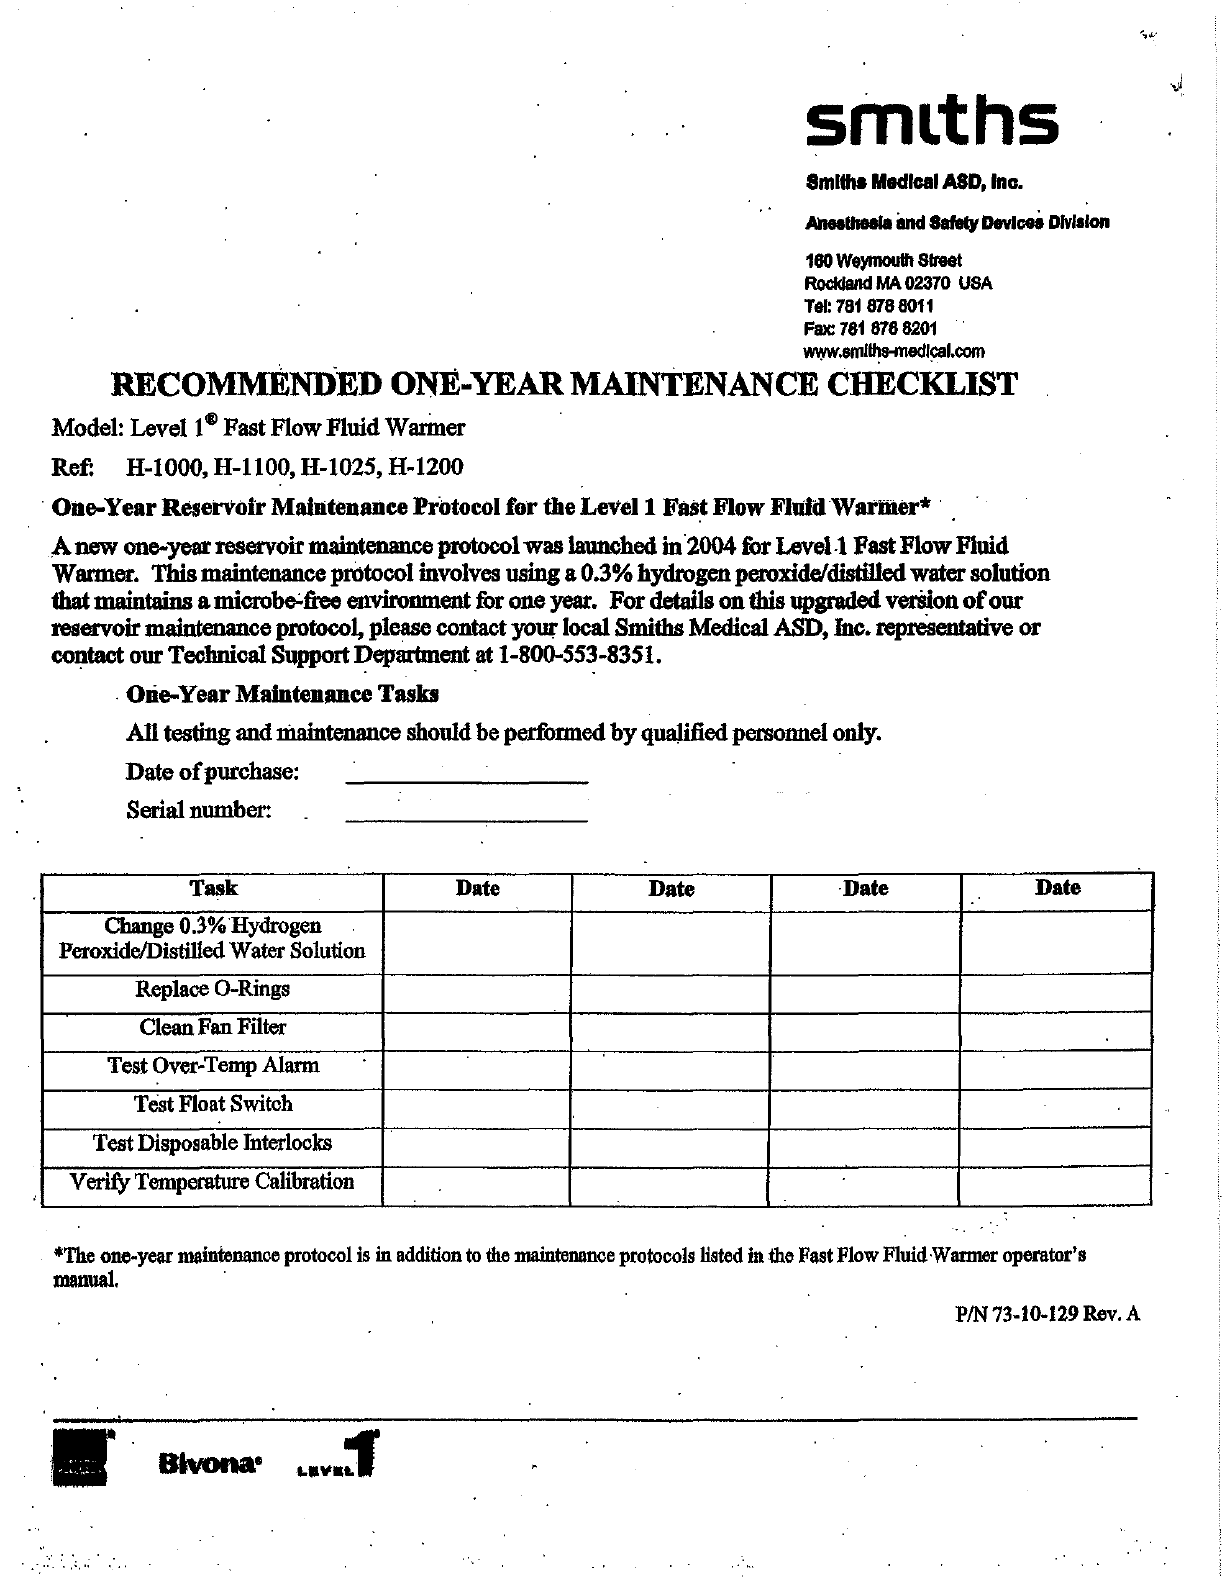
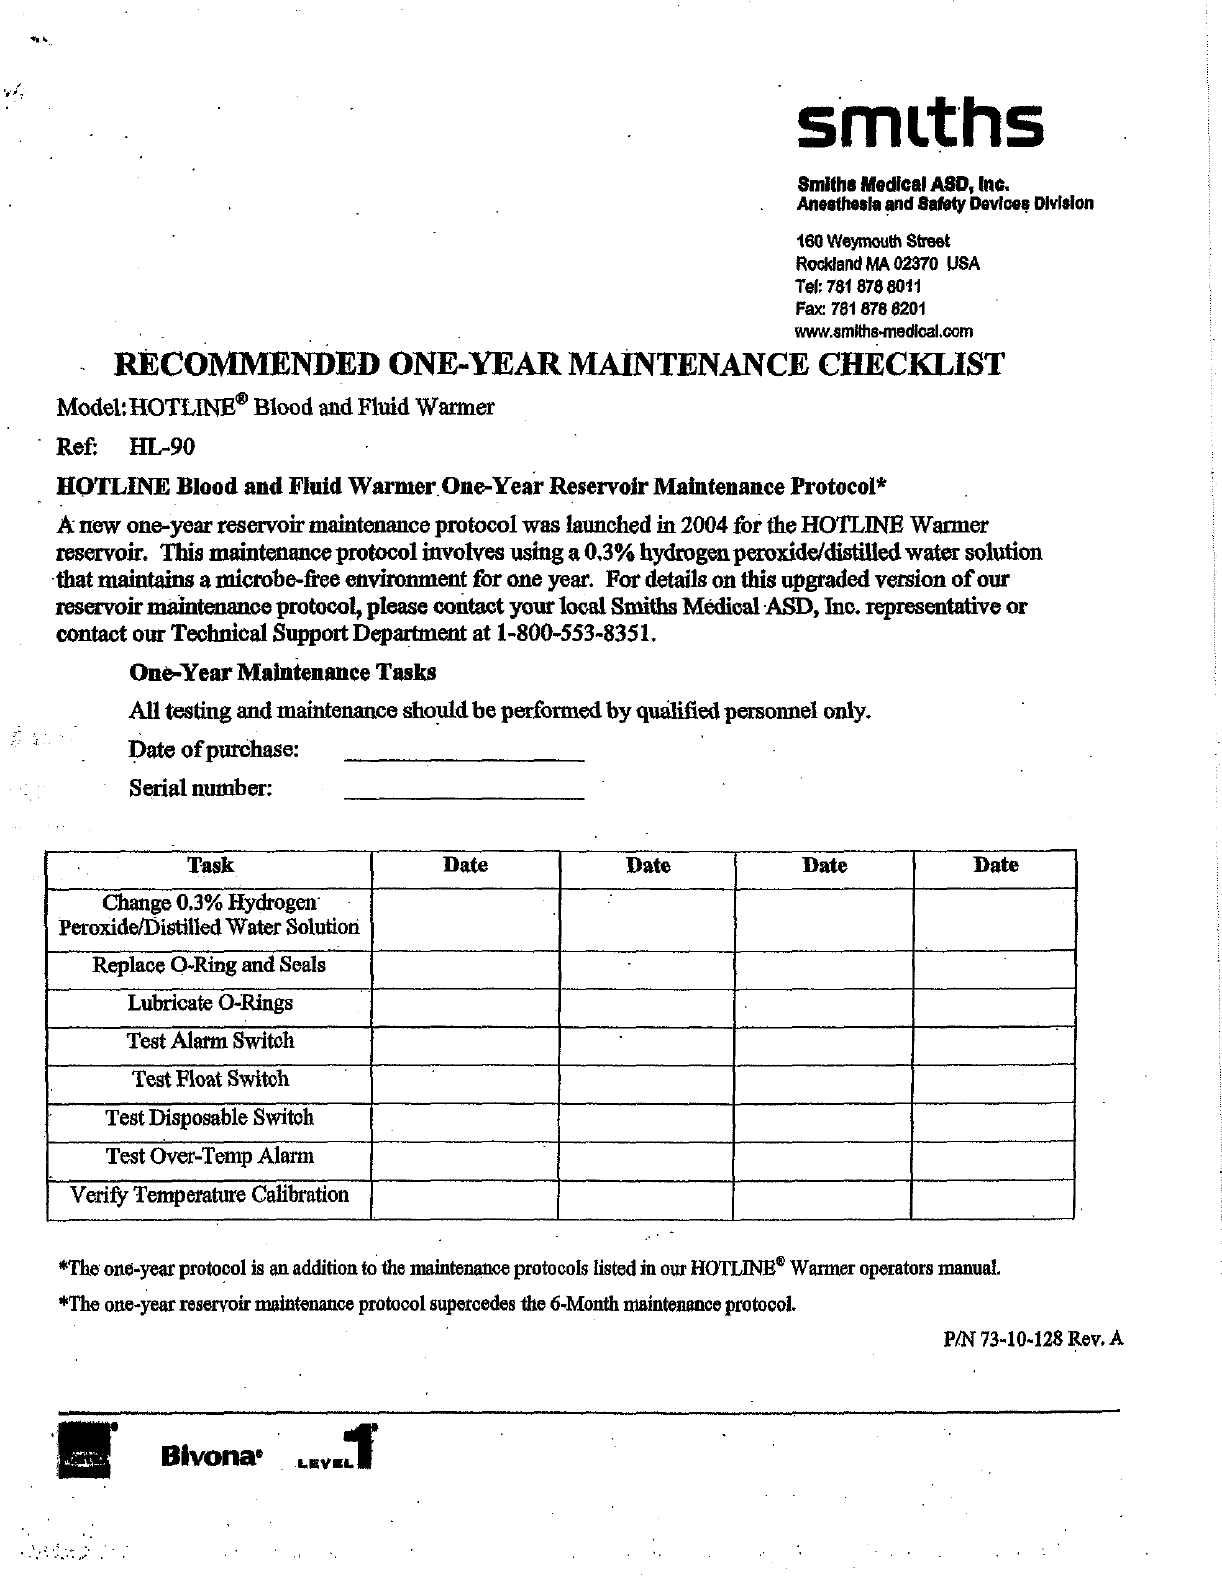
RECOMMENDED
MAİNTENANCE
CHECKLİST
...........
rro
12
LIMITED
WARRANTY
SECTION
..............
0mm
13
SERVİCE
...............
n
13
SPECIFICATIONS
............
L
K
nar
14
PHYSICAL
SPECİFİCATIONS
..........
0.
eee
ners
14
ELECTRICAL
SPECIFICATIONS
...........
ea
14
OPERATING
SPECIFICATIONS
.....0ooooocoocoroncor
rr
rr
14
ENVIRONMENTAL
SPECIFICATIONS
.
00...
ea
ee
14
ο
ο
αμ
rv
renee
14
ELECTRICAL
SCHEMATICS
AND
PARTS
LIST
...............,,...,.,....,,,,...,
15
SYMBOLS
...........
0...
learn
a
anana
нь
16