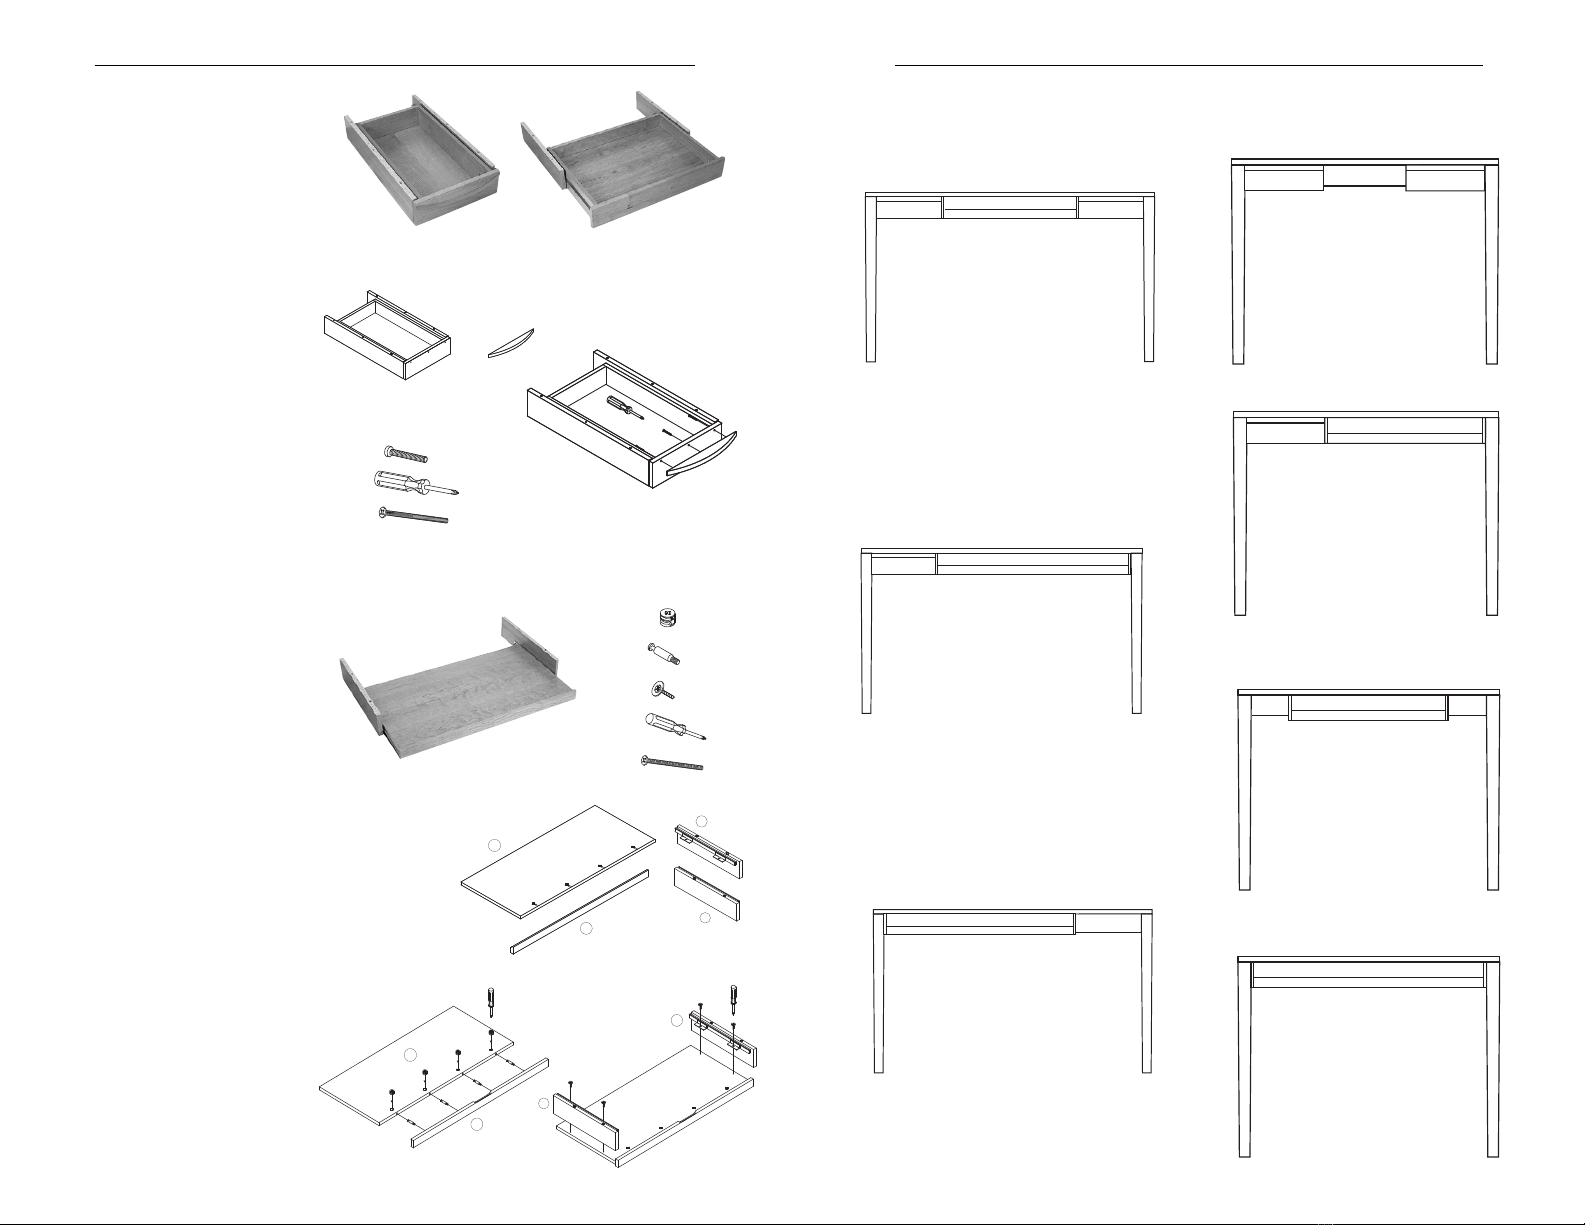
HO W T O O R G A N I Z E —A N D D I S O R G A N I Z E —A D R A W E R
S P E C I A L N O T E O N T H E D A R K E N I N G O F N AT U R A L C H E R R W O O D :
Natural cherry wood will gradually darken with exposure to light.
his is a natural process
and enhances the beauty of the wood; be mindful, however, of uneven darkening. We
recommend not permanently resting objects on exposed surfaces during the first two weeks.
During this period, an object left in the same place for even a few days will show a lighter
color beneath. After this break-in period, objects may be left in place since color development
will be complete.
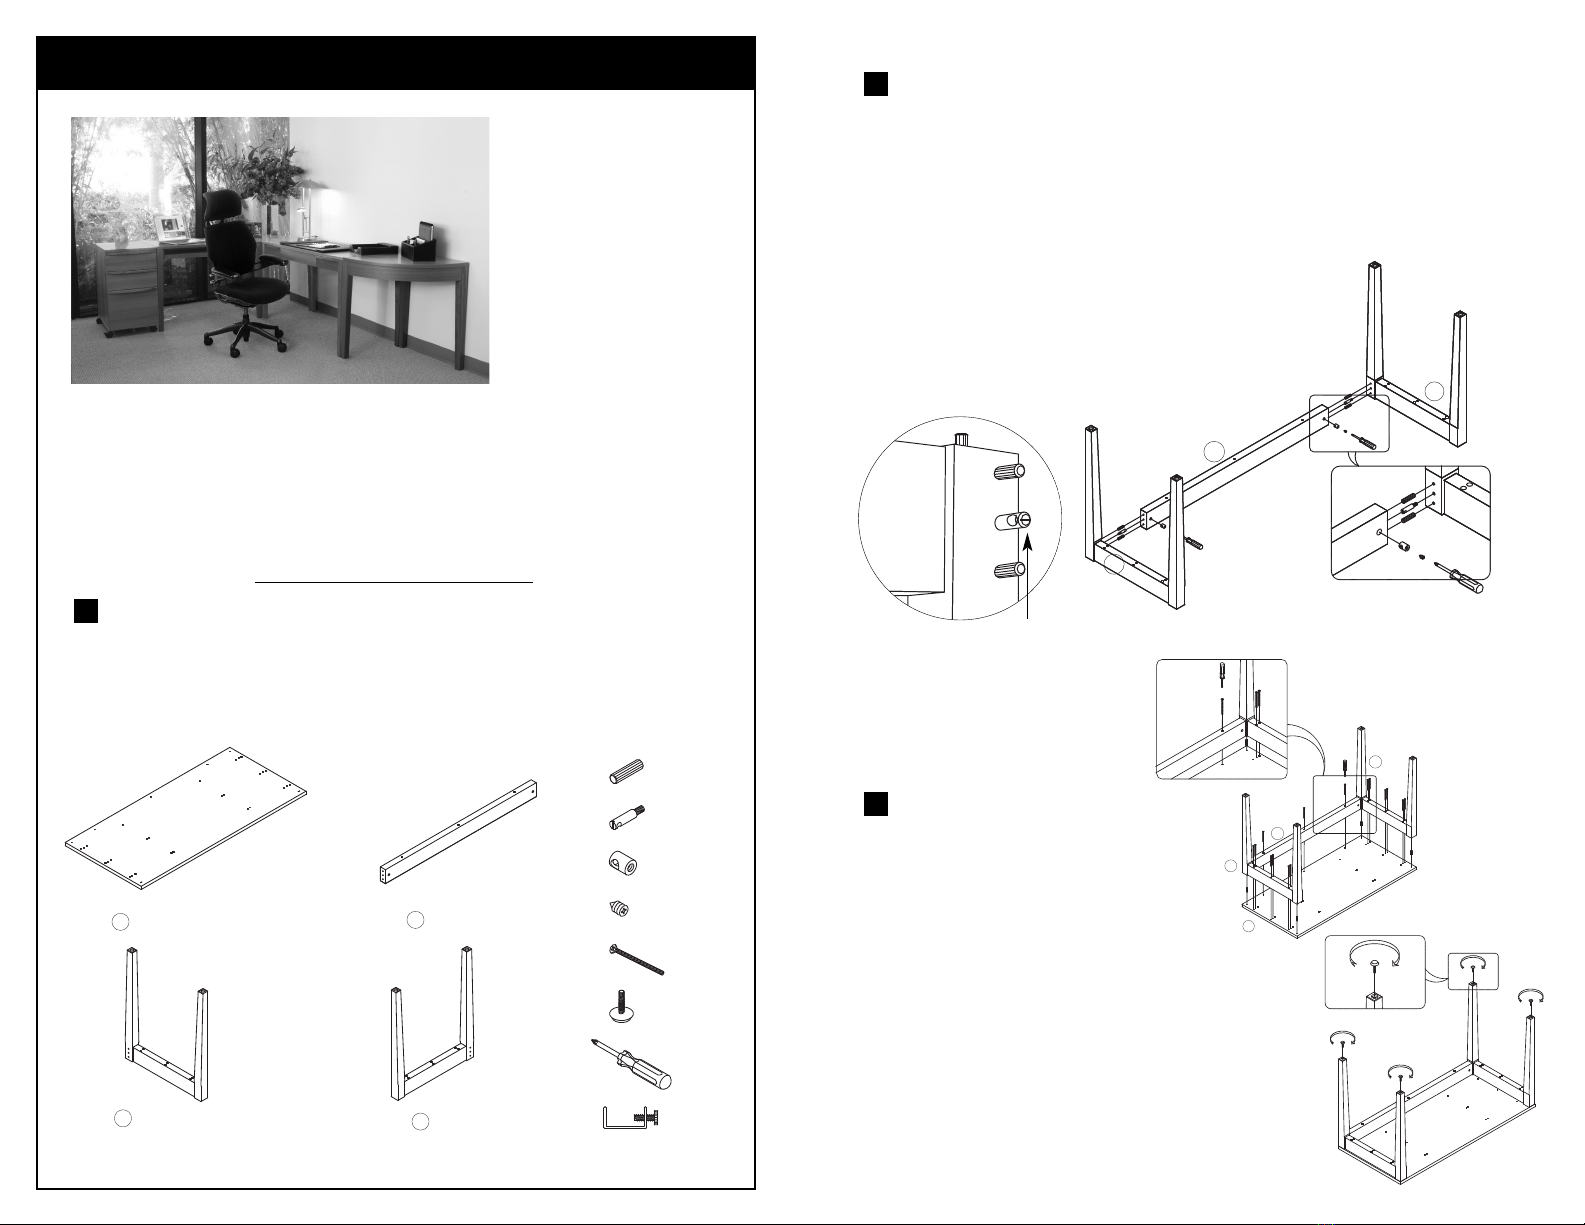
For added stability you can connect the pieces of your Euro Desk system
together. From underneath, simply slide the C-clamp(s) provided over the
aprons of the adjoining pieces and fasten securely.
C O N N E C T I N G O U R E U R O C O M P O N E N T S
The key is to organize for retrie al rather than storage.
Dedicate one drawer for your most frequently needed tools, then determine what those tools
are and precisely where you want to put them.
Lo and behold, when you want your fa orite mechanical pencil or highlighter or staple
remo er, it will be there for you. The thousands of seconds you’ll sa e can amount to days o er
the years.
But don’t go o erboard. It’s good to maintain at least one junk drawer where you can put
things without a thought to organization.
Organize hard in one place and be totally messy in another; it’s one secret for success.
We hope you enjoy your Euro Desk System. Visit us online at Levenger.com
to read customer reviews of this product or to write your own review. o
place an order or request our catalog, call 800-544-0880 or visit us online.
Sign up on the home page to become a member of our Preferred Customer
E-List and be the first to see our new products and receive exclusive offers
and gifts with purchase.
© 2012 Levenger (F S•FD0185/FD0180 • 06/12/12)
800-544-0880 Levenger.com
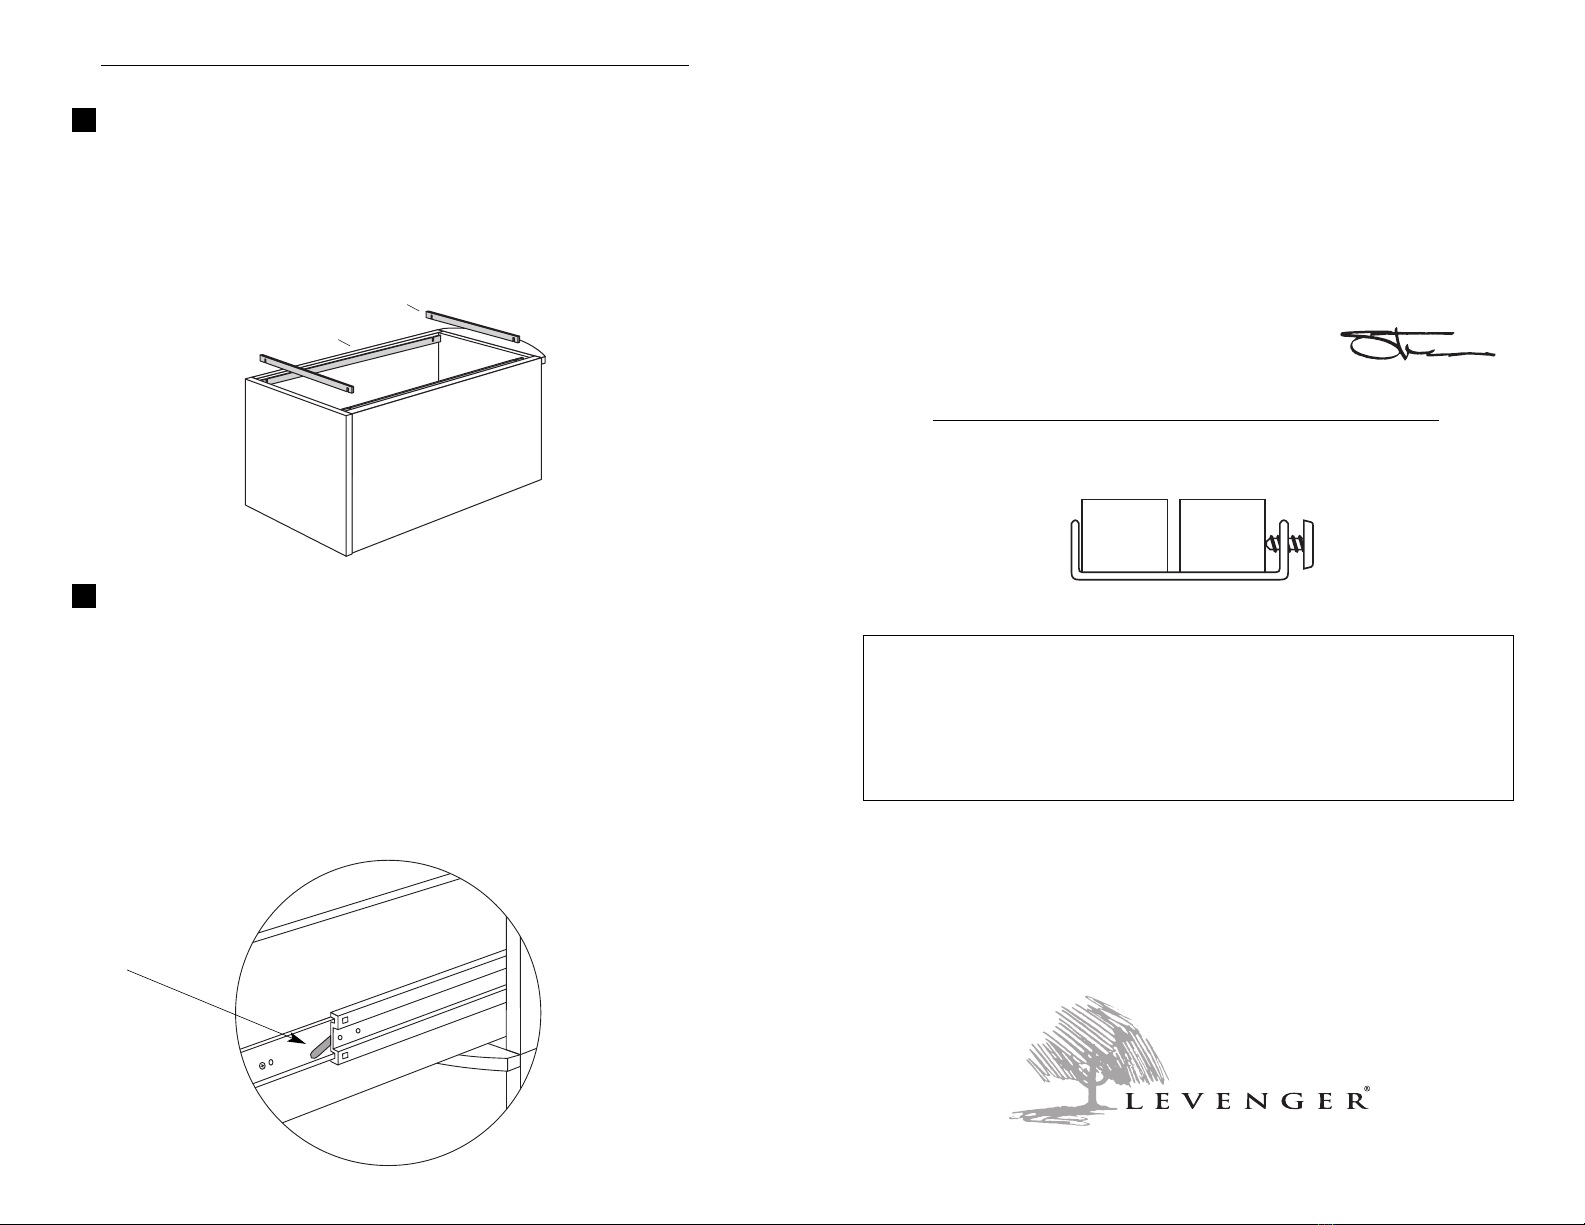
E U R O 3-D R AW E R S T O R A G E T R O L L E A S S E M B L
Attach the file hangers
Flip the cabinet over so it is on its wheels and open the bottom drawer. Attach
the long file hanger (F) with the slots up, start at the front of the drawer and
slide down into the slots at the back of the drawer. Next insert the short file
hangers (G) slot-side down into the slots of the large file hanger. Letter files
are inserted front to back while legal files are inserted side to side.
3
lever
Removing the drawer
Should you need to remove a drawer, pull it straight out until it will go no
farther. Locate the plastic lever on each side of the drawer glides. Push the
lever on the left side up and the lever on the right side down and hold as you
pull the drawer completely out of the frame. here will be some resistance,
but it should ride smoothly. o reinsert the drawer, align the side rails of each
drawer with the glider of the frame. Carefully insert the drawer. Make sure
not to force the rail into the glider. here will be resistance, but if aligned
properly, it should be smooth. est by pulling the drawer in and out.
Movement should be smooth and even. If it is not, carefully remove the
drawer and reinsert.
4