We hope you enjoy your Morgan Charger Valet. E-mail us at
productreview@Levenger.com and let us know your comments.
Questions? Call us toll-free at 800-545-0242 and we will be happy to
assist you. To place an order, please call 800-544-0880. To join our
Preferred Customer E-list and be the first to see our new
merchandise, please sign up on the homepage of Levenger.com.
© 2007 Levenger (FTS•AD5830•3/15/07)
Levenger Distribution Center
3530 E. Raines Road, Suite 101 Memphis, TN 38118
800-545-0242 or 901-375-9318 Fax: 800-544-6910 or 901-375-8346
levenger.com cservice@levenger.com
IMPORTANT SAFETY INSTRUCTIONS
DANGER
To reduce the risk of electrical shock, burns, fire or injury:
1. Do not use outdoors.
2. Always unplug the unit from the electrical outlet after use.
3. Do not use near or in water or any other liquid.
4. Do not place or store unit where it can fall or be pulled into water or any other liquid.
5. Do not reach for a unit that has fallen into water. Unplug from wall immediately.
6. Care should be taken so that liquids do not fall or are spilled onto unit.
WARNING
Combined amp load on all outlets at any one time must not exceed 1875 watts. The
maximum load is 15A 125VAC, 60Hz. Use only with 110/125 volt AC Power.
Do not plug in more than the specified number of watts into the cord.
Do not run the cord through doorways, holes in ceiling, walls or floors.
Ensure your product is off before connecting it to the outlet.
Fully insert the plug into the outlet.
If the circuit breaker “pops” due to power overload, unplug the cord, remove excess power,
then reset the breaker.
CAUTION
TO REDUCE THE RISK OF ELECTRICAL SHOCK, DO NOT REMOVE COVER
OF YOUR UL-APPROVED SURGE PROTECTOR.
THERE ARE NO SERVICEABLE PARTS INSIDE.
TO REDUCE THE RISK OF FIRE OR ELECTRICAL SHOCK, DO NOT STORE
THIS UNIT NEAR WATER OR EXPOSE TO MOISTURE.
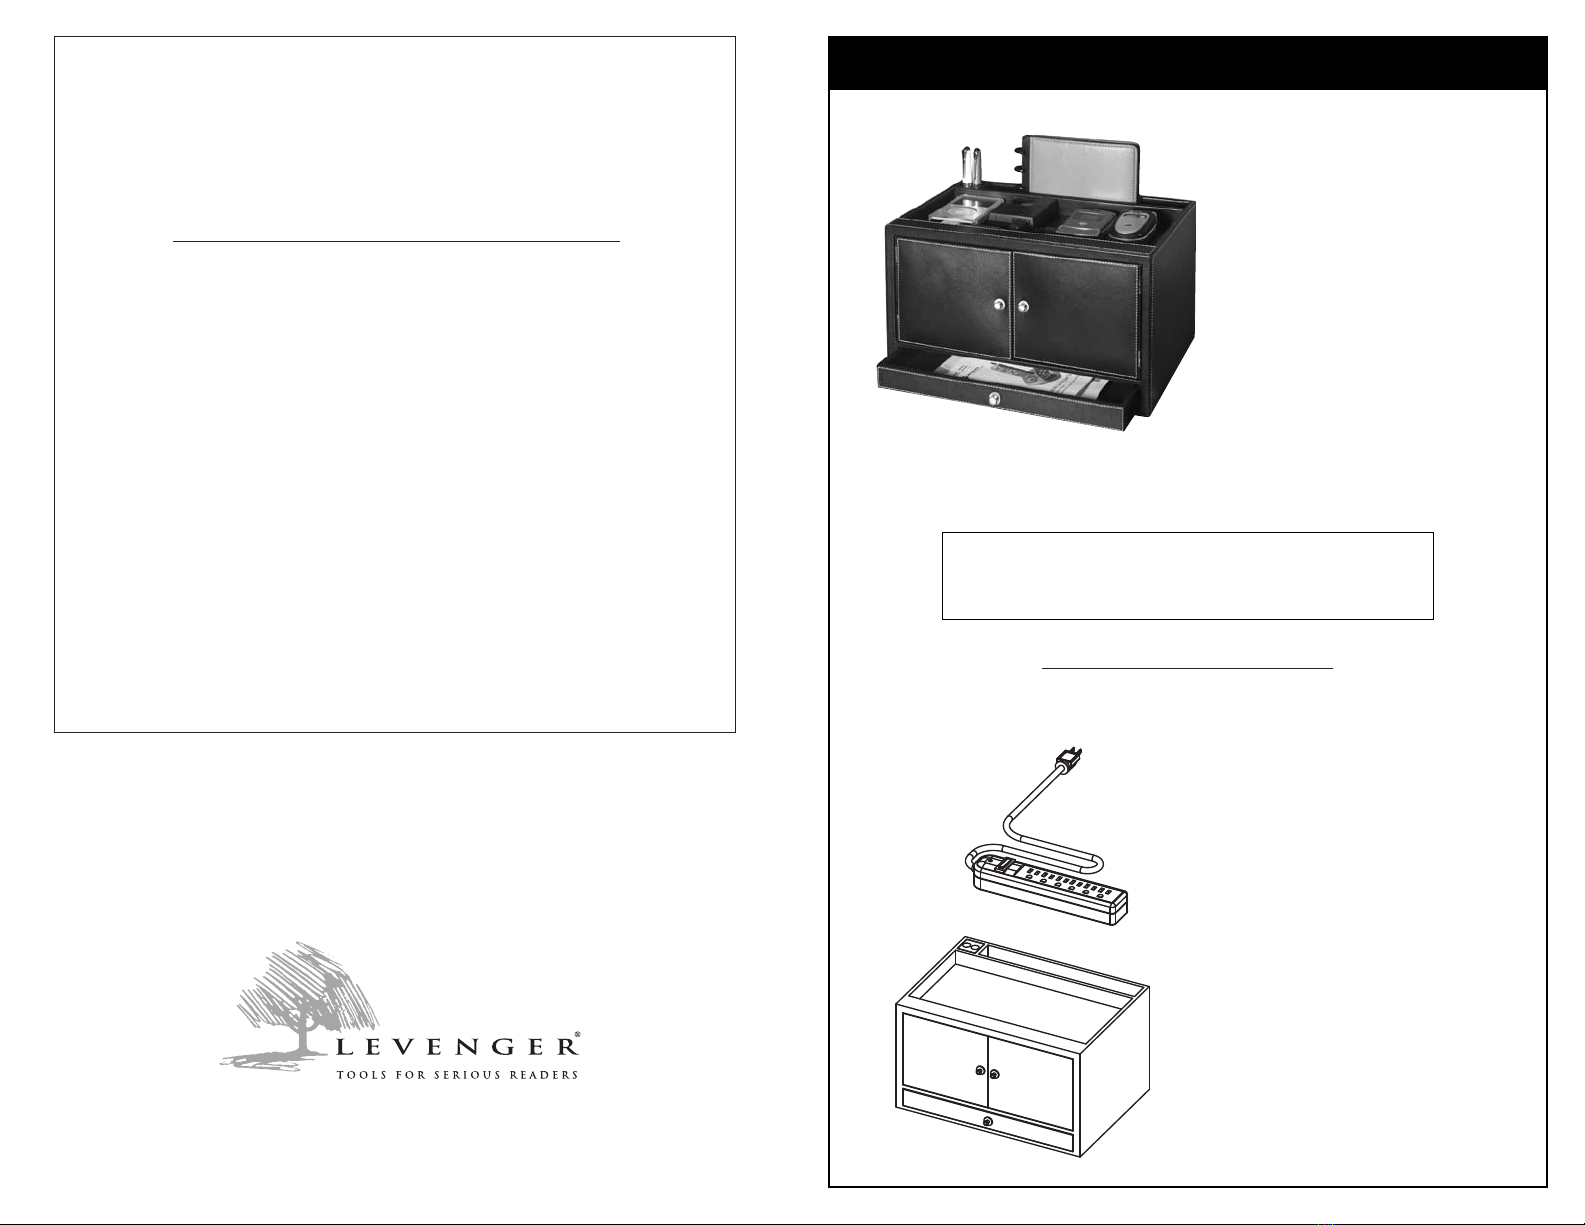
MORGAN CHARGER VALET
Your Morgan Charger Valet keeps
personal communication tools in
one convenient hub. Chargers for
cell phone, PDA and iPod can rest
on the Valet’s upper deck area.
We include a six-outlet surge
protector, which hides in the
Valet’s inner chamber. Below is a
drawer to store instruction
manuals or warranty information,
and in the back are slots for pens
or pencils and a notebook or note pad. 131⁄4W x 91⁄4D x 71⁄2H. Charger deck
area, 121⁄2W x 61⁄4D x 3⁄4H. Drawer interior, 111⁄2W x 81⁄2D x 3⁄4H.
Please read all instructions carefully before proceeding.
All the safety and operating instructions should be read,
adhered to and followed before the unit is operated.
Morgan Charger Valet
6-Outlet Surge Protector
CHECKING THE PARTS
First check to make sure that all the parts are included:


