7
Set-up
1. Place salt lamp housing and base on a flat,
level surface.
2. Remove silicone caps from the base.
3. Remove salt crystals from their packaging and
carefully place them inside the housing,
ensuring that the crystals are evenly
distributed around the bulb housing.
4. Plug the salt lamp into an electrical outlet.
1. Turn o the salt lamp and unplug it from its
power source.
2. Carefully remove the salt crystals to reveal the
bulb housing. Place the salt crystals in a safe,
dry place.
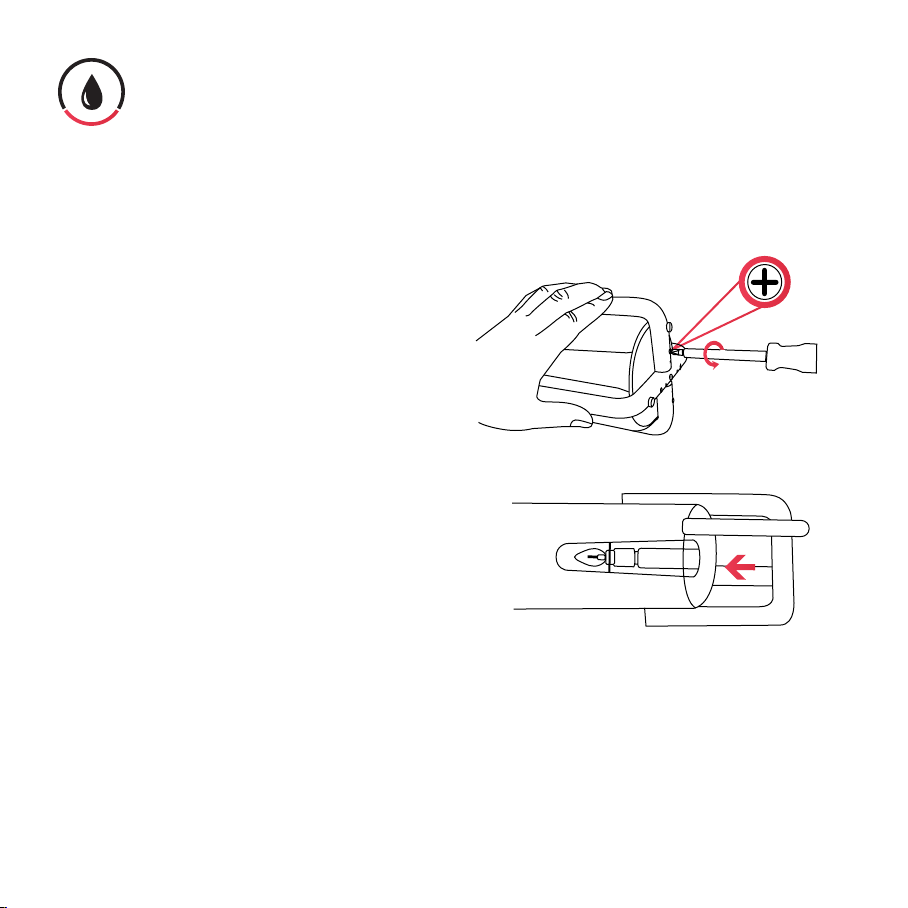
3. Gently twist the top of the bulb housing while
pulling it up to uncover the bulb.
4. Remove the bulb from its socket by gently
turning it counterclockwise.
5. Install a new C7 15W bulb, and replace the
bulb housing.
6. Carefully replace all of the salt crystals back
into the housing, ensuring the crystals are
evenly distributed.
Light Bulb Replacement
NOTE: The lamp will remember the last mode and
brightness level when turned on and o, only if the
lamp is still plugged into a wall socket.
NOTE: DO NOT pour salt crystals directly into or out
of the glass housing. Doing so may damage or even
break the housing.
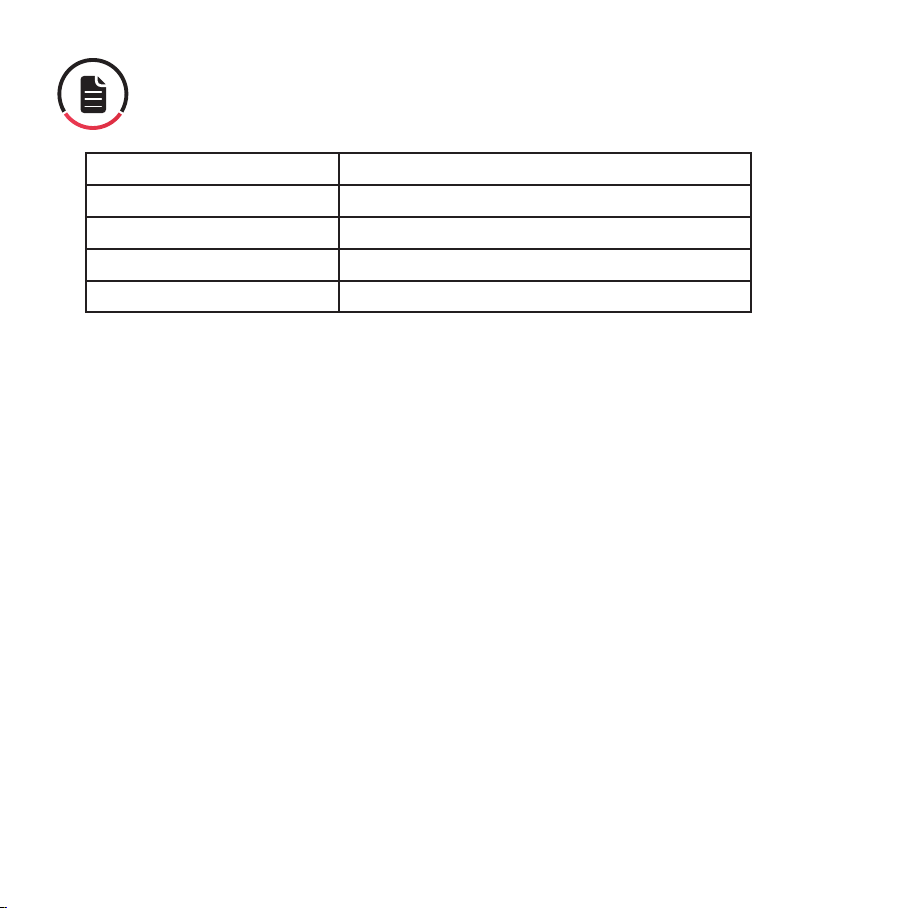
Operation
Function Operation
Power On Tap the lighting control button once.
Brightness
Control
Press and hold the lighting control
button and release at the desired
brightness.
Power O Tap the lighting control button once
while the salt lamp is on.