Lexing LX-HS08 Operator's manual

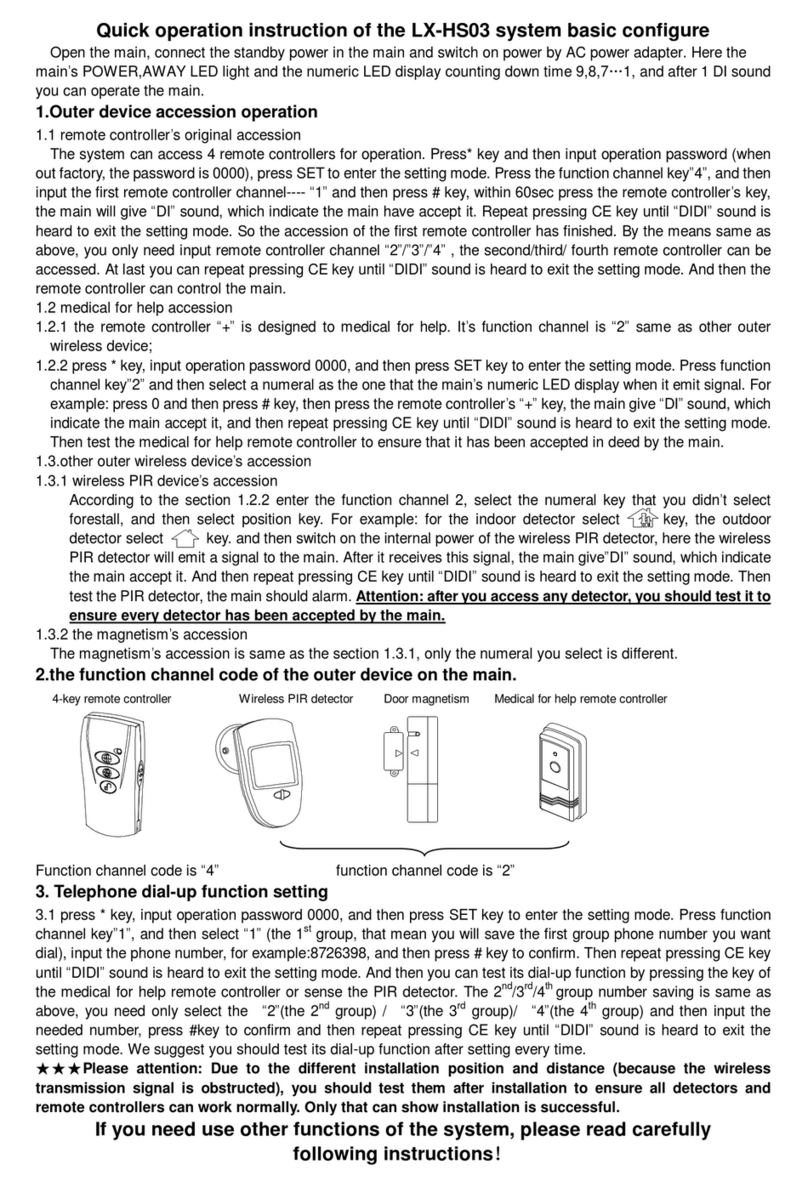
Quick operationinstructionoftheLX-HS08 systembasicconfigure
Openthemain, connect thestandbypowerinthemainand switchon powerbyACpoweradapter. Herethe
mainsPOWER,AWAY LEDlight and thenumericLEDdisplaycounting downtime9,8,7 1, and after1DIsound
you can operatethemain.
1.Outerdevice accession operation
1.1remotecontroller soriginalaccession
Thesystemcanaccess 4remotecontrollersforoperation.Press*keyand theninputoperation password(when
outfactory,thepasswordis0000),press SETtoenterthesetting mode.Press thefunction channelkey”4”,andthen
input thefirstremotecontrollerchannel---- “1”andthenpress#key,within60secpress theremotecontroller skey,
themainwillgive “DI”sound,whichindicatethemainhaveacceptit.Repeatpressing CEkeyuntil “DIDI”soundis
heardtoexitthesettingmode.Sotheaccessionofthefirstremotecontrollerhasfinished.Bythemeanssameas
above,youonlyneedinputremotecontrollerchannel “2”/”3”/”4”,thesecond/third/fourthremotecontrollercan be
accessed.Atlast youcan repeat pressing CEkeyuntil “DIDI”sound isheardtoexitthesettingmode.And thenthe
remotecontrollercan controlthemain.
1.2otherouterwireless devicesaccession
1.2.1wireless PIRdevicesaccession
Press*keyandtheninputoperationpassword0000, press SETtoenterthesetting mode. Press thefunction
channelkey”4”,selectthenumeralkeythatyou didntselectforestall,and thenselectposition key.For
example: fortheindoordetectorselectHOMEkey, theoutdoordetectorselect AWAYkey.andthenswitchon
theinternalpowerofthewireless PIRdetector,herethewireless PIRdetectorwillemitasignaltothemain.
Afteritreceivesthissignal,themaingive”DI”sound,whichindicatethemainacceptit.Andthenrepeat
pressingCEkeyuntil “DIDI”soundisheardtoexitthesetting mode.Then testthePIRdetector,themain
shouldalarm. Attention:afteryou accessanydetector,you shouldtestittoensureeverydetectorhas
beenacceptedbythemain.
1.3.2themagnetism saccession
Themagnetism saccession issameasthesection 1.3.1, onlythenumeralyou select isdifferent.
2.thefunction channel codeoftheouterdevice on themain.
4-keyremotecontrollerWireless PIRdetectorDoormagnetism
Function channelcodeis “4”function channelcodeis “2”
3. Telephonedial-up function setting
3.1press *key,inputoperationpassword0000,andthen press SETkeytoenterthesettingmode.Pressfunction
channelkey”1”,and thenselect “1”(the1st group,thatmeanyouwillsavethefirstgroupphonenumberyouwant
dial),inputthephonenumber,forexample:8726398, andthenpress #keytoconfirm.Thenrepeat pressingCEkey
until “DIDI”soundisheardtoexitthesetting mode. Andthenyou cantestitsdial-up function bypressing thekeyof
themedicalforhelpremotecontrollerorsensethePIRdetector.The2nd/3rd/4th groupnumbersaving issameas
above,you needonlyselectthe“2”(the2nd group)/“3”(the3rd group)/“4”(the4th group)andtheninputthe
needednumber,press #keytoconfirmand thenrepeatpressingCEkeyuntil “DIDI”sound isheardtoexitthe
setting mode. Wesuggest you shouldtest itsdial-up function aftersetting everytime.
Pleaseattention:Duetothedifferentinstallation position and distance(because thewireless
transmission signalisobstructed),you shouldtestthemafterinstallation toensureall detectorsand
remotecontrollerscanworknormally. Onlythatcanshowinstallation issuccessful.
Ifyou needuse otherfunctionsofthesystem, please readcarefully
following instructions!

Basicconfigure
Configureinstruction: Tostrengthensecurity, besidesthe
standardconfigureweprovide, you can add otherfittings.Our
fittingsforyourchoicehave: wireless smoke
alarm(LX98-RF,LX728-RF)\ siren(LX-SR)\ wireless
detector(glass detectorLX-AL5, PIRdetector(LX-AL6),PIR&
glass detector(LX-AL7), doubledetector(LX-AL11)\ wiredor
wireless detector(LX-AL9)etc.
Main sspecification
Power: poweradapterprovideDC9V1A
Standbypower: DC9.6V(chargeablebatterygroups)
Working frequency: 433MHz 315MHz
Receiving distance: ≥30m(wideplace)
Staticcurrent: 30mA
Alarmcurrent: 150 mA
Alarmvolume: ≥90db
Senseangle: 90°
Sensedistance:5m.max(<24℃)
Installation height:1.5m-2m
Main spanel instruction 1.POWER: PowerLED, it lightsafterswitching on
power.
2.AWAY LED: Awayarm, Lighting indicateaway
armstate.
3.HOMELED: Homearm,Lighting indicatehome
armstate.
4.FIRE: FirealarmLED,it light whensmoke/gas/
COdetectorisalarming.Afterdisarmitflash(thisis
alarmmemorystate, thismemoryfunction will be
cancelledafterre-arm)
5.PHONE:PhoneLED,off indicatenormalstate,it
light whenthemainisdialing orphonecall in.
6.REC: RecordLED. It light whenrecording orplaying.
7.NumericLED:Whendisplay0-9, it indicatethiszonehavestatus(forexample: guardagainst theft alarming).
NumericLEDdisplays“.”Whenpanicalarm.
8.0-9、*、#、SET(functionsetting)、 HOME(homearm)、AWAY(awayarm)、CE(Exitsetting\returnprevious
menu)total16 keys forsystemsetting.
Operation function instruction
1.Switchon power,POWERandAWAYLEDlight,thecontrollergive ”Di”sound,andthenthedisplaywindowcount
down9,8,7 1, and thengive “DiDi”, thecontrollerenterworking state. Hereit hasbeeninarmedstate.Press the
“disarm”keyon remotecontrollertodisarmsystem. And thenyou can operatethemain.
2.press*key→inputoperationpassword(out factoryset to0000)DI —DI sound→press SETtoentersettingmode.
Specialattention: if themainalarmimmediatelyaftercounting down9,8,7 1(thewireddetector-- includethe
mainssensorhavebeentriggeredfalsely),hereyou needdisarmthesystem,and thencoverthedetection window
of themainwithopaqueobject(likeblack cloth), forotherwiredzonesyou shouldensurethemtonot triggered.
press*key→input operation password→press “SET”→“9”→“5”re-memorizeall wiredzonesstate.
3.setwireless fittingsinsetting mode,itcan setcontinuouslydivisionally.Thewireless fittingscan controlthemain
onlyaftersetting successfully.
4.Wireless zonehas0-9zones, everyzonecan beset toindoor/outdoor/24Hrzone/medicalalarmtype. The
numericLEDdisplaywireless zone “0/1/2…9”
LX-HS08 main (chargeablebatteryinclude)1pcs
Poweradapter(AC220VDC9V1A)1pcs
Wireless PIRdetectorLX-AL8(batteryinclude)1pcs
Wireless doormagnetismLX-DM1(batteryinclude)2pcs
4-keyremotecontrollerLX-FS4-V3(batteryinclude)2pcs
Phoneline 1pcs
SET
HOME
CE
AWAY
POWER
AWAY
HOME
FIRE
PHONE
REC
SET
HOME
CE
AWAY
POWER
AWAY
HOME
FIRE
PHONE
REC

5. Wiredzonehas1-4zones, everyzonecan beset toindoor/outdoor/24Hrzonetype. ThenumericLEDdisplay
wiredzone “1./2./3./4”. TheNo.1zoneismainssensor.
6. Armmode
a. All theday(24HR)panicforhelp(fireormedicalalarmzone)
b. Awayarm: all indoor, outdoorzonesbearmed
c. Homearm: outdoorzonebearmed. Whenindoordetectoristriggedthemainwill not alarm.
d. Disarm: cancelarm
7. Time-delaysetting: you can set thetime-delayfromthezonebetriggeredtothemainstart alarm, 0sec, 10sec,
20secforyourchoice.
8.Phonepathtroublealarmsetting: setwhetherthemainwillalarmornot whenthephonepathhastrouble.When
set thisalarmON, 2DI soundswill beheardevery20secwhenpathtroubleoccurred.
9. Dialmode(pulse/tone)can beselected.
10. Audible/inaudiblealarmcan beset.
11. DialON/OFF can beset.
12.Alarmmemoryfunction: afterzonetriggerthemain,themainwilldisplaythealarmedzonenumber. Thememory
isdeletedonlyafterre-arm.
13.automaticaldialfunction:
(1)speechweft and automaticallydialinstruction:
aThe1-4group numbersarespeechweft telephonenumber.Thenumberispermit15bitsatmost. Whenalarm,it
dialthis4group numbersinturnsuntil meet thephoneand confirm.
b. Theusershouldpre-set thetelephonenumberand thespeechweft information.
cif themainstelephonenumberisbusy, themainwill re-dialwhenthepathisfree.
dif thetelephonenumberbeing dialisbusy ornoneanswer, themainwill dialnext group numberafterplaying
speech5times.
eaftermeeting thephoneyou will hearcorresponding speechinformation, whenspeechstop playing ,you can
confirmbypressing thekeyon thephoneaccording tofollowing:
·press the “*”key, themainstopsalarming and you can monitorhearing thescenesound,after “DI”sound you
can press “*”keytocontinuehearing scenesound otherwiseit will automaticallyring off aftersometime.
·press the “0”key, themainstopsalarming and ring off automatically.
·press the “#”key, themainring off automaticallybut it still alarm.
·press the “7”key, themainring off automaticallyand disarm.
Attention:thetime-delayofpressing above keyshouldnotbebelow1sec, otherwise will beinvalid
(2)speechinformation record: you can pre-recordthespeechcontent(4sectsat most)
The1st sect isthecontent whenindoorzonealarm;
The2nd sect isthecontent whenoutdoorzonealarm;
The3rd sect isthecontent forfirealarmor24HR zonealarm
The4th sect isthecontent formedicalforhelp.
(3)Thespeechinformation will playwhenstatusoccursand dialedphoneismeet;
14.Long-distancesetting
Call themain→Afterhearing 6waiting forpicking up telephonesounds→“DIDI”→press *key→“DI”sound→
input 4-bit operation passwordon telephonekeypad(If input passwordcorrectly, you can hear “DIDIDIDI”sound.If
you inputitfalsely,DIDIDI soundwillbeheard.And youneedpress *keytore-inputit. You arepermittedtoinputfor
3times) →setbytelephonekeypad:NOTE:whenyou pressthekeyontelephonekeypad,you shouldwaiting
forDI sound toconfirmpressing keyeffective.
Press 0: ring off;
Press 9: homearm,onlyoutdoorzonesarmed, and indoorzonesnot armed
Press 6: awayarm, indoorand outdoorzonesarmed
Press 7: disarm
Press#: ring off and themainalarm
Press*: monitorhearing scene, afterDI sound, monitorhearing stop and then:
Press*: continuetomonitorhearing
Press0: ring off
Press#: themainalarmand ring off
Press1: returntoprevious.

press HOEM(setto indoorzone)
press AWAY(setto outdoorzone)
press *(setto fire alarmor24 HRzone)
press #(setto medicalalarm)
press 0 (deletezone)
press
1
(resumedeletedzone)
Press HOME(setto indoorzone)
press AWAY (setto outdoorzone)
press *(setto 24HRzone)
press 0(deletezone)
press 1 (resumedeletedzone)
Press 3
(Setwiredzone, total4zones)
Press 5
press#(set),andthenpress theremotecontroller
key, themaingiveDIsound and settingfinished.
press
0
(deletesetting)
Thentrigger
thezone,the
maingiveDIsound an
d
settingfinished.
Press 4 (setremotecontroller,
canset
total4pcs)
Function setting menu(you can operatefollowing onlyinsetting mode)
Press7disarm
Press8modifypassword, note:shouldinput same4-bit passwordtwicecontinually.
Press # (setthetime-delayfrom
wirelesszoneis
triggerdto themainstartalarm)
Press 0(time-delayis 0)
Press 1(time-delayis 10 sec)
Press 2(time-delay20 sec)
Press 1input TELNo. #to save,press 1# to delete
Press 2 input TELNo. # to save,press 2# to delete
Press 3input TELNo. #to save,press 3# to delete
Press 4input TELNo. # to save,press 4# to delete
Pres 0zone
Press 1zone
press 9zone
Press 0zone
Press 1zone
press 9zone
Press 1
press2
press3
press 4
press2
press3
press0(Telpath troublealarmOFF)
press1(Telpath troublealarmON)
press0(pulsedialling)
press1(tonedialling)
Press
1
(set telephone number)
Press 2
(set wireless zone, total 10 zones)
press6(record)
press1(indoorzonerecord)
press2(outdoorzonerecord)
press3(fire alarmrecord)
press4(medicalzonerecord)
press5(playall records)
Pres 1zone(
the
main ssensor)
Press 2zone
press 3zone
Press 4zone
Press # (setthetime-
delayfromwiredzoneis
triggerdto themainstartalarm)
Press 1zone(
the
main ssensor)
Press 2zone
Press 3zone
press 4zone
Press 0(time-delayis 0)
Press 1(time-delayis 10 sec)
Press 2(time-delay20 sec)
NOTE
:Press
key,therecordtimeis 5sec;ifyou
want tokeeponrecording,you shouldpress and
hold key, therecordtimeis 15sec.

press AWAY(awayarm, indoorand outdoorzonearmed)press0(quickarm)
press1(delayarm)
press HOME(homearm, onlyoutdoorzonearmed, and indoorzonenot armed)
press 9 ——
NOTE:1. Onaboveanystep, pressingCEkeycanreturnto previous.
Function setting mode
(thefollowing isoperatedinsetting mode,ifyou don toperateitalways,after20sec itwill exitthesetting
mode )
NOTE:insetting mode, pressing CEkeycanreturntoprevious.
(1)entersetting mode
Operation program Voiceprompt /LEDstate
*operation password(it is0000 when
out-factory)SET ①2DI soundsconfirmthepassword;
②1DI sound will beheardwhenentersetting
mode.
(2)set/ modifytelephonenumber
Operation program Voiceprompt /LEDstate
11-4(group)TELnumber# ①numericLEDwill displaythesavednumber
once;
②if youneedmodifythenumber,pleaserepeatto
operatethisprogram;
③Thenumberispermit 15bitsat most.
(3)deletetelephonenumber
Operation program Voiceprompt /LEDstate
11-4# 2 DI soundswill beheard
ExampleResult and remarks
13# Deletethe3rd number
press
1
(
setwhether themaingive
alarmsound after beingtriggered
bywiredzone)
Press 1zone(themain ssensor)
Press2zone
Press 3zone
Press 4zone
press0(inaudiblealarm)
press1(audiblealarm)
press
2
(
setwhether themaingive
alarms
oundafter beingtriggered
bywireless zone)
Press 0zone
Press 1zone
Press 9zone
press0(inaudiblealarm)
press1(audiblealarm)
press
3
(
setwhether themain
dialafter beingtriggeredby
wiredzone)
Press 1zone(themain ssensor)
Press 2zone
Press 3zone
Press 4zone
press0(dialingOFF)
press1(dialingON)
press
4
(
setwhether the
maindialafter being
triggeredbywireless zone)
Press 0zone
Press 1zone
Press 9zone
press0(dialingOFF)
press1(dialingON)
press
5
Re-memorize wiredzone sstateand neednot re-switchoff and on power.

(4)setwireless zone: Thewireless zonecan controlthemainonlyaftersetting.
Operation program Voiceprompt /LEDstate
20-9(zone)HOME:set toindoorzone
AWAY :set tooutdoorzone
*:set tofireor24HR zone
#: set tomedicalzone
And thentriggerthewireless detectoremit
signaltothemain. 1DI sound will beheardand
setting successfully.
Example Result and remarks
21AWAY SensetheLX-AL8 and makeit emit signal. 1DI
sound willbeheard.SothisLX-AL8issettoNo.1
zoneand isoutdoorzone
Setwireless zoneattention:
◇Ifthezoneshavingset needsettoanothertype,atfirstyoushoulddeletethezonehaving set andthenre-setto
anothertype.
◇If thecodingofthezoneneeding settingissameasthecodingof zonehavingset,during setting “DiDi…” sound
will beheard, and thenumericalLEDdisplaythezonenumberHaving set, thezonecan not beset. Hereyou
can reviseitscoding ordeletethezonehaving set and thenre-set).
(5)deletewireless zone
Operation program remarks
20-9(zone)0 Deletewireless zone
(6)resumedeletedwireless zone
Operation program remarks
20-9(zone)1 Resumedeletedwireless zone
(7)wireless zonetime-delaysetting
Operation program remarks
2#0-9(zone)0(0sec)
1(10sec)
2(20sec)
Setthetime-delayfromwireless zoneistriggered
tothemainstart alarm
8)setwiredzone
Operation program remarks
31-4(zone)HOME: set toindoorzone
AWAY :set tooutdoorzone
*: set to24HR zone
Set thetypeof wiredzonehaving
connectedwiththemain
NOTE: No.1zoneisthemainssensor.
(9)deletewiredzone
Operation program remarks
31-4(zone)0 Deletewiredzone
(10)resumedeletedwiredzone
Operation program remarks
31-4(zone)1 Resumedeletedwiredzone
(11)wiredzonetime-delaysetting
Operation program remarks
3#1-4(zone)0(0sec)
1(10sec)
2(20sec)
Setthetime-delayfromwiredzoneistriggeredto
themainstart alarm
(12)setremotecontroller theremotecontrollercan controlthemainonlyaftersetting.
Operation program Voiceprompt /LEDstate
41-4#And thenpress theemitting key, 1DI sound will
beheardand setting successfully.
Setremotecontrollerattention:
◇You can set 4-group remotecontrollerswithdifferent coding.
◇Iftheremotecontrollershavingsetneedsettoanothernumber,you shoulddeletetheremotecontrollershaving
set and thenre-set again.
◇If thecoding of theremotecontrollersneeding setting issameasthecoding of remotecontrollershaving set,
during setting “DiDi…” soundwillbeheard, and thenumericalLEDdisplaytheremotecontrollersnumberhaving set,
theremotecontrollerscannot beset.Hereyou canreviseitscodingordeletetheremotecontrollershavingsetand
thenre-set).
(13)deleteremotecontroller
Operation program Voiceprompt /LEDstate
41-40 2 DI soundsconfirmdeleting

(14)Tel pathtroublealarmsetting
Operation program remarks
520(OFF)
1(ON)set whetherthemainwill alarmornot whenthe
phonepathhastrouble. Whenset thisalarm
ON, 2DI soundswill beheardevery20sec
whenpathtroubleoccurred.
(15)dial-umodesetting
Operation program remarks
530(pulse)
1(tone)Set pulse/ tonedial-up mode
(16)speechinformation record: you can pre-recordthespeechcontent(4sectsat most)
Operation program
61indoorzonerecord(example: herestatusoccur, pleasesuccor)
2outdoorzonerecord(example: robberenter, pleasecall thepolice)
3firealarmor24HR zonerecord(example: fireoccur, pleasesuccor)
4medicalzonerecord(pleasecall ambulance)
Voiceprompt/LEDstate
RECLEDlight,1DI sound promptyoustartrecording,facingthemainleavesthewords,1DI
soundpromptrecordtimeover.Afterrecordfinished,Therecordedcontentwillbeplayed
automaticallyonce.
NOTE:◇recordtimedefaultis5sec,ifyou wanttokeepon recording,you shouldpress and
holdthekey.Therecordtimeis15sec.
◇thesystemonlysavethelast recordedcontent of everysect.
(17)playall records
Operation program Voiceprompt/LEDstate
65Example, themainwill playinturns:
herestatusoccur, pleasesuccor(numericLEDdisplay”1”);
robberenter,pleasecallthepolice(numericLEDdisplay”2”);
fireoccur, pleasesuccor(numericLEDdisplay”3”);
pleasecall ambulance(numericLEDdisplay”4”).
(18)disarm
Operation program Voiceprompt/LEDstate
7 2 DI sound will beheard
(19)modifyoperatepassword
Operation program Voiceprompt/LEDstate
8 You needinputsamenewpassword(4-bit)twice,
afterinputting thenumericLEDwilldisplaythenew
passwordonce.
(20)awayarm
Operation program Voiceprompt/LEDstate
AWAY 0(quick arm)
1(delayarm)Quickarm:1DI soundenterarmstate,AWAYLED
light.
delayarm:numericLEDflash,AWAYLEDlight,
after60sec, 1DI sound enterarmstate
(21)homearm
Operation program Voiceprompt/LEDstate
HOME1DI sound enterarmstate, HOMELEDlight.
(22)wiredzoneinaudible/audiblealarmsetting
Operation program remarks
911-40inaudiblealarm
1audiblealarm Setwhetherthemaingivealarmsoundornot
whenwiredzoneistriggered.
(23)wireless zoneinaudible/audiblealarmsetting
Operation program remarks
920-90inaudiblealarm
1audiblealarm Setwhetherthemaingivealarmsoundornot
whenwireless zoneistriggered.
(24)setwhetherthemaindial ornotwhenwiredzonebetriggered
Operation program remarks

931-40dialOFF
1dialON setwhetherthemaindialornotwhenwiredzone
betriggered
(25)setwhetherthemaindial ornotwhenwireless zonebetriggered
Operation program remarks
940-90dialOFF
1dialON set whetherthemaindialornot whenwireless
zonebetriggered
(26)re-memorizewiredzone sstate
Operation program Voiceprompt/LEDstate
95 1 DI sound confirm.
Specialattention: if themainalarmimmediately
aftercounting down9,8,7 1(thewireddetectors
havebeentriggeredfalsely), hereyou needdisarm
thesystem, and ensurewiredzonesnot be
triggered. Thenaccording tothismethod
re-memorizeall wiredzonesstate.
InteriorPCB configure
1.Stand bypowerjack;
2.DC powerinputterminal,connect
withpoweradapter; theadapter
requires: input 230VAC, output
9VDC, and current 1000mA.
During ACpowerison, standby
batterywill becharged
automatically. WhenACpower
cut off, theproduct works by
standbybatteryentirely.
3.Phonelinejack: providefor
out-connect automaticdial-up forhelp;
4.Connect wiredfittings, pleasereferencetheinstruction of out-connect wiredfittings;
5.DC9Vpoweroutput terminal,do not usetheterminalforpowersupplyaspossibleasyou can;
6.Adjustableinductance;
7.Receiving module;
8.Speechmodule
9.CPU
Out-connectwiredfittings(see theleft figure)
1. CH2-GND, CH3-GND, CH4-GND terminal----channel2~4, connect wired
detector soutput terminal, NOTE:switchon power, thereareabout45
secondsforall out-connectwiredzones toenterstablestate.Afterthis
time-delay,themainwillmemorizeall wiredzones on “notalarm”state.
attention:during this45sec time-delay, you shouldnottriggerany
zone,otherwise themainwill memorizezones being triggeredstateto
“notalarm”statefalsely.Ifmemorizefalsely,you canswitchoff power
and thenswitchon powertore-memorize;
2. “ALARMGND”terminal----connect withsiren(voltageDC12V, current
<800mA), ALARMwithsiren”+”, GND withsiren “-“;
3. “+9v –OUT “terminal---poweroutputterminal.Thatcan supplypowerfor
wireddetector, but you shouldnot usetheterminalforpowersupplyas
possibleasyou can.
Themain sinstallation
⑴opentheunit byun-tightenthe2screwsfixing thefront and back coverwithscrewdriver(see fig.1);
⑵inset thestandbypowerplug intothestandbypowerjack(see the1of InteriorPCBconfigure), put outerwire
through theout-lineholeand connect wireaccording totheout-connect wiredfittingsfigure;
⑶according tofig.2install theback coveron theinstallation position;
⑷closefront cover, and thentightenup screwstolock thefront and back cover(see fig.3)。
9
45
3
21
6
8
7
TAMPERRELAY
12VDC+
_
LX-AL6
内部
PCB
RELAY
_+TAMPER
-2
2
4
0
-6
-4
OFF
LED PULSEON 3 1
+ -

warning:duringyou opentheunittoinstall,donottouchtheadjustableinductanceonPCB(seethe6
oftheinteriorPCB configure),otherwise thatwilleffectthemain sreceiving frequencyand leadits
receiving distancebecomeshort.Ifyou find thereceivingdistance isshort,maybeyou have touched
theinductance. Herewesuggesttheprofessional installation person micro-adjusttheinductance.
4-key remotecontroller LX-FS4-V3
1.specification
①power:DC3V(lithiumbattery)
②staticcurrent: <1μAemitting current:<8mA
③remotecontroldistance: ≥30m(wideplace)
2.operate
①at first set itscode. It adaptsfree coding. Thecoding method: tightenoff the
basescrewand openit, press and holdanyemission keyand theninstall battery,
heretheLEDflashindicating it iscoding. Thecoding isconfirmedwhenyou
loosenthekey.(if you find remotecontrollershaverepeat codlings, you can
re-codeaccording abovemethod).
②wireless setting:Enter “setremotecontroller”insettingmode,press any
emitting keytomakeitemitsignal,and themainwillgive1DIsound,setting
successfully.
③keyfunction:
◇pushup thepanickey, themaingivepanicalarm, and alsoit dialnumbersbyturns.
◇Press armkey: Away/homearm, thecorresponding HOME,AWAY LEDlight.
◇Press disarmkey: Cancelarm, and alsocan intermit alarming and dialing.
◇Press delayarmkey:themaingiveDI—DIsound,andafter60sec,DIsound willbeheardagain,enterarmed,
AWAY LEDlight.
Wireless PIRdetectorLX-AL8
1.specification
power:DC9V6F22 batterydetect angle:110°
staticcurrent:30μAremotecontroldistance:≥30m(wideplace)
detect distance:12minstallation height:2m
2.function
①prevent false-alarmfunction: you can set senseonce/twicetoemit;
②sense、emission LED
③Low-batteryLED:Whenbatteryenergyisbelow7V, thelow-batteryLEDwillflashoncea
second and remind you replacebattery.
3.jumpersetting(see rightdiagram)
①senseoncetoemit:
Senseonce, theunit emitsignal,15seclaterafterit emit signal.
Senseit onceagain, theunit emit signalagain;
②sensetwicetoemit:
Sensetwice,theunitemitsignal,15seclaterafterit
emitsignal.Senseittwiceagain,theunitemitsignal
again; thissetting enhanceitspreventing false-alarmand
preventing-pet function.
4.operateand install
◇switchon 9Vbattery, after60sectheunit enterworking state;
Fig.1 Fig.2 Fig.3
134MM
77MM
83MM
AUTO
DIPswitch SenseLED
PIR
Jumper
AUTO / 1 AUTO / 1
1
EmitLED
Sense
onceto
emit
Sense
twiceto
emit
Low-batteryLED
panic
disarm
delayarm
arm pushup

◇set itscoding byDIPswitch;
◇wireless setting:Enter “setwirelesszone”insettingmode,swayyourhandinfrontofthedetectingwindowto
makeit emit signal, and themainwill give1DI sound, setting successfully.
◇wesuggestitshouldbeinstalledindypass,living room,resideroometcarea,and installiton high place.Its
detecting windowshouldfacethedetection range.
◇Avoidinstalling theunit on metalbase;
◇Avoidinstallingtheunitwheresunshineortemperaturechangeobviously,forexample:airconditioning,heater
etc.
Wireless doormagnetismLX-DM1
1.specification
①power:DC12VA23 battery
②staticcurrent: 0μAemission current: <8mA
③remotecontroldistance: ≥30m(wideplace)
2.function
①it transmit thesignalof thedoor/ windowsopening orclosing tothemain;
②Tamperdesign: Underthecondition that thetriangleon emitteraimsattriangleon magnetism,whenthebattery
lidisremoved, it will emit signaltothemain.
3.operate
①Set itscoding byDIPswitch;
②Wireless setting:enter “setwireless zone”insetting mode,thetriangleonemitteraimsattriangleonmagnetism,
put awaythemagnetismoremittertomakeit emit signal, and themainwill give1DI sound, setting
successfully.
4.Installation attention
◇Installmagnetismand emitteronuprightpositionofdoorlock,thedistancebetweenthemis3mm~5mm and
triangleon emitteraimsat triangleon magnetism(likeleft following figure);
◇Themagnetismshouldbeon theleft of theemitter(likeright following figure).
3mm~5mm
correct using incorrectusing
Table of contents
Other Lexing Security System manuals
Popular Security System manuals by other brands

Response
Response ML6 Installation and operating instructions

Adiant Mobile
Adiant Mobile LifeBeacon quick start guide

Emergency Caller Products
Emergency Caller Products EC-4 Programming Quick Reference Guide

Axis
Axis FA54 user manual

Risco
Risco Agility 3 Installer manual

M-system
M-system 48NDT instruction manual