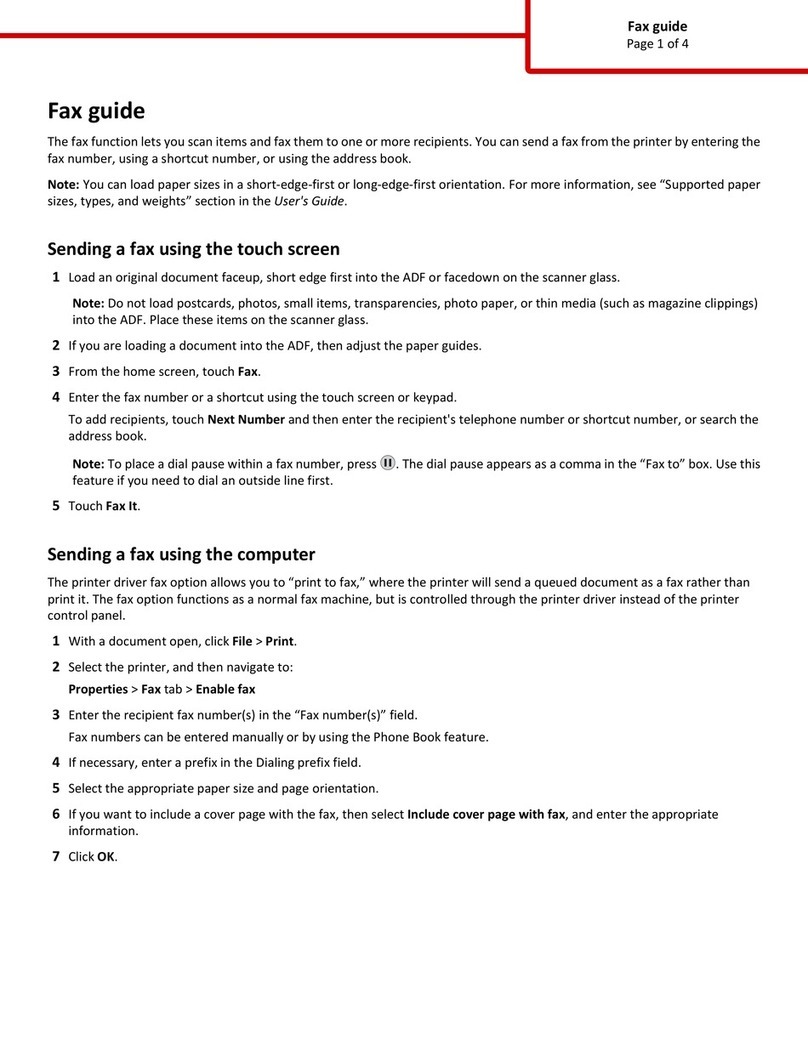
manuals.online logo
Brands
  1. Home
  2. •
  3. Brands
  4. •
  5. Lexmark
  6. •
  7. All In One Printer
  8. •
  9. Lexmark 4200 Series Manual

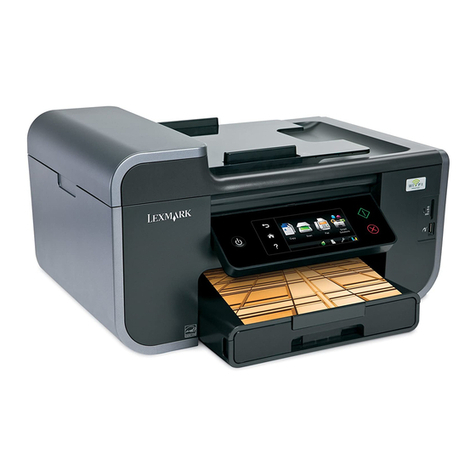
Lexmark 4200 Series Manual

Other manuals for 4200 Series

3

Other Lexmark All In One Printer manuals

Lexmark X642E User manual

Lexmark

Lexmark X642E User manual

Lexmark X792 Technical manual

Lexmark

Lexmark X792 Technical manual

Lexmark X746 User manual

Lexmark

Lexmark X746 User manual

Lexmark X792de Owner's manual

Lexmark

Lexmark X792de Owner's manual

Lexmark Platinum Pro905 User manual

Lexmark

Lexmark Platinum Pro905 User manual

Lexmark 6500E User manual

Lexmark

Lexmark 6500E User manual

Lexmark S315 User manual

Lexmark

Lexmark S315 User manual

Lexmark 3400 User manual

Lexmark

Lexmark 3400 User manual

Lexmark X95 series User manual

Lexmark

Lexmark X95 series User manual

Lexmark Clinical Assistant X646dte User manual

Lexmark

Lexmark Clinical Assistant X646dte User manual

Lexmark MB2236 User manual

Lexmark

Lexmark MB2236 User manual

Lexmark MX810 Series User manual

Lexmark

Lexmark MX810 Series User manual

Lexmark 8300 Series Manual

Lexmark

Lexmark 8300 Series Manual

Lexmark Pro715 User manual

Lexmark

Lexmark Pro715 User manual

Lexmark X544 Operating manual

Lexmark

Lexmark X544 Operating manual

Lexmark XC2335 User manual

Lexmark

Lexmark XC2335 User manual

Lexmark CX942 User manual

Lexmark

Lexmark CX942 User manual

Lexmark 940e - X Color Laser User manual

Lexmark

Lexmark 940e - X Color Laser User manual

Lexmark X792 User manual

Lexmark

Lexmark X792 User manual

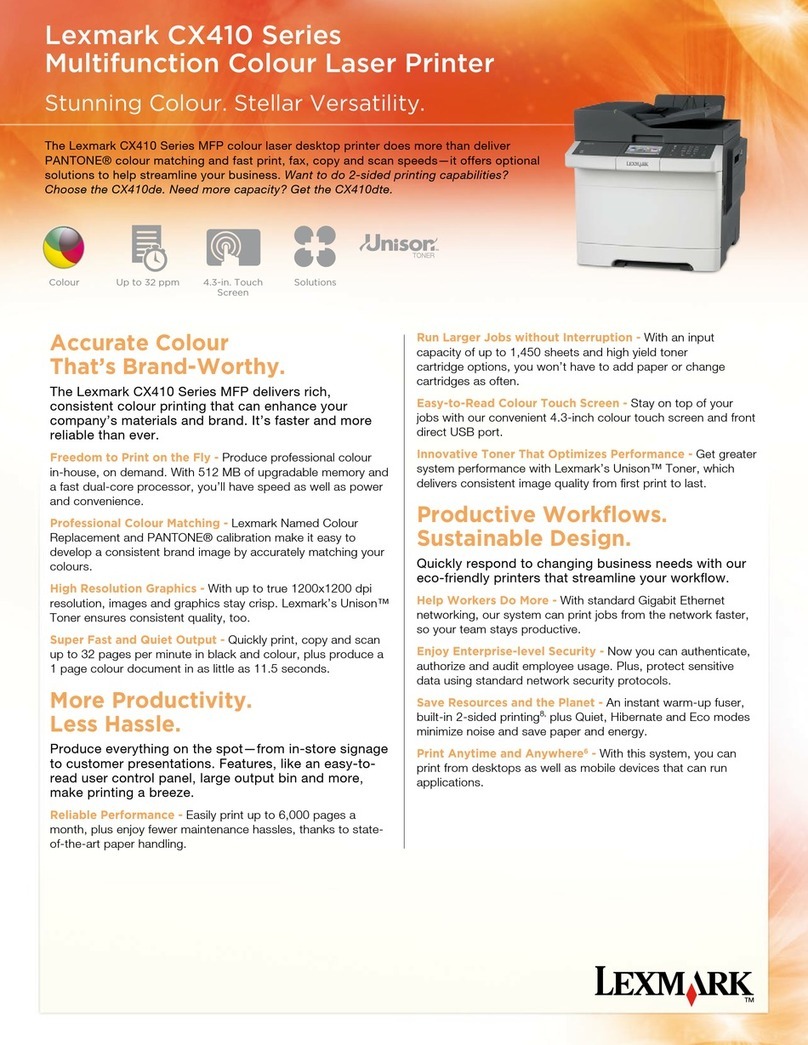
Lexmark CX410 series User manual

Lexmark

Lexmark CX410 series User manual

Lexmark XM1145 User manual

Lexmark

Lexmark XM1145 User manual

Lexmark X782 Operator's manual

Lexmark

Lexmark X782 Operator's manual

Lexmark 1200 Series User manual

Lexmark

Lexmark 1200 Series User manual

Lexmark X543DN User manual

Lexmark

Lexmark X543DN User manual

Popular All In One Printer manuals by other brands

Brother MFC-J220 Basic user's guide

Brother

Brother MFC-J220 Basic user's guide

Brother MFC-8510DN Basic user's guide

Brother

Brother MFC-8510DN Basic user's guide

Ricoh Aficio FX200 Service training

Ricoh

Ricoh Aficio FX200 Service training

Olivetti d-Copia 16W Operation manual

Olivetti

Olivetti d-Copia 16W Operation manual

Konica Minolta bizhub C3850FS user guide

Konica Minolta

Konica Minolta bizhub C3850FS user guide

Konica Minolta bizhub 758 manual

Konica Minolta

Konica Minolta bizhub 758 manual

Ricoh Aficio 3224C operating instructions

Ricoh

Ricoh Aficio 3224C operating instructions

Sagem MF 3625 user manual

Sagem

Sagem MF 3625 user manual

Epson Epson Stylus NX530 quick guide

Epson

Epson Epson Stylus NX530 quick guide

Brother MFC9800 - MFC 9800 B/W Laser owner's manual

Brother

Brother MFC9800 - MFC 9800 B/W Laser owner's manual

Konica Minolta 7033 instruction manual

Konica Minolta

Konica Minolta 7033 instruction manual

Ricoh Aficio MP 161F operating instructions

Ricoh

Ricoh Aficio MP 161F operating instructions

Epson WorkForce WF-2510 Basic guide

Epson

Epson WorkForce WF-2510 Basic guide

Epson Stylus Scan 2000 Product information guide

Epson

Epson Stylus Scan 2000 Product information guide

Epson PictureMate Snap PM 240 Start here

Epson

Epson PictureMate Snap PM 240 Start here

Brother MFC-J430w user guide

Brother

Brother MFC-J430w user guide

Konica Minolta BIZHUB 558 Quick reference guide

Konica Minolta

Konica Minolta BIZHUB 558 Quick reference guide

Brother MFC-9760 owner's manual

Brother

Brother MFC-9760 owner's manual

manuals.online logo
manuals.online logoBrands
  • About & Mission
  • Contact us
  • Privacy Policy
  • Terms and Conditions

Copyright 2025 Manuals.Online. All Rights Reserved.

4200 Series Setup/ 安装指南 /安裝指南 /ติดตั้ง 4200 Series
Safety information
• Use only the power supply provided with this product, or the manufacturer’s authorized replacement power
supply.
• Connect the power supply to an electrical outlet that is near the product and easily accessible.
• Refer service or repairs, other than those described in the user documentation, to a professional service person.
CAUTION: Do not use the fax feature during a lightning storm. Do not set up this product or make any electrical or
cabling connections, such as the power cord or telephone, during a lightning storm.
安全信息
• 请只使用随同此产品提供的电源,或者使用经过厂家认证的电源作为替代。
• 电源线要连接在距离此产品尽量近的电源插座上,以便于使用。
• 如果需要服务或维修,除参考操作说明书以外,也可以向专业的服务人员请教。
当心:请不要在雷雨天气时使用传真功能。请不要在雷雨天气时安装此产品,或者进行任何的电线 /电缆连接 (电
源线,电话线等 )。
安全資訊
• 僅使用本產品所提供的電源供應器或製造商授權的替換電源供應器。
• 電源線所連接的電源插座與產品的距離不可太遠,且必須方便使用。
• 有關服務或維修的事項,除了參考本使用者說明文件所提供的說明之外,您可以向專業維修人員尋求協助。
請當心: 請勿在雷雨天氣時使用傳真功能。在雷雨期間,請勿安裝本產品,或進行任何電器或電纜接線工作,例如
電源線或電話線。
ขอมูลเพื่อความปลอดภัย
•ใหใชแหลงจายไฟที่ใหมาพรอมกับตัวผลิตภัณฑนี้เทานั้น หรือแหลงจายไฟทดแทนจากแหลงผลิตที่ไดรับการอนุญาต
•เชื่อมตอแหลงจายไฟเขากับปลั๊กจายไฟฟาซึ่งอยูใกลตัวเครื่องและสามารถตอไดโดยสะดวก
•สําหรับการใหบริการหรือซอมแซมอื่นใดที่นอกเหนือไปจากที่อธิบายไวในคูมือการใชกรุณามอบหมายใหเปนหนาที่ของชางบริการมืออาชีพ
ขอควรระวัง:หามใชคุณสมบัติของโทรสารในระหวางมีพายุฟาคะนอง หามติดตั้งผลิตภัณฑนี้
หรือเชื่อมตอสายเคเบิ้ลหรือสิ่งที่เกี่ยวกับไฟฟาในระหวางมีพายุฝนฟาคะนอง เชนสายไฟ หรือสายโทรศัพท
2Connect the power supply and the telephone line.
If you need to connect your All-In-One to an external device, such as an answering machine,
refer to your User’s Guide.
连接电源线和电话线。
如果您需要将您的多功能一体机连接到外接设备上,例如电话答录机,请参阅您的
用户手册
。
連接電源供應器和電話線。
如果您需要將 「多功能複合機」連接到外部裝置,如電話答錄機,請參閱
用戶手冊
。
เสียบสายไฟ และสายโทรศัพท
ถาทานตองเชื่อมตอ All-In-One เขากับอุปกรณภายนอก, เชน เครื่องตอบรับอัตโนมัติ, ใหอางอิงจาก
คูมือผูใช
1
2
3Lift the paper supports and extend the paper exit tray.
打开纸张支架并拉开出纸托盘。
掀開紙張托架,並且將出紙拖盤拉出。
ดึงตัวหนุนกระดาษ และขยายถาดทางออกของกระดาษ
Unpack the All-In-One.
Note: Your model may not include a handset.
打开多功能一体机的包装。
注意: 您的型号可能不带有电话听筒。
拆開 「多功能複合機」的包裝。
請注意: 您的型號可能不含電話聽筒。
แกะกลอง All-In-One
หมายเหตุ:รุนของทานอาจจะไมไดใหหูฟงโทรศัพทมาดวย
1
Enslish
简体中文
繁體中文
ไทย
4Remove the overlay, if necessary.
如果需要,去掉面板覆盖层。
移除面板蓋 (如有必要)。
นําหนากากของเครื่องออก ถาจําเปน 5Add an overlay, if necessary.
如果需要,增加面板覆盖层。
新增面板蓋 (如有必要)。
ปดหนากากของเครื่อง ถาจําเปน
1
21
2
www.lexmark.com
© 2004 Lexmark International, Inc. All rights reserved.
8Press to scroll, and then press Select to enter your default
language, and then your default country.
连续按 按钮,然后按 Select ( 选择 ) 按钮,输入您的默认语言。
同样方法输入您的默认国家 /地区。
按下 加以捲動,然後按下 Select (選取)按鈕,輸入預設語
言,接著輸入您的預設國家 /地區。
กด เพื่อเลื่อน และกด Select (เลือก) เพื่อปอนภาษาที่ใชปกติของทาน และระบุประเทศของทาน
11 Open the control panel and the cartridge access door.
打开操作面板和墨盒保护门。
打開操作面板與墨水匣門。
เปดฝาแผงควบคุม และชองใสกลักหมึก
9Use the keypad to enter the date, format, time, name, and fax number. Press Select after each
entry.
To enter text, press the corresponding keypad number until the desired character appears.
使用数字符号键区的按钮输入日期、格式、时间、姓名、和传真号码。每一项输入完毕后按
Select ( 选择 )按钮。
如要输入文字,连续按相应的数字按钮,直到正确的字母出现在显示屏上。
使用數字符號按鍵區,輸入日期、格式、時間、名稱以及傳真號碼。為每個項目輸入資料後,按下
Select (選取)。
若要輸入文字,請按下對應的數字符號按鍵區號碼,直到所要的字元出現。
ใชแปนตัวเลขเพื่อปอนวันที่ รูปแบบ เวลา ชื่อ และ หมายเลขโทรสาร กด Select (เลือก) ภายหลังการปอน
ถาตองการปอนตัวหนังสือ ใหกดแปนตัวเลขที่เหมาะสมจนกระทั่งอักษรที่ตองการปรากฏ.
10 Load plain paper and adjust the paper guide.
装入普通纸,然后调节进纸导轨到适当的位置。
載入普通紙,並調整紙張導引夾至適當的位置。
ปอนกระดาษธรรมดา และปรับตัวนํากระดาษ
7Make sure the power is on.
确认多功能一体机的电源已打开。
確定電源已開啟。
ตรวจดูใหแนใจวาเปดเครื่องอยู
6Attach the handset to the All-In-One, if your model includes a
handset.
如果您的型号带有电话听筒,将电话听筒连接在多功能一体机上。
如果您的機種含有電話聽筒,請將電話聽筒連接到 「多功能複合
機」。
ถาเครื่องของทานมีหูฟงโทรศัพทใหมาดวย ใหตอเขากับ All-In-One
16 Press Select to align the cartridges.
按Select ( 选择 ) 按钮校正打印墨盒。
按下 Select (選取)按鈕,以校正墨水匣。
กด Select (เลือก) เพื่อปรับกลักหมึกใหเขาที่
15 Press Select, and then press to scroll through the color cartridge numbers.
Press Select to verify the color cartridge you installed.
Repeat this step for the black cartridge.
按Select ( 选择 ) 按钮,后连续按 按钮滚动显示彩色打印墨盒的产品编号。
按Select ( 选择 ) 按钮确认您所安装的彩色打印墨盒。
重复以上的步骤设置黑色打印墨盒。
按下 Select (選取)按鈕,然後按下 ,來捲動彩色墨水匣號碼。
按下 Select (選取),來驗證您安裝的彩色墨水匣。
接著為黑色墨水匣重複這個步驟。
กด Select (เลือก), และกด เพื่อเลื่อนไปยังหมายเลขกลักหมึกสี
กด Select (เลือก) เพื่อตรวจสอบกลักหมึกสีที่ทานติดตั้ง
ทําซ้ําขั้นตอนนี้สําหรับกลักหมึกสีดํา
14 Close the cartridge access door and the control panel.
关闭墨盒保护门和操作面板。
關上墨水匣門與操作面板。
ปดฝาของชองกลักหมึก และฝาแผงควบคุม
17 Attach the Automatic Document Feeder (ADF) exit tray.
安装自动文档传送器 (ADF) 输出托盘。
裝上並連接 「自動送件器」 (Automatic Document Feeder, ADF)
出紙匣。
ติดถาดทางออกที่ดึงกระดาษอัตโนมัติ(ADF)
13 Insert the cartridges.
装入打印墨盒。
插入墨水匣。
ใสกลักหมึก
2
1
12 Remove the sticker and tape from the print cartridges.
撕掉打印墨盒底部的透明封条。
撕下墨水匣上的貼紙和膠帶。
ดึงสติกเกอรและเทปออกจากกลักหมึกพิมพ
Insert the CD. Follow the instructions on the screen to install the software.
If the CD does not automatically run:
1 Click Start Run.
2 Click Browse.
3 Select the Lexmark CD located in your CD-ROM drive, and then click OK.
4 Follow the instructions on the screen to install the software.
插入软件光盘。按照计算机屏幕上的提示安装软件。
如果软件光盘没有自动运行:
1 点击开始 运行。
2 点击 “浏览”。
3 选择您的光盘驱动器中的 Lexmark 软件光盘,然后点击 “确定”。
4 按照计算机屏幕上的提示安装软件。
插入光碟。請遵循畫面上的指示,來安裝軟體。
如果光碟無法自動執行:
1 按一下開始 執行。
2 按一下瀏覽。
3 選取位在您光碟機中的 「Lexmark 光碟」 CD,然後按一下確定。
4 請遵循畫面上的指示,來安裝軟體。
ใสแผนซีดี ทําตามคําสั่งที่อยูบนหนาจอเพื่อติดตั้งซอฟทแวร
ถาหากซีดีไมทํางานโดยอัตโนมัติ:
1คลิก Start Run
2คลิก Browse
3เลือกซีดีของ Lexmark ที่อยูในไดรฟซีดีรอม แลวคลิก OK
4ทําตามคําสั่งที่อยูบนหนาจอเพื่อติดตั้งซอฟทแวร
21
Important!
Click Cancel on all New Hardware screens.
重要!
请在
所有
的 “新硬件”界面中点击 “取消”。
重要事項!
在
所有
「加入新的硬體」畫面上,按一下取消。
สําคัญ!
คลิก Cancel (ยกเลิก)บน หนาจอ ทั้งหมดของ New Hardware
Connect the USB cable to the computer and to the All-In-One.
使用 USB 电缆连接计算机和多功能一体机。
將USB 電纜連接到電腦和 「多功能複合機」。
ตอสาย USB เขากับคอมพิวเตอรและ All-In-One
19
Make sure the computer is on.
确认计算机的电源已打开。
確定已開啟電腦的電源。
ตรวจดูใหแนใจวาเปดเครื่องอยู
18
20
If you are using your All-In-One with a computer, continue with the following steps.
如果您希望
连接
计算机使用您的多功能一体机,请继续完成下面的步骤。
如果您想
透過
電腦使用 「多功能複合機」,請繼續下列步驟。
ถาทานกําลังใชงาน All-In-One พรอมคอมพิวเตอรใหทําตามขั้นตอนตอไป
If you are using your All-In-One without a computer, you are finished.
如果您希望
不连接
计算机单独使用您的多功能一体机,您已经完成了安装。
如果您
不想透過
電腦使用 「多功能複合機」,便算完成作業。
ถาทานกําลังใชงาน All-In-One โดยไมใชคอมพิวเตอรการติดตั้งของทานเสร็จเรียบรอยแลว