manuals.online logo
Brands
  1. Home
  2. •
  3. Brands
  4. •
  5. Lexmark
  6. •
  7. All In One Printer
  8. •
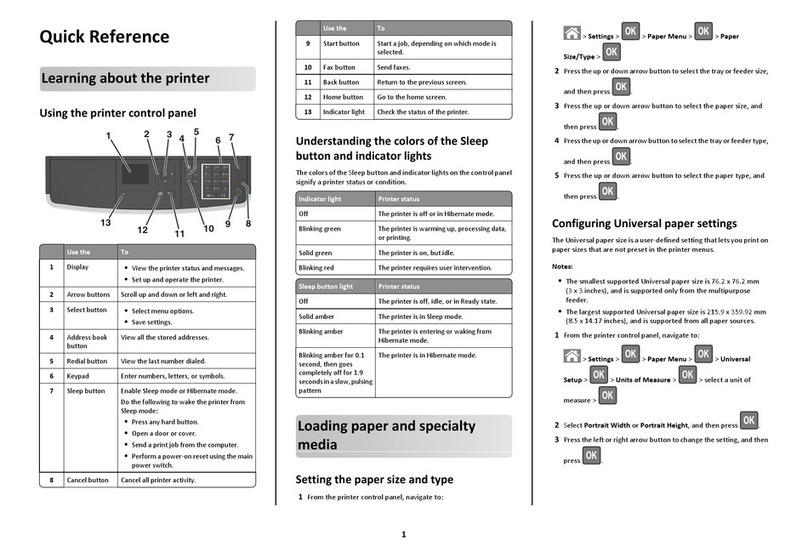
  9. Lexmark 4300 User manual

Lexmark 4300 User manual

Lexmark Confidential until announced
Note: Contents may vary.
Remarque : Le contenu de l'emballage peut varier.
4300 Series All-In-One / Tout en un 4300 Series
Lift the paper support, and extend
the paper exit tray.
Redressez le support papier
et déployez le bac de sortie.
Load plain paper.
Chargez du papier ordinaire.
?
??
?
??
*22D0077*
Open the cartridge lids, insert the cartridges, and snap the lids closed.
Ouvrez les couvercles des cartouches, insérez celles-ci et refermez les
couvercles d'un coup sec.
123
Left:
A gauche : Right:
A droite :
Lower the paper feed guard, squeeze the
paper guide, and slide it to the left edge of
the paper.
Abaissez le guide papier, exercez une
pression dessus, puis faites-le glisser
jusqu'au bord gauche du papier.
1
2
3
2
1
Prepare the All-In-One
Préparez l'imprimante Tout en un
3
1
Load paper
Chargez du papier
23
Unpack the All-In-One
Déballez l'imprimante Tout en un
2
Install the print cartridges
Installez les cartouches d'encre
3Close the scanner unit.
Fermez l'unité du scanner.
1
2
3
Press the right arrow button to scroll to
your language, and then press Select.
Appuyez sur la touche de la flèche vers
la droite pour afficher la langue voulue,
puis sur la touche Sélectionner.
2
1
4Press Select to print an alignment
page.
Appuyez sur la touche
Sélectionner pour imprimer
une page d'alignement.
You may discard the alignment
page after it prints.
Une fois la page d'alignement
imprimée, vous pouvez vous
en débarrasser.
Place the stored cartridge in the
storage area of the All-In-One.
Placez la cartouche ainsi
rangée dans la zone de stockage
de l'imprimante Tout en un.
Keep a new or partially
used cartridge in the print
cartridge storage unit.
Conservez toute
cartouche neuve ou
partiellementutiliséedans
son unité de stockage.
12
Cartridge storage
Stockage des cartouches
12
3 5 Prepare the print cartridges
Préparez les cartouches
Remove the sticker and tape from the print
cartridges.
Retirez l'autocollant et la bande protectrice
des cartouches.
Warning: Do not touch the copper contact area on
the back or the metal print cartridge nozzles on the
bottom.
Avertissement : Ne touchez pas la zone de contact
dorée qui se trouve au dos des cartouches ni les
buses que vous trouverez au bas de celles-ci.
2
11
2
1
2
Remove the photo cartridge
from the print cartridge
storage unit.
Retirez la cartouche photo
de l'unité de stockage des
cartouches.
Lift the scanner unit.
Soulevez l'unité du scanner.
1
6
If you are using the
All-In-One with a computer, continue
with “Install the software”...
Si vous utilisez l'imprimante
Tout en un avec un ordinateur, passez
à l'étape « Installez le logiciel. ».
213
or
ou
1
Select a language
Sélectionnez une langue 4
Connect the power cord.
Branchez le cordon d'alimentation. Makesure thePower
light is on.
Assurez-vous que le
voyant de mise sous
tension est allumé.
Install the control panel, if necessary.
Installez le panneau de commandes,
si nécessaire.
2
Lexmark Confidential until announced
P/N 22D0077 E.C. 5Z0003
© 2005 Lexmark International, Inc. All rights reserved. /© 2005 Lexmark International, Inc. Tous droits réservés.
Make sure your computer
is on.
Assurez-vous que
l'ordinateur est sous
tension.
Insert the CD.
Insérez le CD.
Click Cancel on all New Hardware screens.
Cliquez sur Annuler sur tous les écrans
Nouveau matériel.
Note: Do not continue until all
New Hardware windows
are canceled.
Remarque : Attendez que toutes les
fenêtres Nouveau matériel
soient refermées pour
poursuivre.
Windows 98/Me
Windows 2000/XP
Install the software
Installez le logiciel
12 3 4
Connect the USB cable.
Branchez le câble USB.
2
1
5Click Install, and follow the instructions on your screen
to complete the installation.
Cliquez sur Installer et suivez les instructions
qui s'affichent à l'écran pour terminer l'installation.
Make sure your computer
is on.
Assurez-vous que
l'ordinateur est sous
tension.
12
Connect the USB cable.
Branchez le câble USB.
1
2
3Insert the CD.
Insérez le CD. Double-click:
Cliquez deux fois :
45
Double-click:
Cliquez deux fois :
7
To prevent errors during installation:
1Close all open programs.
2Temporarily disable any anti-virus
software. For help, see your program
documentation, or contact the software
manufacturer for support.
After installation is complete, remember to
re-enable your anti-virus software.
If this installation screen does not appear:
1Click Cancel on any New Hardware screens.
2Eject and reinsert the All-In-One software CD.
3If the All-In-One software install screen does not appear:
aFrom your desktop, double-click My Computer
(In Windows XP, click Start ÆMy Computer).
bDouble-click the CD-ROM drive icon. If necessary,
double-click setup.exe.
cWhen the All-In-One software installation screen
appears, click Install.
dFollow the instructions on the screen.
Need more ink?
Cartouches d'encre disponibles
Photo cartridge
Cartouche photo Black cartridge
Cartouche noire Color cartridge
Cartouche couleur
•31 •32
•34 •33
•35
Windows
Macintosh
To prevent errors during installation:
1Close all open programs.
2Temporarily disable any anti-virus
software. For help, see your program
documentation, or contact the software
manufacturer for support.
After installation is complete, remember to
re-enable your anti-virus software.
Pour éviter tout problème d'installation :
1Fermez les programmes ouverts.
2Désactivez temporairement le logiciel
anti-virus sur l'ordinateur. Pour obtenir de
l'aide, reportez-vous à la documentation
de ce programme ou contactez le
fabricant.
Une fois l'installation terminée, n'oubliez pas
de réactiver le logiciel anti-virus.
Si cet écran d'installation n'apparaît pas :
1Cliquez sur Annuler sur les écrans Nouveau matériel qui
s’affichent.
2Ejectez et réinsérez le CD du logiciel de l’imprimante
Tout en un.
3Si l’écran d’installation du logiciel de l’imprimante
Tout en un n’apparaît pas :
aSur le bureau, cliquez deux fois sur Poste de travail
(Sous Windows XP, cliquez sur Démarrer Æ
Poste de travail).
bCliquez deux fois sur l'icône du lecteur de CD-ROM.
Si nécessaire, cliquez deux fois sur le fichier setup.exe.
cLorsque l’écran d’installation du logiciel de l’imprimante
Tout en un apparaît, cliquez sur Installer.
dSuivez les instructions qui s’affichent à l'écran.
•Refer to your User’s Guide.
•Visit our Web site: http://support.lexmark.com/.
•Consultez le Guide de l’utilisateur.
•Visitez notre site Web :
http://support.lexmark.com/.
•Use only the power supply and power cord provided with this product or the manufacturer's authorized
replacement power supply and power cord.
•Connect the power supply to an electrical outlet that is near the product and easily accessible.
•Refer service or repairs, other than those described in the user documentation, to a professional
service person.
CAUTION: Do not use the fax feature during a lightning storm. Do not set up this product or make any
electrical or cabling connections, such as the power supply or telephone, during a lightning storm.
•Utilisez uniquement l'unité d'alimentation et le cordon fournis avec ce produit ou l'unité et le cordon
de remplacement autorisés par le fabricant.
•Connectez l'unité d'alimentation à une prise électrique proche du produit et facile d'accès.
•Pour toutes interventions ou réparations autres que celles décrites dans la documentation
de l'utilisateur, adressez-vous à un technicien qualifié.
ATTENTION : N'utilisez pas la fonction de télécopie lors d'un orage. N'installez pas ce produit
et ne procédez à aucun branchement (cordon d'alimentation, téléphone, etc.) en cas d'orage.
?
??
?
??
Safety Information
Consignes de sécurité Have a question?
Avez-vous des questions ?
Other manuals for 4300

2

This manual suits for next models

3

Other Lexmark All In One Printer manuals

Lexmark X5100 Series User manual

Lexmark

Lexmark X5100 Series User manual

Lexmark 131 User manual

Lexmark

Lexmark 131 User manual

Lexmark Pro715 User manual

Lexmark

Lexmark Pro715 User manual

Lexmark X295 User manual

Lexmark

Lexmark X295 User manual

Lexmark X792 User manual

Lexmark

Lexmark X792 User manual

Lexmark X950 Series Installation and maintenance instructions

Lexmark

Lexmark X950 Series Installation and maintenance instructions

Lexmark 3300 Series User manual

Lexmark

Lexmark 3300 Series User manual

Lexmark X782 User manual

Lexmark

Lexmark X782 User manual

Lexmark X820E User manual

Lexmark

Lexmark X820E User manual

Lexmark X1100 Series Original instructions

Lexmark

Lexmark X1100 Series Original instructions

Lexmark 14A1010 User manual

Lexmark

Lexmark 14A1010 User manual

Lexmark X748de Installation instructions

Lexmark

Lexmark X748de Installation instructions

Lexmark 19Z0202 - X 864dhe 4 B/W Laser User manual

Lexmark

Lexmark 19Z0202 - X 864dhe 4 B/W Laser User manual

Lexmark XS795dte User manual

Lexmark

Lexmark XS795dte User manual

Lexmark S410 series User manual

Lexmark

Lexmark S410 series User manual

Lexmark 22G0320 User manual

Lexmark

Lexmark 22G0320 User manual

Lexmark OptraImage 232 User manual

Lexmark

Lexmark OptraImage 232 User manual

Lexmark X125 User manual

Lexmark

Lexmark X125 User manual

Lexmark 20D0000 - X 340 MFP B/W Laser User manual

Lexmark

Lexmark 20D0000 - X 340 MFP B/W Laser User manual

Lexmark CX310 series User manual

Lexmark

Lexmark CX310 series User manual

Lexmark X925 Operating manual

Lexmark

Lexmark X925 Operating manual

Lexmark 560n - X Color Laser User manual

Lexmark

Lexmark 560n - X Color Laser User manual

Lexmark MX910de User manual

Lexmark

Lexmark MX910de User manual

Lexmark MX810 Series Installation and maintenance instructions

Lexmark

Lexmark MX810 Series Installation and maintenance instructions

Popular All In One Printer manuals by other brands

Kyocera TASKalfa 650c quick start guide

Kyocera

Kyocera TASKalfa 650c quick start guide

Epson Stylus CX5700 quick start

Epson

Epson Stylus CX5700 quick start

Kyocera ECOSYS M5526cdw Frequently asked questions

Kyocera

Kyocera ECOSYS M5526cdw Frequently asked questions

Xerox Versant 280 Press quick start guide

Xerox

Xerox Versant 280 Press quick start guide

Oce OP1030 Operation guide

Oce

Oce OP1030 Operation guide

Xerox WorkCentre 4265 Quick use guide

Xerox

Xerox WorkCentre 4265 Quick use guide

Konica Minolta BIZHUB C353P Service manual

Konica Minolta

Konica Minolta BIZHUB C353P Service manual

Ricoh Aficio 2035e Service manual

Ricoh

Ricoh Aficio 2035e Service manual

Epson STYLUS SX218 Basic operation guide

Epson

Epson STYLUS SX218 Basic operation guide

Oce cm4010 user guide

Oce

Oce cm4010 user guide

Ricoh Aficio 615C operating instructions

Ricoh

Ricoh Aficio 615C operating instructions

National Instruments CVS-1459RT user manual

National Instruments

National Instruments CVS-1459RT user manual

Ricoh G188 Service manual

Ricoh

Ricoh G188 Service manual

Frontier LP7500 Service manual

Frontier

Frontier LP7500 Service manual

Xerox versalink C7020 installation guide

Xerox

Xerox versalink C7020 installation guide

Utax 2550ci user manual

Utax

Utax 2550ci user manual

Kyocera Copystar CS 300ci Technical bulletin

Kyocera

Kyocera Copystar CS 300ci Technical bulletin

Sharp MX-M1056 quick start guide

Sharp

Sharp MX-M1056 quick start guide

manuals.online logo
manuals.online logoBrands
  • About & Mission
  • Contact us
  • Privacy Policy
  • Terms and Conditions

Copyright 2025 Manuals.Online. All Rights Reserved.