manuals.online logo
Brands
  1. Home
  2. •
  3. Brands
  4. •
  5. Lexmark
  6. •
  7. Printer
  8. •
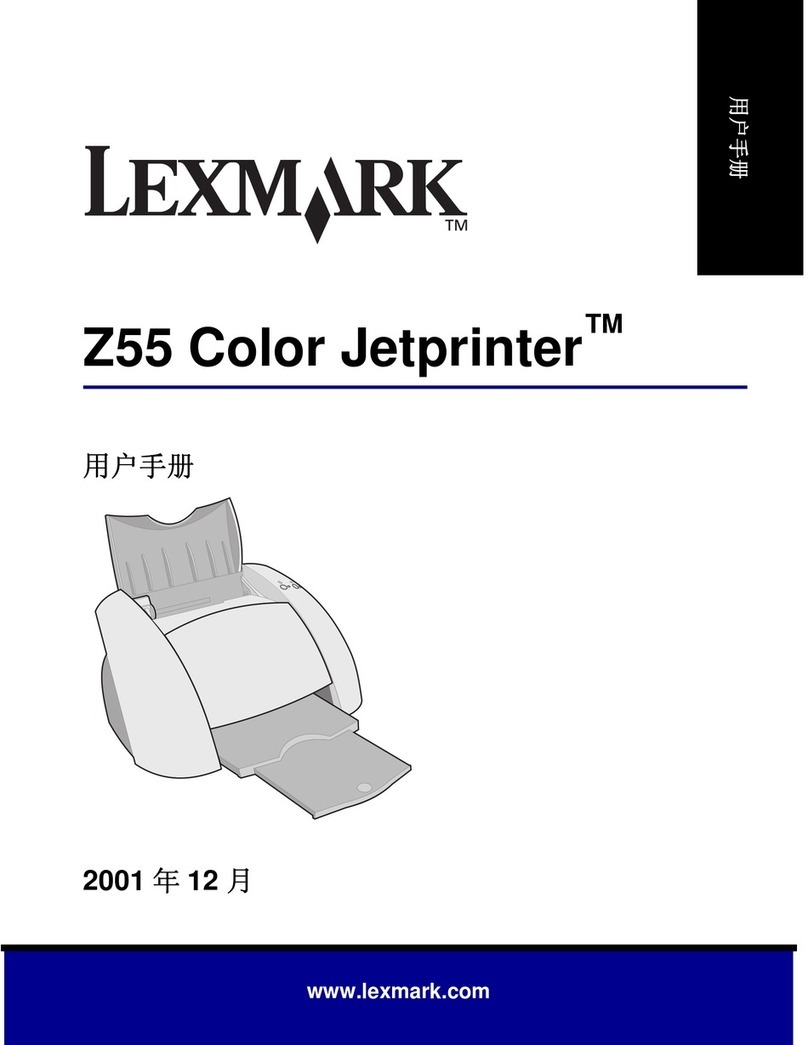
  9. Lexmark 7300 Series User manual

Lexmark 7300 Series User manual

7300 Series 多功能一体机
多功能一体机多功能一体机
多功能一体机
7300 Series All-In-One
7300 Series 多功能複合機
多功能複合機多功能複合機
多功能複合機
7300 Series 복합기
安全信息
安全信息安全信息
安全信息
•请只使用随同此产品提供的电源,或者使用经过制造商认证的电源作
为替代。
•请将电源线连接在产品附近、使用方便、且正确接地的电源插座上。
•有关操作说明书中未提及的其他服务或维修,请向专业的服务人员咨
询。
•当您将此产品连接到公共交换电话网络中时,请只使用 26 美国线规
(AWG)或更大的电信 (RJ-11)电缆。
当心:
当心:当心:
当心:请不要在雷雨天气时使用传真功能。请不要在雷雨天气时安装此产
品,或者进行任何电线/电缆连接 (例如电源线,电话线等)。
Safety information
• Use only the power supply provided with this product or the
manufacturer’s authorized replacement power supply.
• Connect the power cord to a properly grounded electrical outlet that is
near the product and easily accessible.
• Refer service or repairs, other than those described in the user
documentation, to a professional service person.
• Use only a 26 AWG or larger telecommunications (RJ-11) cord when
connecting this product to the public switched telephone network.
CAUTION: Do not use the fax feature during a lightning storm. Do not set
up this product or make any electrical or cabling connections, such as the
power supply cord or telephone, during a lightning storm.
打开多功能一体机的包装。
Unpack the All-In-One.
1
12 3 4
准备多功能一体机。
准备多功能一体机。准备多功能一体机。
准备多功能一体机。
Prepare the All-In-One.
3
12
在连接电话线或者其他设备之前,请首先参阅随同产品一起提供
的,专为您所在的国家 /地区制定的信息。
Refer to the additional geographic specific information provided
before connecting the telephone line or additional equipment.
連接電話線或其他設備之前,請先參閱隨產品提供的當地特殊要
求資訊。
전화선 또는 추가 장비를 연결하기 전에 위치와 관련하여 추가적으로
제공된 상세 정보를 참조하십시오 .
按按钮。
Press .
按下 按鈕。
을누릅니다 .
3
按按钮浏览选项,然后按 按钮输入您的
默认
语言,接着输入
您的
默认
国家或地区。
Press to scroll, press to enter your default language, and then
enter your default country or region.
按下 按鈕可以捲動,然後按下 按鈕,輸入您
預設的
語言,接
著再輸入您
預設的
國家或地區。
스크롤하려면 를,
기본
언어를 입력하려면 를누른 후해당되는
기본
국
가또는 지역을 입력합니다 .
4使用数字符号键区的按钮输入:
Press the keypad to enter the:
按下數字符號按鍵區,以輸入:
키패드를 눌러 다음 항목을 입력합니다 .
1时间
时间时间
时间
Time 時間
時間時間
時間
시간
2日期
日期日期
日期
Date 日期
日期日期
日期
날짜
3传真号码
传真号码传真号码
传真号码
Fax number 傳真號碼
傳真號碼傳真號碼
傳真號碼
팩스 번호
5
请继续进行步骤
请继续进行步骤请继续进行步骤
请继续进行步骤 4...
Continue with Step 4...
繼續進行步驟
繼續進行步驟繼續進行步驟
繼續進行步驟 4...
4단계를 계속합니다 .
*20W0078*
按按钮。
Press .
按下 按鈕。
을누릅니다 .
P/N 20W0078 E.C. 6M0011
© 2005 Lexmark International, Inc. All rights reserved.
2
1
3
12
x
另外单独销售。
Sold separately.
另外銷售。
별도로 판매됩니다 .
?
??
?
??
安全資訊
安全資訊安全資訊
安全資訊
功t僅使用本產品所提供的電源供應器或製造商授權的替換電源供應器。
功t將電源線連接到妥善接地的電源插座,而插座必須與產品的距離不可
太遠,且必須方便使用。
功t有關服務或維修的事項,除了參考本使用者說明文件所提供的說明之
外,您可以向專業維修人員尋求協助。
功t要將本產品連接到公眾交換電話網路時,請務必選用 26 AWG 電話線
材或較大型號的電信 (RJ-11) 纜線。
請當心
請當心請當心
請當心 :請勿在雷雨天氣時使用傳真功能。在雷雨期間,請勿安裝本產
品,或進行任何電器或電纜的接線工作,例如電源線或電話線。
안전 정보
•이제품과 함께 제공된 전원 공급 장치 또는 제조자가 승인한 교체용 전원 공
급장치만 사용하십시오 .
•제품에 가깝고 접근하기 쉬우며 올바로 접지된 전기 콘센트에 전원 코드를
연결하십시오 .
•사용 설명서에 없는 문제는 전문 서비스 담당자에게 서비스나 수리를 문의하
십시오 .
•이제품이 공중 전화 교환망에 연결될 때에는 26 AWG 또는 더큰통신
(RJ-11) 코드를 사용하십시오 .
주의
주의주의
주의 :천둥 번개가 칠때는 팩스 기능을 사용하지 마십시오 . 천둥 번개가
칠때이제품을 설치하거나 전원 코드 또는 전화선 등을 연결하지 마십
시오 .
注意:
注意:注意:
注意:包装箱里的内容可能会有所不同。
Note: Contents may vary.
装入纸张。
装入纸张。装入纸张。
装入纸张。
Load paper.
2
請注意:
請注意:請注意:
請注意: 內容物可能略有差異。
참고 :내용물은 그림과 다를 수있습니다 .
拆開 「多功能複合機」的包裝。
拆開 「多功能複合機」的包裝。拆開 「多功能複合機」的包裝。
拆開 「多功能複合機」的包裝。
복합기 포장을 풉니다 .
載入紙張。
載入紙張。載入紙張。
載入紙張。
용지를 넣습니다 .
將 「多功能複合機」準備就緒。
將 「多功能複合機」準備就緒。將 「多功能複合機」準備就緒。
將 「多功能複合機」準備就緒。
복합기를 준비합니다 .
1
2
安装打印墨盒。
安装打印墨盒。安装打印墨盒。
安装打印墨盒。
Install the print cartridges.
4
如要
连接
连接连接
连接
计算机使用您的多功能一体机,请继续进行以下的步骤。
If you are using the All-In-One with a computer, continue with the following step.
若您操作 「多功能複合機」時
搭配
搭配搭配
搭配
電腦使用,請繼續進行下列步驟。
컴퓨터와
함께
복합기를 사용하고 있는 경우에는 다음 단계를 계속 진행하십시오 .
如要
不连接
不连接不连接
不连接
计算机单独使用您的多功能一体机,您已经完成了安装。
If you are using the All-In-One without a computer, you are finished.
如果您操作 「多功能複合機」時
不搭配
不搭配不搭配
不搭配
電腦使用,便已完成安裝作
業。
컴퓨터
없이
복합기를 사용하고 있는 경우에는 이것으로 완료되었습니다 .
安装软件。
安装软件。安装软件。
安装软件。
Install the software.
5
12
在
所有
的 “新硬件”界面中单击 “取消
取消取消
取消”。
Click Cancel on all New Hardware Screens.
在
所有
「加入新的硬體」畫面上,按一下取消
取消取消
取消。
모든
새하드웨어 화면에서 취소를 누릅니다 .
35
12 3 4
4
如果此软件安装界面没有出现,请单击开始
开始开始
开始 Æ
运行
运行运行
运行,然后输入 D:\
\\
\setup,其中 D是您的光盘
驱动器的盘符。
If this install screen does not appear, click
Start ÆRun, and then type D:\setup,where
Dis the letter of your CD-ROM drive.
如果此安裝畫面沒有顯示,請按一下開始
開始開始
開始 Æ執
執執
執
行
行行
行,然後輸入 D:\setup,此處的 D是指光碟機
代號。
설치 화면이 나타나지 않으면 시작 Æ실행을 누른 다
음D:\setup 을입력합니다 . 여기서 D는CD-ROM
드라이브를 가리킵니다 .
为了避免在安装过程中出现错误:
1关闭所有打开的应用程序。
2暂时关闭所有的防病毒软件。如果需要帮助,请参阅您的应用程序帮助
文档,或者与软件制造商联系获取技术支持。
注意:
注意:注意:
注意:安装完毕后,请记得重新启用您的防病毒软件。
To prevent errors during installation:
1Close all open programs.
2Temporarily disable any anti-virus software. For help, see your program
documentation, or contact the software manufacturer for support.
Note: After installation is complete, remember to enable your anti-virus software.
要避免安裝時發生錯誤:
1關閉所有開啟的程式。
2暫時關閉任何防毒軟體。如需說明,請參閱您程式的說明文件,或聯繫
軟體製造商獲得支援。
請肴意
請肴意請肴意
請肴意 :安裝完成後,請記得啟動您的防毒軟體。
설치 도중 오류가 발생하지 않도록 다음에 주의하십시오 .
1열려 있는 프로그램을 모두 닫습니다 .
2안티바이러스 소프트웨어를 임시로 비활성화합니다 . 도움말을 보려면 해당 프
로그램 설명서를 참조하거나 소프트웨어 제조업체에 문의하십시오 .
참고
참고참고
참고 :설치를 완료한 후반드시 안티바이러스 소프트웨어를 다시 활성화하십시오 .
!
!
!
!
www.lexmark.com
123
LINE EXT
EXT
1
2
1
2
Windows 2000/XP
左边:
Left:
左側:
왼쪽 :
右边:
Right:
右側:
오른쪽 :
安裝墨水匣。
安裝墨水匣。安裝墨水匣。
安裝墨水匣。
잉크 카트리지를 설치합니다 .
安裝軟體。
安裝軟體。安裝軟體。
安裝軟體。
소프트웨어를 설치합니다 .
Windows 98/Me
安装问题解答
安装问题解答安装问题解答
安装问题解答
Setup troubleshooting
问题:
问题:问题:
问题: 解决方法:
解决方法:解决方法:
解决方法:
“电源”指示灯不亮。 1从电源插座和多功能一体机上断开电源线。
2重新连接电源线,请确认电源线完全插入多功能一体机的插口中。
3将电源线的另一端连接在一个其他电子设备使用过的电源插座上。
4如果 “电源”指示灯没有变亮,请按 按钮。
操作面板显示屏上的文字是
错误的语言。
1按操作面板上的 “扫描模式
扫描模式扫描模式
扫描模式”按钮,然后按 按钮。
2按两次 按钮。
3按按钮。
4按按钮。
5反复按 或按钮,直到显示屏上出现您希望使用的语言。
6按按钮保存。
7按两次 按钮退出。
Problem Solution
Power light is not lit. 1Disconnect the power supply cord from the wall outlet and then from the All-In-One.
2Plug the cord all the way into the power supply port on the All-In-One.
3Plug the cord into an electrical outlet that other electrical devices have been using.
4If the Power button light is not on, press .
Incorrect language appears
on the display. 1From the control panel, press Scan Mode, and then press .
2Press twice.
3Press .
4Press .
5Press or repeatedly until the language you want appears on the display.
6Press to save.
7Press twice to exit.
安裝上的疑難排解
安裝上的疑難排解安裝上的疑難排解
安裝上的疑難排解
설치 문제 해결
問題
問題問題
問題 解決方案
解決方案解決方案
解決方案
電源指示燈未亮起。 1從牆壁上的插座拔下電源線,然後再從 「多功能複合機」拔下電源線。
2將電源線完全推入 「多功能複合機」上的電源供應器連接埠。
3將電源線插入其他電器正在使用的電源插座。
4如果 「電源」按鈕指示燈沒有亮起,請按下 按鈕。
顯示幕上出現不適用的語
言。
1從操作面板,按下掃描模式
掃描模式掃描模式
掃描模式,然後按下 按鈕。
2按兩次 按鈕。
3按下 按鈕。
4按下 按鈕。
5重複按下 或按鈕,直到您所要的語言出現在顯示幕上。
6按下 按鈕以儲存。
7按兩次 按鈕以結束。
확인 사항 해결 방법
전원 표시등에 불이 들어오지
않음
1콘센트에서 전원 코드를 분리한 후복합기에서도 분리합니다 .
2코드를 복합기의 전원 공급 포트에 끝까지 꽂습니다 .
3다른 전기 장치에서 사용하고 있던 전기 콘센트에 코드를 연결합니다 .
4전원 표시등에 불이 들어오지 않는 경우 을누르십시오 .
디스플레이에 잘못된 언어가
나타남
1제어판에서 스캔 모드를 누른 후을누릅니다 .
2을두번누릅니다 .
3을누릅니다 .
4을누릅니다 .
5디스플레이에 원하는 언어가 나타날 때까지 또는 를반복하여 누릅니다 .
6저장하려면 을누릅니다 .
7종료하려면 을두번누릅니다 .
Other manuals for 7300 Series

6

Other Lexmark Printer manuals

Lexmark C746 Quick reference guide

Lexmark

Lexmark C746 Quick reference guide

Lexmark MX611 Series Installation instructions

Lexmark

Lexmark MX611 Series Installation instructions

Lexmark E210 User manual

Lexmark

Lexmark E210 User manual

Lexmark PRO700 User manual

Lexmark

Lexmark PRO700 User manual

Lexmark E350d User manual

Lexmark

Lexmark E350d User manual

Lexmark Z2400 Series User manual

Lexmark

Lexmark Z2400 Series User manual

Lexmark E120n User manual

Lexmark

Lexmark E120n User manual

Lexmark MS310 Series User manual

Lexmark

Lexmark MS310 Series User manual

Lexmark C925 User manual

Lexmark

Lexmark C925 User manual

Lexmark M5100 Series User manual

Lexmark

Lexmark M5100 Series User manual

Lexmark 2480 - Forms Printer B/W Dot-matrix User manual

Lexmark

Lexmark 2480 - Forms Printer B/W Dot-matrix User manual

Lexmark C910 Finisher User manual

Lexmark

Lexmark C910 Finisher User manual

Lexmark C792 Family User manual

Lexmark

Lexmark C792 Family User manual

Lexmark MS410 series User manual

Lexmark

Lexmark MS410 series User manual

Lexmark B2236 User manual

Lexmark

Lexmark B2236 User manual

Lexmark SERIES E460DN User manual

Lexmark

Lexmark SERIES E460DN User manual

Lexmark 10G0200 User manual

Lexmark

Lexmark 10G0200 User manual

Lexmark M1145 User manual

Lexmark

Lexmark M1145 User manual

Lexmark Z31 Color Jetprinter User manual

Lexmark

Lexmark Z31 Color Jetprinter User manual

Lexmark C720 SERIES User manual

Lexmark

Lexmark C720 SERIES User manual

Lexmark C720 SERIES User manual

Lexmark

Lexmark C720 SERIES User manual

Lexmark Z35 User manual

Lexmark

Lexmark Z35 User manual

Lexmark CS827 User manual

Lexmark

Lexmark CS827 User manual

Lexmark 350 User manual

Lexmark

Lexmark 350 User manual

Popular Printer manuals by other brands

Xerox Wide Format 6030 user guide

Xerox

Xerox Wide Format 6030 user guide

Centronics 101A Technical manual

Centronics

Centronics 101A Technical manual

Printronix P8000 Series Maintenance manual

Printronix

Printronix P8000 Series Maintenance manual

Epson Stylus N10 Notices and warranty

Epson

Epson Stylus N10 Notices and warranty

Samsung SRP-350 Bixolon Operator's manual

Samsung

Samsung SRP-350 Bixolon Operator's manual

Canon PIXMA MX850 brochure

Canon

Canon PIXMA MX850 brochure

Canon imagePASS-A2 Service guide

Canon

Canon imagePASS-A2 Service guide

Brady BradyPrinter S3000 user manual

Brady

Brady BradyPrinter S3000 user manual

Jolimark bp-900kll user manual

Jolimark

Jolimark bp-900kll user manual

CIM PRO THERMAL 2000 Operator's manual

CIM

CIM PRO THERMAL 2000 Operator's manual

Gainscha PT-380 manual

Gainscha

Gainscha PT-380 manual

NSR Marine NPT-100 user manual

NSR Marine

NSR Marine NPT-100 user manual

Epson B-510DN - Business Color Ink Jet Printer Specifications

Epson

Epson B-510DN - Business Color Ink Jet Printer Specifications

Rimage Everest 600 user guide

Rimage

Rimage Everest 600 user guide

Xerox Phaser 6200N specification

Xerox

Xerox Phaser 6200N specification

Konica Minolta magicolor 7450 installation guide

Konica Minolta

Konica Minolta magicolor 7450 installation guide

Canon BJC-4000 Service manual

Canon

Canon BJC-4000 Service manual

Konica Minolta Magicolor 3300 user guide

Konica Minolta

Konica Minolta Magicolor 3300 user guide

manuals.online logo
manuals.online logoBrands
  • About & Mission
  • Contact us
  • Privacy Policy
  • Terms and Conditions

Copyright 2025 Manuals.Online. All Rights Reserved.