9
10
ASSEMBLY INSTRUCTIONS
10. Set the shelf pins (NN) at your desired height at the
same level. Tilt and install adjustable shelves (E) in place.
Plug the plastic covers (II) onto the visible cams locks to
conceal the cams.
11. This cabinet was designed with a feature that allows
stacking two units. Additional units sold separately. Insert
wood dowels (CC) into the holes on top of the base unit.
Place bottom of second unit onto the inserted dowels.
Secure units together by attaching the metal plates (EE)
at both ends with the M3.5 x 19 mm screws (QQ) into
the predrilled holes.
Note: Remove caps (HH) before stacking two units
together.
Note: You must install the Tipping Restraint Hardware
with the unit in use to prevent any accidents or damage
to the unit.
10
11
II
NN
QQ
CC
EE
Hardware Used
Hardware Used
Plastic cover
Shelf pin
Metal plate
Wood dowel
M3.5 x 19 mm Screw
x 4
x 8
x 1
x 4
x 4
II
NN
EE
CC
QQ
E
E
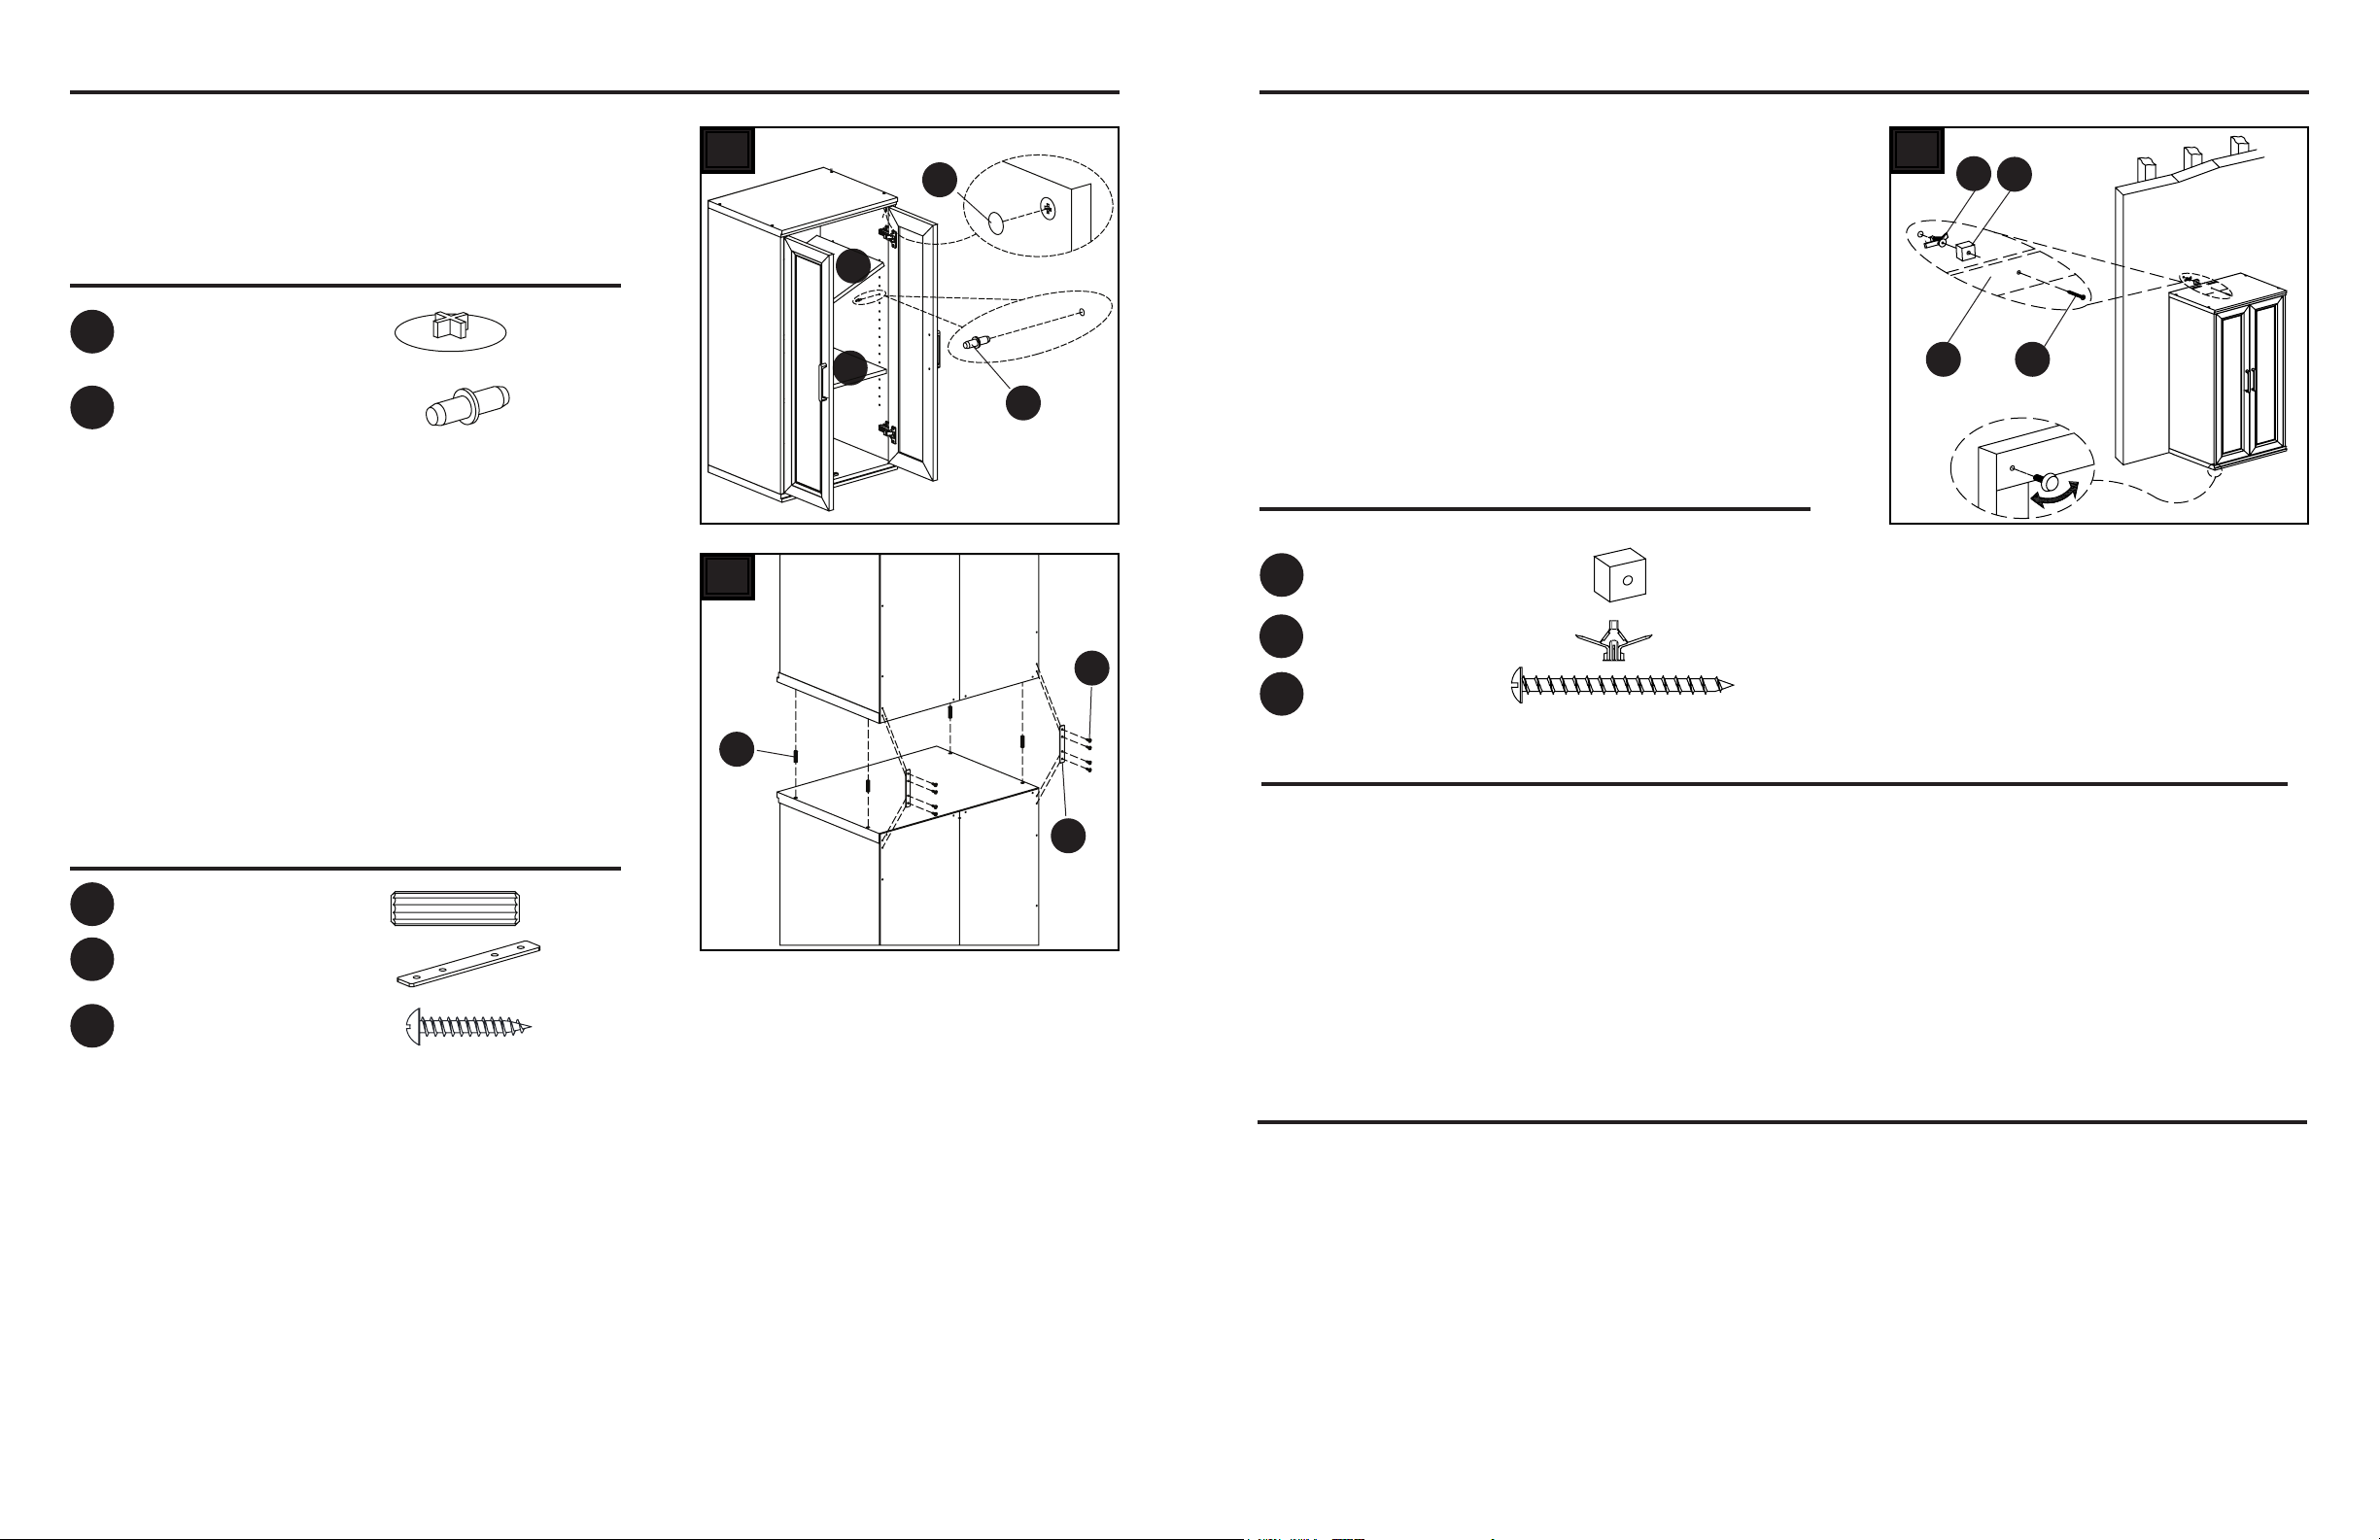
ASSEMBLY INSTRUCTIONS
12. Adjust oor levelers to level the unit against the wall
where desired. Using stretcher (B) as a template, mark
one mounting holes location on the wall. Drill one pilot
holes into the wall where previously marked. Make sure
that the drilled holes can t for the wall anchors (sold
separately) properly. Press the anchors into the holes
and gently tap with a hammer until ush in the holes. If
the mounting hole coincides with a wooden stud, there is
no need wall anchor. Align top frame (B) and back cross-
ers (RR) over the drywall anchors (SS) and secure with
M5 x 65 mm screw (TT). Tighten securely with phillips
screwdriver.
NOTE: Must install for both base and stacker.
12
Hardware Used
BTT
SS RR
Drywall Anchor x 1
x 1
SS
Back Crosser
x 1
TT
RR
M5 x 65 mm
Screw
Wall
CARE AND MAINTENANCE
LIMITED LIFETIME WARRANTY
This product is warranted to the original purchaser. If there is a failure in this unit due to defects in
materials or workmanship, the manufacturer will repair or replace this item at our discretion without
charge. Warranty is void if product has been assembled incorrectly, misused, abused by
overloading, altered in any way or damaged due to accident. This warranty is not transferable and
does not cover chipping, aking, scratches, rust, dents, or other damages to the surfaces of this
product. Responsibility of the manufacturer is limited to repair or replacement of this product. The
manufacturer is not responsible for consequential, incidental, or other damages or losses resulting
from product failure.
This warranty is in lieu of all other expressed warranties. Some states do not allow the exclusion
or limitation of incidental or consequential damages, so the above limitation may not apply to you.
This warranty gives you specic legal rights and you may have other rights which vary from state
to state.
• Periodically check to make certain all components are properly positioned, free from damage
and rmly connected.
• Use a soft, clean cloth that will not scratch the surface when dusting.
• Never use water to clean the furniture as it may cause damage to the nish.
• Wipe clean using a damp cloth and a mild cleaner. Wipe dry with a clean cloth.
• In the event that the furniture is stained or otherwise damaged during use, it is recommended
you call a professional to repair the furniture.
• Keep furniture away from direct sunlight as it may damage the nish.
• It is best to keep the furniture in a climate-controlled environment. Extreme temperature and
humidity changes can cause fading, warping, shrinking and splitting of wood.