3
Important Safety Information
READ THIS BEFORE OPERATING MACHINE
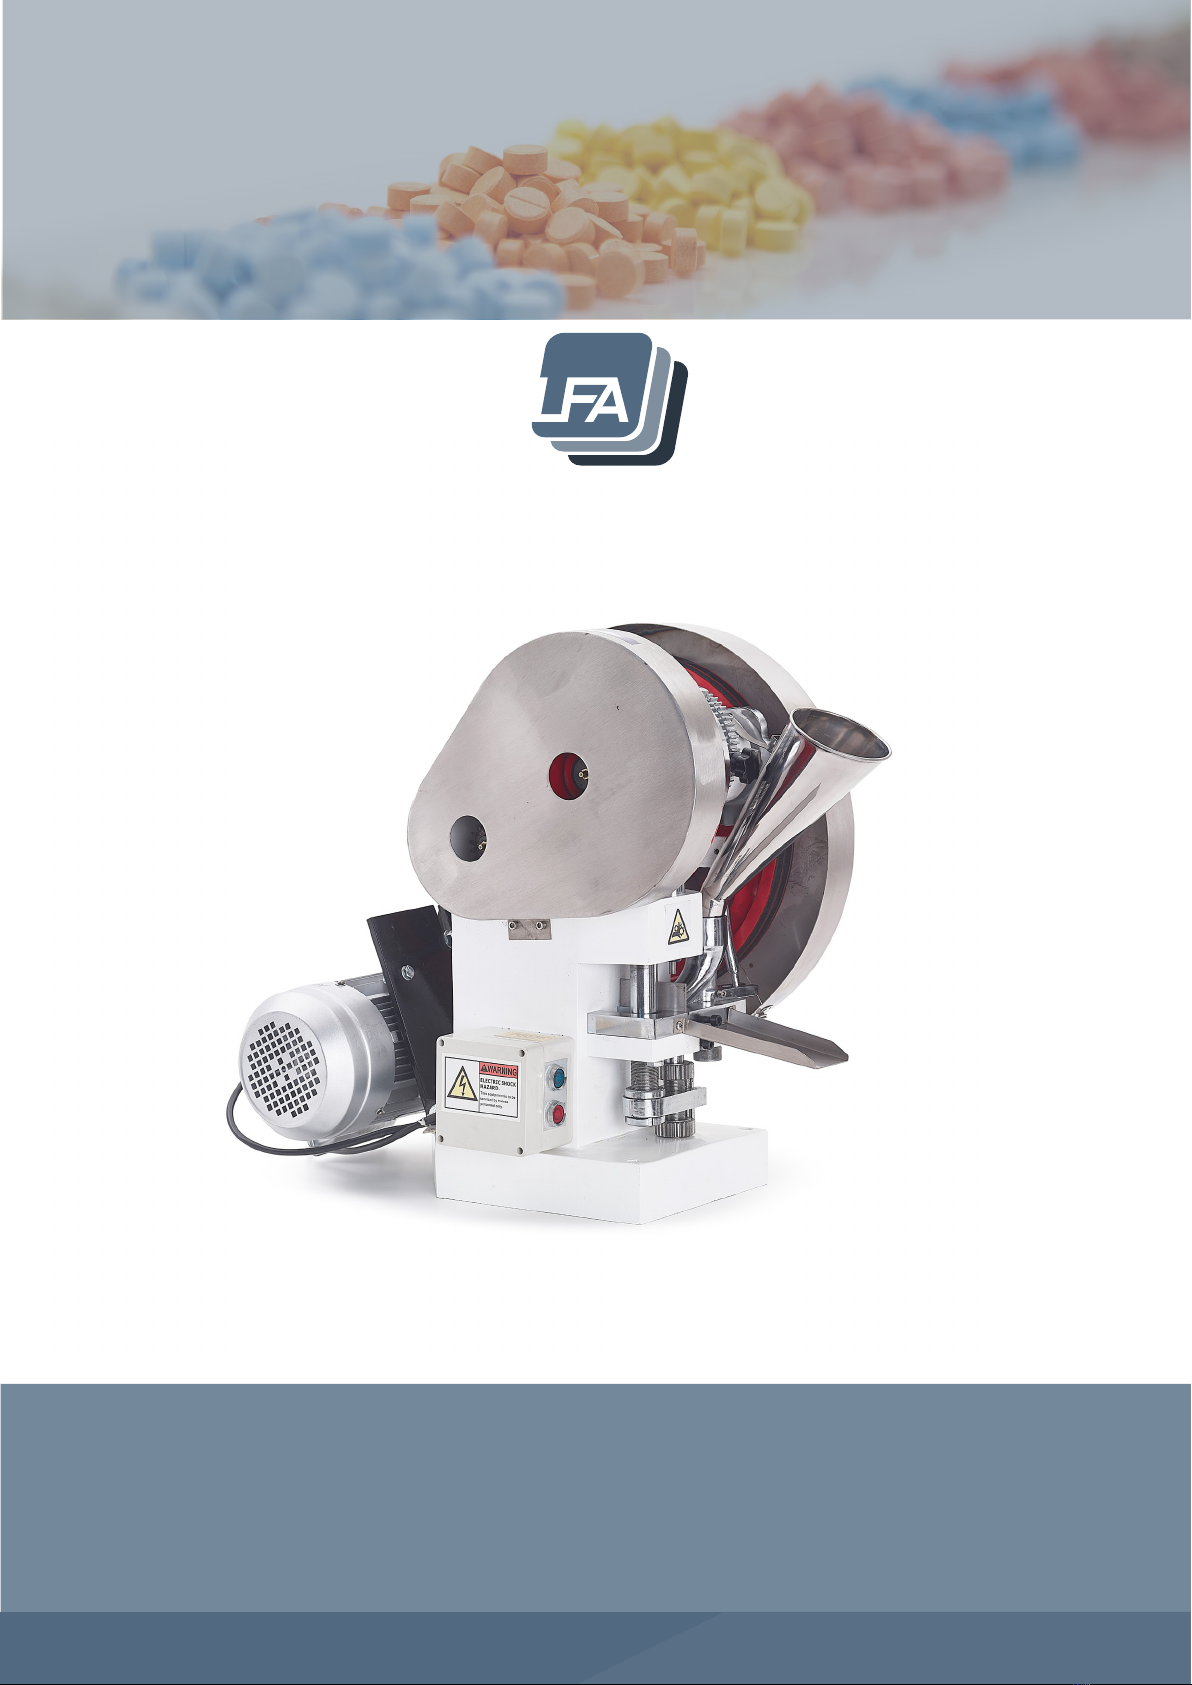
Intended Use
The intended use of this machine is to press dry
raw materials into tablet form.
Potential misuse of this machine includes:
• Applying too much force to the powder.
• Trying to fill the Die with powder by hand.
• Inserting Tooling that is too big for the
machine.
• Not properly mounting the machine.
• Using powders that could explode under
pressure.
• Using wet or damp material.
Personal Protection
For personal protection while transporting the
TDP 6s®, abide by these actions:
• Use an engine hoist to lift the machine.
• Wear steel toe boots to prevent foot injury.
• Wear heavy duty grip gloves to ensure firm
grasp on machine.
• Wear back support belt to prevent injury if
needed.
For personal protection while operating the
TDP 6s®, abide by these actions:
• Avoid wearing loose jewelry to prevent
machine entanglement.
• Contain long hair to prevent machine
entanglement.
• Wear safety goggles.
• Wear disposable latex/rubber gloves.
• Wear a hairnet (food grade products only).
• Wear a beard net if needed (food grade
products only).
General Hazards
• Be aware of risk of entanglement and pinch
point due to moving parts.
• Do not operate in a wet environment or with
wet hands due to risk of electrical shock or
burn.
• Do not operate if any wires are damaged,
pinched, or frayed due to risk of electrical
shock or burn.
• Keep out of reach of children.
• Keep fingers away from all moving parts.
• Ensure that it is secured to a workbench to
prevent from falling.
• Inspect machine before use.
• Check that nuts and bolts are suitably
tightened.
• Use this machine only for its intended use
as described in this manual.
• Turn off and unplug the machine before
conducting cleaning and maintenance.
• Do not modify the machine in any way.