2
Getting to know your phone ....................... 3
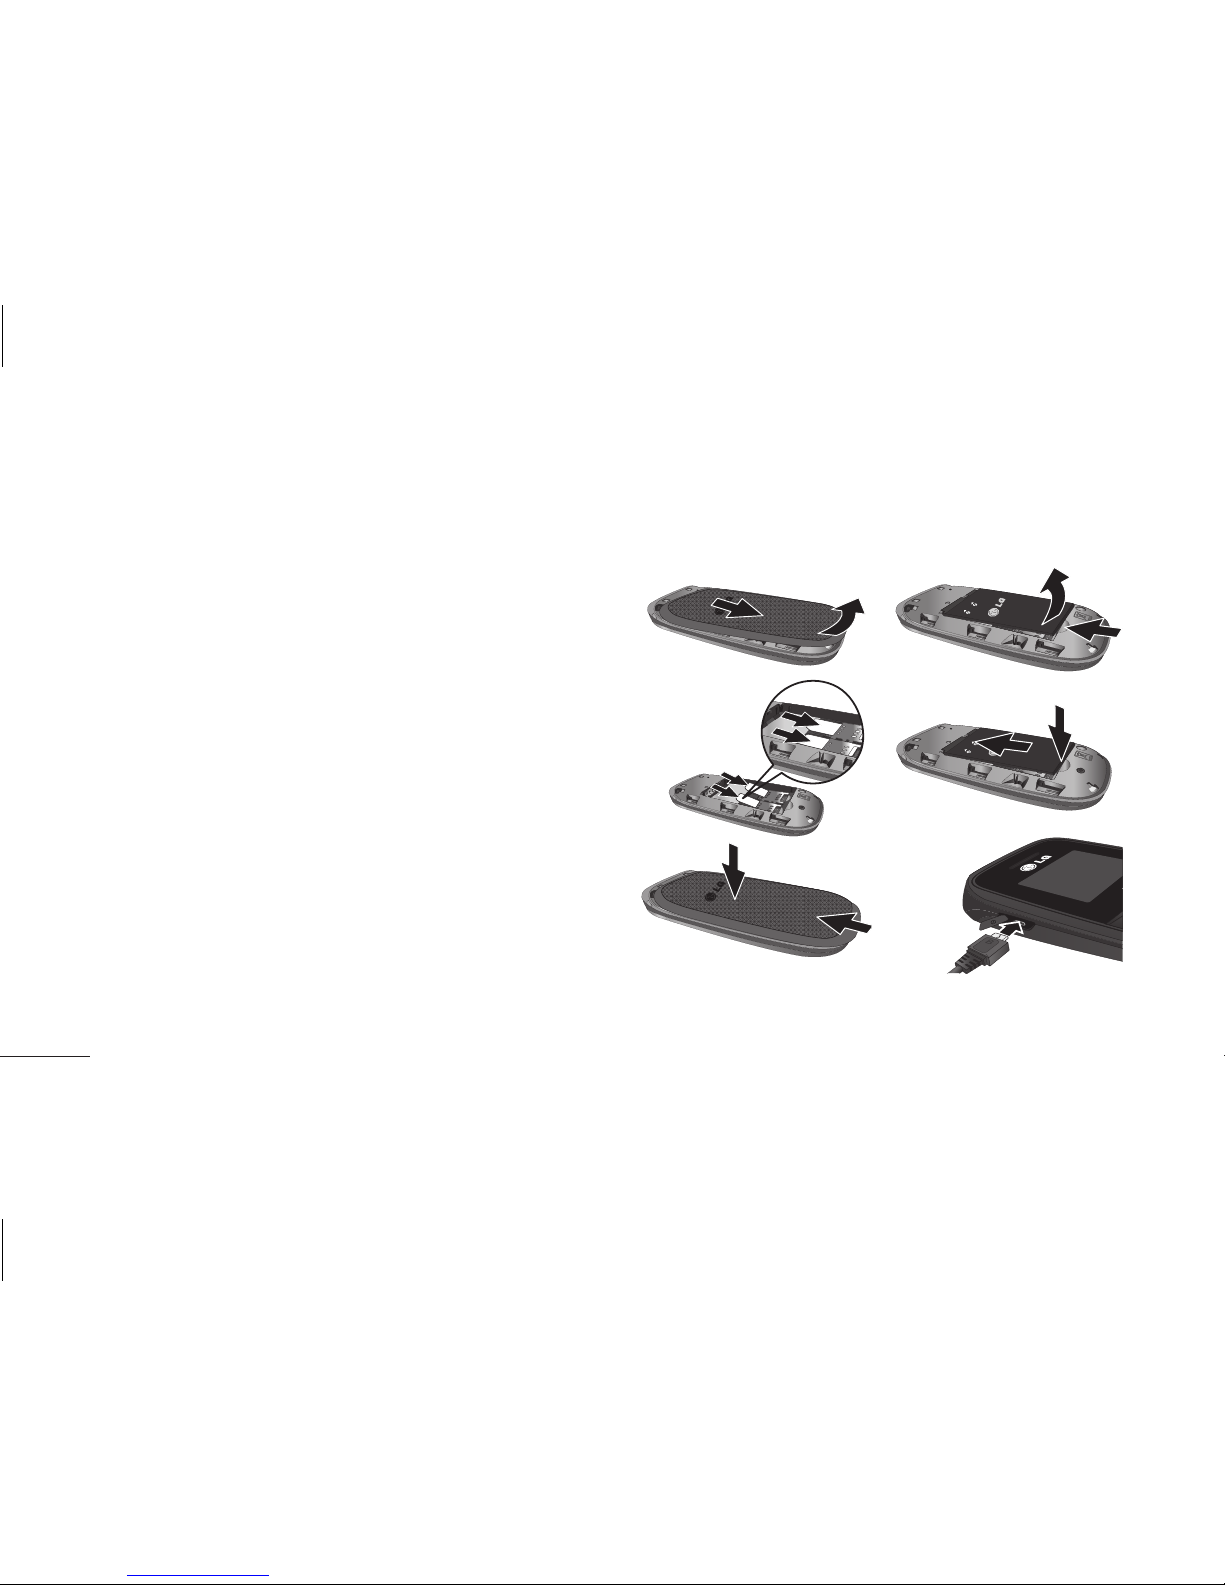
Installing the SIM Card and Charging the
Battery.................................................................. 5
Display Information......................................... 7
Menu and Options........................................... 8
Entering Text ...................................................... 9
Quick feature reference................................13
Messaging.........................................................13
Contacts.............................................................14
Call history ........................................................16
Alarm...................................................................16
FM radio ............................................................17
Proles................................................................18
Tools....................................................................19
Organiser...........................................................20
Settings..............................................................20
Guidelines for safe and ecient use .......23
Accessories .......................................................33
Troubleshooting .............................................34
Contents