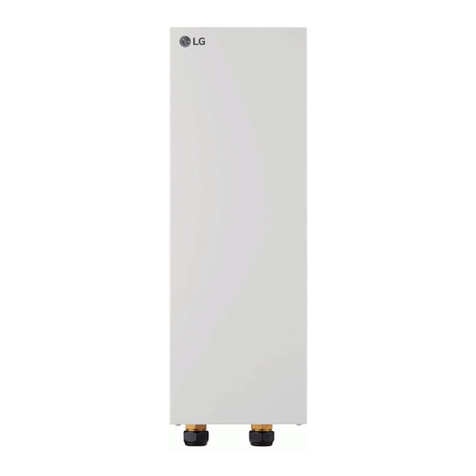
LG ZPLT1A51A User manual

DRAIN PAN HEATER
INSTALLATION MANUAL
ZPLT1A51A
ZPLT1A52A
ZPLT2A51A
ZPLT2A52A
Drain Pan Heater for Multi V 5 6.0 - 20.0 Ton Outdoor Units

The instructions included in this manual must be followed to prevent product malfunction, property damage, injury, or death to the user or
other people. Incorrect operation due to ignoring any instructions will cause harm or damage. The level of seriousness is classified by the
symbols described below.
Do not throw away, destroy, or lose this manual.
Please read carefully and store in a safe place for future reference.
Content familiarity required for proper installation.
A summary list of safety precautions begins on page 3.
For more technical materials such as submittals, engineering
databooks, service manuals, and catalogs, visit www.lghvac.com.
For continual product development, LG Electronics U.S.A., Inc., reserves the right to change specifications without notice.
©LG Electronics U.S.A., Inc.
This document, as well as all reports, illustrations, data, information, and other materials are the property of LG Electronics U.S.A., Inc.
PROPRIETARY DATA NOTICE
This document, as well as all reports, illustrations, data, information, and
other materials are the property of LG Electronics U.S.A., Inc., and are
disclosed by LG Electronics U.S.A., Inc., only in confidence.
This document is for design purposes only.
IM_MV5_ODU_Drain_Pan_Heater_06_18

3
Safety Instructions
Due to our policy of continuous product innovation, some specifications may change without notification.
©LG Electronics U.S.A., Inc., Englewood Cliffs, NJ. All rights reserved. “LG” is a registered trademark of LG Corp.
SAFETY INSTRUCTIONS
The instructions below must be followed to prevent product malfunction, property damage, injury or death to the user or other people. Incor-
rect operation due to ignoring any instructions will cause harm or damage. The level of seriousness is classified by the symbols described
below.
TABLE OF SYMBOLS
Do not install or remove the unit by yourself (end user).
Ask the dealer or an LG trained service provider to install the
unit.
Improper installation by the user may result in water leakage, re,
explosion, electric shock, physical injury or death.
For replacement of an installed unit, always contact an LG
trained service provider.
There is risk of re, electric shock, explosion, and physical injury or
death.
The unit is shipped with refrigerant and the service valves
closed. Do not open service valves on the unit until all
non-condensibles have been removed from the piping sys-
tem and authorization to do so has been obtained from the
commissioning agent.
There is a risk of physical injury or death.
Do not operate the compressor with the service valves
closed.
There is a risk of explosion, physical injury, or death.
Periodically check that the outdoor frame is not damaged.
There is a risk of explosion, physical injury, or death.
Conrm all control box and panel covers are secure and
intact.
If cover panels are not installed securely, dust, water and animals may
enter the unit, causing re, electric shock, and physical injury or death.
Always check for system refrigerant leaks after the unit has
been installed or serviced.
Exposure to high concentration levels of refrigerant gas may lead to
illness or death.
Wear protective gloves and safety goggles when handling
equipment. Sharp edges may cause personal injury.
Dispose of the packing materials safely.
• Packing materials, such as nails and other metal or wooden parts,
may cause puncture wounds or other injuries.
• Tear apart and throw away plastic packaging bags so that children
may not play with them and risk suffocation and death.
Install the unit considering the potential for strong winds or
earthquakes.
Improper installation may cause the unit to fall over, resulting in physical
injury or death.
Do not change the settings of the protection devices.
If the pressure switch, thermal switch, or other protection device is
shorted and forced to operate improperly, or parts other than those
specied by LG are used, there is risk of re, electric shock, explosion,
and physical injury or death.
Do not install the unit on a defective stand.
There is a risk of physical injury.
INSTALLATION
Don’t store or use ammable gas / combustibles near the unit.
There is risk of re, explosion, and physical injury or death.
This symbol indicates an imminently hazardous situation which, if not avoided, will result in death or serious injury.
This symbol indicates a potentially hazardous situation which, if not avoided, could result in death or serious injury.
This symbol indicates a potentially hazardous situation which, if not avoided, may result in minor or moderate injury.
This symbol indicates situations that may result in equipment or property damage accidents only.
This symbol indicates an action that must not be completed.
DANGER

4
MULTI V 5 Outdoor Unit Drain Pan Heater Installation Manual
Due to our policy of continuous product innovation, some specifications may change without notification.
©LG Electronics U.S.A., Inc., Englewood Cliffs, NJ. All rights reserved. “LG” is a registered trademark of LG Corp.
SAFETY INSTRUCTIONS
INSTALLATION - CONTINUED
Don’t install the unit where it’s directly exposed to ocean
winds.
Ocean winds may cause corrosion, particularly on the condenser and
evaporator ns, which, in turn could cause product malfunction or inef-
cient performance.
When installing the unit in a low-lying area, or a location that
is not level, use a raised concrete pad or concrete blocks to
provide a solid, level foundation.
This may prevent water damage and reduce abnormal vibration.
Properly insulate all cold surfaces to prevent “sweating.”
Cold surfaces such as uninsulated piping can generate condensate that
may drip and cause a slippery surface condition and/or water damage to
walls.
When installing the unit in a hospital, mechanical room, or
similar electromagnetic eld (EMF) sensitive environment,
provide sufcient protection against electrical noise.
Inverter equipment, power generators, high-frequency medical equip-
ment, or radio communication equipment may cause the air conditioner to
operate improperly. The unit may also affect such equipment by creating
electrical noise that disturbs medical treatment or image broadcasting.
Do not use the product for special purposes such as
preserving foods, works of art, wine coolers, or other
precision air conditioning applications. The equipment is
designed to provide comfort cooling and heating.
There is risk of property damage.
Do not make refrigerant substitutions. Use R410A only.
If a different refrigerant is used, or air mixes with original refrigerant, the
unit will malfunction and be damaged.
Keep the unit upright during installation to avoid vibration or
water leakage.
Do not install the unit in a noise sensitive area.
When connecting refrigerant tubing, remember to allow for
pipe expansion.
Improper piping may cause refrigerant leaks and system malfunction.
Take appropriate actions at the end of HVAC equipment life
to recover, recycle, reclaim or destroy R410A refrigerant
according to applicable U.S. Environmental Protection
Agency (EPA) rules.
Periodically check that the outdoor frame is not damaged.
There is a risk of equipment damage.
Install the unit in a safe location where nobody can step on or
fall onto it. Do not install the unit on a defective stand.
There is risk of unit and property damage.
Install the drain hose to ensure adequate drainage.
There is a risk of water leakage and property damage.
Don’t store or use ammable gas / combustibles near the
unit.
There is risk of product failure.
Always check for system refrigerant leaks after the unit has
been installed or serviced.
Low refrigerant levels may cause product failure.
The unit is shipped with refrigerant and the service valves
closed. Do not open service valves on the unit until all
non-condensibles have been removed from the piping system
and authorization to do so has been obtained from the com-
missioning agent.
There is a risk of refrigerant contamination, refrigerant loss and equip-
ment damage.
Do not run the compressor with the service valves closed.
There is a risk of equipment damage.
Be very careful when transporting the product.
• Do not attempt to carry the product without assistance.
• Some products use polypropylene bands for packaging. Do not use polypropylene bands to lift the unit.
• Suspend the unit from the base at specified positions.
• Support the unit a minimum of four points to avoid slippage from rigging apparatus.
If the air conditioner is installed in a small space, take
measures to prevent the refrigerant concentration from
exceeding safety limits in the event of a refrigerant leak.
Consult the latest edition of ASHRAE (American Society of Heating,
Refrigerating, and Air Conditioning Engineers) Standard 15. If the
refrigerant leaks and safety limits are exceeded, it could result in person-
al injuries or death from oxygen depletion.
Install the unit in a safe location where nobody can step on or
fall onto it.
There is risk of physical injury or death.
Properly insulate all cold surfaces to prevent “sweating.”
Cold surfaces such as uninsulated piping can generate condensate
that could drip, causing a slippery surface that creates a risk of slipping,
falling, and personal injury.

5
Safety Instructions
Due to our policy of continuous product innovation, some specifications may change without notification.
©LG Electronics U.S.A., Inc., Englewood Cliffs, NJ. All rights reserved. “LG” is a registered trademark of LG Corp.
SAFETY INSTRUCTIONS
High voltage electricity is required to operate this system.
Adhere to the National Electrical Codes and these
instructions when wiring.
Improper connections and inadequate grounding can cause accidental
injury or death.
Always ground the unit following local, state, and National
Electrical Codes.
Turn the power off at the nearest disconnect before servicing
the equipment.
Electrical shock can cause physical injury or death.
Properly size all circuit breakers or fuses.
There is risk of re, electric shock, explosion, physical injury or death.
WIRING
The information contained in this manual is intended for use
by an industry-qualied, experienced, certied electrician
familiar with the U.S. National Electric Code (NEC) who is
equipped with the proper tools and test instruments.
Failure to carefully read and follow all instructions in this manual can
result in equipment malfunction, property damage, personal injury or
death.
All electric work must be performed by a licensed electrician
and conform to local building codes or, in the absence of
local codes, with the National Electrical Code, and the
instructions given in this manual.
If the power source capacity is inadequate or the electric work is not
performed properly, it may result in re, electric shock, physical injury or
death.
Refer to local, state, and federal codes, and use power wires
of sufcient current capacity and rating.
Wires that are too small may generate heat and cause a re.
Secure all eld wiring connections with appropriate wire
strain relief.
Improperly securing wires will create undue stress on equipment power
lugs. Inadequate connections may generate heat, cause a re and
physical injury or death.

6
MULTI V 5 Outdoor Unit Drain Pan Heater Installation Manual
Due to our policy of continuous product innovation, some specifications may change without notification.
©LG Electronics U.S.A., Inc., Englewood Cliffs, NJ. All rights reserved. “LG” is a registered trademark of LG Corp.
SAFETY INSTRUCTIONS
Clean up the site after installation is nished, and check
that no metal scraps, screws, or bits of wiring have been left
inside or surrounding the unit.
Do not use this equipment in mission critical or special-
purpose applications such as preserving foods, works of art,
wine coolers or refrigeration. The equipment is designed to
provide comfort cooling and heating.
Oil, steam, sulfuric smoke, etc., can signicantly reduce the performance
of the unit, or damage its parts.
Do not block the inlet or outlet.
Unit may malfunction.
Securely attach the electrical part cover to the indoor unit
and the service panel to the outdoor unit.
Non-secured covers can result in malfunction due to dust or water in the
service panel.
Periodically verify the equipment mounts have not
deteriorated.
If the base collapses, the unit could fall and cause property damage
or product failure.
Do not allow water, dirt, or animals to enter the unit.
There is risk of unit failure.
OPERATION
Do not provide power to or operate the unit if it is ood-
ed or submerged.
There is risk of re, electric shock, physical injury or death.
Use a dedicated power source for this product.
There is risk of re, electric shock, physical injury or death.
Do not operate the disconnect switch with wet hands.
There is risk of re, electric shock, physical injury or death.
If gas leaks out, ventilate the area before operating the unit.
If the unit is mounted in an enclosed, low-lying, or poorly ventilated area,
and the system develops a refrigerant leak, it may cause re, electric
shock, explosion, physical injury, or death.
To avoid physical injury, use caution when cleaning or servicing the air conditioner.
Do not allow water, dirt, or animals to enter the unit.
There is risk of re, electric shock, physical injury or death.
Avoid excessive cooling and periodically perform ventilation
to the unit.
Inadequate ventilation is a health hazard.
Do not touch the refrigerant piping during or after
operation.
It can cause burns or frostbite.
Do not operate the unit with the panel(s) or protective
cover(s) removed; keep ngers and clothing away from
moving parts.
The rotating, hot, cold, and high-voltage parts of the unit can cause
physical injury or death.
Periodically verify the equipment mounts have not
deteriorated.
If the base collapses, the unit could fall and cause physical injury or
death.
Periodically check power wiring for damage.
Power wiring must be replaced by the manufacturer, its service agent, or
similar qualied persons in order to avoid physical injury and/or electric
shock.
Do not open the inlet grille of the unit during operation.
Do not operate the unit with the panels or guards re-
moved. Do not insert hands or other objects through the
inlet or outlet when the unit has power applied to it. Do
not touch the electrostatic lter, if the unit includes one.
The unit contains sharp, rotating, hot, and high voltage parts that can
cause personal injury and/or electric shock.
Securely attach the electrical part cover to the indoor unit
and the service panel to the outdoor unit.
Non-secured covers can result in burns or electric shock due to dust or
water in the service panel.

7
Installation
Due to our policy of continuous product innovation, some specifications may change without notification.
©LG Electronics U.S.A., Inc., Englewood Cliffs, NJ. All rights reserved. “LG” is a registered trademark of LG Corp.
TABLE OF CONTENTS
Safety Precautions ...................................................................................................................................................................................................... 3-6
Congurations................................................................................................................................................................................................................ 8
Options............................................................................................................................................................................................................................ 9
Components............................................................................................................................................................................................................. 10-13
Wiring ............................................................................................................................................................................................................................ 14
Installation ............................................................................................................................................................................................................... 15-24

8
MULTI V 5 Outdoor Unit Drain Pan Heater Installation Manual
Due to our policy of continuous product innovation, some specifications may change without notification.
©LG Electronics U.S.A., Inc., Englewood Cliffs, NJ. All rights reserved. “LG” is a registered trademark of LG Corp.
Drain pan heater is an optional accessory (sold separately) for Multi VTM 5 Outdoor Units (ODUs). The heater is for use on both heat pump
and heat recovery systems. Drain pan heater is available in the following configurations:
6.0 Ton Multi V 5 ODU
• 208/240V - 498W
• 460V—633W
8.0 - 20.0 Ton Multi V 5 ODU
• 208/240V - 599W
• 460V - 761W
Control sequence for the drain pan heater function
Function (Fn23) informs the master outdoor unit microprocessor that an optional drain pan heater is installed in the outdoor unit. Selecting to
engage this option can only be done if a properly sized heater is in place to keep the bottom surface of the outdoor unit >32°F.
The microprocessor will power outdoor unit PCB terminal “CN25_Basepan Heater” when at least one (1) compressor in the frame is operat-
ing, the outdoor air temperature is <39ºF, and either the following conditions occur:
1. Outdoor unit is operating in heating.
2. Outdoor unit is in defrost.
The controller will shut off drain pan heating operation when the outdoor air temperature rises >39ºF, or when all compressors stop operating.
Heater element paths for 6.0 Ton and 8.0 - 20.0 Ton ODUs
Figure 1: Heater Element path for 6 Ton ODU.
DRAIN PAN HEATER CONFIGURATIONS
Figure 2: Heater Element path for 8 - 20 Ton ODU.
Heater Element path.
(ODU Bottom View)

9
Installation
Due to our policy of continuous product innovation, some specifications may change without notification.
©LG Electronics U.S.A., Inc., Englewood Cliffs, NJ. All rights reserved. “LG” is a registered trademark of LG Corp.
Drain pan heater options
Table 1 lists the drain pan heater models and the corresponding Multi V 5 Outdoor Unit model numbers.
Model Number Multi V 5 ODU Model Tonnage Wattage Voltage Amps Fuse
ZPLT1A51A ARUM072BTE5 6 498 208/230 2.39 KTK-3
ZPLT2A51A ARUM072DTE5 6 633 460 1.38 KTK-1 1/2
ZPLT1A52A ARUM096BTE5 8 599 208/230 2.88 KTK-3
ZPLT2A52A ARUM096DTE5 8 761 460 1.65 KTK-2
ZPLT1A52A ARUM121BTE5 10 599 208/230 2.88 KTK-3
ZPLT2A52A ARUM121DTE5 10 761 460 1.65 KTK-2
ZPLT1A52A ARUM144BTE5 12 599 208/230 2.88 KTK-3
ZPLT2A52A ARUM144DTE5 12 761 460 1.65 KTK-2
ZPLT1A52A ARUM168BTE5 14 599 208/230 2.88 KTK-3
ZPLT2A52A ARUM168DTE5 14 761 460 1.65 KTK-2
ZPLT1A52A ARUM192BTE5 16 599 208/230 2.88 KTK-3
ZPLT2A52A ARUM192DTE5 16 761 460 1.65 KTK-2
ZPLT1A52A ARUM216BTE5 18 599 208/230 2.88 KTK-3
ZPLT2A52A ARUM216DTE5 18 761 460 1.65 KTK-2
ZPLT1A52A ARUM241BTE5 20 599 208/230 2.88 KTK-3
ZPLT2A52A ARUM241DTE5 20 761 460 1.65 KTK-2
Table 1: Drain Pan Heater options and corresponding Multi V 5 ODU models.
DRAIN PAN HEATER OPTIONS

10
MULTI V 5 Outdoor Unit Drain Pan Heater Installation Manual
Due to our policy of continuous product innovation, some specifications may change without notification.
©LG Electronics U.S.A., Inc., Englewood Cliffs, NJ. All rights reserved. “LG” is a registered trademark of LG Corp.
ZPLT1A51A: Drain pan heater for Multi V 5 6.0 Ton ODU
208-230V/ 60Hz/ 1Ø, 498W
Part Quantity Image
Control Box Assembly 1
Control Signal Harness 1
Heater Contactor 1
Rubber Fuseholder covers 4
Incoming Power Fuseholder 2
Incoming Power Fuse (KTK-3) 2
Tubular Heater Element 498W (126
inches) (CSA Listed) 1
1/4” Attachment Clamps 10
Control Box Grommets 2
Self-drilling Screws 12
Slot Screws 2
DRAIN PAN HEATER COMPONENTS

11
Installation
Due to our policy of continuous product innovation, some specifications may change without notification.
©LG Electronics U.S.A., Inc., Englewood Cliffs, NJ. All rights reserved. “LG” is a registered trademark of LG Corp.
ZPLT1A52A: Drain pan heater for Multi V 5 8.0 - 20.0 Ton ODU
208-230V/ 60Hz/ 1Ø, 599W
Part Quantity Image
Control Box Assembly 1
Control Signal Harness 1
Heater Contactor 1
Rubber Fuseholder covers 4
Incoming Power Fuseholder 2
Incoming Power Fuse (KTK-3) 2
Tubular Heater Element 599W (149
inches) (CSA Listed) 1
1/4” Attachment Clamps 10
Control Box Grommets 2
Self-drilling Screws 12
Slot Screws 2
DRAIN PAN HEATER COMPONENTS

12
MULTI V 5 Outdoor Unit Drain Pan Heater Installation Manual
Due to our policy of continuous product innovation, some specifications may change without notification.
©LG Electronics U.S.A., Inc., Englewood Cliffs, NJ. All rights reserved. “LG” is a registered trademark of LG Corp.
ZPLT2A51A: Drain pan heater for Multi V 5 6.0 Ton ODU
460V/ 60Hz/ 1Ø, 633W
Part Quantity Image
Control Box Assembly 1
Control Signal Harness 1
Heater Contactor 1
Rubber Fuseholder covers 4
Incoming Power Fuseholder 2
Incoming Power Fuse (KTK- 1 1/2) 2
Tubular Heater Element 633W (126
inches) (CSA Listed) 1
1/4” Attachment Clamps 10
Control Box Grommets 2
Self-drilling Screws 12
Slot Screws 2
DRAIN PAN HEATER COMPONENTS

13
Installation
Due to our policy of continuous product innovation, some specifications may change without notification.
©LG Electronics U.S.A., Inc., Englewood Cliffs, NJ. All rights reserved. “LG” is a registered trademark of LG Corp.
ZPLT2A52A: Drain pan heater for Multi V 5 8.0 - 20.0 Ton ODU
460V/ 60Hz/ 1Ø, 761W
Part Quantity Image
Control Box Assembly 1
Control Signal Harness 1
Heater Contactor 1
Rubber Fuseholder covers 4
Incoming Power Fuseholder 2
Incoming Power Fuse (KTK-2) 2
Tubular Heater Element 599W (149
inches) (CSA Listed) 1
1/4” Attachment Clamps 10
Control Box Grommets 2
Self-drilling Screws 12
Slot Screws 2
DRAIN PAN HEATER COMPONENTS

14
MULTI V 5 Outdoor Unit Drain Pan Heater Installation Manual
Due to our policy of continuous product innovation, some specifications may change without notification.
©LG Electronics U.S.A., Inc., Englewood Cliffs, NJ. All rights reserved. “LG” is a registered trademark of LG Corp.
Unit Label for Drain Pan Heater
Each drain pan heater model has 1 unit label.
DRAIN PAN HEATER WIRING
Figure 3: Additional Unit Label for Drain Pan Heater.
Figure 4: Drain pan heater wiring diagram.

15
Installation
Due to our policy of continuous product innovation, some specifications may change without notification.
©LG Electronics U.S.A., Inc., Englewood Cliffs, NJ. All rights reserved. “LG” is a registered trademark of LG Corp.
Step 1
It is recommended to install the drain pan heater prior to final installation of the outdoor unit. However, if the heater is to be added post instal-
lation then sufficient space under the unit must be available to properly install the element.
Minimum distance above the roof surface for post outdoor unit installation of the drain pan heater element is 18 inches.
Typical, locally approved
snow curb (field supplied
and installed by others)
DRAIN PAN HEATER INSTALLATION
Figure 5: Minimum space requirements if installing drain pan heater after ODU installation.
Turn off power to outdoor unit before installation.
Electric shock can cause physical injury or death.
Depending on the area of installation, add a Ground Fault Interrupt (GFI) circuit breaking device to prevent potential electric
shock.
Electric shock can cause physical injury or death.
Properly ground all outdoor units. Ground wiring must always be installed by a qualied technician. Ground wiring is re-
quired to prevent accidental electrical shock.
Electric shock can cause physical injury or death.

16
MULTI V 5 Outdoor Unit Drain Pan Heater Installation Manual
Due to our policy of continuous product innovation, some specifications may change without notification.
©LG Electronics U.S.A., Inc., Englewood Cliffs, NJ. All rights reserved. “LG” is a registered trademark of LG Corp.
Steps 2 and 3
2. Clean the bottom of the outdoor unit. Verify that it is free from dirt and debris to ensure proper adhesion of the foil tape to drain pan sur-
face.
3. Apply foil tape to the bottom of the ODU as shown below, along the path that the heater element will follow.
• Use only UL181 listed aluminum foil tape.
Do not allow direct contact between the element and the painted drain pan surface.
Apply UL181 listed aluminum foil tape
to bottom of the outdoor unit along the path of heater element.
Prior to applying tape, verify that the surface is free of dirt and debris.
Apply UL181 listed aluminum foil tape
to bottom of the outdoor unit along the path of heater element.
Prior to applying tape, verify that the surface is free of dirt and debris.
Figure 6: Apply tape to bottom of ODU (6.0Ton). Figure 7: Apply tape to bottom of ODU (8.0 - 20 Ton).
DRAIN PAN HEATER INSTALLATION
Turn off power to outdoor unit before installation.
Electric shock can cause physical injury or death.
Depending on the area of installation, add a Ground Fault Interrupt (GFI) circuit breaking device to prevent potential electric
shock.
Electric shock can cause physical injury or death.

17
Installation
Due to our policy of continuous product innovation, some specifications may change without notification.
©LG Electronics U.S.A., Inc., Englewood Cliffs, NJ. All rights reserved. “LG” is a registered trademark of LG Corp.
Step 4
4. Unroll the flexible heater element and form it to the geometric shape shown in the figure below. Heater must be formed and the ends
extended through the bottom knockouts to the inside of the outdoor unit.
• Six inches from each end of the element are not heated.
• Minimum heater bend radii are 1 inch.
Route heater element along the taped path not allowing the element
to have direct, physical contact with the base pan paint surface.
Attach the heater element using
the clamps (10 places) and
self-drilling screws provided.
Hex Head drilling screws for metal.
High-strength 410 stainless steel,
#8 size, 1/2" long.
6 Ton Multi V 5 ODU bottom view.
Figure 8: Form heater element and extend ends through the knockouts at bottom of ODU (6.0 Ton).
DRAIN PAN HEATER INSTALLATION
Turn off power to outdoor unit before installation.
Electric shock can cause physical injury or death.
Do not puncture the outdoor unit coil or other interior components when drilling holes for the screws.
If there is a hole in the outdoor unit coil, there is a risk of refrigerant leak. Exposure to high concentration levels of refrigerant gas may lead to
illness or death.

18
MULTI V 5 Outdoor Unit Drain Pan Heater Installation Manual
Due to our policy of continuous product innovation, some specifications may change without notification.
©LG Electronics U.S.A., Inc., Englewood Cliffs, NJ. All rights reserved. “LG” is a registered trademark of LG Corp.
Route heater element along the taped path not allowing the element
to have direct, physical contact with the base pan paint surface.
Attach the heater element using
the clamps (10 places) and
self-drilling screws provided.
8-20 Ton Multi V 5 ODU bottom view.
Figure 9: Form heater element and extend ends through the knockouts at bottom of ODU (8 - 20 Ton).
Six inches from each end of the
element are not heated. Run
rubber ends through knockouts
into the inside of the ODU
in the vertical position as shown.
Service Ports
Pipe Not Used for
Heat Pump Systems
(Keep Closed
and Capped)
Liquid Pipe
Vapor Pipe
Top view of knockoputs inside ODU
Figure 10: Multi V 5 ODU Service Ports.
DRAIN PAN HEATER INSTALLATION
Turn off power to outdoor unit before installation.
Electric shock can cause physical injury or death.
Do not puncture the outdoor unit coil or other interior components when drilling holes for the screws.
If there is a hole in the outdoor unit coil, there is a risk of refrigerant leak. Exposure to high concentration levels of refrigerant gas may lead to
illness or death.
Step 4, continued

19
Installation
Due to our policy of continuous product innovation, some specifications may change without notification.
©LG Electronics U.S.A., Inc., Englewood Cliffs, NJ. All rights reserved. “LG” is a registered trademark of LG Corp.
5. Remove outdoor unit front panel to access internal components.
6 Ton Control Box access
Rear
Top view
Right Right
Left Left
Rear
Front Front
Top view
8 - 20 Ton Control Box access
6. After removing the outdoor unit front panel to access internal components, attach the Contact Box Cover as shown below to the outdoor
unit control box.
• Attach on the right hand side of the unit control box for the 6 Ton ODU.
• Attach on the left hand side of the control box for 8 - 20 Ton ODU.
• Use two of the self-drilling #8, ½” screws in the installation kit.
Remove the Contactor Mounting Plate Subassembly from the Contactor Box Cover rst.
6 Ton Multi V 5 Outdoor Unit
Front view Side view Control box front view
Step 5
Figure 11: Multi V 5 ODU Front Panel.
Step 6
Figure 12: Attach contact box cover for 6.0 Ton Multi V 5 ODU unit.
DRAIN PAN HEATER INSTALLATION
Do not damage the electrical components inside the oudoor unit control box when drilling screws.
Damaged wiring runs the risk of re, electric shock, and physical injury or death.
Turn off power to outdoor unit before installation.
Electric shock can cause physical injury or death.
Verify the wires are
routed such that they
do not get pinched,
placed in tension or
rub against any sharp,
metal edge prior to
securing.
Damaged wiring runs the
risk of re, electric shock,
and physical injury or death.

20
MULTI V 5 Outdoor Unit Drain Pan Heater Installation Manual
Due to our policy of continuous product innovation, some specifications may change without notification.
©LG Electronics U.S.A., Inc., Englewood Cliffs, NJ. All rights reserved. “LG” is a registered trademark of LG Corp.
8 - 20 Ton Multi V 5 Outdoor Unit
Front viewSide view
Control box front view
Figure 13: Attach contact box cover for 8 - 20 Ton Multi V 5 ODU unit.
Step 6, continued
Attach on the left hand side of the control box for 8.0 - 20.0 Ton ODU.
Contactor Box Cover
Figure 14: Contactor box cover.
DRAIN PAN HEATER INSTALLATION
Do not damage the electrical components inside the oudoor unit control box when drilling screws.
Damaged wiring runs the risk of re, electric shock, and physical injury or death.
Verify the wires are routed such that they do not get pinched, placed in tension or rub against any sharp, metal edge prior to
securing.
Damaged wiring runs the risk of re, electric shock, and physical injury or death.
Turn off power to outdoor unit before installation.
Electric shock can cause physical injury or death.
This manual suits for next models
4
Table of contents
Other LG Heater manuals
Popular Heater manuals by other brands

Sonniger
Sonniger Heater R2 Operation and maintenance manual

Milan Blagojevic
Milan Blagojevic Royal 900 owner's manual

HeatStar
HeatStar HSRR30SP(LP) Operating instructions and owner's manual

S&P
S&P PM-755 instruction manual

Master
Master B 3 EPB W 110 User and Maintenance Book

Drolet
Drolet DV30 Installation and operating instructions