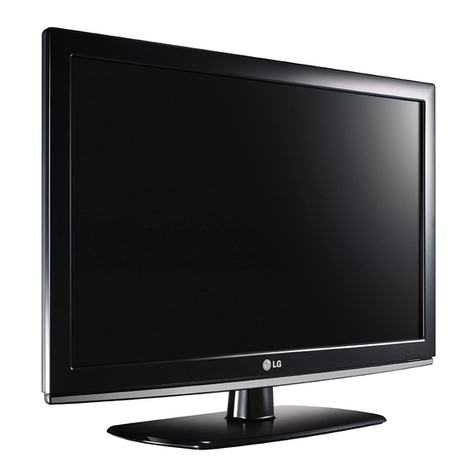
LG 23LC1RB User manual

LCD
_lllllllllllllllllllllllllll_
OWNER'S MANUAL
MODEL: 23LCi R*
Intemet Home Page: hffp:/lw_Jge.com
ENF_RGYSATR is a set of power-saving
guidelines issued by the U.S.
Environmental Protection Agency(EPA),
As a_ ENERGY KIAR
Partner Lf_E U, S. A,,lnc.
has demnniued that this
product meres the ENER-
GY STAR guidelines fi_
energy efficiency,
Please read this manual carefully before operating
your set.
Retain it for future reference.
Record model number and serial number of the set.
See the label attached on the back cover and quote
this information to your dealer
when you require service.
P/NO : 38289U0024C (0605-REVO0)
Printed in Korea

Warn_
WARNING:
TO R_UCE THE RI_ OF ELECTRIC S_K DO NOT REMOVE COVER (OR BACK). rio
_ER SEFCVlCEABLEPARTS INSIDE. REFER TO QUALIFIED SERVICE PERSONNEL.
The lightning flash with arrowhead sym_, v_hin an equilate_ t6_.,_.ngle,is inter_ed to alert
to _ p_ence of mi_ed "dan_rous vol_ge" within tte prod_s encore that may
be of s_ier_ magn_,zJe to constA,,tea _k of _.ric shock to _r_qs.
T#_ exclama_ pointwithin an equilateral triangle is intendedto _ _ _er to _ p_ence of
i_rtant operating and m__ (ser,4ci_) _trt_ons in_ literature _panying
_ia_
NOTE TO CABLE/TV INSTALLER:
This reminder is provided to call the CATV system instaHer's attention to Article 82G40 of the
National Electric Code (U.S.A.). The code provides guidelines for proper grounding and, in par-
ticular, specifies that the cable ground shah be connected to the grounding system of the build°
ing, as close to the point of the cable entry as practical
REGULATORY INFORMATION
This equipment has been tested and found to comply with the limits for a Class B digitai device,
pursuant to Part 15 of the FCC Rules. These limits are design_ to provide reasonable pro-
tection against harmful interference in a residential installation. This equipment generates,
uses and can radiate radio frequency energy and, if not installed and used in accordance with
the instructions, may cause harmful interference to radio communications. However, there is
no guarantee that interference writ not occur in a particular installation If this equipment does
cause harmful interference to radio or television reception, which can be determined by turn
ing the equipment off and on, the user is encouraged to try to correct the interference by one
or more of the following measures:
- Reorient or relocate the receiving antenna.
- increase the separation between the equipment and receiver.
- Connect the eq_ment into _ oulet _ a d_it different from _ to w_h the receiver is_nnected
- Consult the dealer or an experienced radioiTV technician for help.
Any changes or modifications not expressly approved by the party, responsiMe for compliance
could void the user's authority" to operate the equipment.
CAUTION:
Do not attempt to rrk.'_Jifythis product in any":way without written au_rizatbn from LG Electronics
Co.ratio, Unaut_dzed m_ificat#n oou_dvoid the _'s au_ to operate this _u_.
U.S.A. only
COMPLIANCE:
The responsible party for this product's compliance is:
LG Electronics U.S.A., Inc.
10_ Sylvan Avenue, Englewood Cliffs, NJ 07632
Phone: 1-8_-243-00&3
http:i/us,lge.com
2

SafetyInstructions
fWARNING:
To Reduce The Risk Of Fire Or Electric Shock, Do Not Expose This Apparat_ To Rain Or Moisture.
Apparatus shall not be exposed to dripping or splashing and no objects filled with liquids, such as vases,
shall _ placed on the _pparatus.
IMPORTANT SAFETY INSTRUCTIONS
1. Read these instructions.
2. Keep these instructions.
3 Heed all warnings.
4 Follow all instructions,
5. Do not use this apparatus near water.
6. Clean only with a dry cloth.
8. Do not install near any heat sources such
as radiators, heat registers, stoves, or other
apparatus (including amplifiers) that pro=
duce heat.
9_ Do not defeat the safety purpose of the
polarized or grounding type plug A polar-
ized plug has two blades with one wider
than the other. A grounding type plug has
two blades and a third grounding prong. The
wide blade or the third prong is provided for
your safety. When the provided plug does
not fit into your outlet, consult an electrician
for replacement of the obsolete outlet.
10 Protect the power cord from being walked
on or pinched particularly, at plugs, conve-
nience receptacles, and the point where
they exit from the apparatus,
7. Do not block any of the ventilation open-
ings. Install in accordance with the manu -
facturer's instructions. 11_Only use the attachments /acces_ries
specified by the manufacturer.
J
3

Safety instructions
Safety Instructions continued
12 Use onty with a _rL stand, tripod, bracket, or
table specified by the manufacturer, or sold
with the apparatus. When a _rt is _ed, use
cau_on when moving _e cart /apparatus
combination to avoid injury from tip-over.
14. Refer all servicing to qualified service per-
sonnel. Servicing is required when the
apparatus has been damaged in any way',
such as power supply cord or plug is dam-
aged, liquid has been spilled or objects
have fallen into the apparatus, the appara-
tus has been exposed to rain or moisture,
does not operate normally, or has been
dropped.
13. Unplug this apparatus during lightning storms
or when unwed for !ong pe#ods of time,
fNote
- if the TV feels cold to the touch, there may be a small '_licker" when when it is turned on. This
is normal, there is nothing wrong with TW
oSome minute dot defects may be visible on the screen, appearing as tiny red, green, or blue
spots. However, they have no adverse effect on the monitoCs performance
- Avoid touching the LCD screen or holding your finger(s) against it for long periods of time.
Doing so may produce some temporary distortion effects on the screen.
/f
CAUTION concerning the Power Cord
Most appliances recommend they be placed upon a dedicated circuit; that is, a single outlet circuit
which powers only that appliance and has no additional outlets or branch circuits. Check the speci-
fication page of this owner's manual to be certain.
Do not overload wall outlets. Overloaded wall outlets, loose or damaged wall outlets, extension
co_s, frayed power cords, or damaged or cracked wire insulation are dangerous Any of these con-
ditions could result in electric shock or fire. Periodically examine the cord of your appliance, and if
i_ appearance indicates damage or deterioration, unplug it, discontinue use of the appliance, and
have the cord replaced with an exact replacement part by' an authorized servicer.
Protect the power cord from physical or mechanical abuse, such as being twisted, kinked, pinched,
closed in a door, or walked upon. Pay particular attention to plugs, wall outlets,, and the point where
the cord exits the appliance.
J
%
J
4
I°° 1
a. The fluorescent lamp used in this product contains a small amount of mercury'.
b Do not dispose of this product with general household waste.
Di_sal of this product m_t be carried out: in accordance to the t_ulatior'_ of your I_l authority:

Contents
Warnings ........................ 2
Safety instructions ................... 3-4
Introduction
Controls ..................... 6
Connection Options ............... 7
Remote Control Key Functions ...... 8
Installation
Accessories .................... 9
Kensington Security System ........ 9
installation instruction ........... 10
Please set it up carefully so the product doesn't
fall over ....................... 12
External Equipment Connections , ,13~16
Antenna Connection ............. 13
VOR Setup ....................... 14
Cable TV Setup ................. 14
External #J'v' Source Setup ........ 15
DVD Setup .................... 15
DTV Setup .................... 16
Using Headphones .............. 16
PC Setup ....................... 16
TV Operation Overview ......... 17
Menu Language Selection ........... 17
Channei Menu Options
Me_r_ir_j the Chanr_s wi_ E Scan, .18
Add/Delete Channels with Manual
Program ...................... 18
Favorite Channels Setup ........... 19
Picture Menu Options
EZ Video ...................... 20
Manual Picture Control( User option) .20
Picture format(ARC) .............. 20
Sound Menu Options
EZ Audio .................... 21
Equalizer Adjustments ............ 21
AVL (Auto Volume Leveler) ........... 21
Sound Balance ................. 22
Stereo/SAP Broadcasts Setup ...... 22
Time Menu Options
Auto Clock Setup ............... 23
Manual Clock Setup ............. 23
OpJOff Timer Setup ............. 24
Sleep Timer Setup .............. 24
Auto Off ....................... 24
Special Menu Options
Closed Captions ................ 25
Caption/Text .................... 26
Captions ...................... 26
Key Lock ........................ 27
Lock Menu Options .............. 28
Lock Menu Setup ............... 29
Power indicator ................. 29
PC Menu Options ................. 3,9
Maintenance ......................... 31
Troublesh_ting Checklist ............. 32
Product Specifications ................ 34
After reading this manual, keep it handy for future reference.
5
I

Introduction
Channel
Buttons
Volume
Buttons
On/Off
Enter Button
Button Input
Button
Menu
Button
Remote Control Sensor
PowedStandby indicator
Glows amber in Standby mode,
Glows blue when the TV is turned on,
6

Introduction
Connection Options
ANTENNA
INPUT PC SOUND
PC INPUT JACK i INPUT
i// _ I I
,,_ /l " '" oI
AC INPUT 1 S-VIDEO
COMPONENT (DTV/DVD IN) 1 INPUT
((480ii480p!720p/1080i), Audio) 1
AUDIO!VIDEO HEADPHONE
INPUT JACK
7

Introduction
Remote Control Key
- When using the remote control, aim it at the remote control sensor on the TV.
MUTE
Switches the sound on or off.
TV
Returns to the _ mode.
FAV
(Refer to p19)
EXIT
NUMBER buttons
AUDIO
(Refer to p.21)
CC
(Refer to p26)
ARC.
(Refer to p20)
INPUT
Selects: _#,
Videol, Video2,
Com_nent or
PC input sources
MTS
(Refer to p.22)
ENTER
OH AtV (Channel button)
VOL _/I1_ (Volunr_ button)
VIDEO
(Refer to p.20)
SLEEP
(Refer to p_24)
FLASHBK
Press the FLASHBK button
to return to the last channel
you were watching.
° Open the battery compartment cover on the back side and insert
the batteries with correct polarity:
° Use two 1.5V batteries of AAA _pe. Don't mix used batteries with
new batteries.
8

Installation
i
Owner's Manual AAA Batteries
Remote Control Power Cord Tie Holder
- Arrange the wires
with the tie Holder.
D-sub cable (PC) Audio cable (PC) 2-TV
Br_ket Bolts I-TV Bracket,
2-Wali Bracket
Installation
guide Rack 4-Anchor 4_Screws for wall
mount rack Fixing _rew
-The TV is equipped with a Kensington Security System con-
nector on the back panel. Connect the Kensington Security
System cable as shown below,
- For the detailed installation and use of the Kensington
Security System, refer to the user's guide provided with the
Kensington Security System
For further info_ation, contact http:tfwww,kensington,_m,
the intemet homepage of the Kensington company,
Kensington sells _urity systems for expensive electronic
equipment such as noteb_k PCs and LCD projector&
NOTE
oThe Kensington _curity System is an optional accesso_.
NOTES
a. If the TV feels cold to the touch, there may _ a small "flicker" when when it is turned on.
This is normal, there is nothing wrong with TV.
b. Some minute dot defects may _ visible on the _r_n, appeari_ as tiny red, green, or blue spots.
However, they have no adverse effect on tP_ monitor's perfom_ance.
c. Avoid touching the LCD _reen or holding your finger(s) against it for long periods of time.
Doing so may produce some temporary distortion effects on the screen.
9
I

Installation
Installation Instruction
1. Place the set with its front facing downward on a cushion or soft cloth.
2. Hold down the release button inside the stand and strongly pull out the stand with your two hands.
Note: Here shown my _ somew_t d_erent from your set
The stand won't: move if you don't
press release button.
4 inch_
,!
//
......i¸¸¸
s ¸
/-
i,/,
For proper ventilaSon, allow a clearance of 4" on _ch side and from the wa& Detailed insta_tion instruc-
tbns are available from your dealer, see the optional Tilt Wail Mounting Bracket instalAtion and Setup Guide.
For proper ventilation, allow a clearance of 4" on each side and from
the wall.
10¸

Installation
Installatio n !nstructio n Co nti nued
1. Connect the aerial cable to the socket mark_/75 _ on the back. For the best reception an
outdoor aerial should be used.
2. To connect an additional equipment, see the External Equipment Connections section.
3. Connect the power cord.
Note: Here shown may be somewhat different from your set.
Adjust the positbn of the panel in various ways for maximum comfort.
-Tilt range
Be careful that your hands are _t
pressed down when tiring the screen.
11

Installation
Please set it up carefully so the product:
n,does t fall over
Set it up close to the wall so the product doesn't fall over when it is pushed back_
'wards.
The instructions shown below is a safer way to set up the pr_uct, which is to fix it on
the wail so the product doesn't fall over when it is pulled in the forward direction. It:will
prevent the product from failing forward and hurting people. _t will a}so prevent the
product from damage caused by fall. Please make sure that children don't climb on
or hang from the product.
Accessories /
2°TV Bracket Bolts t oTV Bracket, 2°Wall Bracket
1. Use the bracket and the bo_t to fix the product to the ,Nail as shown in the picture.
2. Secure the bracket w_h the bolt (not prov_ed as parts of the pr_'Juct, must purchase separately) on the waU.
3. Use a sturdy rope (not provided as parts of the product, must purchase separately) to tie the product.
It is safer to tie the rope so it becomes horizontal between the wal_ and the product.
Notes
•When moving the product to another place undo the ropes first.
• Use aproduct holder or acabinet that is big and strong enough for the size and weight of the product.
• To use the product safely make sure that the height of the bracket that is mounted on the wall is same
as that of the product.
12

Installa#on
" n iEqu!pme it Connect ons
- For optimum picture quality, adjust antenna direction,
Connecting to an Inside Antenna Setup
- If you have a 75£). round cable, insert the bronze wire and then tighten the conn_tion nut. ff you have
a 300_. fiat wire, connect the twisted wire to the antenna converter and then connect the converter to
the antenna jack on the TV.
-ff using 75_ round cable, do not bend the bronze wire. It may cause poor picture quality.
Connecting to an Outdoor Antenna _tup
-in poor signal areas, to get better picture qual-
ity, install a signal amplifier to the antenna as
shown to the right.
-ff signal needs to be split for two TVs, use an
antenna signal splitter for connection. UHF
_IP_ ANTIN
13

Installation
External Equipment Connections Continued
In Video mode, TV automatically reverts to TV
mode if the TV buttons are pressed.
Connection 1
Set VCR switch to 3 or 4 and then tune TV to
the same channel number.
Connection 2
1 Connect the audio/video ou_ut jacks on VCR
to the corresponding input jacks on the TW
When connecting the TV to a VCR, match
the jack colors (Video = yellow, Audio Left =
white, and Audio Right = red).
2 Insert a video tape into the VCR and press
PLAY on the VCR, (Refer to the VCR
owner's manual.)
3 Use the INPUT button on the remote control
to select Vicleol
- ff connect_ to S-VIDEO on rear panel
select the S-Vid_ external input source_
After sub_ribing to a local c_le TV sewice aM ins_l_ing a converter, you can watch cable TV pr_ramming
- For further cable TV information, con_ct a local cable serv#e provider.
Connection 1
1_Select 3 or 4 with channe_ switch on cable box,
2, Tune the TV channel to the same selected output channe_ of
cable box,
3_ Se_e_ channels at the cable box or ,Mth the cable box remote control
Connection 2
1_Connect the audio/video ou_ut jacks on Cable Box to the corre-
sponding input jacks on the TV, When connecting the TV to
Cable Box, match the jack co_ors
(Video = yellow, Audio Left = white, and Audio Right = red).
2 Use the INPUT #atton on the remote control to s_t Video1,
3_ Select channels with the cable box remote control,
[]
Cable Box
14

Installation
Connect the audio/video output jacks on the
external A/V equipment to the corresponding
input jacks on the TV. When connecting the
TV to external A/V equipment, match the jack
colors (Video = yellow, Audio Left = white,
and Audio Right = red),
Viewing Setup
1_Turn on the external A/V equipmenL
2 Use the INPUT button on the remote con =
trol to select Video1 or Video 2
3Operate the corresponding external quip-
ment, Refer to external _uipment operat-
ing guide.
External J Video Game
Equipment set
side panel
Camcorder
Video Game
External set
1. Connect the DVD video outputs to the COMPONENT (Y, Ps, PR) jacks and connect the DVD audio
outputs to the AUDIO jacks.
2. If your DVD only has an S-Video output jack, connect this to the S-VIDEO input on the TV and con-
nect the DVD audio outputs to the AUDIO INPUT jacks on the TV.
NOTE: If your DVD player does not have component video output, use S-Video.
Viewing Setup
1. Turn on the DVD player, insert a DVD,
2. Use the INPUT button on the remote control to select
3. Refer to the DVD player's manual for operating instruc_
tions. (If connected to S-VIDEO on rear panel select the
S-Video external input source.)
• Component Input ports
To get better picture quali_, connect a DVD player to
the component input ports as shown below.
Component ports
of the TV
DVD
Video output ports
of DVD piayer
15

Instaflation
To watch digitally broadcast programs, purchase and con °
nect a digital set=top box
Connect the digital set4op box video outputs to the COM-
PONENT (Y, P& PR) jacks and connect the digital set-top
box audio ou_uts to the AUDIO jacks.
Viewing _tup
1 Turn on the digital set4op box. (Refer to the owner's
manual for the digital set4op box)
2. Use the INPUT button on the remote control to select
- Plug headphones in to H/P jack as shown.
-Adjust sound level to a headphone using the volume
(<!, I_) buttons. While you are listening to sound
through a headphone(s), TV speakers will not be heard.
- After setup, be sure to select PC source on TV
ANT IN (lrzs# PC SOUND
0
H!P
__J
1. Set _ mor_or output re_.<&.¢_ _ the _ bdore con_i_ # tt-_TV.
2. Connect the TV to the PC with the PC _ble.
3. Connect the PC audio output to the TV's PC SOUND input.
Viewing _tup
1_Turn on the PC.
2. Use the INPUT button on the remote control to select PC.
MODE Resolut_ Horizontal Vertical
Frequeney(kHz) Frequency{Hz)
VGA 640x480 31_4 60
SVGA 800x600 378 60
XGA 1024x768 4&3 60
WXGA 1280x768 47.7 60
WXGA 1360x768 47.6 60
NOTES
a, F_ optimum pict_e q_ity, _ slarda_ 1360x768@60Hz co_uter _put at a 60Hz re_h m_e, Using _er
formats (VGA, SVGA, etc.) or refresh rates may result in reduced picture q_ity. (Tochan_ the _,ter v_
_put formal please refer to the _ratir_ man_ for _ _puter you are us#g).
b. if the message "Out of range" appears on the screen, adjust the PC output to a format listed in the
'Monitor Display Specifications' chaA above.
c. The synchronization input form for Horizontal and Vertical frequencies is separate.
DPM (Display Power Management) mode
if the PC goes to _wer saving m_e, the monitor automatically switches to DPM mode.
If you don't use the PC cable provided, DPM mode may net work.
16

Operation
ion
TV Operation Overview
1. First, make all _uipment connections. Plug the AC Adapter into the TV, then plug the AC Adapter into
a power outlet. At this time, the TV is switched to standby mode.
•In standby m_e, press the POW_, _, CH (A,V), INPUT or number button on the remote con-
trol or _ f 1,CH (A,V), INPUT button located on the TV to turn the TV on.
2. Select the viewing source by pressing INPUT.
•Note: See page i8 if you have not auto programmed the TV to receive channels in your local broad-
cast area.
3. After viewing, press the POWER button on the remote control or _ /Ibu_on located on the TV. The TV
reve_s to standby mode
NOTE
•if you want to turn the TV off, press the orJoff button located on the TV_ If you intend to be away on
vacation, disconnect the power plug from the wall power outtet.
Men u Lang uage Selection
-The menus can be shown on the screen in the selected language. First select your language.
1 Press the MENU button and then use ,& / Vbutton to select the Sl_,,,lal menu.
2. Press the I_ button arm then _ A /Vbutton to _lect _guage.
3. Press _e I_ button arm then use A /Vbutton to select your desired language.
From this point on, the on-screen menus will be shown in the language of your choice.
4. Press the ENTER button to save.
17
I

Operation
Channel Menu Options
- For Auto program to work, the pr_ramming source must be connect_ to the TV and the _ must be
receiving programming signals either over-the-air or from a cable-type service provider.
1 Press _e MENU button and _en use A /V button to select
the Charme! menu,
2,Press the I_ button and then use ,& / T button to select
Scan,
3, Press the I_ button to begin the channel search,
• Wait for auto program to complete the channel search
cycle before choosing a channel. The TV scans for
over4he-air channels and then channels provided by a
cable service
NOTES
-When the channel search is complete, use the & /T buttons to review the memoriz_ channels.
° If you press the ENTER button in auto programming, the function will stop and only channels programming
up to that time will remain.
* Auto program function can memorize only the channels which are being received at that time
° You can manually include or erase individual channels.
1 Press the MENU button and _en use Ai./T button to select _e
Channel menu,
2 Press the Iw button and then use A /T button to select
M_ual prog.
3 Press the I_ button and then use <1 /I_ button to select a
channel you want to add to memory or erase,
4. Press the V button and then use </I_ button to select
Memory (add) or _ase (delete),
5 Press the ENTER button to save The current channel is
added to Memory or Erased from the channel list
@
The current _anr:el number is d_p{_.
18

Operation
o Favorite Channel lets you quickly tune in up to 8 channels of your choice without having to wait for the
TV to scan through all the in-between channels.
@
1. Press the MENU button and then use A /Vbutton to select the Channel menu.
2. Press the I_ button and then use A /Vbutton to select Favorite cir..
3. Press the I_ button and then use A /_' button to select the first favorite channel _sition.
4. Use the _ /I_ button to set the desired channeJ number for first favorite channel.
5. Repeat steps 3 to 4 to memorize other channels.
6. Press the ENTER button to save.
• To tune to a favorite channel, press the FAV button repeatedly_ The 8 favorite channels appear on
the screen one-by-one,
19
I

Operation
Picture Menu Options
° This function adjusts the Fv' for the best picture appearance.
1. Press the VIDEO button repeatedly to select the picture appearance setup option as shown below:
° You can also adjust EZ Video in the Picture menu.
•Clear, Optimum and Soft are preset for good picture quality at the factory and cannot be changed,
- You can adjust picture contrast, brightness, color, sharpness and tint to the levels you prefer.
1, Press the MENU bu_on and then use A /Vbutton to select the
Picture menu.
2. Press the !_ button and then use A /Vbutton to select the
desired picture option (Contrast Brigh_ess, Color,
Sharpness, TLnt).
3. Use the </I_ button to make appropriate adjustments.
° Contrast, Brightness, Color, and Sharpness are adjustable
from 0 to 1_.
° Tint is adjustable from _ 50 to + 50.
4. Press the ENTER button to save.
@
- You can watch TV in various picture formats; 16;9, Zoom, 4:3.
Repeatedly press the ARC button to select your desired picture format.
-I_9
You can enjoy the cinema (the picture format of 16:9) or general TV programme through the 16:9 mode.
The screen 16:9 is viewed just like that but the screen 4:3 is magnified to the left and right so that the
screen 16:9 is full
° _m
You can enjoy the cinema in a vast screen through the Zoom mode.
The screen 4:3 is magnified to the upper /lower and left /right sides so that the screen 16:9 is full. The
bottom and top of the picture may be lost.
• @3
This picture format is 4 to 3 of general TV.
NOTES
7-oom is not available in PC mode.
20¸
Other manuals for 23LC1RB
1
This manual suits for next models
1
Table of contents
Other LG LCD TV manuals