LG LFX25950TT User manual

websitehttp://us.lge.com
"Z_1-800-243-0000
24 HOURS A DAY, 7 DAYS A WEEK FOR LG CUSTOMER SERVICE
para el Servicio LG (Atenci6n al Cliente) 24 horasal dfa, 7 dfas a la semana
24 HEURES SUR 24, SERVICE ,_LA CLIENTELE LG 7 JOURS SUR 7
BOTTOM FREEZER
REFRIGERATOR
Please read this guide thoroughly
before operating and keep it handy for
reference at all times.
R
y Cuantes
referencia
R
de mettre
& portee de la
P/No. MFL37933501

English Version 2
Spanish Version 40
French Version 78
Warranty (USA) 3
Warranty (CANADA) 4
Safety Instructions 5-10
Grounding Requirements 6
Parts And Features 11
Refrigerator Installation 12-19
Unpacking Your Refrigerator 12
Installation 12
Removing And Replacing
Your Refrigerator Handles
And Doors 13-18
Leveling And Door Alignment 19
Base Cover 19
Using Your Refrigerator 20-28
Setting The Controls 20
Ensuring Proper Air Circulation 21
How To Use A New Door Ice Bucket 22
Adjusting Control Settings 23
Food Storage Guide 23
Storing Frozen Food 24
I_ Refrigerator Section
Water Dispenser 24
Refrigerator Shelves 25
Snack Pan 25
Crisper Humidity Control 25
Removing Crisper 26
Dairy Bin 26
Modular Door Bin
Freezer Section
Ice Bin
Durabase
Durabase Divider
Pull Out Drawer
Filter
Care And Cleaning
General Cleaning Tips
Outside
Inside Walls
Door Liner And Gaskets
Plastic Parts
Light Bulb Replacement
Power Interruptions
When You Go On Vacation
When You Move
About The Automatic Icemaker
Connecting The Water Line
Troubleshooting Guide
26
26
27
27
27
28
29-30
29
29
29
29
29
29-30
30
30
30
31
32-34
35-38

Your LG Refrigerator will be will repaired or replaced, at LG's option, if it proves to be defective in material or
workmanship under normal use, during the warranty period ("Warranty Period") set forth below, effective from the date
("Date of Purchase") of original consumer purchase of the product. This warranty is good only to the original purchaser
of the product and effective only when used in the United States, including Alaska, Hawaii, and U.S. Territories.
WARRANTY PERIOD
REFRIGERATOR/FREEZER
LABOR: One Year from the Date of Purchase.
PARTS: One Year from the Date of Purchase.
SEALED SYSTEM (Compressor, Condenser, and
Evaporator)
LABOR: One Year from the Date of Purchase.
PARTS: Seven years from the Date of Purchase.
Replacement Units and Repair Parts are warranted
for the remaining portion of the original unit's warranty
period.
HOW SERVICE IS HANDLED
In-Home Service (Except Model GR051)
Please retain dealer's dated bill of sale or delivery
ticket as evidence of the Date of Purchase for proof of
warranty, and submit a copy of the bill of sale to the
service person at the time warranty service is
provided.
Please call 1-800-243-0000 and choose the
appropriate option to locate your nearest LG
Authorized Service Center. (Phones are answered
24 hours a day, 365 days per year.)
Or visit our website at http://wwwJgservice.com
THIS WARRANTY IS IN LIEU OF ANY OTHER WARRANTY, EXPRESS OR IMPLIED, INCLUDING WITHOUT
LIMITATION, ANY WARRANTY OF MERCHANTABILITY OR FITNESS FOR A PARTICULAR PURPOSE. TO THE
EXTENT ANY IMPLIED WARRANTY IS REQUIRED BY LAW, IT IS LIMITED IN DURATION TO THE EXPRESS
WARRANTY PERIOD ABOVE. NEITHER THE MANUFACTURER NOR ITS U.S. DISTRIBUTOR SHALL BE LIABLE
FOR ANY INCIDENTAL, CONSEQUENTIAL, INDIRECT, SPECIAL, OR PUNITIVE DAMAGES OF ANY NATURE,
INCLUDING WITHOUT LIMITATION, LOST REVENUES OR PROFITS, OR ANY OTHER DAMAGE WHETHER
BASED IN CONTRACT, TORT, OR OTHERWISE. Some states do not allow the exclusion or limitation of incidental or
consequential damages or limitations on how long an implied warranty lasts, so the above exclusion or limitation may
not apply to you. This warranty gives you specific legal rights and you may also have other rights that vary from state to
state.
THIS LIMITED WARRANTY DOES NOT APPLY TO
• Service trips to your hometo deliver, pick up, and/or install the product, instruct, or replace house fuses or correct wiring, or
correction of unauthorized repairs.
• Damages or operating problems that result from misuse, abuse, operation outside environmental specifications or contrary to the
requirements of precautions in the Operating Guide, accident, vermin, fire, flood, improper installation, acts of God, unauthorized
modification or alteration, incorrect electrical current or voltage, or commercial use, or use for other than intended purpose.
• Repairs when your LG refrigerator is used in other than normal, single-family household use.
The cost of repair or replacement under these excluded circumstances shall be borne by the consumer.
CUSTOMER INTERACTIVE CENTER NUMBERS
To obtain Customer Assistance, Product Information, or
Dealer or Authorized Service Center location Call 1-800-243-0000 (24 hours a day, 365 days per
year) and select the appropriate option from the menu.
Or visit our website at http://www.lgservice.com
TO CONTACT LG ELECTRONICS BY MAIL
LG Customer Interactive Center
P. O. Box 240007
201 James Record Road
Huntsville, Alabama 35824
ATTN: CIC

LIMITED WARRANTY (CANADA)
LG REFRIGERATOR
LG Electronics will repair or at its option replace, without charge, yore product which proves to be detective in
material or workananship under normal use, during the warranty period listed below fiom the date of original
purchase. This warranD is good onb 7to the original purchaser of the product during the warranD period as
long as it is in any Canadian Pro+Jnce.
WARRANTY PERIOD
MODEL# : LFX25950** LABOR : 2 Years PARTS : 2 Years
SEALED SYSTEM : Labor/2 Years, Parts/5 Years (Compressoi; condensm; and evaporator)
HOW SERVICE IS HANDLED : Call 1-888-542-2623 (1-888-LG-CANADA) and choose the appropriate
prompt. Please have product type (refrigerator) and ZIP Code rea@.
See our website at http:iA_vw.lg.ca
This wananty provides in-home sin=ice.
No other express warranty is applicable to this product. THE DURATION OF AN_f IMPLIED WARRANTIES,
INCLUDING THE IMPLIED WARRANTY OF MERCHANTABILITY, IS LIMITED TO THE
DURATION OF THE EXPRESS WARRANTY HEREIN'. LG ELECTRONICS USA, INC. SHALL NOT
BE LIABLE FOR THE LOSS OF THE USE OF THE PRODUCT, INCONWIENCE, LOSS OR ANY
OTHER DAMAGES, DIRECT OR CONSEQUENTIAL ARISING OUT OF THE USE OF, OR
INABILITY TO USE, THIS PRODUCT OR FOR ANY BREACH OF ANY EXPRESS OR IMPLIED
WARRANTY, INCLUDING THE IMPLIED WARRANTY OF MERCHANTABILITY APPLICABLE TO
THIS PRODUCT.
Some provinces do not allow the exclusion or lhnitation of incidental or consequential damages or lhnitations on
how long an implied wananty lasts; so these limitations or exclusions may not apply to you. This wananty gives
you specific legal rights and you may also have other rights which vary fiom province to provthce.
THE ABOVE WARRANTY DOES NOT APPLY TO
1. Service trips to your home to deliver and pickup, install, instruct, or replace house fuses or correct wiring, plumbing,
o1"correction of unauthorized repairs.
2. Damage to the product caused by accident, verlnin, fire, flood, alteration, misues, abuse, improper installation, or acts
of God.
3. Commercial use or use for other than the intended purpose.
Therefore, these costs are the responsibiliO of the consumel:
CUSTOMER ASSISTANCE NUMBERS
To Prove WarranD_Coverage --_
To Obtain Product, Customel; or
Selwice Assistance by phone
or by Internet
To Obtain Nearest Authorized
Service Centel; Parts Distributol;
or Sales Dealer by phone
Retain your Sales Receipt to prove date of purchase.
A copy of your Sales Receipt must be submitted at the time
wananty smice is provided.
Call 1-888-842-2623 (1-888-LG-CANADA) and choose the
appropriate prompt.
http://_v.lg.ca
Call 1-888-842-2623 (1-888-LG-CANADA) and choose the
appropriate prompt. Please have your product type
(ret_rigerator)and ZIP Code ready.
or by Internet _ http://_v.lg.ca

BASIC SAFETY PRECAUTIONS
This guide contains many important safety messages. Always read and obey all safety messages.
This is the safety alert symbol. It alerts you to safety messages that inform you
of hazards that can kill or hurt you or others, or cause damage to the product.
All safety messages will be preceded by the safety alert symbol and the hazard
signal word DANGER, WARNING, or CAUTION. These words mean
You can be killed or seriously injured if you don't follow instructions.
Indicates an imminently hazardous situation which, if not avoided,
result in minor or moderate injury, or product damage only.
All safety messages will identify the hazard, tell you how to reduce the chance of injury, and tell you what can happen if
the instructions are not followed.
Child entrapment and suffocation are not problems of
the past. Junked or abandoned refrigerators are still
dangerous...even if they will sit for just a few days. If
you are getting rid of your old refrigerator, please follow
the instructions at right to help prevent accidents.
BEFORE YOU THROW AWAY
YOUR OLD REFRIGERATOR
OR FREEZER
•Take off the doors.
•Leave the shelves in place so that
children may not easily climb inside.
Your old refrigerator may have a cooling system that used
CFCs (chlorofluorocarbons). CFCs are believed to harm
stratospheric ozone.
If you are throwing away your old refrigerator, make sure
the CFC refrigerant is removed for proper disposal by a
qualified servicer. If you intentionally release this CFC
refrigerant, you can be subject to fines and imprisonment
under provisions of environmental legislation.

IMPORTANT Please read carefully.
TO CONNECT ELECTRICITY
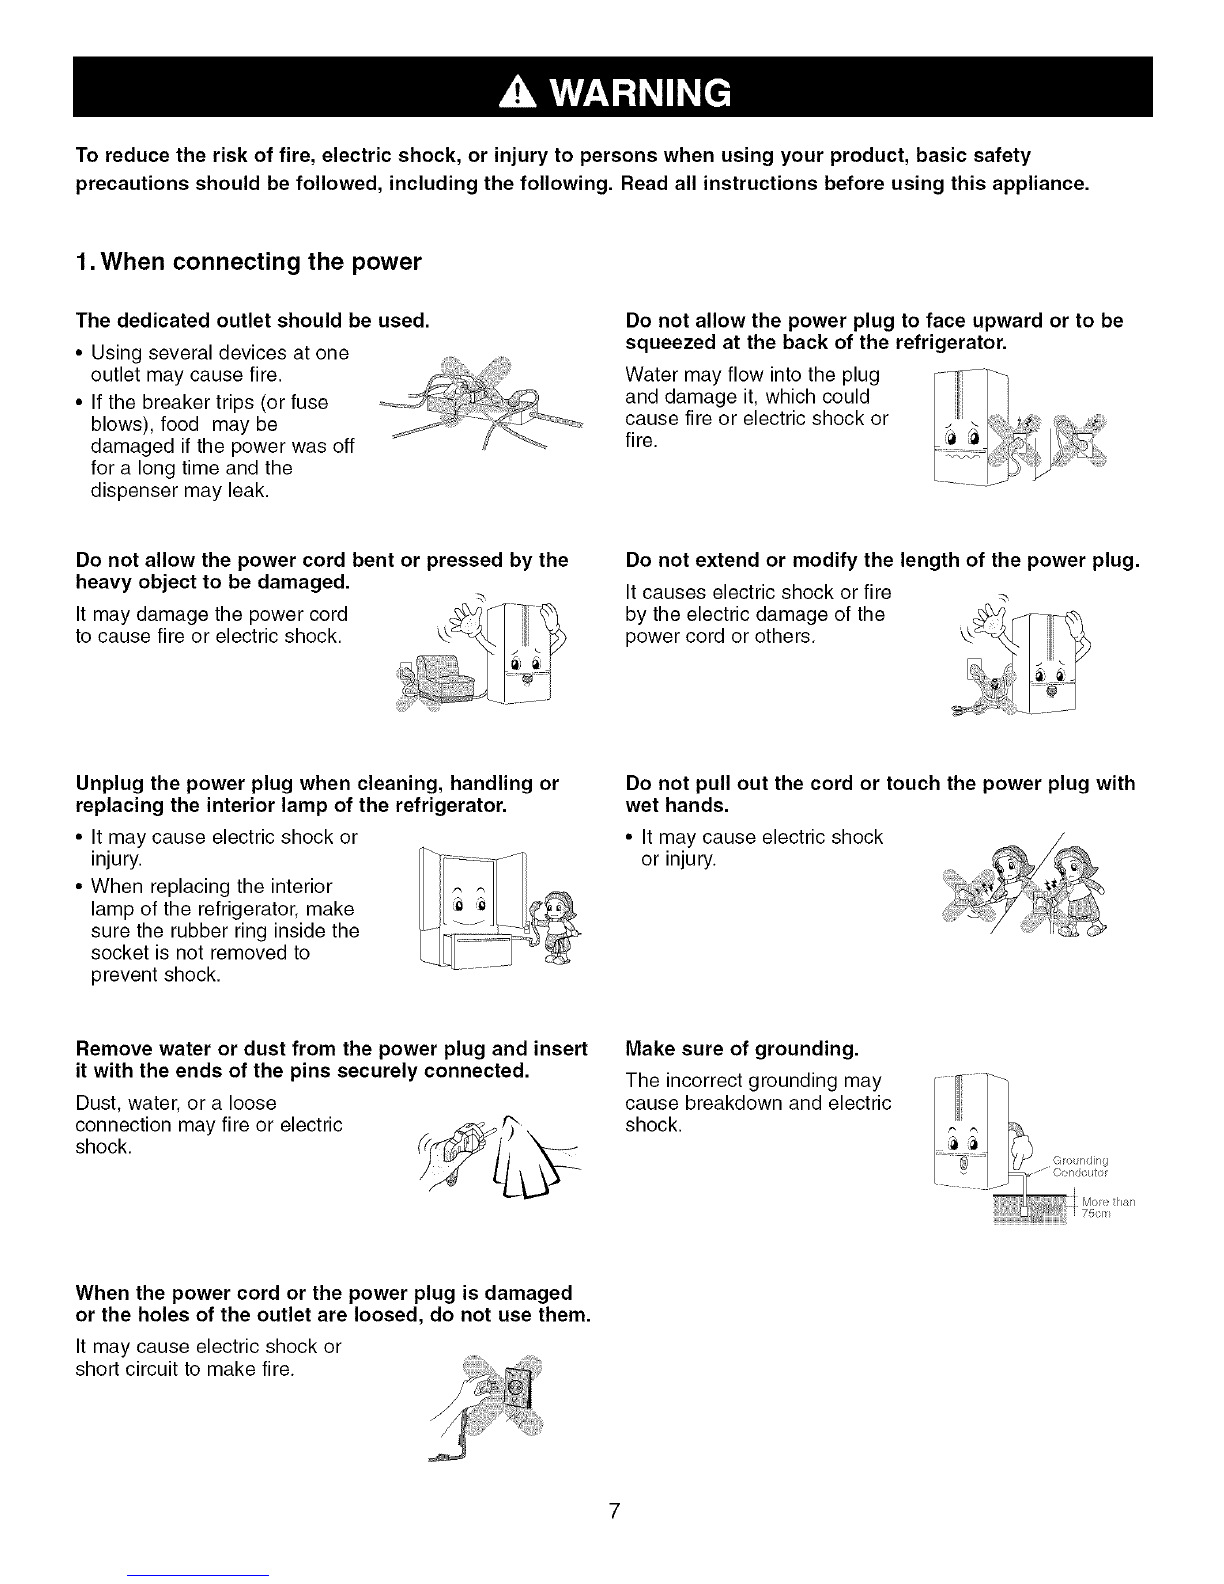
Electrical Shock Hazard
FOR PERSONAL SAFETY, this appliance must be
properly grounded. Have the wall outlet and the
circuit checked by a qualified electrician to make sure
the outlet is properly grounded.
3-prong
grounding
plug
3-prong
grounding type
wall receptacle
__ sur _ pr?pe_ t
efore use.
RECOMMENDED GROUNDING METHOD
The refrigerator should always be plugged into its own
individual properly grounded electrical outlet rated for
115 Volts, 60 Hz, AC only, and fused at 15 or 20 amperes.
This provides the best performance and also prevents
overloading house wiring circuits which could cause a fire
hazard from overheated wires. It is recommended that a
separate circuit serving only this appliance be provided.
Use a receptacle which cannot be turned off with a switch
or pull chain. Do not use an extension cord.
Where a standard two-prong wall outlet is encountered,
it is your personal responsibility and obligation to have it
replaced with a properly grounded three-prong wall outlet.
Do not, under any circumstances, cut or remove the
third (ground) prong from the power cord.
NOTE Before performing any type of installation, cleaning,
or removing a light bulb, turn the control (Thermostat,
Refrigerator Control or Freezer Control, depending on the
model) to OFF and then disconnect the refrigerator from
the electrical source. When you are finished, reconnect
the refrigerator to the electrical source and reset the
control (Thermostat, Refrigerator Control or Freezer
Control, depending on the model) to the desired setting.
USE OF EXTENSION CORDS
Because of potential safety hazards under certain
conditions, we strongly recommend against the use of
an extension cord. However, ifyou still elect to use an
extension cord, it is absolutely necessary that it be a
UL-listed (USA), 3-wire grounding type appliance
extension cord having a grounding type plug and outlet,
and that the electrical rating of the cord be 15 amperes
(minimum) and 120 volts.
Use of an extension cord will increase the clearance
needed for the back of the refrigerator.
• Repair or replace immediately all electric service cords that
have become frayed or otherwise damaged. Do not use a
cord that shows cracks or abrasion damage along its length
or at either the plug or connector end.
• When moving your refrigerator away from the wall,
be careful not to roll over or damage the power cord.
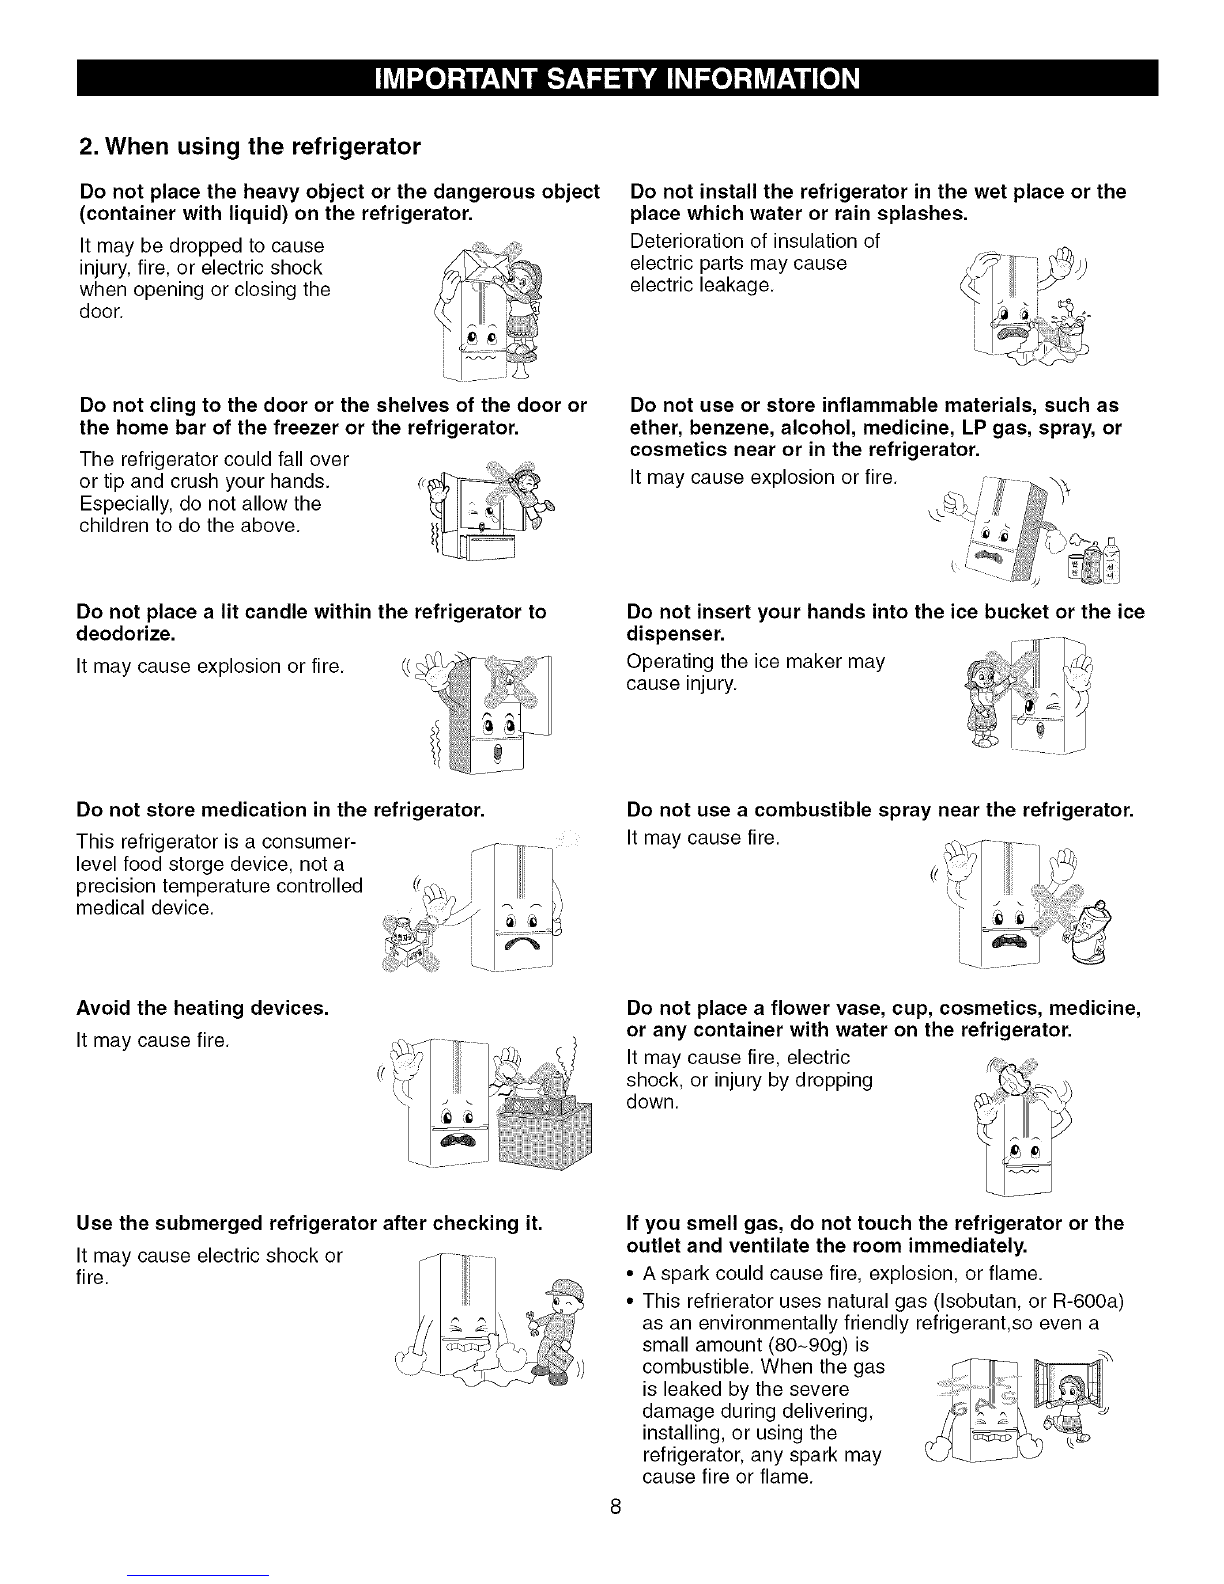
• Keep fingers out of pinch point areas; clearances between
the doors and cabinet are necessarily small. Be careful
closing doors when children are in the area.
• This refrigerator must be properly installed in accordance
with the Attention Installer Instructions that were taped
to the front of the refrigerator.
• Don't touch the lamp. If it is on for a long time, it can
become very hot.
DO NOT refreeze frozen foods which have thawed
completely. The United States Department of Agriculture in
Home and Garden Bulletin No. 69 says
...You may safely refreeze frozen foods that have thawed if
they still contain ice crystals or if they are still cold--below
40°F (4°C).
...Thawed ground meats, poultry or fish that have any off-
odor or off-color should not be refrozen and should not be
eaten. Thawed ice cream should be discarded. If the odor
or color of any food is poor or questionable, get rid of it.
The food may be dangerous to eat.
Even partial thawing and refreezing reduces the eating
quality of foods, particularly fruits, vegetables and prepared
foods. The eating quality of red meats is affected less than
that of many other foods. Use refrozen foods as soon as
possible to save as much of their quality as you can.
SAVE THESE INSTRUCTIONS

To reduce the risk of fire, electric shock, or injury to persons when using your product, basic safety
precautions should be followed, including the following. Read all instructions before using this appliance.
1. When connecting the power
The dedicated outlet should be used.
• Using several devices at one
outlet may cause fire.
• If the breaker trips (or fuse
blows), food may be
damaged if the power was off
for a long time and the
dispenser may leak.
Do not allow the power plug to face upward or to be
squeezed at the back of the refrigerator.
Water may flow into the plug
and damage it, which could
cause fire or electric shock or
fire.
Do not allow the power cord bent or pressed by the
heavy object to be damaged.
It may damage the power cord
to cause fire or electric shock.
Do not extend or modify the length of the power plug.
It causes electric shock or fire
by the electric damage of the
power cord or others.
Unplug the power plug when cleaning, handling or
replacing the interior lamp of the refrigerator.
• It may cause electric shock or
injury.
• When replacing the interior
lamp of the refrigerator, make
sure the rubber ring inside the
socket is not removed to
prevent shock.
Do not pull out the cord or touch the power plug with
wet hands.
• It may cause electric shock
or injury.
Remove water or dust from the power plug and insert
it with the ends of the pins securely connected.
Dust, water, or a loose
connection may fire or electric
shock.
Make sure of grounding.
The incorrect grounding may
cause breakdown and electric
shock.
When the power cord or the power plug is damaged
or the holes of the outlet are loosed, do not use them.
It may cause electric shock or
short circuit to make fire.

2. When using the refrigerator
Do not place the heavy object or the dangerous object
(container with liquid) on the refrigerator.
It may be dropped to cause
injury, fire, or electric shock
when opening or closing the
door.
Do not install the refrigerator in the wet place or the
place which water or rain splashes.
Deterioration of insulation of
electric parts may cause
electric leakage.
Do not cling to the door or the shelves of the door or
the home bar of the freezer or the refrigerator.
The refrigerator could fall over
or tip and crush your hands.
Especially, do not allow the
children to do the above.
Do not place a lit candle within the refrigerator to
deodorize.
It may cause explosion or fire.
Do not store medication in the refrigerator.
This refrigerator is a consumer-
level food storge device, not a
precision temperature controlled
medical device.
Avoid the heating devices.
It may cause fire.
Do not use or store inflammable materials, such as
ether, benzene, alcohol, medicine, LP gas, spray, or
cosmetics near or in the refrigerator.
It may cause explosion or fire.
Do not insert your hands into the ice bucket or the ice
dispenser.
Operating the ice maker may
cause injury.
Do not use a combustible spray near the refrigerator.
It may cause fire.
Do not place a flower vase, cup, cosmetics, medicine,
or any container with water on the refrigerator.
It may cause fire, electric
shock, or injury by dropping
down.
Use the submerged refrigerator after checking it.
It may cause electric shock or
fire.
If you smell gas, do not touch the refrigerator or the
outlet and ventilate the room immediately.
• A spark could cause fire, explosion, or flame.
• This refrierator uses natural gas (Isobutan, or R-6OOa)
as an environmentally friendly refrigerant,so even a
small amount (80_90g) is
combustible. When the gas
is leaked by the severe
damage during delivering,
installing, or using the
refrigerator, any spark may
cause fire or flame.

2. When using the refrigerator
Do not spray water at the outside or the inside of the
refrigerator and do not clean it with benzene or
thinner.
Deterioration of insulation of
electric parts may cause electric
shock or fire.
When any strange smell or smoke is detected from
the refrigerator, disconnect the power plug
immediately and contact to the service center. Service
center Servi_
It may cause fire.
Do not allow any person except an authorized servicer
to disassemble, repair, or alter the refrigerator.
It may cause injury, electric
shock, or fire.
Do not use the refrigerator for non-domestic purpose
(storing medicine or testing on a boat, plane, or
recreational vehicle, etc.).
It may cause an unexpected
risk such as fire, electric
shock, deterioration of stored
material, or chemical reaction.
When disposing the refrigerator, remove the gaskets
and take off the doors.
It may cause to lock out the
child.
Install the refrigerator on the solid and level floor.
Installing the refrigerator on
an unstable floor might cause
it to tip when being opened.
Do not insert the hands or the metal stick into the exit
of cool air, the cover, the bottom of the refrigerator,
the heatproof grill (exhaust hole) at the backside.
It may cause electric shock or
injury.
When you want to dispose the refrigerator, contact
local recyling or solid waste authority.
When you want to dispose a
large item like a refrigerator,
you must first have the
refrigerant removed and
recovered. Then contact your
local recycling or solid waste
authority.
Violating this direction may cause injury or damage house or furniture. Always be careful, please.
Do not touch food or containers at the freezer with
wet hands.
It may cause frostbite.
Do not put ice in thin crystal cups or ceramic ware.
It may break the cup or ceramic
ware to cause injury.

Wait for 5 minutes or longer when reconnecting the
plug.
It may cause the operation of
the freezer to fail.
Supply the automatic ice maker with drinkable water
only (only for the model with the dispenser).
Otherwise, it may cause a
health risk.
Hold the end of the plug to pull it out, not the cord.
It may cause electric shock or
short circuit.
Do not put glass containers in the freezer.
It may freeze the contents to
break the bottle to cause
injury.
Do not insert the hands into the bottom of the
refrigerator.
The iron plate of the bottom
may cause injury.
Do not install the refrigerator in a wet place or a place
which water or rain splashes.
Deterioration of insulation of
electric parts may cause
electric leakage.
Because opening or closing the door of the
refrigerator may cause injury to the person around it,
be careful, please.
Opening or closing the door
may cause feet or hands to be
caught in the gap between the
doors or the child to be get hurt
by the corner.
Carry the refrigerator with the handle bar at the
bottom of the front and the top of the rear.
Otherwise, your hands may
slip, causing injury and
property damage.
Do not put any living animal in the refrigerator.
It is not good for your pets. They
may suffocate if you forget
totake them out.
10

Use this page to become more familiar with the parts and features. Page references are included for your convenience.
NOTE This manual purports to cover only one model. There should be no question about what this model includes. We
should edit the manual accordingly.
O Refrigerator Light (p. 29)
Q Filter (Inside) (p. 28)
Modular Door Bins (p. 26)
Refrigerator Shelves (p. 25)
Optibin Crisper
(Keeps fruits and vegetable fresh
and crisper)
Ice Room
(Ice Maker and Ice Bucket)
Pull out Drawer (p. 27)
Turbo Motor
O Durabase (p. 27)
O Divider (p. 27)
(_ Ice Bin (p. 26)
Water Tank Cover
_) Snack Pan (p. 25)
Q Dairy Bin (p. 26) ¸¸¸¸¸¸¸¸¸%¸
Ice Bucket
Ice Room Door
11

Excessive Weight Hazard
Use two or more people to move and install
refrigerator.
Failure to do so can result in back or other injury.
UNPACKING YOUR REFRIGERATOR
Remove tape and any temporary labels from your
refrigerator before using. Do not remove any warning-
type labels, the model and serial number label, or the
TechSheet that is attached to back wall of the refrigerator.
To remove any remaining tape or glue, rub the area
briskly with your thumb. Tape or glue residue can also be
easily removed by rubbing a small amount of liquid dish
soap over the adhesive with your fingers. Wipe with warm
water and dry.
Do not use sharp instruments, rubbing alcohol, flammable
fluids, or abrasive cleaners to remove tape or glue. These
products can damage the surface of your refrigerator. For
more information, see the Important Safety Instructions
section.
Refrigerator shelves are installed in the shipping position.
Please reinstall shelves according to your individual
storage needs.
When Moving Your Refrigerator
Your refrigerator is heavy. When moving the
refrigerator for cleaning or service, be sure to protect
the floor. Always pull the refrigerator straight out
when moving it. Do not wiggle or walk the refrigerator
when trying to move it, as floor damage could occur.
INSTALLATION
1. To avoid vibration, the unit must be level. If required,
adjust the leveling legs to compensate for unevenness
of the floor. The front should be slightly higher than the
rear to aid in door closing. Leveling legs can be turned
easily by tipping the cabinet slightly. Turn the leveling
legs clockwise ("_'_) to raise the unit,
counterclockwise (_,.L) to lower it.
2. Install this appliance in an area where the temperature
is between 55°F (13°C) and 110°F (43°C.) If the
temperature around the appliance is too low or high,
cooling ability may be adversely affected.
3. Allow the clearance of at least 2 inches from the ceiling
and 1 inches from the side walls for better cooling
efficiency, ease of installation, proper air circulation, and
electrical connections.
I& CAUTION } Avoid placing the unit near heat sources,
direct sunlight, or moisture.
NEXT
1. Clean your refrigerator thoroughly and wipe off all dust
accumulated during shipping.
2. Install accessories such as ice cube bin, drawers,
shelves, etc., in their proper places. They are packed
together to prevent possible damage during shipment.
3. Let your refrigerator run for at least 2 or 3 hours before
putting food in it. Check the flow of cold air in the
freezer compartment to ensure proper cooling. Your
refrigerator is now ready for use.
I& WARNING 1
• Be careful when you work with the hinge, base grille,
stopper, etc. You may be injured.
• Do not put hands or feet or metal sticks into air vents,
base grille, or bottom of refrigerator. You may be injured
or receive an electrical shock.
Explosion Hazard
Keep flammable materials and vapors, such as
gasoline, away from refrigerator.
Failure to do so can result in death, explosion, or fire.
12

HOW TO REMOVE DOOR HANDLES
To move refrigerator through a house door, it may be necessary to remove the refrigertor door handles.
NOTE Handle appearance may vary from
illustrations on this page,
1. Removing Refrigerator Handle
•Grasp the handle tightly with both hands
and slide the handle up (1) (this may
require some force).
• The keyhole slots (2) on the back of the
handle allow the handle to separate from
the mounting screws (3).
/A CAUTION 1The handle could be
damaged if you hit it with a hammer
while removing or attaching.
IA CAUTION 1When you assemble or
disassemble handle, you must push or
pull with reasonable force.
Screws
on door
AKeyholeslots
?(_ on back of
j handle
2. Removing Freezer Drawer Handle
• Press the handle against door first.
• Grasp the handle tightly with both hands
and slide the handle to right (1) (this may
require some force).
• The keyhole slots (2) on the back of the
handle allow the handle to separate from
the mounting screws (3).
Screws
mounted @!
on door
Keyhole slots
on backof
handle
13

HOW TO REPLACE DOOR HANDLES
NOTE Handle appearance may vary from
illustrations on this page.
1. Reinstalling the Refrigerator Door Handle
• Align keyhole slots (1) on the top and
bottom of the back of the handle with the
screws (2) mounted on the front of the
door.
• Press the handle against the door front,
making sure that the screws (2) go into the
keyhole slots (1).
• Holding the handle with both hands, press
it firmly against the front of the door and
slide the handle down (3). (_)_
Screws
mounted
on door
2. Reinstalling the Freezer Drawer Handle
• Align keyhole slots (4) on the right and left
sides of the back of the handle with the
screws (5) mounted on the front of the
drawer.
• Press the handle against the drawer front,
making sure that the screws (5) go into the
keyhole slots (4).
• Holding the handle with both hands, press
it firmly against the front of the drawer and
slide the handle to the left (6).
®
Screws
mounted
on door
Keyholeslots
on backof
handle
14

REMOVING AND REPLACING REFRIGERATOR DOORS
1. Removing Refrigerator Door
/A CAUTION 1Before you begin, unplug the refrigerator. Remove food and bins from doors.
• Left Door - FIGURE 2
1. Disconnect water supply tube by pushing back on the disconnect ring (4). - FIGURE 1
2. Open door. Loosen top hinge cover screw (1).
Use flat tip screwdriver to pry back hooks on front underside of cover (3). Lift up cover.
3. Disconnect door switch wire harness (2). Remove cover.
4. Pull out the tube.
5. Disconnect the three wire harnesses (5). Remove the grounding screw (6).
6. Rotate hinge lever (7) counterclockwise and remove. Lift top hinge (8) free of hinge lever latch (9).
(A CAUTION 1When lifting hinge free of latch, be careful that door does not fall forward.
7. Lift door up from middle hinge pin and remove door.
8. Place door, inside facing up, down onto a non-scratching surface.
• Right Door - FIGURE 3
1. Open door. Loosen top hinge cover screw (1). Lift up cover (3).
2. Disconnect door switch wire harness (2). Remove cover.
3. Disconnect wire harness (5). Remove the grounding screw (6).
4. Rotate hinge lever (7) clockwise and remove. Lift top hinge (8) free of hinge lever latch (9).
(& CAUTION 1When lifting hinge free of latch, be careful that door does not fall forward.
5. Lift door up from middle hinge pin (10) and remove door.
6. Place door, inside facing up, down onto a non-scratching surface.
FIGURE 2 FIGURE 3
\\
FIGURE 1
15

2. Reinsalling the Refrigerator Door
•Right Door
1. Lower the door onto middle hinge pin (10).
2. Fit top hinge (8) over hinge lever latch (9) and intoplace. Insert hinge lever (7) under lever latch. Rotate lever
counterclockwise to secure hinge.
3. Install the grounding screw (6) and connect the three wire harnesses (5).
4. Connect door switch wire harness (2).
5. Hook tab on door switch side of cover under edge of wire opening in cabinet top. Position cover (3) into place. Insert
and tighten cover screw (1).
• Left Door
1. Lower the door onto middle hinge pin (10).
2. Fit top hinge (8) over hinge lever latch (9) and into place. Insert hinge lever (7) under lever latch. Rotate lever clockwise
to secure hinge.
3. Install the grounding screw (6) and connect the three wire harnesses (5).
4. Connect door switch wire harness (2).Push the water supply tube into the hall on the top case and pull it out on the
backplate.
5. Insert the water supply tube (4) into the connector tube until you see only one scale mark.
(Fully insert the tube over 5/8"(15mm)).
6. Hook tab on door switch side of cover (3) under edge of wire opening in cabinet top. Position cover into place. Insert
and tighten cover screw (1).
Correct
Incorrect
16

HOW TO REMOVE AND INSTALL THE
PULLOUT DRAWER
IMPORTANT To avoid possible injury or product or
property damage, you will need two people to perform the
following instructions.
1. Removing Pullout Drawer
• Pull the drawer open to full extension. Remove the
lower basket (1) by lifting basket from rail system.
(If you tilt the door, it will be easier.)
• Press both hangers with your thumbs to lift it up.
• Separate the left and right rail cover
• Remove the screws(2) of the rail on both sides.
J
• With both hands, hold both sides of the door and pull it
up to separate it from the rails.
• With both hands, hold the center bar and push it in to let
both rails fitted simultaneously.
I,& CAUTION / When you remove the drawer, do not hold
the handle. If it may come off and it could cause
personal injury.
IA CAUTION / When laying the drawer down, be careful
not to damage the floor or hurt your feet by the sharp
edges on hinge side.
17

HOW TO REMOVE AND INSTALL THE
PULLOUT DRAWER
IMPORTANT To avoid possible injury or product or
property damage, you will need two people to perform the
following instructions.
2. Installing Pullout Drawer
•With both hands, hold the center bar and push it out to
let both rails out to full extension simultaneously.
• Hook door supports (1) into rail tabs (2).
• Make sure you have a right rail cover for each side.
Right
Rail Cover
• Align the top holes of the rail cover with the top holes of
the door supports to assemble the rail covers.
Assembly Hole
• Lower door into final position and tighten the screws (3).
• With the drawer pulled out to full extension, insert the
lower basket (4) in the rail assembly.
f
¢
[& WARNING} To prevent accidental child and pet
entrapment or suffocation risk. DO NOT allow them to
play inside of drawer.
[& WARNING} DO NOT step or sit down on freezer door.
18

LEVELING AND DOOR ALIGNMENT
Leveling
Your refrigerator has two front leveling legs--one on the
right and one on the left. Adjust legs to alter tilt from front-
to-back or side-to-side. If your refrigerator seems
unsteady or you want the doors to close easier, adjust the
refrigerator's tilt using the instructions below
1. Plug the refrigerator's power cord into a 3-prong grounded
outlet. Move the refrigerator into its final position. Remove
the base cover.
To remove the base cover
1. Open the Freezer Drawer. (Drawer not shown for clarity.)
2. Once drawer is open there is sufficient clearance to
remove legs on top of cover.
To replace base cover
• Place cover into position and insert and tighten legs.
2. Turn the leveling leg clockwise to raise that side of the
refrigerator or counterclockwise to lower it. It may take
several turns of the leveling leg to adjust the tilt of the
refrigerator.
NOTE Having someone push backward against the top
of the refrigerator takes some weight off the leveling
legs. This makes it easier to adjust the legs.
3. Open both doors again and check to make sure that
they close easily. If not, tilt the refrigerator slightly more
to the rear by turning both leveling legs clockwise. It
may take several more turns, and you should turn both
leveling legs the same amount.
4. Re-adjust if necessary.
5. Reinstall the base cover.
NOTE Your new refrigerator is uniquely designed with
two fresh food doors. Either door can be opened or
closed independently of one another. You may have to
exert slight pressure on doors to get them to close
completely.
Door Alignment
If the space between your doors is uneven, follow the
instructions below to align the doors
1. With one hand, lift up the door you want to raise at
middle hinge.
2. With other hand, use pliers to insert snap ring as
shown.
3. Insert additional snap rings until the doors are aligned.
(Three snap rings are provided with the refrigerator.)
19

SETTING THE CONTROLS
Temperature
•Your refrigerator has a control pad on the dispenser that lets
you regulate the temperature in the freezer and refrigerator
compartments.
• Initially set the REFRIGERATOR CONTROL at 37°F (3°C)
and the FREEZER CONTROL at O°F (-18°C). Leave it at
this setting for 24 hours (one day) to stabilize. Then adjust
the compartment temperature as desired.
• Every time you press the freezer temperature adjust
button, the temperature changes in a circulating order of
0 *-1 *-2 *-3 *-4 *-6 *8 *6 *5 *4 *3 *2
'1 *0.
• Every time you press the refrigerator temperature adjust
button, the temperature changes in a circulating order of
37 .36 .35 .34 .32 .47 .45 .44 .43 .42
.41 *40 *39 *38 *37.
Ice Plus
• When you press the ICE PLUS button, the graphic
[_] will light up in the display and it continues for 24
hours. It will automatically shut off after 24 hours have
passed.
Or you can stop this function manually by pressing the
button one more time.
•This function increases both icemaking and freezing
capabilities.
Dispenser
•You can select water, crushed ice, or cubed ice by
pressing the o_R button as you desire.
•There could be some dripping after dispensing.
It is recommended to hold your cup for a couple of
seconds after dispensing.
I
I
NOTE The dispenser will not to operate while
either refrigerator door is left open.
Filter
• It displays in months the number of months left to
exchange the filter from the moment power is connected
to the refrigerator.
• If you have changed the filter after 6 months of use or
want to reset the filter display, press and hold the Filter
Reset Button 3 seconds or more and the filter display
will be initialized with a buzzing sound.
NOTE The average life of the filter is 6 months.
Alarm
• When the power is connected to the refrigerator_.o_door
alarm is initially set OFF. When you press the 0
button, the LED will turn on _}) and door alarm function
is now activated.
• When either refrigerator or the freezer door is left open
for more than 60 seconds, the alarm will ding to let you
know the door is open.
• When you close the door, the door alarm will stop dinging.
• If you want to disable the door alarm function, press the
._K.,, button then the door alarm LED will turn off.
k_)
Lock
• When the power is initially connected to the refrigerator,
Lock Function is Off.
• If you want to activate Lock Function to lock other
buttons, press and hold the 0 button for 3 seconds or
more. The _ LED will be turned on and the Lock
Function is now enabled.
• No buttons other than the (') button will work even
including dispenser button while Lock Function is
enabled.
• To disable the Lock Function, press and hold the 0
button for 3 seconds or more.
Ambient Temperature Display Window.
• Temperature is displayed only between
16OF_ 120OF (-9oc _ 49oc).
• Temperature less than 15F (-9°C) is
indicated with LO, and temperature more
than 121°F (49°C) is indicated with HI.
Temperature Mode Switch Function (°F <->°C)
• If you want to convert °F to °C or vice versa, press and
FRE_Z_ R_FRi_T_
hold the C) button and the C) button simultaneously
for 5 seconds or more.
20
This manual suits for next models
1
Table of contents
Other LG Refrigerator manuals

LG
LG LRSC26920 Assembly instructions

LG
LG LMX25981 Series Instruction Manual

LG
LG LSC26905 Series User manual

LG
LG GR-249VV User manual

LG
LG LFC21776ST User manual

LG
LG LRFDS3006 Series User manual

LG
LG LRSC26912SW User manual

LG
LG VT40BJB User manual

LG
LG MFL67783510 User manual

LG
LG LSC23924 Series User manual
Popular Refrigerator manuals by other brands

JUNO
JUNO JKI4434 operating instructions

Frigidaire
Frigidaire FRSHT5EFW4 use and care manual

GE
GE Profile PSDS5YGXSS datasheet

Ingersoll-Rand
Ingersoll-Rand THERMO KING Precedent C-600 Maintenance manual

Hotpoint
Hotpoint HTR16BBSLWW - 15.7 cu. Ft. Top Freezer... Specification sheet

Tricity Bendix
Tricity Bendix TB 116 FF Operating & installation instructions