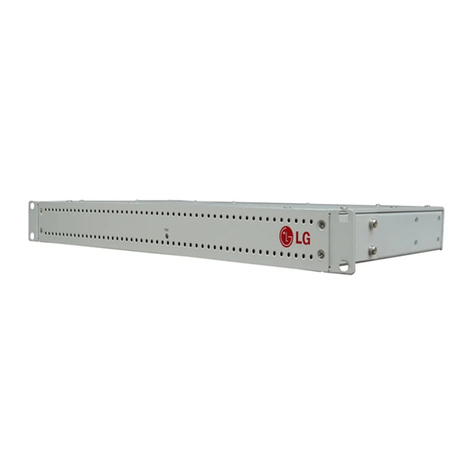
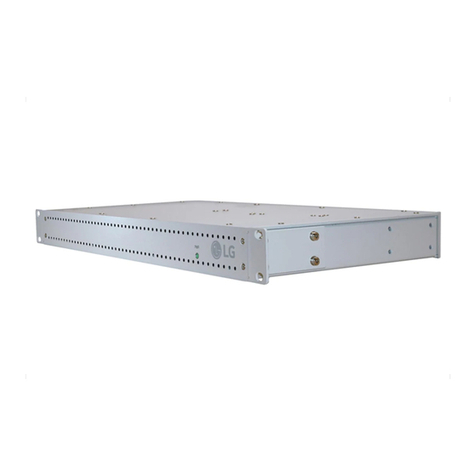
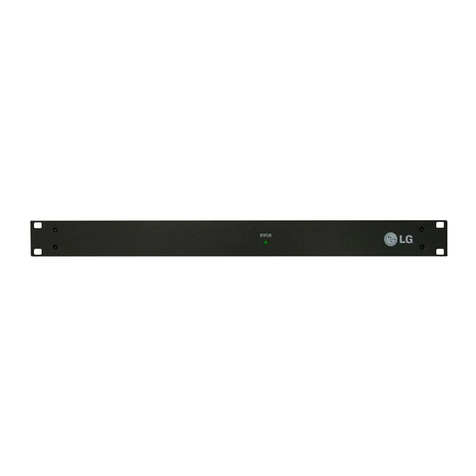
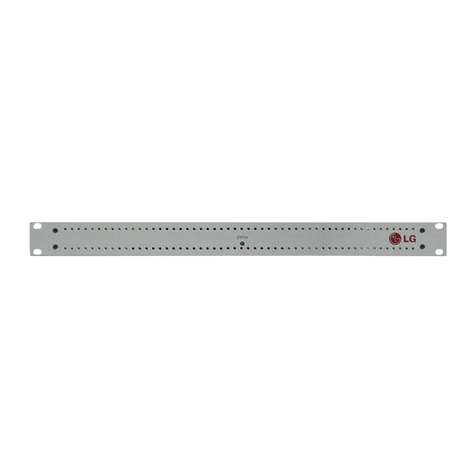
LG PCS500R Pro:Centric Operating and maintenance manual

2
ENGLISH
Table of Contents
4 Warning! Safety instructions
9 PCS500R Product Description
9 Features
10 Setup Information
10 PCS500R
10 Video Channel Assignments for RF Output
(QAM-B)
11 Video Channel Assignments for RF Output
(DVB-C)
11 Video Channel Assignments for RF Output
(ISDB-T)
12 Video Channel Assignments for IP Output
13 Rear and Front Panel Overviews
13 PCS500R Rear View
14 PCS500R Front View
15 Rack Installation
15 Typical Rack Installation
16 Rack-mount Considerations
17 System Setup
17 Typical Setup Diagram for PCS500R with RF
Output
18 Typical Setup Diagram for PCS500R with IP
Output
19 VPN Network Connections Overview
20 Setting Up the Pro:Centric Network
24 PCS500RCongurationOptions
24 Network and Communication Setup
25 Log In to the PCS500R and Access the Main
Menu
26 View System Information
27 Modify Network Settings
31 Modify the Server Host Name (via TUI)
32 Modify the Server Host Name (via CLI)
33 Set the Time Zone
34 Set the Date and Time
35 Change the Login Password
35 Change the Portal Application
37 Monitor the System
38 Send Ping Commands to Network Hosts
39 Update the Pro:Centric Application
39 Update the VPN Setup
40 Shut Down the System
40 Reset the System
41 ReinstalltheFactoryConguration
41 Exit the Current Session

4
ENGLISH
Warning! Safety instructions
• Please read these safety precautions carefully before using the product.
• In this manual, the illustration may be somewhat different from your product because it is just example to help
the instruction.
• Manufacturer and installer cannot provide service related to human safety as the applicable wireless device has
possibility of electric wave interference.
CAUTION
RISK OF ELECTRIC SHOCK
DO NOT OPEN
CAUTION : TO REDUCE THE RISK OF ELECTRIC SHOCK, DO NOT REMOVE COVER (OR BACK). NO USER-
SERVICEABLE PARTS INSIDE. REFER TO QUALIFIED SERVICE PERSONNEL.
This symbol is intended to alert the user to the presence of uninsulated “dangerous voltage” within the
product’senclosurethatmaybeofsufcientmagnitudetoconstituteariskofelectricshocktopersons.
This symbol is intended to alert the user to the presence of important operating and maintenance
(servicing) instructions in the literature accompanying the appliance.
WARNING : TO REDUCE THE RISK OF FIRE AND ELECTRIC SHOCK, DO NOT EXPOSE THIS PRODUCT TO
RAIN OR MOISTURE.
TO PREVENT THE SPREAD OF FIRE, KEEP CANDLES OR OTHER ITMES WITH OPEN FLAMES
AWAY FROM THIS PRODUCT AT ALL TIMES.

5
ENGLISH
• Read these instructions.
• Keep these instructions.
• Heed all warnings.
• Follow all instructions.
• Do not use this apparatus near water.
• Clean only with dry cloth.
• Do not block any ventilation openings. Install in accordance with the manufacturer’s instructions.
• Do not install near any heat sources, such as radiators, heat registers, stoves, or other apparatus
(includingampliers)thatproduceheat.
• Do not defeat the safety purpose of the polarized or grounding-type plug. A polarized plug has two
blades with one wider than the other. A grounding-type plug has two blades and a third grounding
prong.Thewidebladeorthethirdprongareprovidedforyoursafety.Iftheprovidedplugdoesnott
into your outlet, consult an electrician for replacement of the obsolete outlet.
• Protect the power cord from being walked on or pinched, particularly at plugs, convenience
receptacles, and the point where it exits from the apparatus.
• Onlyuseattachments/accessoriesspeciedbythemanufacturer.
• Useonlywiththecart,stand,tripod,bracket,ortablespeciedbythemanufacturerorsoldwiththe
apparatus. When a cart is used, use caution when moving the cart/apparatus combination in order to
avoid injury from tip-over.
• Referallservicingtoqualiedservicepersonnel.Servicingisrequiredwhentheapparatushasbeen
damaged in any way, such as power-supply cord or plug is damaged, liquid has been spilled or objects
have fallen into the apparatus, the apparatus has been exposed to rain or moisture, does not operate
normally, or has been dropped.
• Use authorized detergent only when cleaning the product. Do not clean your product with chemicals
including glass cleaner, any type of air freshener, insecticide, lubricants, wax (car, industrial), abrasive,
thinner, benzene, alcohol etc., which can damage the product and/ or its panel.
-Product can be deformed.
• Do not install this product on a wall if it could be exposed to oil or oil mist. This may damage the
product and cause it to fall.
• If water or another substance enters the product (like a AC adapter, power cord, TV), disconnect the
powercordandcontacttheservicecentreimmediately.Otherwise,thismayresultinreorelectric
shock.
• Only use an authorized AC adapter and power cord approved by LG Electronics. Otherwise, this may
resultinre,electricshock,malfunctionorproductdeformation.
• NeverDisassembletheACadapterorpowercord.Thismayresultinreorelectricshock.
• Be careful in handling the adapter to prevent any external shocks to it. An external shock may cause
damage to the adapter.
• Power Sources
-This product should be operated only from the type of power source indicated on the marking label.
If you are not sure of the type of power supply to your INSTALLATION, consult your product dealer
or local power company.

6
ENGLISH
• Overloading
-Donotoverloadwallpoweroutletsandextensioncordsasthiscanresultinariskofreorelectric
shock.
• Disconnect Device
-The AC mains plug is used as the disconnect device. The disconnect device must remain readily
operable.
• Object and Liquid Entry
-Never push objects of any kind into this product through openings as they may touch dangerous
voltagepointsorshort-outpartsthatcouldresultinareorelectricshock.Neverspillliquidofany
kind on the product. Do not use liquid cleaners or aerosol cleaners.
• Outdoor Use
-Topreventreorshockhazards,donotexposethisproducttorainormoisture.
• Wet Location
-Do not use this product near water or moisture or in an area, such as a basement, that might
becomeooded.Theapparatusshallnotbeexposedtodrippingorsplashingandnoobjectslled
with liquids, such as vases, shall be placed on the apparatus.
• Test Equipment
-In some cases, LG has supplied or recommended the use of test equipment and devices for the
setup and testing of the equipment. The operation and maintenance of test equipment is described
in their associated instruction manuals. Please refer to these manuals for explicit instructions
regarding the safe use and handling of the equipment.
• Damage Requiring Service
Unplugthisproductfromthewallpoweroutletandreferservicingtoqualiedservicepersonnel
under the following conditions:
-If the power-supply cord or plug is damaged.
-If liquid has been spilled, or objects have fallen into the product.
-If the product has been exposed to rain or water.
-If the product does not operate normally by following the operating instructions. Adjust only those
controls that are covered by the operating instructions, as an improper adjustment of other controls
mayresultindamageandwilloftenrequireextensiveworkbyaqualiedtechniciantorestorethe
product to its normal operation.
-If the product has been dropped or the cabinet has been damaged.
-If the product exhibits a distinct change in performance.
Referallservicingtoqualiedservicepersonnel.
• Servicing
-Theseservicinginstructionsareforusebyqualiedservicepersonnelonly.Toreducetheriskof
electrical shock, do not perform any servicing other than that described in the operating instructions
unlessyouarequaliedtodoso.
• Replacement Parts
-When replacement parts are required, be sure the service technician uses replacement parts
speciedbythemanufacturerorthathavethesamecharacteristicsastheoriginalparts.
Unauthorizedsubstitutionsmayresultinre,electricshock,orotherhazards.

7
ENGLISH
• Safety Check
-Upon completion of any service or repairs to this product, ask the service technician to perform
safety checks to determine that the product is in proper operating condition.
• Handling Notice
-Onlyqualiedservicepersonnelshouldhandleandinstallthisunit.Aseriesofscrewswithlock
washers are used to secure the top and bottom covers of the unit. Use caution when handling the
unitasthelockwashersmayhaveroughedges.DoNOTrunyourngersoverthetopandbottom
covers of the unit.
• Do not block any of the ventilation openings. Install in accordance with the manufacturer’s
instructions.
-Theproductcanbedeformedorrecanbreakoutduetooverheatinginsidetheproduct.
• Do not place the product in a built-in installation such as bookcase or rack.
-Ventilation required.
• DISCONNECTING DEVICE FROM MAINS
-Mains plug is the disconnecting device. The plug must remain readily operable.
• Donotplaceanythingcontainingliquidontopoftheproductsuchasowerpot,cup,cosmeticsor
candle.
-Thismaycausearehazard.
PCS500R Rack Installation (See p. 15, 16)
• Wear a properly grounded, antistatic wrist strap to avoid causing electrostatic (ESD) damage to the
PCS500R.
• Carefully slide the PCS500R into a standard 19-inch equipment rack.
• When mounting in the rack, make sure to use the appropriate hardware. ALL FOUR MOUNTING
SCREWS MUST BE USED.
• This equipment is not designed to support other devices. Do NOT stack other equipment on the top
of the PCS500R.
• Rear cabling must be dressed and supported so that the weight of the cabling is not a strain on the
PCS500R connectors.
• MOUNTING OF THE EQUIPMENT IN THE RACK SHOULD BE SUCH THAT A HAZARDOUS
CONDITION IS NOT ACHIEVED DUE TO UNEVEN MECHANICAL LOADING.

8
ENGLISH
Rack-mount Considerations
• Elevated Operating Ambient
-If installed in a closed or multi-unit rack assembly, the operating ambient temperature of the
rack environment may be greater than room ambient. Therefore, consideration should be given to
installing the equipment in an environment compatible with the maximum ambient temperature
(Tma)speciedbythemanufacturer(Seespecicationsinformationinthisdocument).
• Reduced Air Flow
-Installationoftheequipmentinarackshouldbesuchthattheamountofairowrequiredfor
safe operation of the equipment is not compromised. To ventilate the system normally and avoid
overheating, leave at least 2.5 cm on each side (including top and bottom) of the PCS500R. Do
NOT stack other equipment on the top of the PCS500R. Also, ensure that the unit’s AC power
adapter is never stacked or bundled with other AC power adapters. Each adapter should have
adequate ventilation and should be isolated from other heat sources.
• Circuit Overloading
-Consideration should be given to the connection of the equipment to the supply circuit and the
effect that overloading of the circuits might have on overcurrent protection and supply wiring.
• Reliable Earthing
-Maintain reliable earthing of rack-mounted equipment. Particular attention should be given to
supply connections other than direct connections to the branch circuit (e.g. use of power strips).
• Mains Outlet Earthing
-The apparatus with Class I construction must be connected to a mains socket outlet with a
protective earthing connection.

9
ENGLISH
PCS500R Product Description
The LG PCS500R Pro:Centric® server is a stand-alone, remotely-controlled processor and controller for the
Pro:Centric system. The server enables you to create and remotely manage portal and application content for LG
TVs, using either the Pro:Centric Java or Pro:Centric Direct HTML application.
Features
• Supports the Pro:Centric Java or Pro:Centric Direct HTML application
• Two output options: RF or IP
-RF output: QAM-B (6 MHz), DVB-C (6 MHz, 7 MHz, or 8 MHz), and ISDB-T (6 MHz) modulations are
supported. The PCS500R generates one 256-QAM or 64-QAM RF channel for GEM/site data
-IP output: The PCS500R generates two multicast streams for GEM/site data.
• Customer may work with content provider to create Pro:Idiom® encrypted content for RF or IP video playout
channels
-QAM-B and DVB-C RF output: In addition to the GEM/site data channel, the PCS500R generates up to seven
RF channels for video playout. Each of these channels supports either two or three programme streams
multiplexed on each channel. This capability provides output of up to 21 programmes of video content.
-ISDB-T RF output: In addition to the GEM/site data channel, the PCS500R generates up to one (Java
application) or two (HTML application) RF channels for video playout. Each of these channels supports either
two or three programme streams multiplexed on each channel. This capability provides output of up to three
(Java application) or six (HTML application) programmes of video content.
-IP output: In addition to two multicast streams for GEM/site data, the PCS500R generates 21 multicast data
streams for video playout. Each data stream supports one programme. This capability provides output of up to
21 programmes of video content.
• Provides remote management capability over Ethernet
• Small, lightweight chassis
• 19-inch rack-mountable
• 1Uheightproletominimizerackspaceusage
An Internet browser-based Admin Client graphical user interface (GUI), provided for system integrator (SI)
partners and lodging/institution administrators, facilitates support and maintenance of the Pro:Centric system.
TheAdminClientenablesuserstoremotelymanagesystembackups,outputconguration,softwareupdates,
portal/informationsectioncontent,TVcongurationsettings,etc.

10
ENGLISH
Setup Information
Check the following items before you begin the PCS500R installation and setup procedures.
Note: Once the PCS500R hardware and software is installed and the initial setup completed, output parameters
areconguredintheappropriatePro:CentricAdminClient.Alongwiththisdocument,itisrecommendedthatyou
have readily available a copy of either the
Pro:Centric Server Admin Client User Guide
(for the Java application)
or the
Pro:Centric Direct Admin Client User Guide
(for the HTML application), as applicable.
PCS500R
• Unpack the PCS500R Pro:Centric server unit and all accessories.
PCS500R Accessories: AC Power Cord and Adapter
• Select the location for mounting the PCS500R. Ensure adequate ventilation is available.
• Obtain the necessary attachment hardware to mount the PCS500R chassis in its targeted location.
• Plan and install the necessary cabling and network (Ethernet) and AC power access for the PCS500R. You also
will need the following to connect a PC directly to the PCS500R for system setup purposes: FTDI TTL-USB
cable (P/N TTL-232R-5V-AJ).
Video Channel Assignments for RF Output (QAM-B)
Each input programme is limited to one-half or one-third of the output channel bitrates (Mbps), which in turn are
dependent on the modulation format. 256-QAM modulation supports up to 38.8 Mbps per channel, and 64-QAM
modulation supports up to 26.97 Mbps per channel.
• Create a channel assignment plan for the installation site, or modify an existing plan to incorporate the RF
output of the PCS500R. Ensure that up to eight contiguous CATV broadcast channels are allocated for the
PCS500R RF output. The PCS500R uses a 256-QAM or 64-QAM modulation format, thereby occupying
approximately 48 MHz of frequency spectrum.
The RF start channel is user-assigned during system setup (in the Admin Client), and the remaining channels
(up to seven) are then automatically assigned per EIA-542 STD CATV frequency allocation standards or also
user-assigned, depending on channel selections in the Admin Client.
Note for contiguous channel allocation: if the RF start channel assignment is channel 2, the seven remaining
channels will be 3, 4, 5, 6, 95, 96, and 97. Refer to EIA-542 STD CATV frequency allocation tables for further
information as required.
The highest available RF channel number for the PCS500R is 135. Thus, to allocate all eight channels available
for PCS500R RF output, the RF start channel must be set no higher than 128.
• Find a location on the frequency spectrum that is free of existing noise.

11
ENGLISH
Video Channel Assignments for RF Output (DVB-C)
Each input programme is limited to one-half or one-third of the output channel bitrates (Mbps), which in turn are
dependent on the modulation format. 256-QAM modulation supports up to 37.27 Mbps (6 MHz bandwidth),
45.05 Mbps (7 MHz bandwidth) or 50.87 Mbps (8 MHz bandwidth) per channel, and 64-QAM modulation
supports up to 27.95 Mbps (6 MHz bandwidth), 33.79 Mbps (7 MHz bandwidth) or 38.15 Mbps (8 MHz
bandwidth) per channel.
• Create a channel assignment plan for the installation site, or modify an existing plan to incorporate the RF
output of the PCS500R. Ensure that up to eight contiguous CATV channel frequencies are allocated for the
PCS500R RF output. The PCS500R uses a 256-QAM or 64-QAM modulation format, thereby occupying
approximately 48 MHz, 56 MHz, or 64 MHz (depending on channel bandwidth) of frequency spectrum.
The RF start channel frequency is user-assigned, in KHz, during system setup (in the Admin Client), and the
remainingchannelfrequencies(uptoseven)arethenautomaticallyassignedinaccordancewiththespecied
bandwidth. For example, if the RF start channel frequency assignment is 57000 KHz with a 7 MHz bandwidth,
the seven remaining channel frequencies will be 64000 KHz, 71000 KHz, 78000 KHz, 85000 KHz, 92000 KHz,
99000 KHz, and 106000 KHz.
The highest available RF channel frequency for the PCS500R is 861000 KHz.
• Find a location on the frequency spectrum that is free of existing noise.
Video Channel Assignments for RF Output (ISDB-T)
Each input programme is limited to one-half or one-third of the output channel bitrates (Mbps). ISDB-T
modulation supports up to 23.23 Mbps (6 MHz bandwidth) per channel.
• Create a channel assignment plan for the installation site, or modify an existing plan to incorporate the RF
output of the PCS500R. Ensure that up to two (Java application) or three (HTML application) contiguous
CATV broadcast channels are allocated for the PCS500R RF output. The PCS500R occupies up to 18 MHz of
frequency spectrum.
The RF start channel is user-assigned during system setup (in the Admin Client), and the remaining channels
(up to one for the Java application or two for the HTML application) are then automatically assigned in
accordance with the 6 MHz bandwidth. For example, if the RF start channel assignment is channel 7 on a server
conguredfortheHTMLapplication,thetworemainingchannelswillbe8and9.
The data channel number must be between 7 and 69. Thus, for example, to allocate all three channels available
for PCS500R RF output with the HTML application, the RF start channel must be set no higher than 67.
Note:ThePro:Centricservercannotgeneratechannels13and14simultaneously.Ifyouintendtocongure
more than one channel, set the data channel number from 7 to 12 (two channels) or 7 to 11 (three channels)
or from 14 to 68.
• Find a location on the frequency spectrum that is free of existing noise.

12
ENGLISH
Video Channel Assignments for IP Output
Each IP stream is limited to 19.4 Mbps.
• The PCS500R outputs IPv4 multicast streams. Ensure the institution’s IP network and room receivers support
IPv4multicastandthatthenetworkiscapableofselectivelyroutingmulticasttrafc.Refertovendor
equipment documentation for further information.
• Create a channel assignment plan for the installation site, or modify an existing plan to incorporate the IP
output of the PCS500R. Ensure that up to 23 unused and unreserved IPv4 multicast addresses, within the
designated range 224.0.0.0 to 239.255.255.255, are allocated for the PCS500R IP output.
The IP start channel is user-assigned in the Admin Client, and the remaining channel assignments are then
automatically incremented. For example, if the IP start channel assignment is 227.0.0.40, the remaining
channelswillbe227.0.0.41,227.0.0.42,etc.Sincethersttwostreamsarereservedforsitedata,therst
video content channel in this scenario will be 227.0.0.42.
• Reserve one User Datagram Protocol (UDP) port for the multicast data streams. You can use the system
default (1234) or another unassigned port number, for example, 50000, 50001, etc. The port must avoid
conictwithotherprotocolsinuse.
Note: Refer to the IANA IPv4 Multicast Address Space Registry and/or the IANA Service Name and Transport
Protocol Port Number Registry for further IP address/port information as required.

13
ENGLISH
Rear and Front Panel Overviews
PCS500R Rear View
Feature Port Control Port
Service Port
USB
POWER
19 V DC
RF-TAP
RF-OUT
AC power Cord & Adapter
(0 dBmV)
• Disconnect Device
The AC mains plug is used as the disconnect device. The disconnect device must remain readily
operable.
• RF TAP Connector
Reserved for service technician use only. When not in use, this connector must remain terminated
with attached terminator accessory.

14
ENGLISH
PCS500R Front View
PWR
POWER LED
• Ventilation
Airowmustnotbeobstructed.Toventilatethesystemnormallyandavoidoverheating,leave
at least 2.5 cm on each side (including top and bottom) of the PCS500R. Do NOT stack other
equipment on the top of the PCS500R.
• Screws with Lock Washers
OnlyqualiedservicepersonnelshouldhandleandinstallthePCS500R.Aseriesofscrewswithlock
washers are used to secure the top and bottom covers of the PCS500R. Use caution when handling
theunitasthelockwashersmayhaveroughedges.DoNOTrunyourngersoverthetopand
bottom covers of the unit.

15
ENGLISH
Rack Installation
Typical Rack Installation
1 To avoid causing electrostatic (ESD) damage to the PCS500R during installation, attach an antistatic wrist
strap to a properly grounded rack/object and put it on.
2 (Optional)Asshipped,thePCS500Rmountingbracketsareattachedushwiththefrontoftheunit(see
diagram a). If desired, the mounting brackets may be detached from the unit and reattached, for example, so
thattheyareushwiththerearoftheunit(seediagramb).Ifyouwishtochangethelocation/orientationof
the mounting brackets, carefully remove each of the four (M4 x 10 mm) screws and attendant washers (one
atandonelockwasherperscrew)holdingeachbracketinplace.Then,usethesamescrewsandwashersto
reattach the mounting brackets in the desired location.
3 Carefully slide the chassis into a standard 48.2 cm equipment rack.
4 Use all four mounting screws to secure the chassis to the rack.
(A)
PWR
POWER
19 V DC
ServicePort
USB
FeaturePort ControlPort
RF-TAP
RF-OUT
To rack
To rack
(B)
PWR
POWER
19 V DC
ServicePort
USB
FeaturePort ControlPort
RF-TAP
RF-OUT
UseatwasherandlockwasherwitheachM4x10mmmountingbracketscrew.

16
ENGLISH
Front View of Rack Cabinet
PWR
2.5 cm minimum
2.5 cm minimum
Rack-mount Considerations
A. Elevated Operating Ambient
If installed in a closed or multi-unit rack assembly, the operating ambient temperature of the rack environment
may be greater than room ambient. Therefore, consideration should be given to installing the equipment in an
environmentcompatiblewiththemaximumambienttemperature(Tma)speciedbythemanufacturer(see
specicationsinformationinthisdocument).
B. Reduced Air Flow
Installationoftheequipmentinarackshouldbesuchthattheamountofairowrequiredforsafeoperationof
the equipment is not compromised. To ventilate the system normally and avoid overheating, leave at least 2.5
cm on each side (including top and bottom) of the PCS500R. Do NOT stack other equipment on the top of the
PCS500R unit. Also, ensure that the unit’s AC power adapter is never stacked or bundled with other AC power
adapters. Each adapter should have adequate ventilation and should be isolated from other heat sources.
C. Circuit Overloading
Consideration should be given to the connection of the equipment to the supply circuit and the effect that
overloading of the circuits might have on overcurrent protection and supply wiring.
D. Reliable Earthing
Maintain reliable earthing of rack-mounted equipment. Particular attention should be given to supply
connections other than direct connections to the branch circuit (e.g., use of power strips).
E. Mains Outlet Earthing
The apparatus with Class I construction must be connected to a mains socket outlet with a protective earthing
connection.

17
ENGLISH
System Setup
Refer to the following diagrams, and complete the system installation as described on pages 20 to 23.
Caution: Do not make system connections until instructed to do so during the system
installation procedure. In some instances, configuration steps must be performed before physical
connections are made.
Typical Setup Diagram for PCS500R with RF Output
Service Port
USB
POWER
19 V DC
RF-OUT
RF-TAP
Control Port
Feature Port
PCS500R
Service Port connection
RF Cable
Combiner
RF Distribution
System
Switch
Router
Internet
Laptop PC
(for installation purposes)
Laptop PC
(for remote management)
Room Receiver
(eth0)

18
ENGLISH
Typical Setup Diagram for PCS500R with IP Output
POWER
19 V DC
RF-OUT
RF-TAP
ControlPort
FeaturePort
ServicePort
USB
PCS500R
Service Port connection
CAT5E Cable
Room Receiver
Switch
Multicast/IGMPv2 Switch
(with Gigabit ports)
Multicast/IGMPv2 Router
(Ex: 192.168.2.*/24)
Router
(Ex: 192.168.1.*/24)
Internet
Internet
Laptop PC
(for installation purposes)
Laptop PC
(for remote management)
(eth0)
(eth1, 1000BaseT (default)
Full Duplex)

19
ENGLISH
VPN Network Connections Overview
Laptop
PC
Pro:Centric
VPN Server
Internet
VPN Client
VPN Client
Internet/
VPN
Laptop
PC
Pro:Centric VPN
Server
VPN Client
PCS500R

20
ENGLISH
Setting Up the Pro:Centric Network
ThissectiondescribeshowtocompletetheinitialnetworkcongurationforthePCS500R.Seealsotypicalsetup
and VPN network connections diagrams above.
1 To enable remote management, connect one end of a CAT5 RJ-45 Ethernet cable to the Control Port on the
PCS500R rear panel, and connect the other end of the cable to the institution’s network.
2 Connect the PCS500R power supply to the POWER connector on the PCS500R rear panel. Then, plug the AC
power cord into a powered AC line receptacle. When power is applied, the PWR (Power) LED on the PCS500R
frontpanelwillinitiallyashredandthenturngreen(blinkingduringboot-up).
The boot-up process for the PCS500R may take several minutes. When boot-up is complete, the PWR LED on
the PCS500R front panel will light continuously green.
3 Once the PWR LED is lit continuously (no longer blinking), use the FTDI TTL-232R-5V-AJ cable to connect a PC
to the Service Port on the PCS500R rear panel.
4 UsingHyperTerminaloranequivalentterminalemulationprogrammeonthePC,conguretheserialportas
follows: Bits per second/baud = 115200; Data bits = 8; Parity = None; Stop bits = 1; Flow Control = None
Note:Toavoidcongurationerrors,makesurethekeyboardsettingsontheterminalemulatorassignthe
backspace character to Ctrl + H (ASCII 8).
Once the connection is established, you should see a login prompt. (If the login prompt is not automatically
displayed, press to refresh the screen.)
At the prompt, type and press . Then, at the prompt, type
(case-sensitive) and press .
Note: After the initial system setup is complete, it is highly recommended that you change the
admin user password from its default value. See “Change the Login Password” on page 35 for
further information.
5 The system will display a prompt for you to select the Pro:Centric portal application you will be using:
Table of contents
Other LG Server manuals

LG
LG 27CN651N User manual

LG
LG Ericcson iPECS-CM Owner's manual

LG
LG Cloud Device 24CQ65 Series User manual

LG
LG 27CN650N User manual

LG
LG 34CN650N User manual

LG
LG CloudDevice 24CR67 Series User manual

LG
LG CloudDevice 24CN670NK User manual

LG
LG Cloud Device 24CQ650I-6N.AUB User manual

LG
LG CL600I User manual

LG
LG PCS150R Pro:Centric User manual