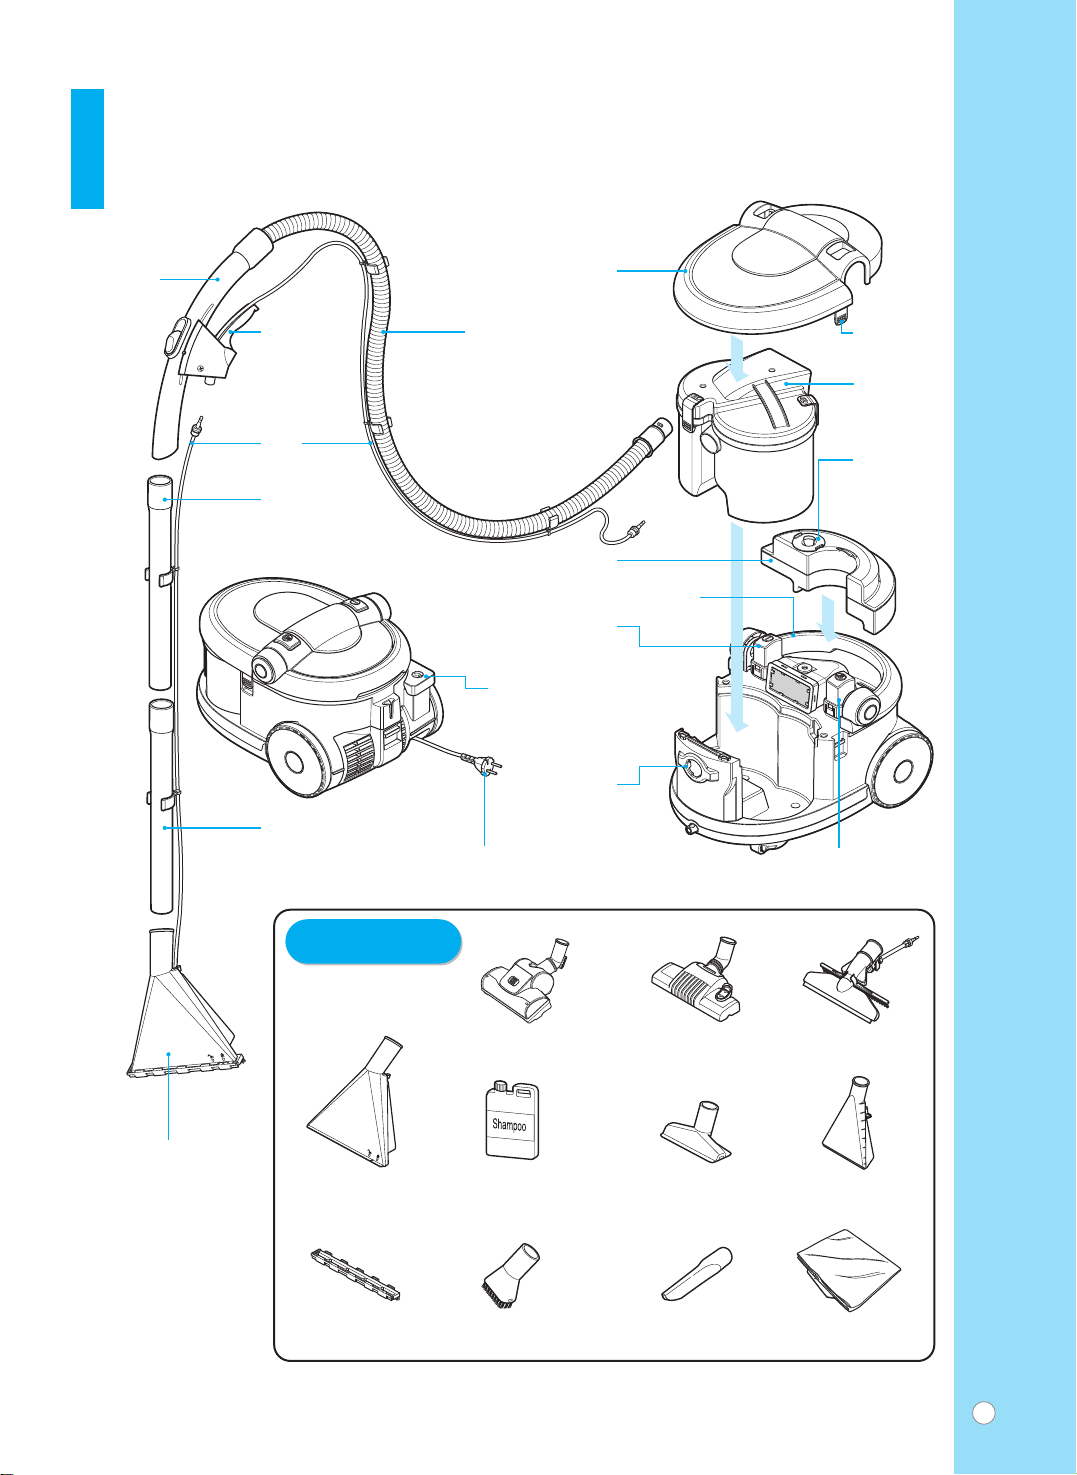
LG V-K97 N Series User manual

Model
Language
Page
재 질 크 기(D*W)
담 당 자
인쇄도수(외/내)
Part No.
작성일자
V-K97*N**
영어+러시아
24
모조지 100
2010.07.02
3828FI3871A
1/2
182*257
김 기 병

OWNER'S MANUAL
РУКОВОДСТВО ПО ЭКСПЛУАТАЦИИ
P/No.: 3828FI3871A www.lg.com
Please read all of the information on page 3, 4 carefully. This information contains important instructions for the safe use and the maintenance of the appliance.
Внимательно изучите сведения, приведенные на стр. 5, 6. В них содержатся важные инструкции по безопасности, эксплуатации и обслуживанию пылесоса.
V-K976*N***

2
Assembling cleaner
Dry vacuuming
Wet cleaning
Carpet cleaning
Tile cleaning
Sofa cleaning
....................................................................... 3
...................................................................................................... 7
.......................................................................................... 7
................................................................................................ 9
................................................................................................. 12
Using carpet/floor nozzle and carpet master
Using accessory nozzles
.......................................................... 8
.................................................................................. 8
............................................................................................. 15
................................................................................................. 17
................................................................................................ 17
Dust Tank cleaning ........................................................................................ 18
Clean filter cleaning ..........................................................................................18
Exhaust filter cleaning ................................................................................... 19
Carpet master cleaning .................................................................................. 19
Shampoo tank net cleaning .............................................................................. 20
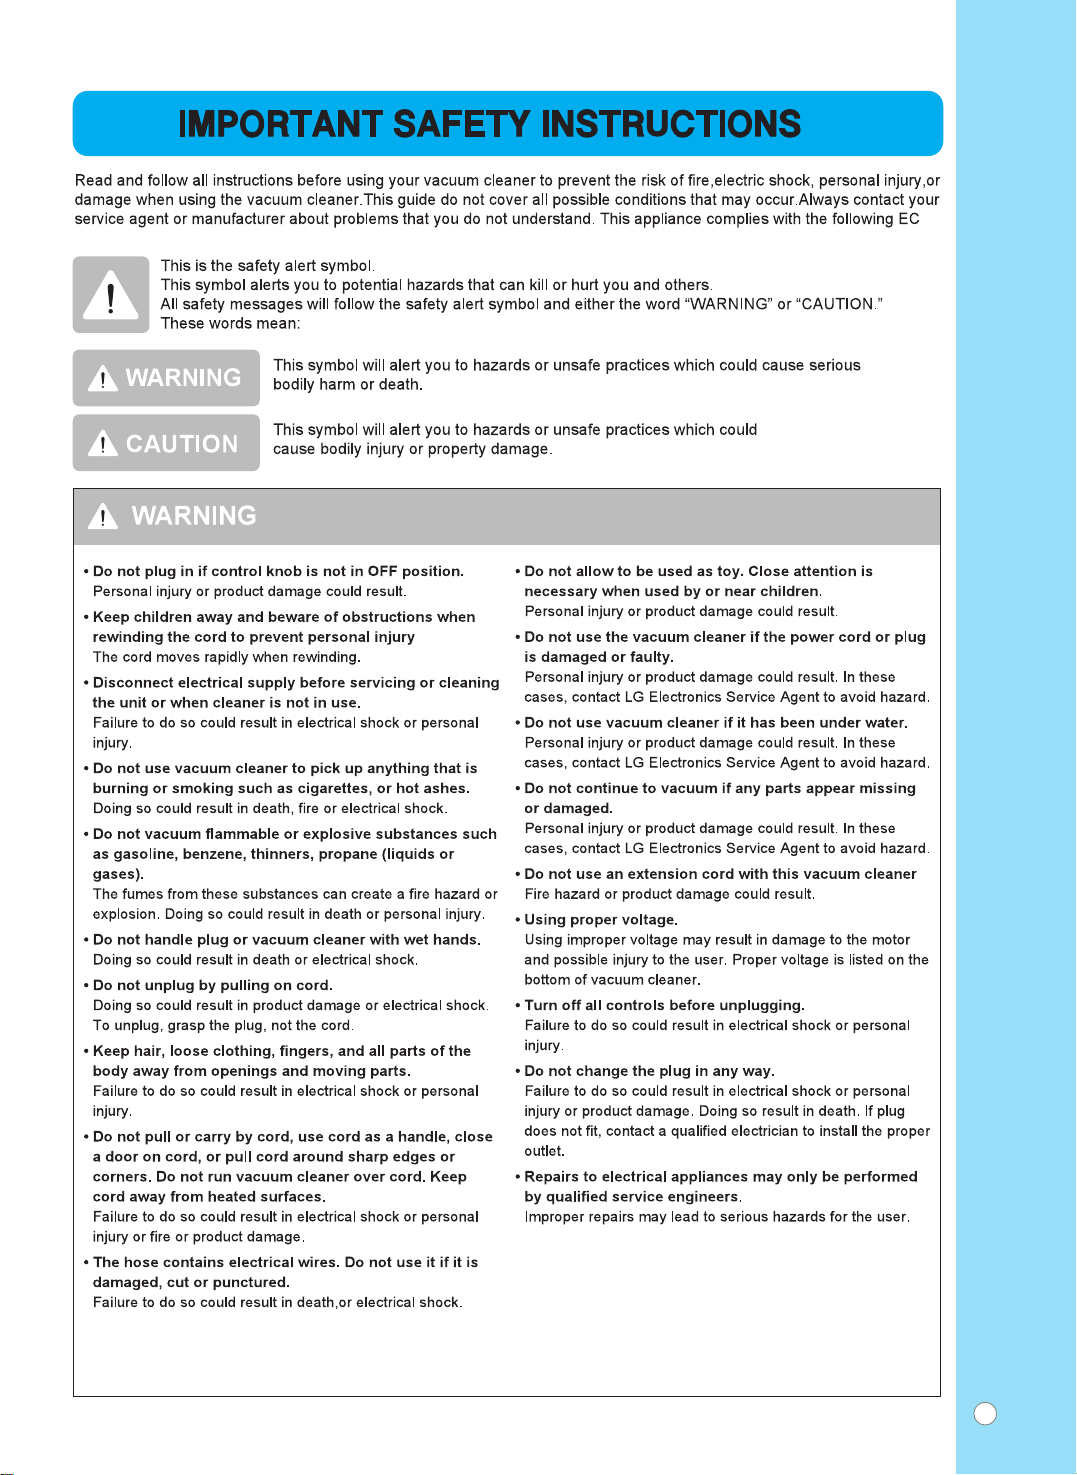
Information safety instructions
How to use
ë·Ó͇ Ô˚ÎÂÒÓÒ‡
ëÛı‡fl ˜ËÒÚ͇
Ç·Ê̇fl ˜ËÒÚ͇
óËÒÚ͇ ÍÓ‚Ó‚
óËÒÚ͇ ÔÎËÚÍË
óËÒÚ͇ ‰Ë‚‡ÌÓ‚
..................................................... 6
............................................................................ 7
........................................................................................... 7
................................................................................................. 9
........................................................................................... 12
ç‡Ò‡‰Í‡ ‰Îfl ÍÓ‚Ó‚/ÔÓ· Ë Ì‡Ò‡‰Í‡ (å‡ÒÚ ÍÓ‚Ó‚)
ÑÓÔÓÎÌËÚÂθÌ˚ ̇҇‰ÍË:
.................................................. 8
.............................................................................. 8
.............................................................................................. 15
.............................................................................................. 17
Window cleaning ........................................................................................... 16
óËÒÚ͇ ÓÍÓÌ ................................................................................................. 16
............................................................................................ 17
óËÒÚ͇ ÍÓÌÚÂÈ̇ ‰Îfl Ô˚ÎË ........................................................................ 18
óËÒÚ͇ ÙËθڇ .............................................................................................18
é˜ËÒÚ͇ ‚˚ÔÛÒÍÌÓ„Ó ÙËθڇ ........................................................................ 19
................................................................... 19
óËÒÚ͇ ÒÂÚÍË ÍÓÌÚÂÈ̇ ‰Îfl ¯‡ÏÔÛÌfl .......................................................... 20
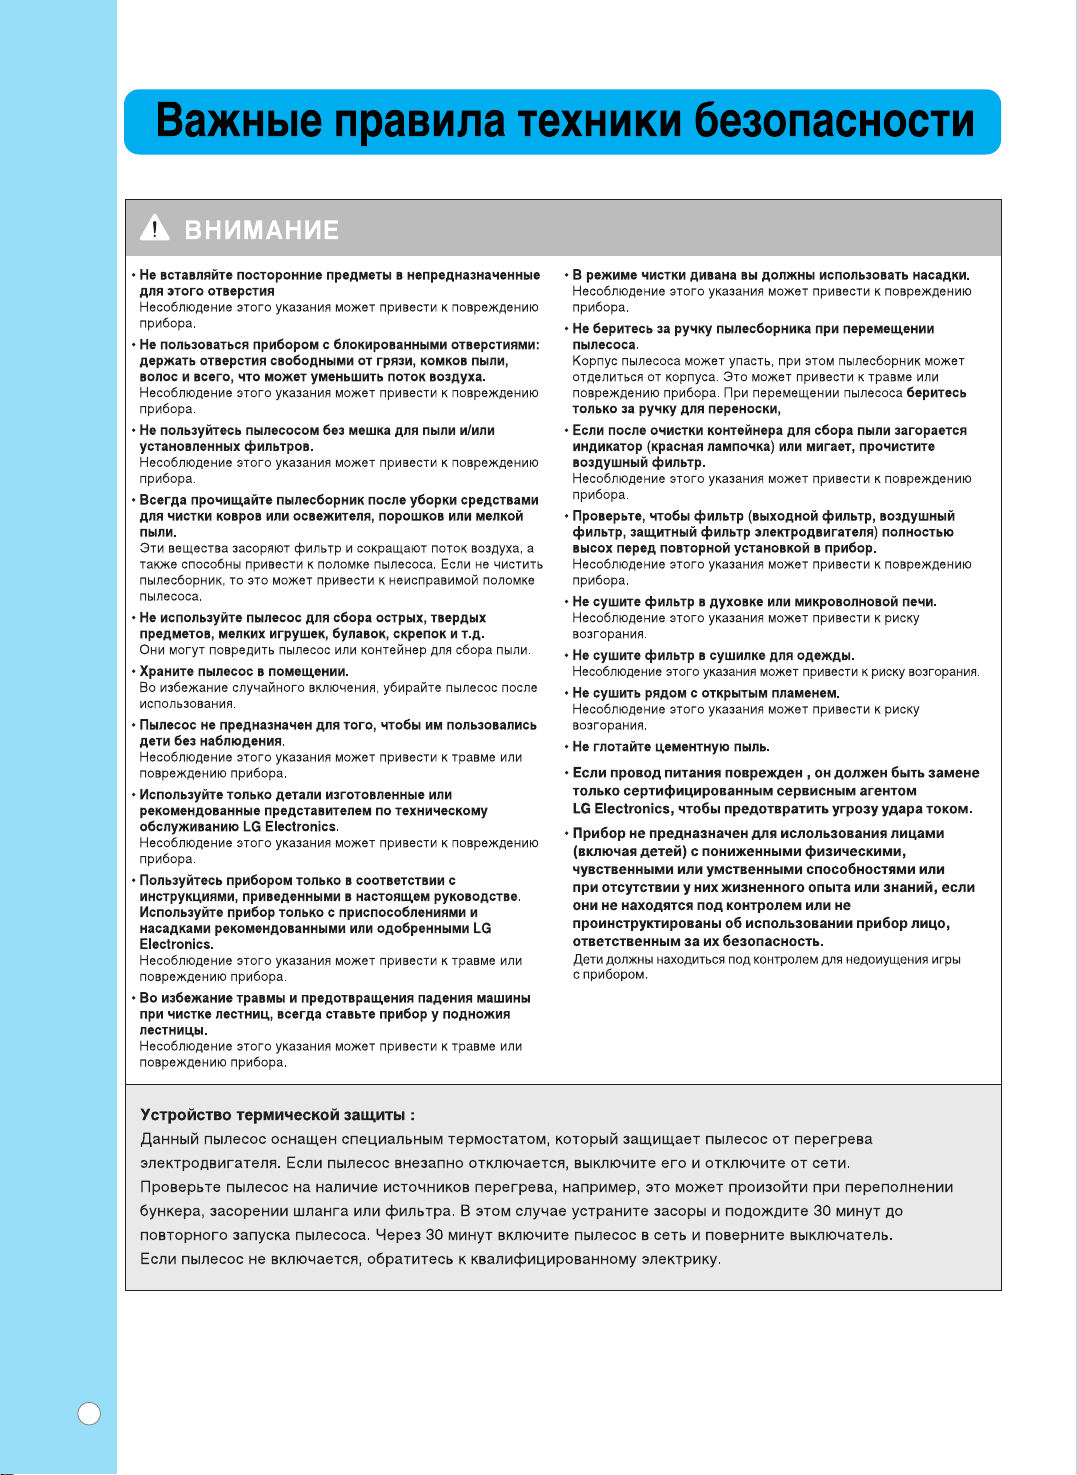
LJÊÌ˚ ԇ‚Ë· ÚÂıÌËÍË ·ÂÁÓÔ‡ÒÌÓÒÚË
àÒÔÓθÁÓ‚‡ÌË Ô˚ÎÂÒÓÒ‡
ëÓ‰ÂʇÌËÂ
Table of contents
óËÒÚ͇ ̇҇‰ÍË (å‡ÒÚ ÍÓ‚Ó‚)

3
Directives : -2006/95/EC Low Voltage Directive 2004/108/EC EMC Directive.

4
• Do If the power cord is damaged, it must be replaced by an
approved LG Electronics Service Agent to avoid a hazard.
• This appliance is not intended for use by persons
(including children) with reduced physical, sensory or mental
capabilities, or lack of experience and knowledge, unless they
have been given supervision or instruction concerning use of
the appliance by a person responsible for their safety.
Children should be supervised to ensure that they do not play
with the appliance.

5

6

7
How to use
Assembling cleaner
àÒÔÓθÁÓ‚‡ÌË Ô˚ÎÂÒÓÒ‡
ë·Ó͇ Ô˚ÎÂÒÓÒ‡
Optional
ç ‚Ó ‚ÒÂı ÏÓ‰ÂÎflı
Carpet/Floor Nozzle
ç‡Ò‡‰Í‡ ‰Îfl ڂ‰˚ı
ÍÓ‚Ó‚˚ı ÔÓÍ˚ÚËÈ
Spray Nozzle
ê‡ÒÔ˚Îfl˛˘‡fl
̇҇‰Í‡
Crevice Tool
ç‡Ò‡‰Í‡ ‰Îfl ˘ÂÎÂÈ
Accessory Bag
ç‡·Ó ‡ÍÒÂÒÒÛ‡Ó‚
Shampoo Bottle
Frame Brush Dusting Brush
˘ÂÚ͇ ‰Îfl Ô˚ÎË
Upholstery Nozzle
äÓÌÚÂÈÌ ‰Îfl
¯‡ÏÔÛÌfl
˘ÂÚ͇ ‰Îfl ‡Ï
˘ÂÚ͇ ‰Îfl
˜ËÒÚÍË Ó·Ë‚ÍË
Window Master
å‡ÒÚ ÓÍÓÌ
Small Shampoo Nozzle
å‡Î‡fl ̇҇‰Í‡
‰Îfl ¯‡ÏÔÛÌfl
Shampoo Button
äÌÓÔ͇ ÔÓ‰‡˜Ë ¯‡ÏÔÛÌfl
Inlet Dust
ÇÔÛÒÍÌÓÂ
ÓÚ‚ÂÒÚËÂ
‰Îfl Ô˚ÎË
Switch Button
äÌÓÔ͇
‚˚Íβ˜‡ÚÂÎfl
Power Cord
ëÂÚ‚ÓÈ ¯ÌÛ
Hose
ò·̄
Hose Handle
êÛÍÓflÚ͇
¯Î‡Ì„‡
Dust Tank
äÓÌÚÂÈÌÂ
‰Îfl Ô˚ÎË
Clamp
ᇢÂÎ͇
Shampoo
Tank Cap
ä˚¯Í‡
ÍÓÌÚÂÈ̇
‰Îfl ¯‡ÏÔÛÌfl
Spray Nozzle
ê‡ÒÔ˚Îfl˛˘‡fl ̇҇‰Í‡
Shampoo
Lever
ê˚˜‡„
ÔÓ‰‡˜Ë
¯‡ÏÔÛÌfl
Pipe
íÛ·‡
Pipe
íÛ·‡
Cover
ä˚¯Í‡
Shampoo Tank
äÓÌÚÂÈÌÂ
‰Îfl ¯‡ÏÔÛÌfl
Cord Reel Button
äÌÓÔ͇ ÒÂÚÂ‚Ó„Ó ¯ÌÛ‡
Handle
ê͇ۘ
Tube
í۷͇
Carpet Master
å‡ÒÚ ÍÓ‚Ó‚

8
How to use
Using carpet/floor nozzle and carpet master plus
How to use
Using accessory nozzles
àÒÔÓθÁÓ‚‡ÌË Ô˚ÎÂÒÓÒ‡
ç‡Ò‡‰Í‡ ‰Îfl ÍÓ‚Ó‚/ÔÓ· Ë Ì‡Ò‡‰Í‡
(å‡ÒÚ ÍÓ‚Ó‚)
àÒÔÓθÁÓ‚‡ÌË Ô˚ÎÂÒÓÒ‡
ÑÓÔÓÎÌËÚÂθÌ˚ ̇҇‰ÍË
: Floor
èÓÎ
: Carpet
äÓ‚Â
Floor
Upholstery Nozzle Dusting Brush Crevice Tool
ç‡Ò‡‰Í‡ ‰Îfl ˜ËÒÚÍË Ó·Ë‚ÍË ôÂÚ͇ ‰Îfl Û‰‡ÎÂÌËfl Ô˚ÎË ç‡Ò‡‰Í‡ ‰Îfl ˜ËÒÚÍË ‚
ÚÛ‰ÌÓ‰ÓÒÚÛÔÌ˚ı ÏÂÒÚ‡ı
Carpet
èÓÎ äÓ‚Â
ç‡Ò‡‰Í‡ ‰Îfl ˜ËÒÚÍË ÍÓ‚‡/ÔÓ·
Carpet/Floor Nozzle
2 1
1
2
Long type Carpet
Hard Floor & Short type Carpet
ÑÎËÌÌÓ‚ÓÒÌ˚È ÍÓ‚Â
ÜÂÒÚÍÓÂ ÔÓÎÓÂ ÔÓÍ˚ÚËÂ Ë
ÍÓÓÚÍÓ‚ÓÒÌ˚È ÍÓ‚Â
Carpet Master
ìÒÚÓÈÒÚ‚Ó ‰Îfl ˜ËÒÚÍË ÍÓ‚Ó‚
Long carpet
Short carpet

9
5
21 3
4
3
How to use
Dry vacuuming
àÒÔÓθÁÓ‚‡ÌË Ô˚ÎÂÒÓÒ‡
ëÛı‡fl ˜ËÒÚ͇
Air Flow Regulator
ê„ÛÎflÚÓ ÒËÎ˚
‚Ò‡Ò˚‚‡ÌËfl éÚÍ˚Ú¸
Open
Close
á‡Í˚Ú¸
The Air Flow Regulator allows you to change the vacuum suction for different fabric and carpet
weight. Adjust the suction power with Air Flow Regulator in the handle.
ê„ÛÎflÚÓ ÒËÎ˚ ‚Ò‡Ò˚‚‡ÌËfl ÔÓÁ‚ÓÎflÂÚ ‡‰‡ÔÚËÓ‚‡Ú¸ ÛÒÎÓ‚Ëfl ˜ËÒÚÍË ‰Îfl χÚÂËË Ë ÍÓ‚Ó‚
‡Á΢ÌÓÈ ÔÎÓÚÌÓÒÚË. éÚ„ÛÎËÛÈÚ ÏÓ˘ÌÓÒÚ¸ ÔÂÂÍβ˜‡ÚÂÎÂÏ Ì‡ Û˜ÍÂ.
Assembling Hose and PipesClosing the Top Cover AssyConnecting the dust tank.
Connecting the Hose Turning on the Power Switch
ë·Ó͇ ¯Î‡Ì„Ó‚ Ë ÚÛ·ÓÍá‡Í˚‚‡ÌË ‚ÂıÌÂÈ Í˚¯ÍË
‡ÔÔ‡‡Ú‡
ìÒÚ‡Ìӂ͇ ÍÓÌÚÂÈ̇ ‰Îfl
Ò·Ó‡ Ô˚ÎË
èÓ‰ÒÓ‰ËÌÂÌË ¯Î‡Ì„‡ ÇÍβ˜ÂÌË ÔËÚ‡ÌËfl óËÒÚ͇ ÔÓ·/ÍÓ‚‡
6
Cleaning the Floor/Carpet.
ON
Çäã
12

10
7 8 9
After cleaning
Opening the Top Cover Assy
and Lifting the Dust Tank.
Separating the Dust Cover and
Pouring the cleaning Dust.
Washing the Guide Buoy.
ëÌflÚË ‚ÂıÌÂÈ Í˚¯ÍË Ë
ËÁ‚ΘÂÌË ÍÓÌÚÂÈ̇
‰Îfl Ò·Ó‡ Ô˚ÎË.
ëÌflÚË Í˚¯ÍË ÍÓÌÚÂÈ̇
‰Îfl Ò·Ó‡ Ô˚ÎË Ë ÓÔÓÓÊÌÂÌËÂ
ÍÓÌÚÂÈ̇.
èÓÏ˚‚‡ÌË ÙËθڇ.
èÓÒΠ˜ËÒÚÍË
èêÖÑìèêÖÜÑÖçàÖ!
ÄÍÍÛ‡ÚÌÓ ÔÓÏÓÈÚÂ Í‡Ê‰Û˛ ‰Âڇθ ÙËθڇ ‚ ıÓÎÓ‰ÌÓÈ ÔÓÚÓ˜ÌÓÈ ‚Ӊ ‰Ó ÚÂı ÔÓ, ÔÓ͇ ‚Ó‰‡ ÌÂ
ÒÚ‡ÌÂÚ ˜ËÒÚÓÈ. çÂθÁfl ËÒÔÓθÁÓ‚‡Ú¸ ÏÓ˛˘Ë Ò‰ÒÚ‚‡, ‡ Ú‡ÍÊ ËÒÔÓθÁÓ‚‡Ú¸ ‰Îfl ÙËθڇ
ÒÚˇθÌÛ˛ ËÎË ÔÓÒÛ‰ÓÏÓ˜ÌÛ˛ χ¯ËÌÛ.
9WARNING!
Gently rinse guide buoy separately under a cold running water until the water runs clear.
Do not use detergent or a washing machine or dishwasher. Shake off excess water from the guide buoy.
Re-assemble and place it back in your machine.

11
10 11 12
Removing the Cleaning Water &
Connecting the Dust Cover.
Connecting the Dust Tank. Closing the Top Cover Assy.
á‡Í˚‚‡ÌË ‚ÂıÌÂÈ
Í˚¯ÍË ‡ÔÔ‡‡Ú‡
á‡Í˚‚‡ÌË ‚ÂıÌÂÈ
ìÒÚ‡Ìӂ͇ ÍÓÌÚÂÈ̇ ‰Îfl
Ò·Ó‡ Ô˚ÎË.
쉇ÎÂÌË ‚Ó‰˚, ÛÒÚ‡Ìӂ͇
Í˚¯ÍË ÍÓÌÚÂÈ̇ ‰Îfl Ò·Ó‡
Ô˚ÎË.

1
3
2
12
How to use
Wet cleaning
àÒÔÓθÁÓ‚‡ÌË Ô˚ÎÂÒÓÒ‡
Ç·Ê̇fl ˜ËÒÚ͇
1 2 3
5
8
64
7
7
If there is a strange sound in the pump, put the cleaning fluids into the shampoo tank.
Because it indicates that there is no cleaning fluid in the shampoo tank.
ÖÒÎË Ì‡ÒÓÒ ÔÓËÁ‚Ó‰ËÚ ÔÓÒÚÓÓÌÌËÈ ¯ÛÏ ‰Ó·‡‚¸Ú ‚ ÍÓÌÚÂÈÌ ‰Îfl ¯‡ÏÔÛÌfl ˜ËÒÚfl˘ÂÈ ÊˉÍÓÒÚË.
òÛÏ „Ó‚ÓËÚ Ó ÚÓÏ, ˜ÚÓ ‚ ÍÓÌÚÂÈÌ ‰Îfl ¯‡ÏÔÛÌfl Ì ÓÒÚ‡ÎÓÒ¸ ˜ËÒÚfl˘ÂÈ ÊˉÍÓÒÚË.
Opening the Top Cover Assy
Closing the Tank Cap and
the Top Cover Assy
Turning on the Power & Shampoo Switch
Connecting the Hose & Tube
Pulling the lever
Assembling Hose & Pipes and
Connecting Tube
Opening the Tank Cap Pouring Water & Shampoo
éÚÍ˚‚‡ÌË ‚ÂıÌÂÈ
Í˚¯ÍË ‡ÔÔ‡‡Ú‡
á‡Í˚‚‡ÌË Í˚¯ÍË ÂÁ‚ۇ‡
Ë ‚ÂıÌÂÈ Í˚¯ÍË ‡ÔÔ‡‡Ú‡
ë·Ó͇ ¯Î‡Ì„‡, ÚÛ· Ë
ÒÓ‰ËÌËÚÂθÌÓ„Ó Ô‡Ú۷͇
ÇÍβ˜ÂÌË ÔËÚ‡ÌËfl Ë ÔÓ‰‡˜Ë ¯‡ÏÔÛÌfl
èÓ‰ÒÓ‰ËÌÂÌË ¯Î‡Ì„‡
èÂÂÏ¢ÂÌË ˚˜‡„‡
éÚÍ˚‚‡ÌË Í˚¯ÍË
ÂÁ‚ۇ‡
á‡ÎË‚‡ÌË ‚Ó‰˚ Ë ¯‡ÏÔÛÌfl Standard spot 1 Cup
Heavy spot 2 Cup
ëڇ̉‡ÚÌÓ ÔflÚÌÓ 1 Cup
íÛ‰ÌÓÛ‰‡ÎflÂÏÓ ÔflÚÌÓ 2 Cup
Tank Cap
ä˚¯Í‡
ÂÁ‚ۇ‡
Carpet
äÓ‚Â
Tile
ä‡ÙÂθ
Window
éÍÌÓ
Sofa
åfl„͇fl Ï·Âθ
ÇÓ‰‡
ON
Çäã ON
Çäã
¯‡ÏÔÛ̸

13
1312
10 119
10
When you hear the big noise from the main body during the operation, empty the dust tank. Because it indicates that the
safety float automatically closes the suction inlet and you will notice that no more liquid is sucked up.
Ç ÒÎÛ˜‡Â ÒËθÌÓ„Ó ¯Ûχ ‚ Ô˚ÎÂÒÓÒ ӘËÒÚËÚ ÍÓÌÚÂÈÌ ‰Îfl ÏÛÒÓ‡. í‡ÍÓÈ ¯ÛÏ „Ó‚ÓËÚ Ó ÚÓÏ, ˜ÚÓ
‡‚ÚÓχÚ˘ÂÒÍËÈ ÍÎ‡Ô‡Ì Á‡Í˚Î ‚ÔÛÒÍÌÓ ÓÚ‚ÂÒÚËÂ. Ç˚ ۂˉËÚÂ, ˜ÚÓ ÊˉÍÓÒÚ¸ ÔÂÂÒڇ· ‚Ò‡Ò˚‚‡Ú¸Òfl.
Wet Cleaning
Lifting the Dust Tank Pouring the Cleaning Liquid
Checking the Cleaning Liquid Opening the Top Cover Assy
Ç·Ê̇fl ˜ËÒÚ͇
àÁ‚ΘÂÌË ÂÁ‚ۇ‡
‰Îfl Ò·Ó‡ Ô˚ÎË
á‡Î˂͇ ˜ËÒÚfl˘ÂÈ ÊˉÍÓÒÚË
èÓ‚Â͇ ÛÓ‚Ìfl ˜ËÒÚfl˘ÂÈ
ÊˉÍÓÒÚË
éÚÍ˚‚‡ÌË ‚ÂıÌÂÈ Í˚¯ÍË
‡ÔÔ‡‡Ú‡
MAX
å‡ÍÒËχθÌ˚È

14
Closing the Top Cover Assy
á‡Í˚‚‡ÌË ‚ÂıÌÂÈ
Í˚¯ÍË ‡ÔÔ‡‡Ú‡
15
Removing the Cleaning Water &
Connecting the Dust Cover.
16
Connecting the Dust Tank.
14
17
Washing the Guide Buoy.
쉇ÎÂÌË ‚Ó‰˚, ÛÒÚ‡Ìӂ͇
Í˚¯ÍË ÍÓÌÚÂÈ̇ ‰Îfl Ò·Ó‡
Ô˚ÎË.
ìÒÚ‡Ìӂ͇ ÍÓÌÚÂÈ̇ ‰Îfl
Ò·Ó‡ Ô˚ÎË.
èÓÏ˚‚‡ÌË ÙËθڇ.
èêÖÑìèêÖÜÑÖçàÖ!
ÄÍÍÛ‡ÚÌÓ ÔÓÏÓÈÚÂ Í‡Ê‰Û˛ ‰Âڇθ ÙËθڇ ‚ ıÓÎÓ‰ÌÓÈ ÔÓÚÓ˜ÌÓÈ ‚Ӊ ‰Ó ÚÂı ÔÓ, ÔÓ͇ ‚Ó‰‡ ÌÂ
ÒÚ‡ÌÂÚ ˜ËÒÚÓÈ. çÂθÁfl ËÒÔÓθÁÓ‚‡Ú¸ ÏÓ˛˘Ë Ò‰ÒÚ‚‡, ‡ Ú‡ÍÊ ËÒÔÓθÁÓ‚‡Ú¸ ‰Îfl ÙËθڇ
ÒÚˇθÌÛ˛ ËÎË ÔÓÒÛ‰ÓÏÓ˜ÌÛ˛ χ¯ËÌÛ.
14 WARNING!
Gently rinse guide buoy separately under a cold running water until the water runs clear.
Do not use detergent or a washing machine or dishwasher. Shake off excess water from the guide buoy.
Re-assemble and place it back in your machine.

15
How to use
Carpet cleaning
àÒÔÓθÁÓ‚‡ÌË Ô˚ÎÂÒÓÒ‡
óËÒÚ͇ ÍÓ‚Ó‚
3 4
1 2
3
It is possible that the pump's thermal security mechanism has been acticated to protect the pump from overheating
in case that the shampoo tank is empty or the shampoo button has remained in the (ON) position without any
operation of the trigger. To check that the pump has not broken down, put the button at the (OFF) position and wait
about 20 to 30 minutes until the pump cools down, then start it again. If your appliance still does not work in spite of
following these instructions, contact the nearest authorized service center.
Ç ÒÎÛ˜‡Â ÓÔÛÒÚÓ¯ÂÌËfl ÍÓÌÚÂÈ̇ ‰Îfl ¯‡ÏÔÛÌfl, ‰‡Ê ÍÓ„‰‡ ÍÌÓÔ͇ ÔÓ‰‡˜Ë ¯‡ÏÔÛÌfl ‚Íβ˜Â̇ (ON),
‡‚ÚÓχÚ˘ÂÒÍËÈ Á‡˘ËÚÌ˚È ÏÂı‡ÌËÁÏ ÏÓÊÂÚ ÓÚÍβ˜ËÚ¸ ̇ÒÓÒ ‚Ó ËÁ·ÂʇÌËÂ Â„Ó Ô„‚‡. èË ˝ÚÓÏ Ì‡Ê‡ÚË ̇
˚˜‡„ ÔÓ‰‡˜Ë ¯‡ÏÔÛÌfl Ì ‰‡ÒÚ ÂÁÛθڇڇ. óÚÓ·˚ ۷‰ËÚ¸Òfl, ˜ÚÓ Ì‡ÒÓÒ ËÒÔ‡‚ÂÌ, ‚˚Íβ˜ËÚ ÍÌÓÔÍÛ ÔÓ‰‡˜Ë
¯‡ÏÔÛÌfl, ÔÓ‰ÓʉËÚ 20-30 ÏËÌÛÚ, ÔÓ͇ ̇ÒÓÒ Ì ÓÒÚ˚ÌÂÚ Ë ÔÓÔÓ·ÛÈÚ ÒÌÓ‚‡. ÖÒÎË ÔÓÒΠ‚˚ÔÓÎÌÂÌËfl Ô
˂‰ÂÌÌ˚ı ‚˚¯Â ËÌÒÚÛ͈ËÈ Ì‡ÒÓÒ Ì Á‡‡·ÓÚ‡ÂÚ, Ó·‡ÚËÚÂÒ¸ ‚ ·ÎËʇȯËÈ ‡‚ÚÓËÁÓ‚‡ÌÌ˚È Ò‚ËÒÌ˚È ˆÂÌÚ.
Turn on the Power(
①
) & Shampoo Switch(
②
) and Pull the Lever(
③
) Wet Cleaning the Carpet
Turn off the Shampoo Switch(
②
) and Release the Lever(
①
) Dry Cleaning the Carpet
ÇÍβ˜ËÚ ÔËÚ‡ÌËÂ(
①
)Ë ÔÓ‰‡˜Û ¯‡ÏÔÛÌfl(
②
)Ë ÔÓÚflÌËÚ Á‡ ˚˜‡„(
③
)Ç·Ê̇fl ˜ËÒÚ͇ ÍÓ‚‡
Ç˚Íβ˜ËÚ ÔÓ‰‡˜Û ¯‡ÏÔÛÌfl(
②
)Ë ÓÚÔÛÒÚËÚ ˚˜‡„(
①
)ëÛı‡fl ˜ËÒÚ͇ ÍÓ‚‡
3
4
1
2
2
1
OFF
Çõäã

16
How to use
Window cleaning
àÒÔÓθÁÓ‚‡ÌË Ô˚ÎÂÒÓÒ‡
óËÒÚ͇ ÓÍÓÌ
2 31
Connecting the Window Master Cleaning the Window
Turning on the Power & Shampoo
Switch
èËÒÓ‰ËÌÂÌË ÛÒÚÓÈÒÚ‚‡
‰Îfl ˜ËÒÚÍË ÓÍÓÌ
óËÒÚ͇ ÓÍ̇
ÇÍβ˜ÂÌË ÔËÚ‡ÌËfl Ë ÔÓ‰‡˜Ë
¯‡ÏÔÛÌfl
2
1
3
ON
Çäã
ON
Çäã
54 6
Rotating the Frame
Turning off Shampoo Switch
Cleaning Window
LJ˘ÂÌË ‡Ï˚
Ç˚Íβ˜ÂÌË ÔËÚ‡ÌËfl Ë ÔÓ‰‡˜Ë
¯‡ÏÔÛÌfl
óËÒÚ͇ ÓÍ̇
OFF
Çõäã

17
How to use
Sofa cleaning
àÒÔÓθÁÓ‚‡ÌË Ô˚ÎÂÒÓÒ‡
óËÒÚ͇ ‰Ë‚‡ÌÓ‚
12
2 31
2 31
Connecting the Small Shompoo Nozzle
Cleaning the Sofa Cleaning the Tile
èËÒÓ‰ËÌÂÌË χÎÂ̸ÍÓÈ Ì‡Ò‡‰ÍË
‰Îfl ¯‡ÏÔÛÌfl
óËÒÚ͇ ‰Ë‚‡Ì‡ óËÒÚ͇ ͇ÙÂÎfl
How to use
Tile cleaning
àÒÔÓθÁÓ‚‡ÌË Ô˚ÎÂÒÓÒ‡
óËÒÚ͇ ÔÎËÚÍË
Button
äÌÓÔ͇
Disconnecting
éÚÒÓ‰ËÌÂÌËÂ
1
2
Connecting the Frame Brush Tube Connecting/Disconnecting Cleaning the Tile
èËÒÓ‰ËÌÂÌË ‡Ï˚ ˘ÂÚÍË èËÒÓ‰ËÌÂÌËÂ/ÓÚÒÓ‰ËÌÂÌËÂ
ÚÛ·ÍË
óËÒÚ͇ ͇ÙÂÎfl
Connecting
èËÒÓ‰ËÌÂÌËÂ

18
How to use
Dust tank cleaning
àÒÔÓθÁÓ‚‡ÌË Ô˚ÎÂÒÓÒ‡
óËÒÚ͇ ÙËθڇ
How to use
Clean filter cleaning
2 31
àÒÔÓθÁÓ‚‡ÌË Ô˚ÎÂÒÓÒ‡
óËÒÚ͇ ÍÓÌÚÂÈ̇ ‰Îfl Ô˚ÎË
2 3 41
CAUTION!
Remove the moisture and dry the filter sufficiently in shade
about a day.
The cycle of the cleaning
When dusts are full by the position indicated as "MAX" in
the dust tank.
When suction power suddenly weakens.
ÇçàåÄçàÖ!
쉇ÎËÚ ‚·„Û Ë ‰‡ÈÚ ÙËθÚÛ ÓÒÌÓ‚‡ÚÂθÌÓ ‚˚ÒÓıÌÛÚ¸ ‚
ÚÂÌË Ì‡ ÔÓÚflÊÂÌËË ‰Ìfl.
èÂËӉ˘ÌÓÒÚ¸ ˜ËÒÚÍË
ÍÓ„‰‡ Ô˚ÎÂÒ·ÓÌËÍ ÔÓÎÓÌ. Ç ˝ÚÓÏ ÒÎÛ‡Â, Ë̉Ë͇ÚÓ
Ô˚ÎÂÒ·ÓÌË͇ ÔÓ͇Á˚‚‡ÂÚ "MAX".
Ç ÒÎÛ˜‡Â ‚ÌÂÁ‡ÔÌÓ„Ó ÒÌËÊÂÌËfl ÏÓ˘ÌÓÒÚË
‚Ò‡Ò˚‚‡ÌËfl Ôӂ¸ÚÂ.
Separating Plates
Separating the Clean Filter Cleaning the Clean Filter
Connecting the Cleaning Filter
Cleaning the Dust Tank Pouring the Water Connecting Plates
éÚÒÓ‰ËÌÂÌË Ô·ÒÚËÌ
éÚÒÓ‰ËÌÂÌËÂ Ó˜Ë˘‡˛˘Â„Ó
ÙËθڇ
óËÒÚ͇ Ó˜Ë˘‡˛˘Â„Ó ÙËθڇ
èÓ‰ÒÓ‰ËÌÂÌËÂ Ó˜Ë˘‡˛˘Â„Ó
ÙËθڇ
óËÒÚ͇ ÂÁ‚ۇ‡
‰Îfl Ò·Ó‡ Ô˚ÎË
á‡Î˂͇ ‚Ó‰˚ èËÒÓ‰ËÌÂÌË Ô·ÒÚËÌ
Cleaning Filter
é˜Ë˘‡˛˘ËÈ
ÙËθÚ
Reuse the Sponge after drying
èÓ‚ÚÓÌÓ ËÒÔÓθÁÓ‚‡ÌË „Û·ÍË ÔÓÒÎÂ
ÔÓÒÛ¯ÍË

19
How to use
Carpet master plus cleaning
How to use
Exhaust filter cleaning
àÒÔÓθÁÓ‚‡ÌË Ô˚ÎÂÒÓÒ‡
óËÒÚ͇ ̇҇‰ÍË (å‡ÒÚ ÍÓ‚Ó‚)
àÒÔÓθÁÓ‚‡ÌË Ô˚ÎÂÒÓÒ‡ é˜ËÒÚ͇ ‚˚ÔÛÛÒÍÌÓ„Ó ÙËθڇ
2 3 41
Separating the Exhaust Cover Separating the Sponge Washing & Drying the
Sponge.
Connecting the
Exhaust Cover
éÚÒÓ‰ËÌÂÌË ‚˚ıÎÓÔÌÓÈ
Í˚¯ÍË
éÚÒÓ‰ËÌÂÌË „Û·ÍË
èÓÏ˚‚͇ Ë ÔÓÒۯ͇
„Û·ÍË
èËÒÓ‰ËÌÂÌËÂ
‚˚ıÎÓÔÌÓÈ Í˚¯ÍË
Reuse the Sponge after drying
èÓ‚ÚÓÌÓ ËÒÔÓθÁÓ‚‡ÌËÂ
„Û·ÍË ÔÓÒΠÔÓÒÛ¯ÍË
Sponge
CAUTION!
Remove the moisture and dry the filter sufficiently in shade
about a day.
The cycle of the cleaning
When dusts are full by the position indicated as "MAX" in
the dust tank.
When suction power suddenly weakens.
ÇçàåÄçàÖ!
쉇ÎËÚ ‚·„Û Ë ‰‡ÈÚ ÙËθÚÛ ÓÒÌÓ‚‡ÚÂθÌÓ ‚˚ÒÓıÌÛÚ¸ ‚
ÚÂÌË Ì‡ ÔÓÚflÊÂÌËË ‰Ìfl.
èÂËӉ˘ÌÓÒÚ¸ ˜ËÒÚÍË
ÍÓ„‰‡ Ô˚ÎÂÒ·ÓÌËÍ ÔÓÎÓÌ. Ç ˝ÚÓÏ ÒÎÛ‡Â, Ë̉Ë͇ÚÓ
Ô˚ÎÂÒ·ÓÌË͇ ÔÓ͇Á˚‚‡ÂÚ "MAX".
Ç ÒÎÛ˜‡Â ‚ÌÂÁ‡ÔÌÓ„Ó ÒÌËÊÂÌËfl ÏÓ˘ÌÓÒÚË
‚Ò‡Ò˚‚‡ÌËfl Ôӂ¸ÚÂ.
21
Opening the Air Cover Cleaning the Dusting Brush
éÚÍ˚‚‡ÌË ‚ÓÁ‰Û¯ÌÓÈ Í˚¯ÍË óËÒÚ͇ ˘ÂÚÍË ‰Îfl Û‰‡ÎÂÌËfl Ô˚ÎË
This manual suits for next models
1
Table of contents
Other LG Vacuum Cleaner manuals

LG
LG V-CA241NT series User manual

LG
LG V-CQ243 Series Instruction manual

LG
LG VC42 NH Series User manual

LG
LG VC-5382NH User manual

LG
LG VI-38 H Series User manual

LG
LG VK79000 HQ User manual

LG
LG VN-19210C Series User manual

LG
LG V-C32**N series User manual

LG
LG VC74 Series User manual

LG
LG VC31 N Series User manual