- 1 -
要安裝此模式,請參閱第 5 - 1 3⾴
SFX PSUMode Specifications
Mode SFX模式規格 / Spécifications du mode SFX / Technische Daten des SFX Modus /
Especificaciones del modo SFX / SFXモードの仕様
AT X PSU Mode Specifications
Mode ATX模式規格 / Spécifications du mode ATX / Technische Daten des ATX Modus /
Especificaciones del modo ATX / ATXモードの仕様
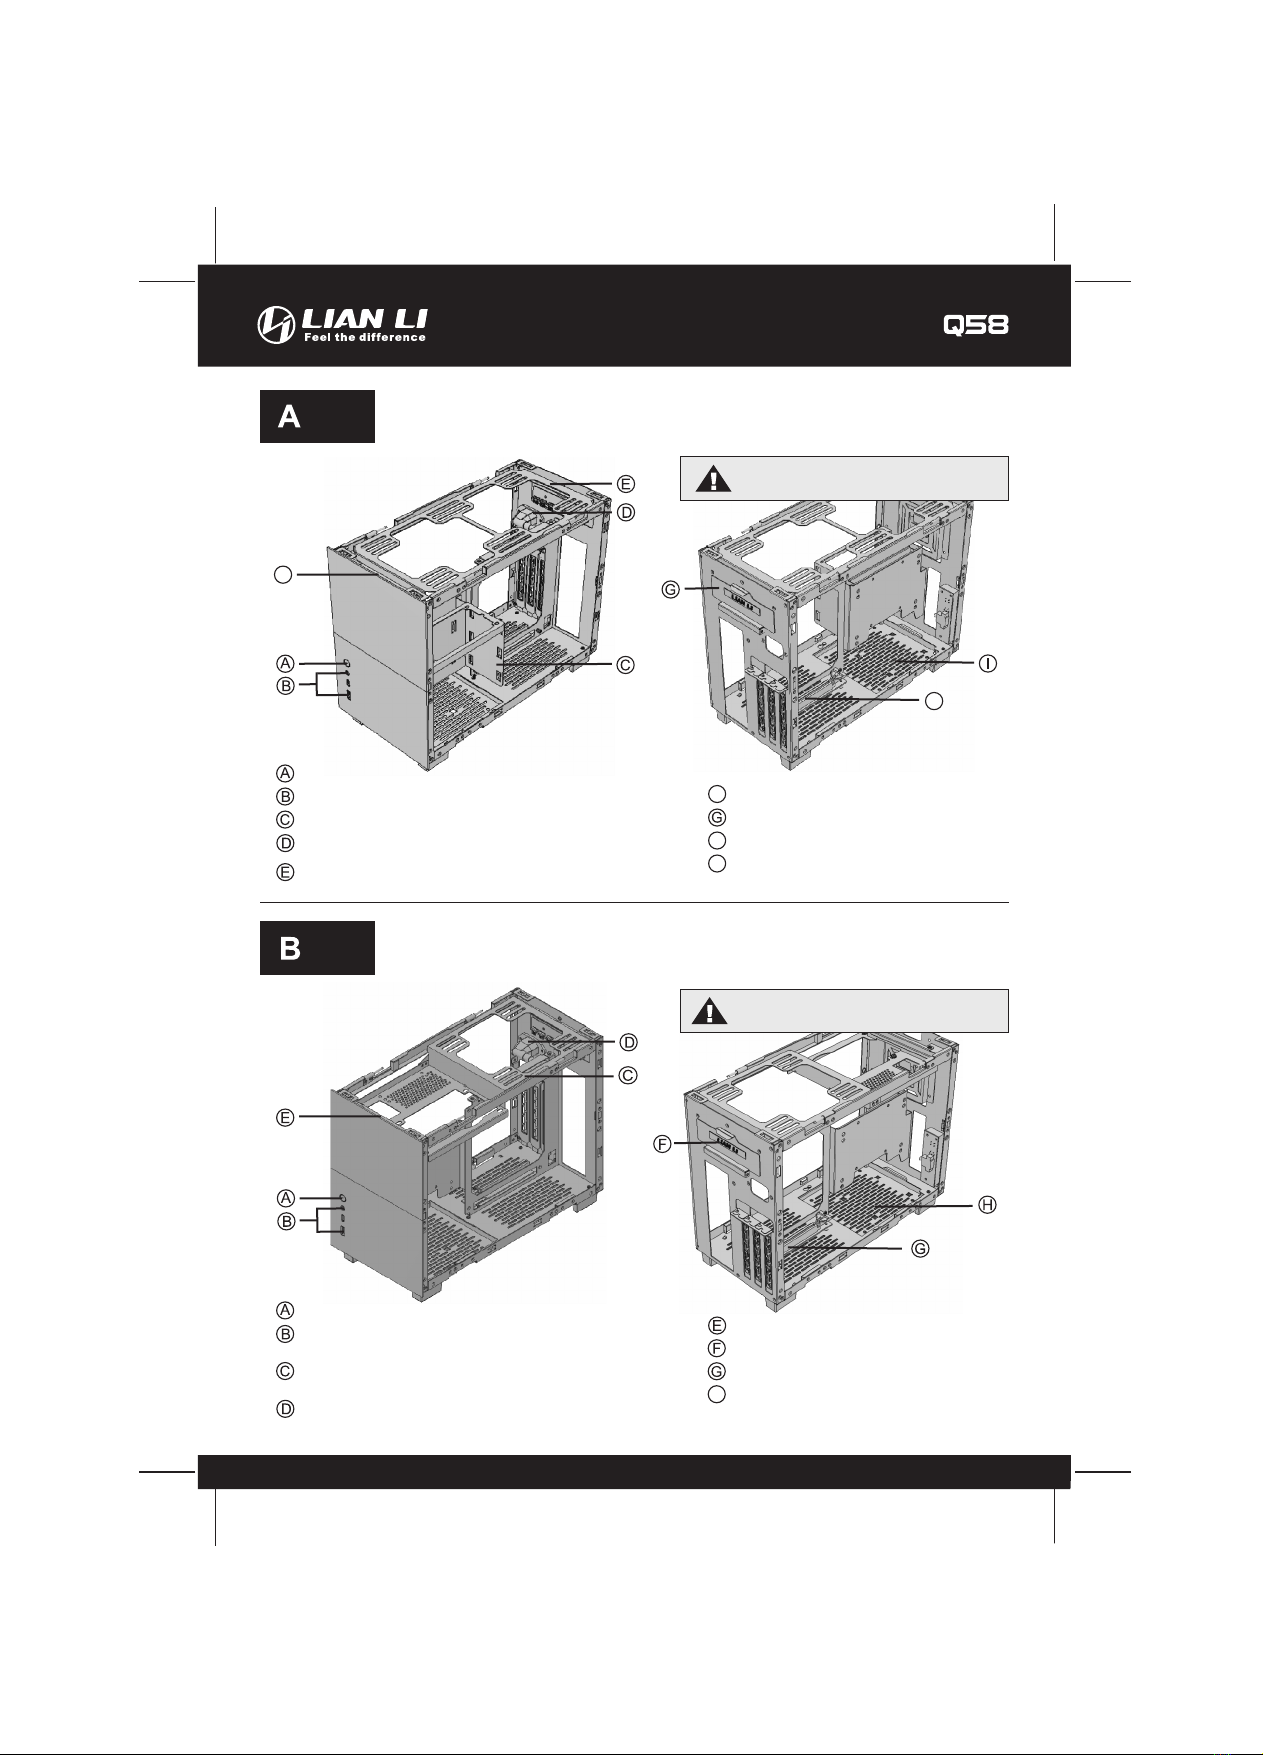
Toolless hot-swap 2.5" SSD tray
LED / fan hub
Bottom fan bracket
(2.5" SSD x 1 or 120 mm fan x1)
PCIE extension cable
I
H
Refer to page 5-13 to install this mode
要安裝此模式,請參閱第 5 , 1 4 - 1 7⾴
Refer to page 5, 14-17 to install this mode
LED / fan hub
PCIE extension cable
H
Power switch
Power extension cord
Supporting ATX PSU max.160 mm,120 mm fan x 1 or
140 mm fan x 1 or 120 mm AIO radiator x 1
Toolless hot-swap 2.5" SSD tray
Bottom fan bracket
(2.5" SSD x 1 or 120 mm fan x1)
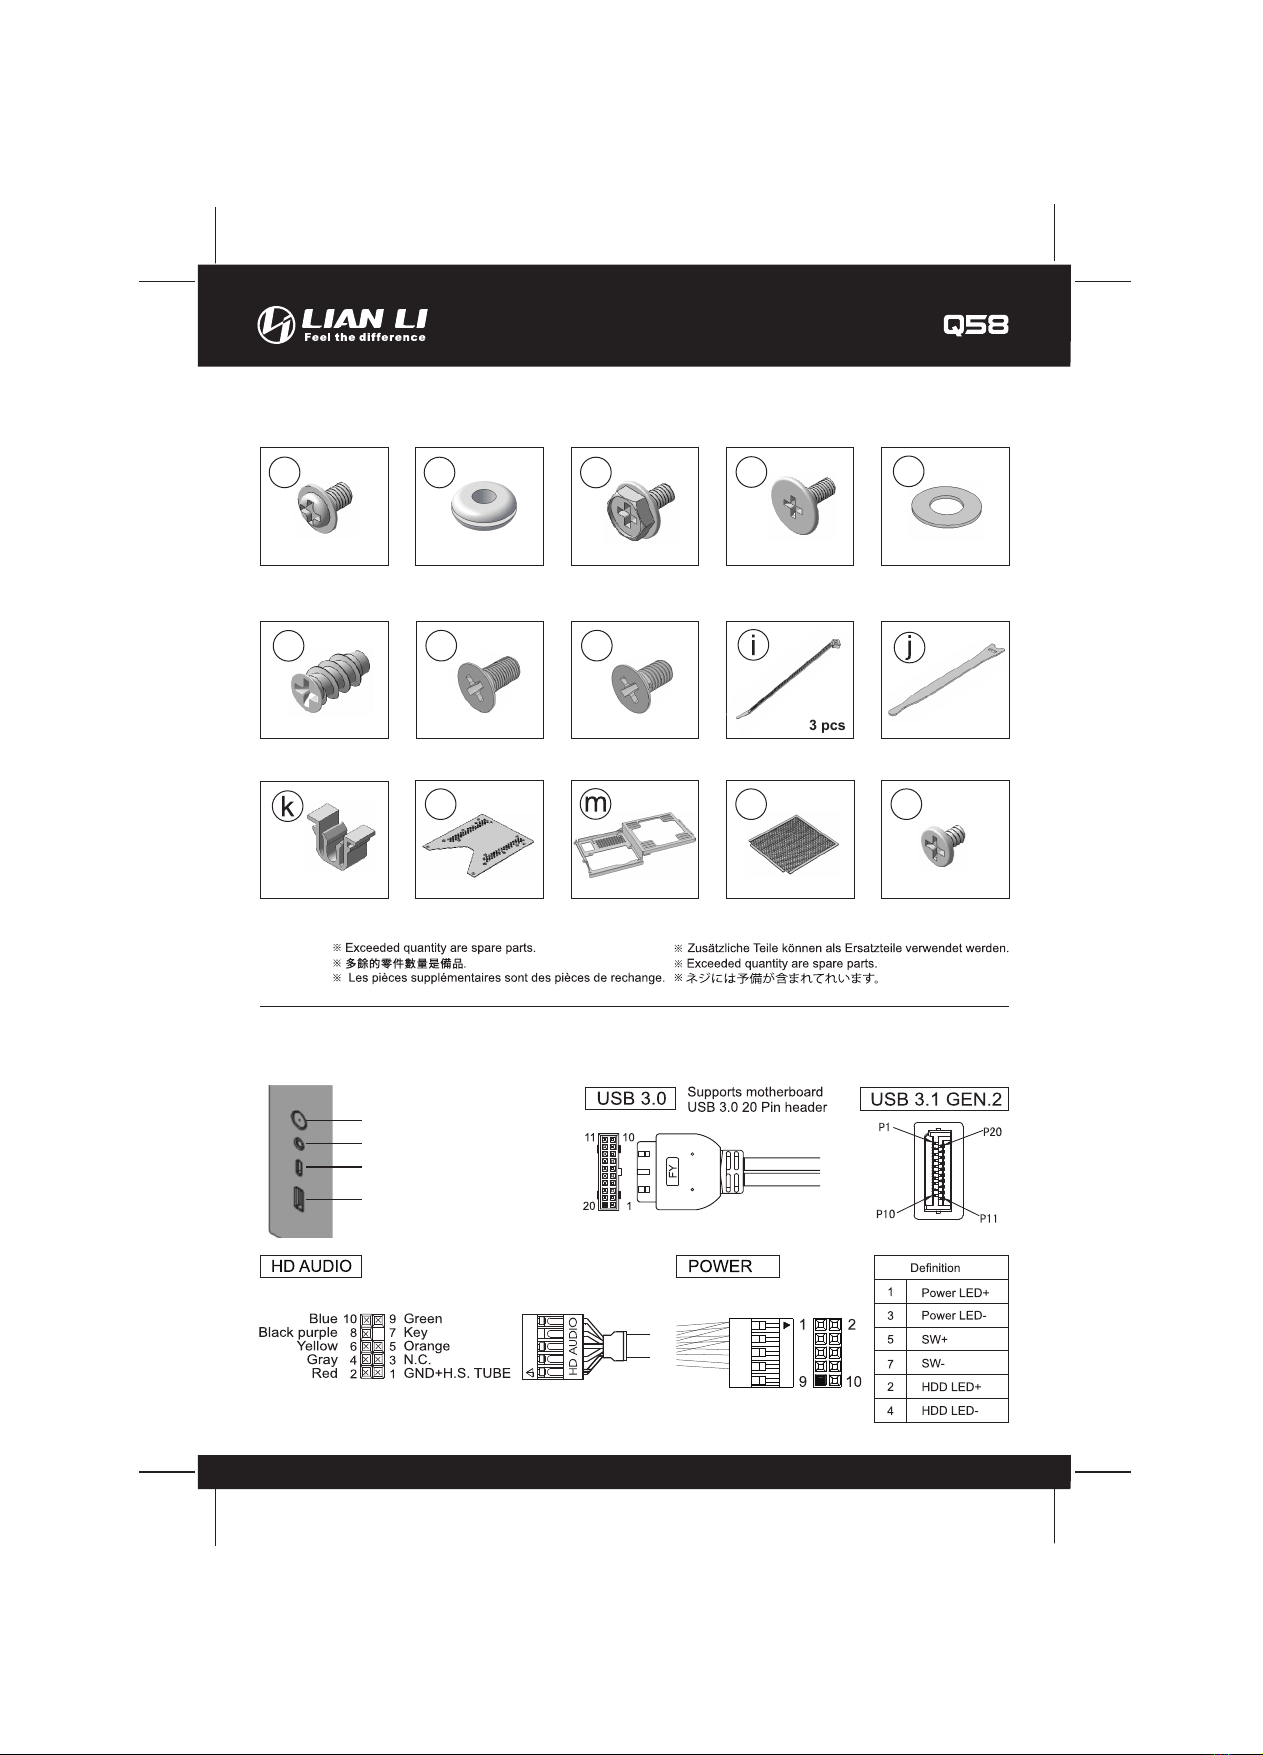
I/O ports: USB 3.0 x 1, Microphone Combo Jack, USB 3.1 x 1(Type-C)
H
Power switch
SFX/SFX-L power supply bracket
Power extension cord
I/O ports: USB 3.0 x 1, Microphone Combo Jack, USB 3.1 x 1(Type-C)
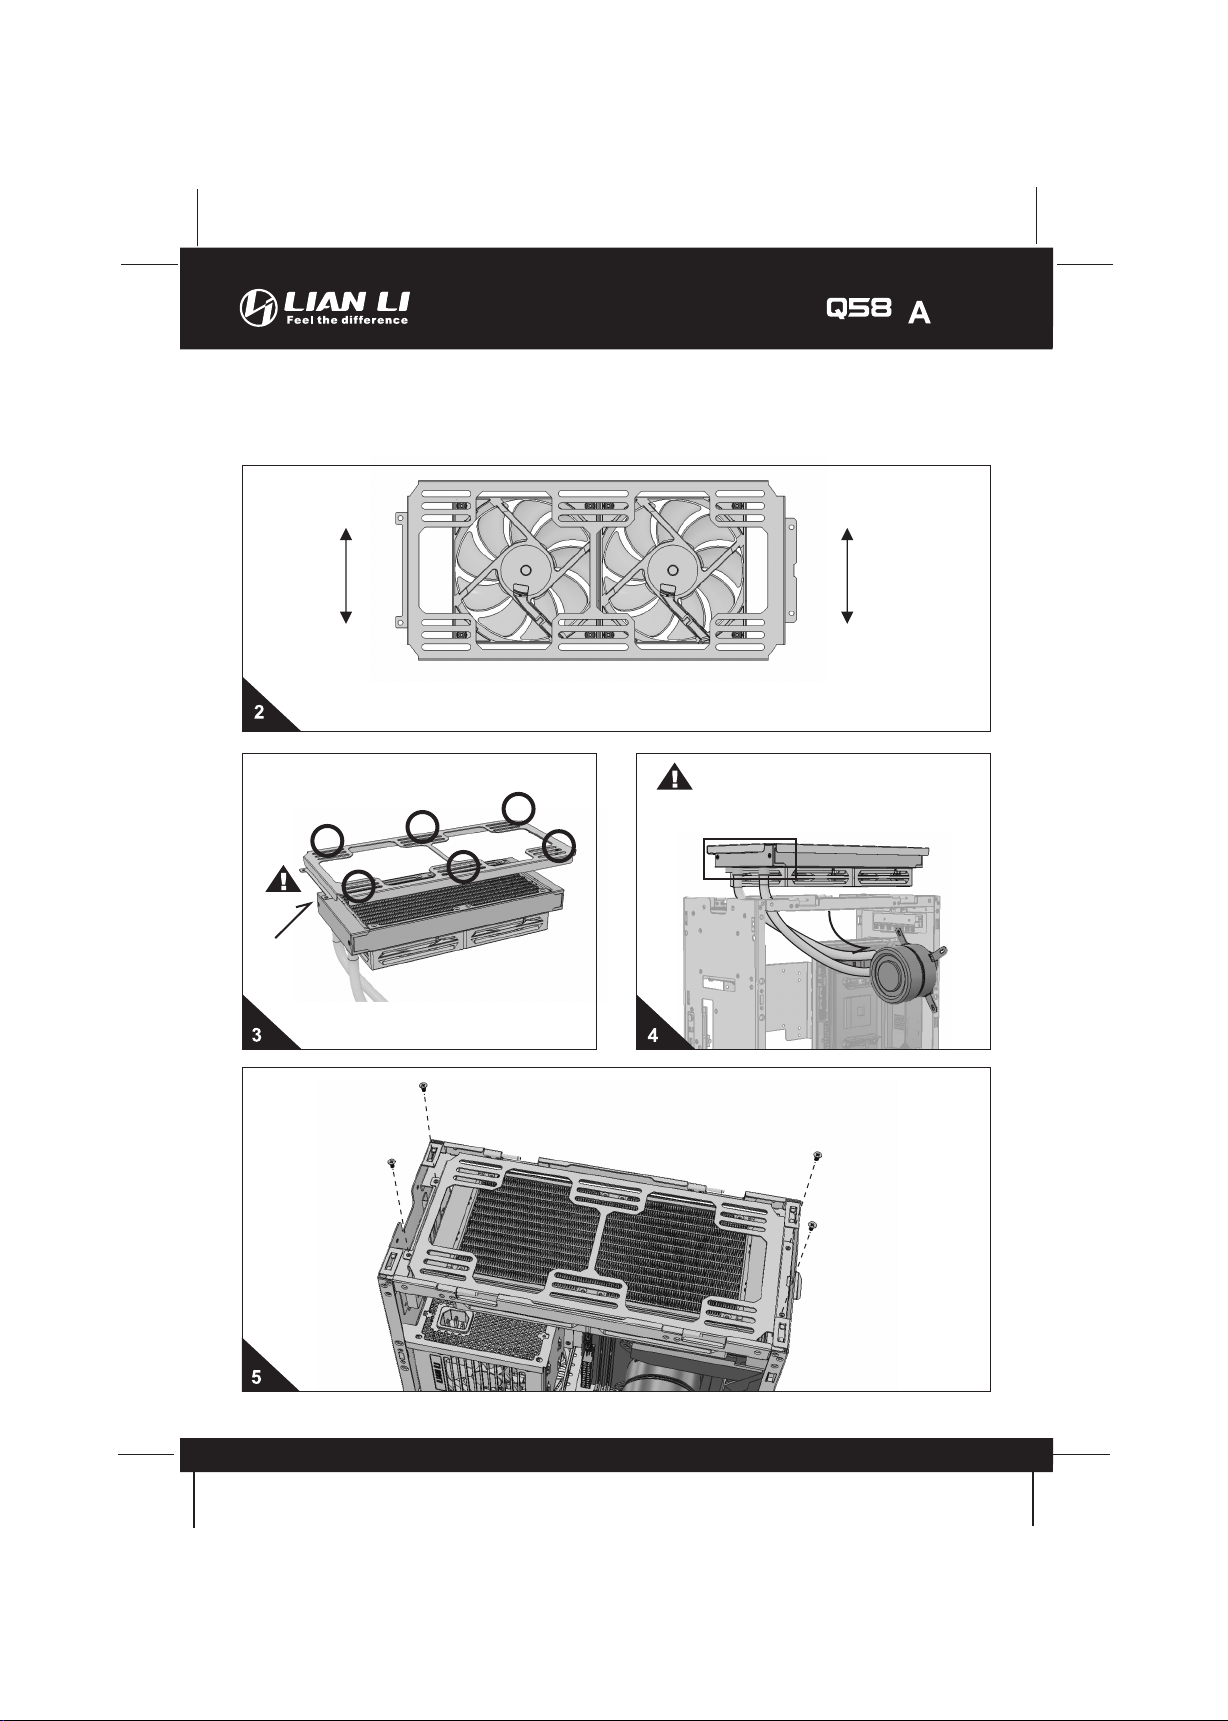
Supporting 120 mm fan x 2 or 140 mm fan x 2 or
240 mm radiator x 1 or 280 mm radiator x 1
F
F