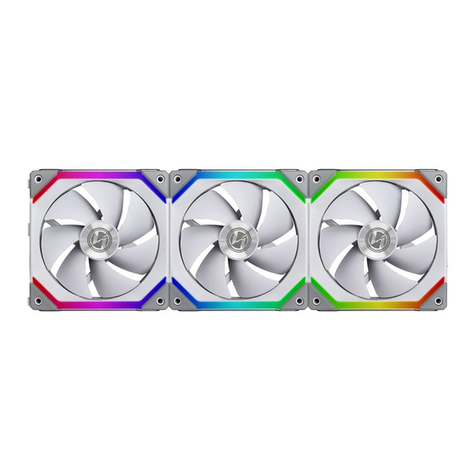
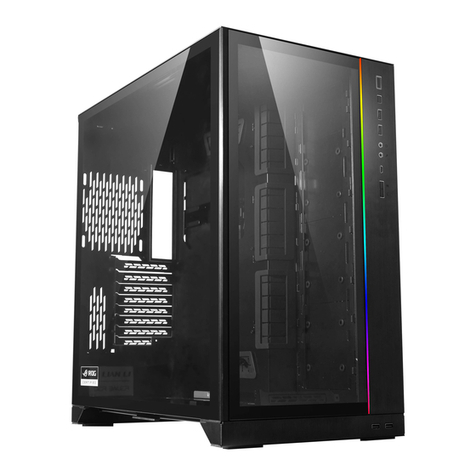
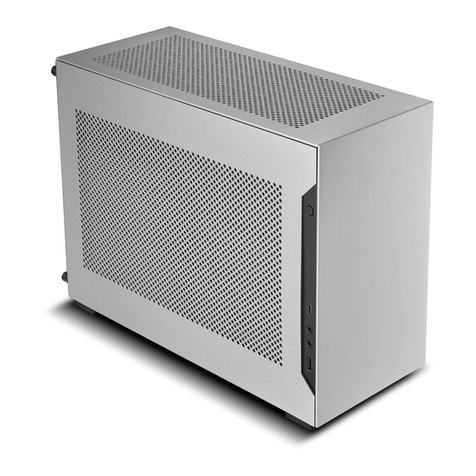
Lian-Li O11 DYNAMIC EVO XL User manual

Remove the Right Side Panel and Top Panel
卸下右側板與上蓋 / Retirez le panneau latéral droit et le capot supérieur / Entfernen Sie die rechte Seitenwand und die obere
Abdeckung / Retire el panel lateral derecho y la cubierta superior/右側のサイドパネルとトップカバーを取り外します
Remove the Side Glass Panel
卸下側玻璃 / Retirer la vitre latérale / Entfernen Sie das Seitenglas / Retire el vidrio lateral/サイドガラスを取り外します
Remove the Front Glass Panel
卸下玻璃前⾯板 / Retirez le panneau avant en verre / Entfernen Sie die Glasfrontplatte / Retire el panel frontal de vidrio/
ガラスのフロントパネルを取り外します
- 1 -
Remove the 2 side protecting
clip before installation/
安裝前記得要移除側邊的兩個保護
膠條/
Retirez les 2 clips de protection
latéraux avant l'installation
Recommend to keep the protecting
clip on for transportation/
如需運送建議將保護膠條裝上/
Il est recommandé de conserver le
clip de protection pour le transport
Screw for transportation purpose/
此螺絲在平時不⽤鎖/
Vis à des fins de transport

Normal Mode Specifications
正常模式規格 / Spécifications du mode normal / Spezifika tionen für den Normalm odus /
Especificac iones del modo normal / 通常モードの仕様
Power Button, Reset Button, button for color C
control, button for lighting mode controlM
IO ports: 1 x AUDIO / Microphone Combo Jack,
x USB 3.0, 1 x USB 3.1 Type C4
Supporting 120 mm fan x 3 or 140 mm fan x 3
or 360 mm radiator x 1 or 0 radiator x 142
Supporting 120 mm fan x 3 or 140 mm fan x 3
or 360 mm radiator x 1 or 0 radiator x 142
Supporting 120 mm fan x 3 or 140 mm fan x 3
or 360 mm radiator x 1 or 420 radiator x 1
Supporting 120 mm fan x 1 or 2
Hot swappable drive trays:
Supporting 3.5” HDD x 2 or 2.5” SSD x 2
Removable HDD tray,
Supporting 2.5” SSD x 3
Normal
Reverse Reverse Mode Specifications
倒置模式規格 / Spéci fications du mode inversé / Spez ifikationen für den R ückwärtsmodus /
Especificac iones del modo inverso / リバースモード仕様
Refer to page 1-15, 28 to install this mode /要安裝此模式,請參閱第1-15、28⾴/
Reportez-vous aux pages 1-15, 28 pour installer ce mode
Power Button, Reset Button, button for color C
control, button for lighting mode controlM
IO ports: 1 x AUDIO / Microphone Combo Jack,
x USB 3.0, 1 x USB 3.1 Type C4
Supporting 120 mm fan x 3 or 140 mm fan x 3
or 360 mm radiator x 1 or 0 radiator x 142
Supporting 120 mm fan x 3 or 140 mm fan x 3
or 360 mm radiator x 1 or 0 radiator x 142
Supporting 120 mm fan x 3 or 140 mm fan x 3
or 360 mm radiator x 1 or 420 radiator x 1
Supporting 120 mm fan x 1 or 2
Hot swappable drive trays:
Supporting 3.5” HDD x 2 or 2.5” SSD x 2
Removable HDD tray,
Supporting 2.5” SSD x 3
Refer to page 1-4, 16-28 to install this mode / 要安裝此模式,請參閱第1-4、16-28⾴/
Reportez-vous aux pages 1-4, 16-28 pour installer ce mode
- 2 -

Hardware List
Anti-vibration rings
for 2.5" SSD /
3.5" HDD mount
Screws
for 2.5" SSD mount
Tool
for stand-off bolt
零件部品⼀覽表 / Liste du matériel / Hardwareliste / Lista de hardware / ハードウェアリスト
Cable ties
for cable
management
Female clips
(spare parts)
for side panel
Plastic buckle
(spare parts)
Screws
for motherboard/
2.5" SSD mounting
Screws
for PSU mounting
Stand-off bolt
(spare parts)
for M/B mount
Screws
(spare parts)Fixed
front/side glass
x 25
x 4
x 3
x 4
x 8x 12x 12
x 16
Screws
for 3.5" HDD mount
Screws
for fan mounting
Name plate
Screws
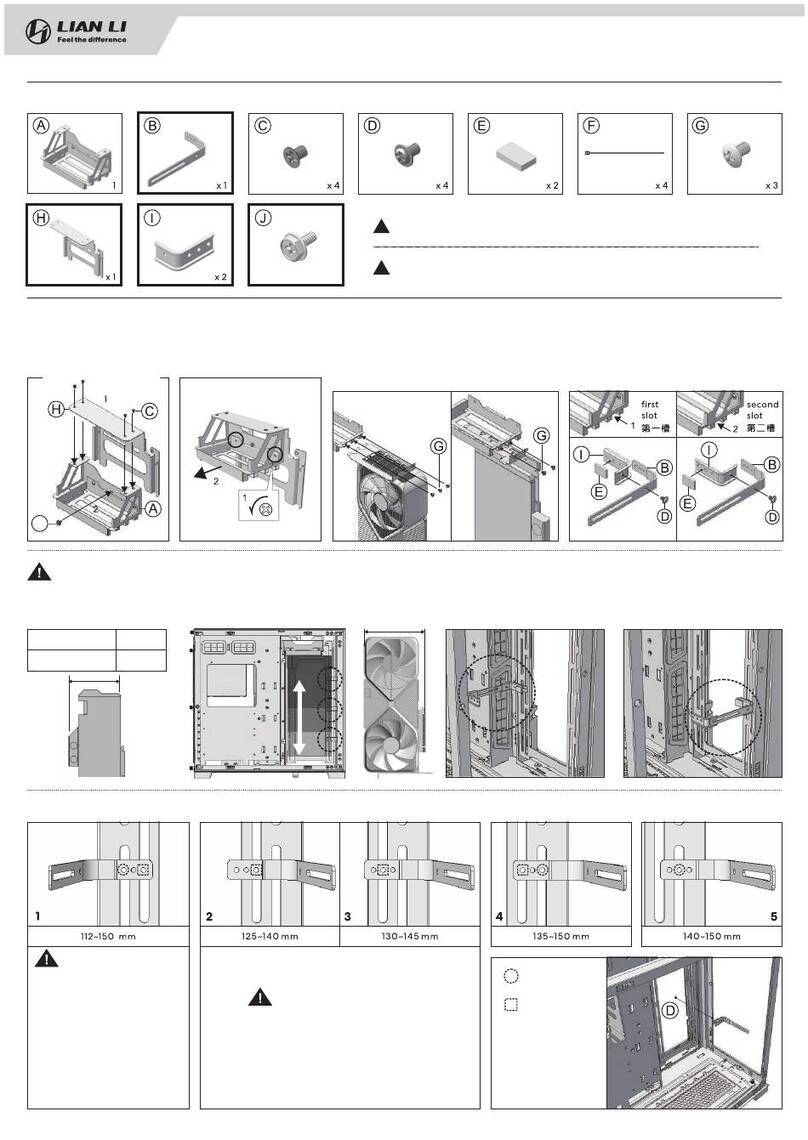
Install 15 mm thick
fan
Fan bracket cover Cable buckle
Tool/⼯具/Outil
ABCD E
FGH I J K
For graphic card anti-sag bracket kit installation/⽤於顯卡防下垂⽀架套件安裝/Pour l'installation du kit de support
anti-affaissement de la carte graphique
x 1 x 1 x 2 x 2 x 3
x 2x 2x 2x 2x 1
- 3 -
x 2x 2
q
Extension cable
for HD audio cable
at reversed mode

I/O Ports Function
I/O port / Installation du port I/O / I/O-Port installieren / Instalación de los puertos de I/O / I/O功能說明 ポート機能
POWER / RESET
HD AUDIO
USB 3.0 USB 3.1 GEN.2
Power
Reset
C-Color
M-Mode
Microphone Combo Jack
Connect to motherboard/
連接⾄主板
Connectez-vous à la carte mère
Connect to PSU/
連接⾄電源/
Connectez-vous au
bloc d'alimentation
LED
5 V 12 V
USB 3.1
Type C
USB 3.0
(or Connect to UNI HUB)/(或連接⾄UNIHUB)/
(ou connectez-vous à UNI HUB)
- 4 -
Supports motherboard
USB 3.0 20 Pin header
C-Color /
C-顏⾊/
C-Couleur
M-Mode /
M-模式/
Mode M
Press one time /
按⼀次/
Appuyez une fois
Long press 3 sec /
⾧按 3秒/
Appuyez
longuement
3 secondes
7 Lighting Effects: Rainbow – Rainbow Morph –
Dual Runway** – Color Bump – Meteor** –
Colorful Runway – Single Meteor
**able to change color by pressing C /
7種燈光效果: 彩虹- 彩虹漸變- 雙⾊跑⾺**
- 雙⾊對撞- 流星**- 彩⾊跑⾺- 單次流星
**按 C鍵可換顏⾊/
Sync to MB or L-Con n ect
(Pre s s M one time t o turn off sync) /
同步主板或 L - Connect(按⼀次 M關閉同步)/
Synchroniser avec MB ou L-Connect
(Appuyez une fois sur M pour désactiver la
synchronisation)
Press one time /
按⼀次/
Appuyez une fois
Long press 3 sec /
⾧按3秒/
Appuyez
longuement
3 secondes
Static Color: White – Red – Green – Blue –
Yellow – Light Blue – Purple /
定⾊:⽩-紅-綠-藍-⿈-淺藍-紫/
Couleur statique: Blanc – Rouge – Vert – Bleu –
Jaune – Bleu clair – Violet
Turn off LED
(Press C or M one time to turn on LED)/
關閉燈光
按 C 或 M ⼀次開啟燈光/
Éteindre la DEL
(Appuyez une fois sur C ou M pour allumer la LED)
7 effets d'éclairage : Rainbow – Rainbow Morph
–Piste double** – Relief de couleur – Météore**
–Piste colorée - Météore unique
**capable de changer de couleur en
appuyant sur C

PSU Installation
電源供應器安裝/
Installation du plateau du bloc d'alimentation /
PSU-Einsatz installieren /
Instalación de la fuente de alimentación /
電源のインストール
2.5" SSD 安裝 /
/ Installation de 2.5" SSD
2.5" SSD-Installation / Instalación de 2.5" SSD /
2.5" SSD
の取り付け
2.5" SSD Installation
灰塵濾網拆卸/
Retirer le filtre à poussière /
Entfernen Sie den Staubfilter /
Retire el filtro de polvo/
防塵フィルターを取り外す
1
1
Remove the Dust Filter
- 5 -
Peel off the adhesive/
撕下背膠/
Décoller l'adhésif
Way 1: Swing 180°to open/
使⽤⽅式⼀:翻轉180度/
Méthode 1 : Pivotez à 180°
pour ouvrir
Way 2 Release: /
使⽤⽅式⼆:取下/
Voie 2 : Libérer

IO Module Location
I/O port 位置變換 / Changement de position du port d'E/S / Positionsänderung des I/O-Ports /
Cambio de posición del puerto de E / S / I/Oポートの位置変更
Remove the IO module/IO port卸除/
Retirer le module IO
Route and fix the cable in different direction/
線材換⽅向⾛線固定/
Acheminez et fixez le câble dans une direction
différente
往左推然後往下取出/
Poussée gauche
pour retirer
Left push to
remove/
按下/
Pousser
Push/
Remove the cable clip/
整線扣卸除/
Retirer le serre-câble
Install the cable clip/
整線扣安裝/
Installez le serre-câble
Move the cables to the
opposite direction
through the gap/
藉由缺⼝將線材拉出與
裝⼊凹位/
Déplacez les câbles dans
la direction opposée à
travers l'espace
Cable orientation
for location 1 & 2/
位置1、2適⽤/
Orientation des
câbles pour les
emplacements 1 et 2/
Cable orientation
for location 3/
3位置適⽤/
Orientation des câbles
pour l'emplacement 3
- 6 -
Location 1(Defualt mode)/位置1(預設模式)/
Emplacement 1 (mode par défaut)
Location 2/位置2/
Emplacement 2
Location 3/位置3/
Emplacement 3

Remove the motherboard tray and back plate
卸除後板與遮⽚ / Retirez le panneau arrière et le masque / Entfernen Sie die Rückwand und die Maske /
Retire el panel posterior y la máscara / バックパネルとマスクを取り外します
Motherboard Installation
主板安裝/
マザーボードの取り付け
Installation de la carte mère / Mainboard-Installation / Instalación de la placa base /
- 7 -
Spars parts/
備品/
Des pièces de rechange
Tool/⼯具/Outil

Install the Back Plate and the Motherboard Tray
安裝後板與遮⽚ / Installez la plaque arrière et le masque / Installieren Sie die Rückplatte und die Maske /
Instale la placa posterior y la máscara / バックプレートとマスクを取り付けます
Middle Mode(Factory Defult)/ /出廠配置
Mode moyen (valeur par défaut)
Low Mode/ /下置配置
Mode bas
Top Mode/ /上置配置
Mode supérieur
Screw here
圓框處請鎖上螺絲
Visser ici
Schema of the Modes
配置⽰意圖 / Schéma de configuration / Konfigurationsdiagramm /
Diagrama de configuración / 構成のヒント
- 8 -
Do align (x 4)/
確實對⿑(x 4)/
Al ignez (x 4)

Graphics card installation
/ Installation de la carte graphique / Grafikkarteninstallation / 顯⽰卡安裝
Instalación de tarjeta gráfica / グラフィックカードの取り付け
Make sure the pole holds the GPU/
/定位凸柱要確實撐住顯卡
Assurez-vous que le poteau tient le
GPU
Remove the pillar
/ Column removal method / ⽴柱卸除⽅式
Methode zum Entfernen von Säulen /
Método de eliminación de columnas /
カラムの取り外し⽅法
Mak e s ur e t o fi x t he pi ll ar fo r
tra ns po rt in g/
/如需運送,務必將⽴柱鎖上
Ass ur ez -v ou s d e fi xe r l e p il ie r
pou r l e tra ns po rt
- 9 -
推開拿出空⽚/
Pousser pour libérer le support
Push to release bracket/
Push/推/
Pousser
7
Gently hold the GPU
horizontally to close
the clamp smoothly/
把顯卡撐⾄⽔平位置/
Tenez doucement le
GPU horizontalement
pour fermer la pince
en douceur

Loosen the screw, do not
completely remove it/轉鬆即可
切勿取下/Desserrez la vis, ne
la retirez pas complètement
15 mm thick fans can be
installed outside the
HDD cage/硬碟籠外側可安裝
15 mm厚度⾵扇/
Des ventilateurs de 15 mm
d'épaisseur peuvent être
installés à l'extérieur de la
cage HDD
Pay attention to the installation direction/
/注意安裝⽅向
Attention au sens de pose
2.5" SSD Installation 3.5" HDD Installation
Cable connection/ /線材連接
Câble de connexion
2.5" SSD, 3.5" HDD Installation
2.5" SSD ,3.5" HDD安裝 2.5" SSD ,3.5" HDD / 2.5" SSD ,3.5" HDD-Installation /
/ Installation de
Instalación de 2.5" SSD ,3.5" HDD / 2.5" SSD ,3.5" HDD
の取り付け
Connecting to Motherboard/
連接⾄主板/
Connexion à la carte mère
Connecting to PSU/
連接到電源/
Connexion au bloc d'alimentation
Grab the notch to remove the tray/
/⼿指勾著溝槽便於施⼒移除托盤
Saisissez l'encoche pour retirer le plateau
- 10 -

亦可拆下魔⿁氈作為控制器黏貼處/
Retirez la bande velcro pour placer un
contrôleur
Cable Management
線材整理/ Gestion des câbles / Kabelmanagement /
Mantenimiento de cable/ ケーブル管理
Cable Holder Installation
整線扣安裝⽅式/ Installation complète de la boucle du
câble / Installation der gesamten Kabelschnalle /
Instalación de hebilla de cable completo/
全ラインバックルの取り付け
Use of Cable Holder
整線扣整線說明/ Description complète de la ligne complète de la boucle du câble / Ganze Beschreibung der
gesamten Kabelschnalle /Descripción de toda la línea de hebilla de cable completo/バックル全体ライン全体
Keep the big cables in the cable holders/
/先將粗線整在⾦屬框架內
Gardez les gros câbles dans les
porte-câbles
Hold the small cables with the velcro straps/
/再將細線使⽤魔⿁氈整好
Maintenez les petits câbles avec les bandes
velcro
Remove the velcro strap to place a
controller/
- 11 -

Radiator & Cooling Support
散熱器&⽔冷排⽀援/ Radiateur et ventilation compatibilité / Kühler- und Kühlungsunterstützung /
Soporte de refrigeración y radiador / ラジエーターと冷却のサポート
120 mm FAN x3
140 mm FAN x3
360 mm RADIATOR
420 mm RADIATOR
120 mm FAN x3
140 mm FAN x3
360 mm RADIATOR
420 mm RADIATOR
120 mm FAN x1
120 mm FAN x2
(Only the bottom configuration/
只有下置配置)
120 mm FAN x3
140 mm FAN x3
360 mm RADIATOR
420 mm RADIATOR
Remove the Top Fan Bracket
卸除上⾵扇⽀架 / Retirez le support du ventilateur supérieur / Entfernen Sie die obere Lüfterhalterung /
Retire el soporte del ventilador superior/上部ファンブラケットを取り外します
- 12 -
Make sure to insert the tab in the
notch tightly while installing/
/組裝時注意卡槽對⿑並扣緊
Assurez-vous d'insérer fermement
la languette dans l'encoche lors
de l'installation
Make sure to insert the tab in the
notch tightly while installing/
/組裝時注意卡槽對⿑並扣緊
Assurez-vous d'insérer fermement
la languette dans l'encoche lors de
l'installation
Remove the Bottom Fan Bracket
下部ファンブラケットを取り外します

Remove the Side Fan Bracket
卸下側⾵扇⽀架 / Retirez le support du ventilateur latéral / Entfernen Sie die seitliche Lüfterhalterung /
Retire el soporte del ventilador lateral/サイドファンブラケットを取り外します
Attention: The fan bracket can be reversed, there are 4 installation style/⾵扇盤可以反轉,有四種樣式/
Le support du ventilateur peut être inversé, il y a 4 styles d'installation
Use of seal plate/ /⾵扇架遮⽚使⽤⽅式
Utilisation de la plaque d'étanchéité
- 13 -
Fans install toward the
front panal/
樣式1/(⾵扇靠前)
Les ventilateurs s'installent
vers lepanneau avant
Fans install toward the
motherboard/
樣式2(⾵扇靠後)/
Les ventilateurs s'installent
vers la carte mère
Style 1 Style 2 Style 3 (reversed) Style 4 (reversed)
Fans install toward the
front panal/
樣式3-反轉-(⾵扇靠前)/
Les ventilateurs s'installent
vers le panneau avant
Fans install toward the
motherboard/
4樣式 -反轉-(⾵扇靠後)/
Les ventilateurs s'installent
vers la carte mère
Push/推/
Pousser

Graphic Card Anti-sag Bracket Installation
顯卡⽀撐架安裝 / Installation du support anti-affaissement de la carte graphique /
Installation der Anti-Sag-Halterung für die Grafikkarte / Instalación del soporte antideslizamiento de la tarjeta
gráfica/グラフィックカードのたるみ防⽌ブラケットの取り付け
E
E
B
J
C
D
A
1 3
Push to adjust position
upward or downward/
按下以調整向上或
往下位置/
Poussez pour ajuster la
position vers le haut ou
vers le bas
2
1
2
I
G
F
Remove the
motherboard/
拆下主機板/
Retirer la
carte mère
21 3
- 14 -
Installation 1( )/安裝 1( ATX)/Installation 1(pour ATX MB) For ATX MB
Installation 2 ( )/安裝 2(E-ATX MB)/Installation 2 (pour E-ATX MB)For E-ATX MB
H
Peel off the adhesive/
撕下背膠/
Décoller l'adhésif
Tool/⼯具/Outil
!
C
D
E
F
G
H
J
K
L
6
1
2
Push to adjust position
upward or downward/
!
按下以調整向上或往下位置/
Poussez pour ajuster la position
vers le haut ou vers le bas
Peel off the adhesive/
撕下背膠/
Décoller l'adhésif
Choose the
appropriate
that suits thickness
your GPU/
請使⽤能壓緊顯卡
之厚度/
Choisissez
l'épaisseur
appropriée qui
convient à votre
GPU

Right Side Panel Installation
右側板安裝/ Installation du panneau latéral droit / Montage der rechten Seitenwand /
Instalación del panel lateral derecho/右側パネルの取り付け
Side & Front Glass Panel Installation
側&前⾯玻璃安裝/ Pose des vitres latérales et frontales/ Seiten- und Frontglasinstallation /
Instalación de vidrio lateral y frontal/側⾯と前⾯のガラスの取り付け
Top Panel Installation
上蓋安裝/ Installation du capot supérieur / Montage der oberen Abdeckung / Instalación de la cubierta superior/
トップカバーの取り付け
Attention: Recommend to fix the screws of the side and front glass panel for transportation/
注意:如需運送,建議將側&前玻璃鎖上螺絲/
Attention : il est recommandé de fixer les vis du panneau de verre latéral et avant pour le transport
Peel off the protective
film on both sides/
撕下兩⾯的保護膜/
Décollez le film
protecteur des deux
côtés
- 15 -
Gently lift the top frame to ensure the smooth installation/
將上板微微往上掀,以利安裝/Gently lift the top frame to
ensure the smoothinstallation
!
Optional/
選擇性使⽤/
Facultative

Reverse Mode Installation
反向模式 / Installation en mode inverse / Installation im umgekehrten Modus / 安裝
Instalación en modo inverso / リバースモードのインストール
2. Remove the top fan bracket/卸除上⾵扇⽀架/
Retirez le support du ventilateur supérieur
5. Flip the chassis and attach the bottom platform/
將機殼前後翻轉 度後與腳座結合/180
Retournez le châssis et fixez la plate-forme inférieure
6. Switch the PSU support bracket to the other way
around/Basculez
將 PSU⽀撐架移動到倒置使⽤的位置/
le support du bloc d'alimentation dans l'autre sens
- 16 -
Reverse
1. /卸下上蓋/Remove the top panel
Retirer le panneau supérieur
3. Remove the bottom fan bracket/卸除下⾵扇⽀架/
Retirez le support inférieur du ventilateur
4. Flip the chassis and detach the bottom platform
(Make sure the IO module is removed beforehand)/
翻轉機箱並卸下腳座(先拔掉USB模組線材)/Retournez le
châssis et détachez la plate-forme inférieure (assurez-
vous que le module IO est retiré au préalable)
1.Push/壓/
Pousser
2. Hold the front foot of the bottom
platform and pull to remove it/
握住前⽅腳墊,以便 施⼒拉動卸除底蓋/
Tenez le pied avant de la
plateforme inférieure et
tirez pour le retirer
2. Hold the front foot of the bottom
platform and push to install it/
握住前⽅腳墊,以便 施⼒推動安裝底蓋/
Tenez le pied avant de la plate-forme
inférieure et poussez
pour l'installer
2. Push/ 推/
Pousser
1
1
1
2. Pull/ 拉/
Tirer
2
2

PSU Installation
電源供應器安裝/
Installation du plateau du bloc d'alimentation /
PSU-Einsatz installieren /
Instalación de la fuente de alimentación /
電源のインストール
2.5" SSD 安裝 /
/ Installation de 2.5" SSD
2.5" SSD-Installation /
Instalación de 2.5" SSD /
2.5" SSD
の取り付け
2.5" SSD Installation
灰塵濾網拆卸/
Retirer les filtres à poussière /
Entfernen Sie die Staubfilter /
Retire los filtros de polvo/
防塵フィルターを取り外します
Remove the Dust Filters
- 17 -
Reverse
Way 1: Swing 180°to open/
使⽤⽅式⼀:翻轉180度/
Méthode 1 : Pivotez à 180°
pour ouvrir
Way 2 Release: /
使⽤⽅式⼆:取下/
Voie 2 : Libérer
Peel off the adhesive/
撕下背膠/
Décoller l'adhésif

IO Module Location
I/O port 位置變換 / Changement de position du port d'E/S / Positionsänderung des I/O-Ports /
Cambio de posición del puerto de E / S / I/Oポートの位置変更
- 18 -
Reverse
Use the HD Audio extension cable/
使⽤HD audio延⾧線/
Utilisez le câble d'extension HD Audio
Location 1(Defualt mode)/位置1(預設模式)/
Emplacement 1 (mode par défaut)
Location 2/位置2/
Emplacement 2
Location 3/位置3/
Emplacement 3
Remove the IO module/IO port卸除/
Retirer le module IO
Route and fix the cable in different direction/
線材換⽅向⾛線固定/
Acheminez et fixez le câble dans une direction
différente
Remove the cable clip/
整線扣卸除/
Retirer le serre-câble
往左推然後往下取出/
Poussée gauche
pour retirer
Left push to
remove/
按下/
Pousser
Push/
Install the cable clip/
整線扣安裝/
Installez le serre-câble
Move the cables to the
opposite direction
through the gap/
藉由缺⼝將線材拉出與
裝⼊凹位/
Déplacez les câbles dans
la direction opposée à
travers l'espace
Cable orientation
for location 1 & 2/
位置1、2適⽤/
Orientation des
câbles pour les
emplacements 1 et 2/
Cable orientation
for location 3/
3位置適⽤/
Orientation des câbles
pour l'emplacement 3

Remove the motherboard tray and back plate
卸除後板與遮⽚ / Retirez le panneau arrière et le masque / Entfernen Sie die Rückwand und die
Maske / Retire el panel posterior y la máscara / バックパネルとマスクを取り外します
Motherboard Installation
主板安裝/
マザーボードの取り付け
Installation de la carte mère / Mainboard-Installation / Instalación de la placa base /
- 19 -
Reverse
Spars parts/
備品/
Des pièces de rechange
Tool/⼯具/Outil

Install the back plate and the motherboard tray
安裝後板與遮⽚ / Installez la plaque arrière et le masque / Installieren Sie die Rückplatte und die
Maske / Instale la placa posterior y la máscara / バックプレートとマスクを取り付けます
Schema of the modes
配置⽰意圖 / Schéma de configuration / Konfigurationsdiagramm /
Diagrama de configuración / 構成のヒント
- 20 -
Reverse
Screw here
圓框處請鎖上螺絲
Visser ici
Middle Mode(Factory Defult)/ /出廠配置
Mode moyen (valeur par défaut)
Low Mode/ /下置配置
Mode bas
Top Mode/ /上置配置
Mode supérieur
確實對⿑(x 4)/
Al ignez (x 4)
Do align (x 4)/
Table of contents
Other Lian-Li Computer Hardware manuals
Popular Computer Hardware manuals by other brands

Behringer
Behringer MINIFEX FEX800 user manual

Extron electronics
Extron electronics Dual Window Multi-Graphic Processor MGP 462D Specification sheet

LifeSafety Power
LifeSafety Power B100 Quick start manual

Cypress Semiconductor
Cypress Semiconductor CY7C1364C Specification sheet

dbx
dbx 160 instruction manual

LaCie
LaCie SATA II ExpressCard 34 Quick install guide