4 | EN Copyright © Liberty Pumps, Inc. 2020
All rights reserved. 2138000F
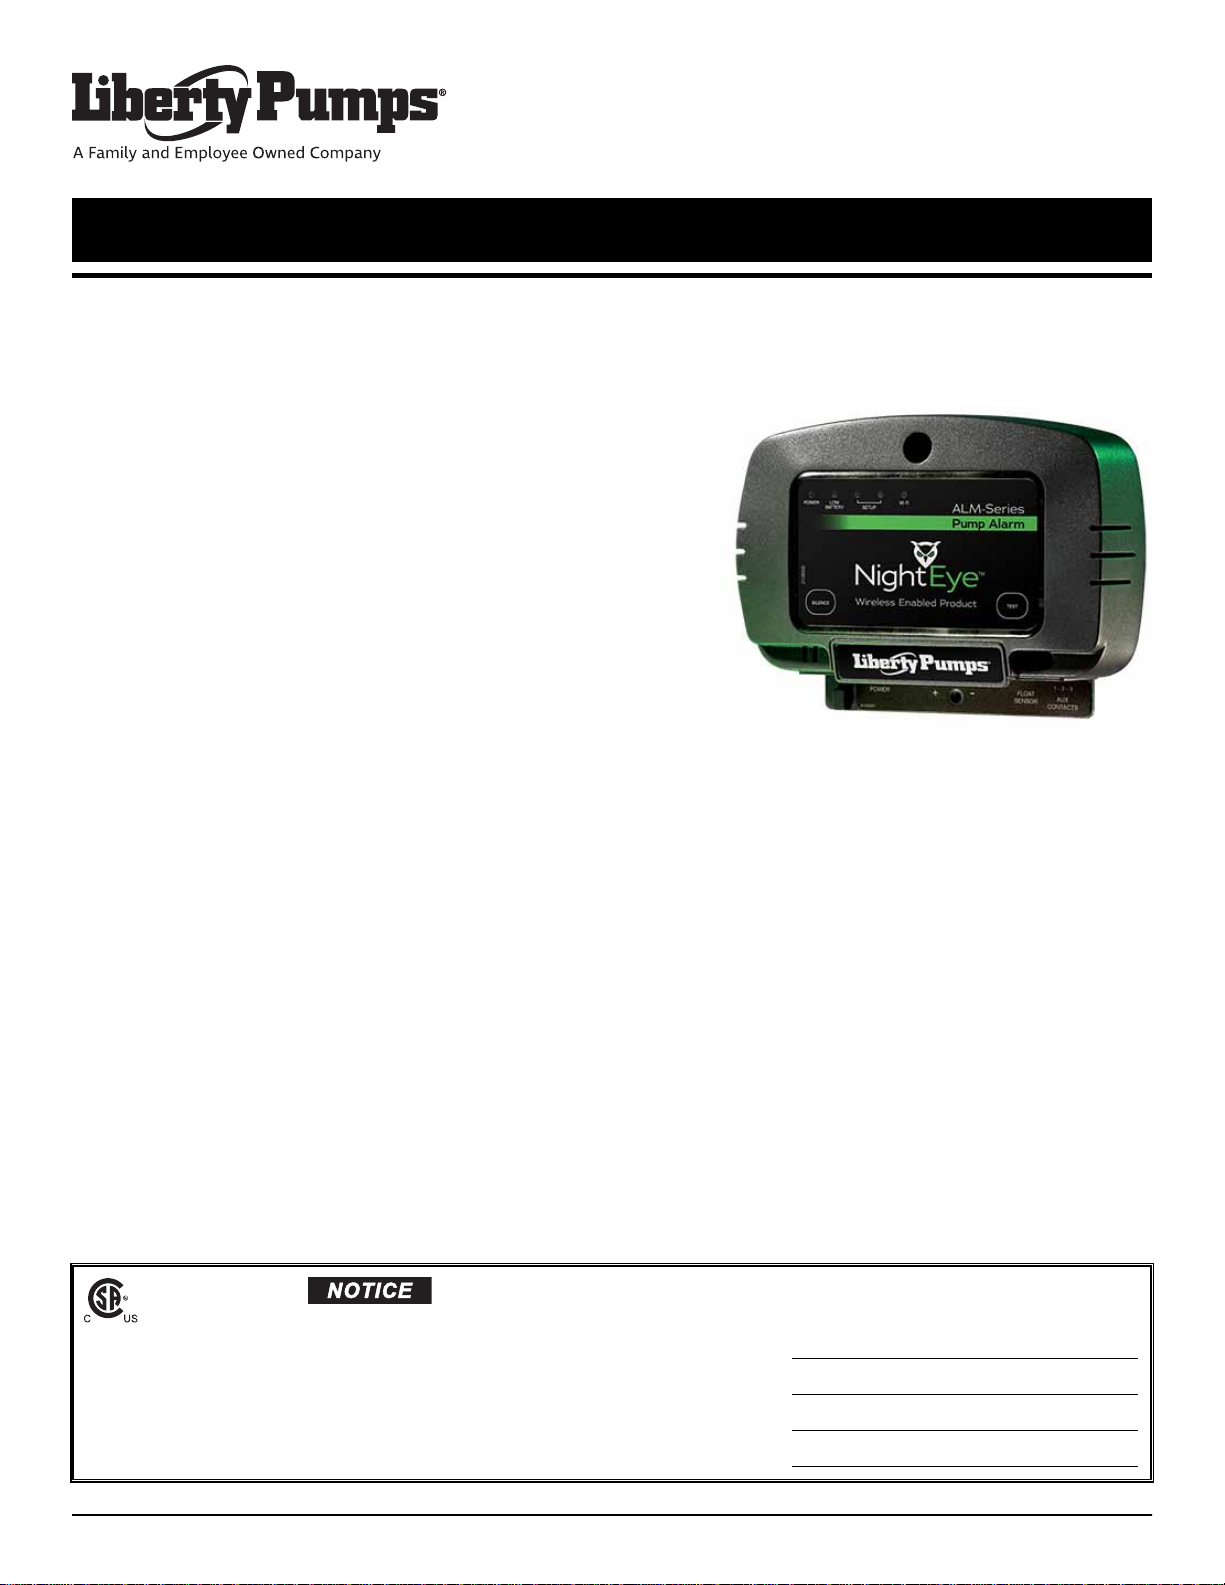
NightEye Configuration
If your device is NightEye enabled, download the NightEye
application from the Apple App store or the Google Play store.
Follow the directions provided in the NightEye to configure the
device.
Alarm Testing
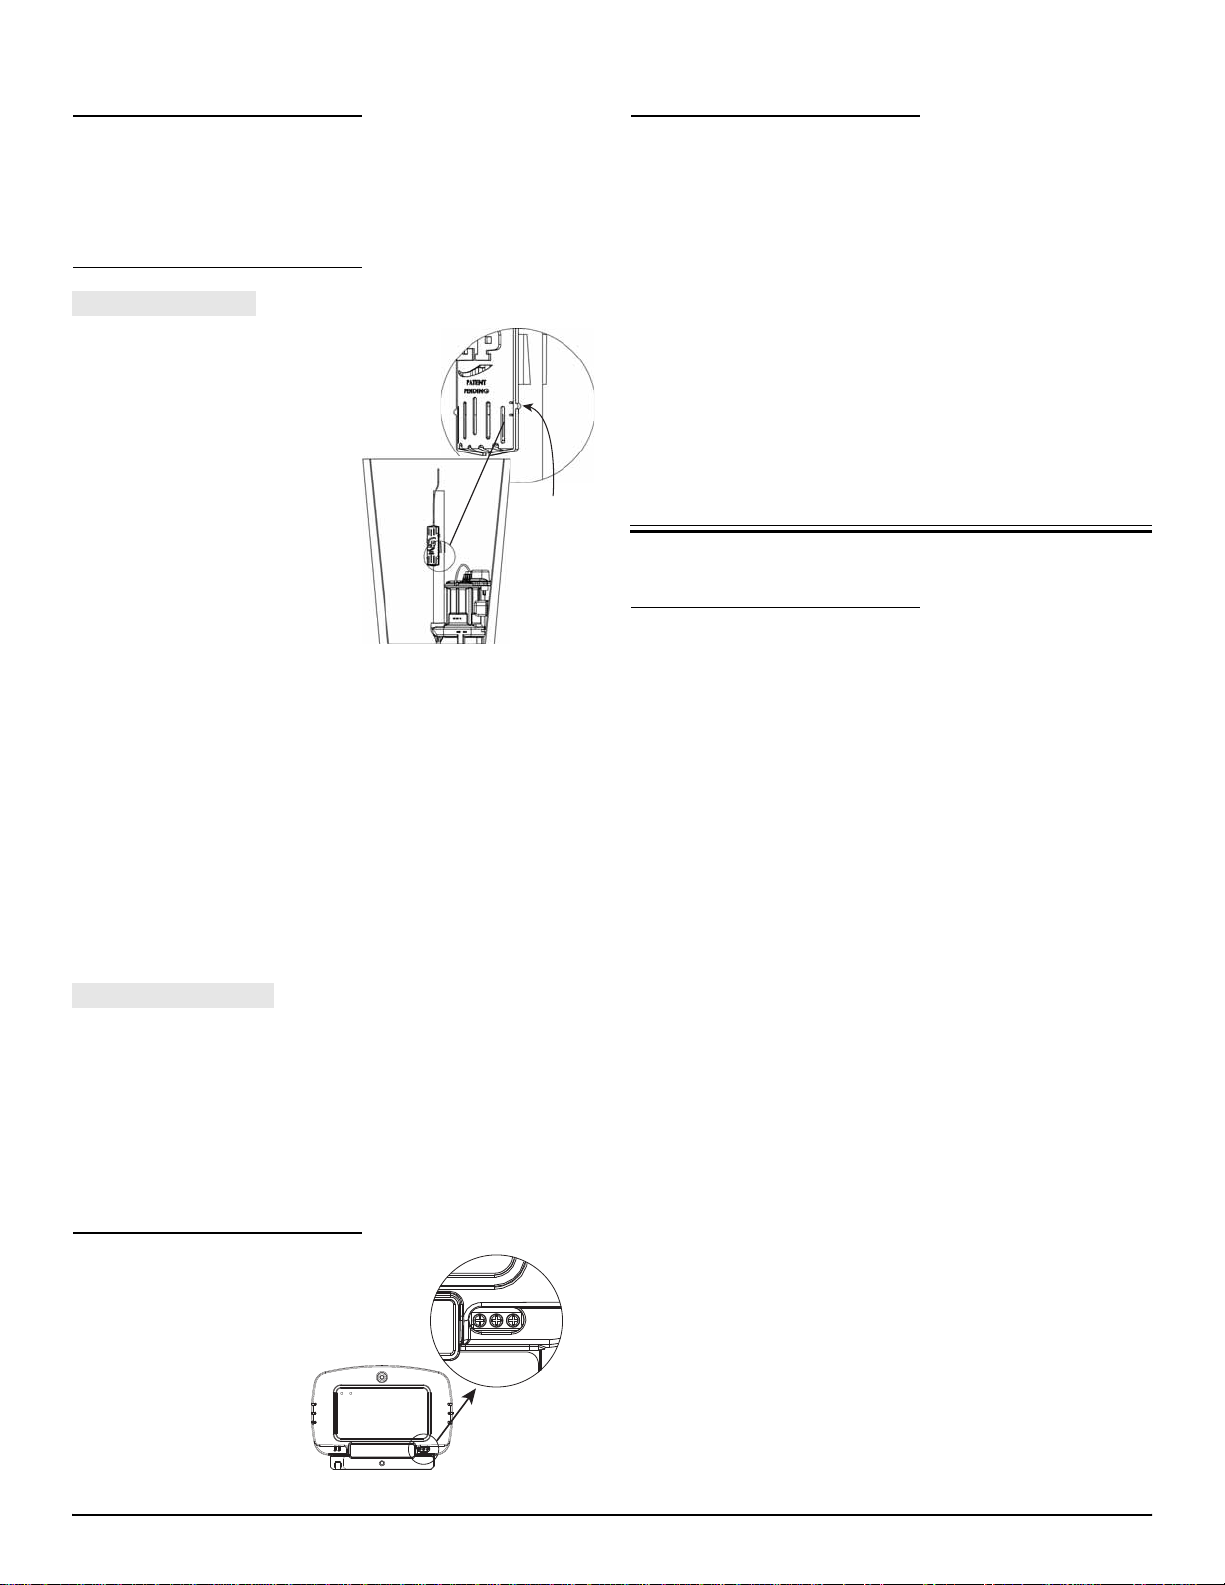
Sump Pump Sensor
This switch is a self-contained
unit. The internal float may not be
visible from the outside of the
switch housing. The switch should
be placed such that the activation
point (the bump on the right) is
slightly higher than the pump
activation point.
1. In order to test the proper
operation of the float switch,
we recommend raising the
water level in your sump pit
above its normal operating
level. When the water level
reaches the lowest mark on
the side of the float housing,
the alarm will activate.
Alternately, a cup of water can be used to confirm float
operation. Raise the cup of water up to the float, and
submerse the float past the bump on the right. This will
trigger the alarm.
2. Once alarm begins to sound, it will continue to sound until
the water level is lowered. The audible alarm can be silenced
using the Silence button on the front of the device. The alarm
will stay silenced for 6 hours after the silence button is
pressed.
3. Once testing is complete, lower the water level in the pit back
to its normal range.
Sewage Pump Sensor
1. Manually tip the float up.
2. Once alarm begins to sound, it will continue to sound until
the float is tipped down. The audible alarm can be silenced
using the Silence button on the front of the device. The alarm
will stay silenced for 6 hours after the silence button is
pressed.
3. Lower the float back to its resting position to reset the alarm.
Auxiliary Contacts
This device comes equipped
with auxiliary contacts.
These contacts can be used
to integrate the output of
this alarm with an existing
home monitoring system.
Contact Rating: Class 2,
24 VDC/VAC (50/60 HZ)
500 mA maximum.
Operation and Maintenance
Now that your alarm unit has been configured and tested, it is
ready for operation.
The following is a list of regular maintenance tasks:
•Test the alarm system every 6 months.Follow the
procedure outlined in Alarm Testing.
In the event the 9V battery is low, the alarm will emit a short chirp
about twice per minute. The 9V battery should be replaced any
time the yellow “low battery” indicator on the alarm unit is lit or
every 12 months.
In the event that an alarm condition is detected by the system, the
audible and visual alarms will activate. The automatic reset feature
of the alarm will turn the audible and visual alarms off once the
condition has been corrected.
Warranty
Liberty Pumps Wholesale Products Limited
Warranty
Liberty Pumps, Inc. warrants that Liberty Pumps wholesale
products are free from all factory defects in material and
workmanship for a period of three (3) years from the date of
purchase (excluding batteries). The date of purchase shall be
determined by a dated sales receipt noting the model and serial
number of the pump. The dated sales receipt must accompany the
returned pump if the date of return is more than three years from
the date of manufacture noted on the pump nameplate.
The manufacturer's sole obligation under this Warranty shall be
limited to the repair or replacement of any parts found by the
manufacturer to be defective, provided the part or assembly is
returned freight prepaid to the manufacturer or its authorized
service center, and provided that none of the following
warranty-voiding characteristics are evident:
The manufacturer shall not be liable under this Warranty if the
product has not been properly installed, operated, or maintained
per manufacturer instructions; if it has been disassembled,
modified, abused, or tampered with; if the electrical cord has been
cut, damaged, or spliced; if the pump discharge has been reduced
in size; if the pump has been used in water temperatures above
the advertised rating; if the pump has been used in water
containing sand, lime, cement, gravel, or other abrasives; if the
product has been used to pump chemicals, grease, or
hydrocarbons; if a non-submersible motor has been subjected to
moisture; or if the label bearing the model and serial number has
been removed.
Liberty Pumps, Inc. shall not be liable for any loss, damage, or
expenses resulting from installation or use of its products, or for
indirect, incidental, and consequential damages, including costs of
removal, reinstallation or transportation.
There is no other express warranty. All implied warranties,
including those of merchantability and fitness for a particular
purpose, are limited to three years from the date of purchase.
This Warranty contains the exclusive remedy of the purchaser,
and, where permitted, liability for consequential or incidental
damages under any and all warranties are excluded.
float “on”
1–2–3
1: Normally Open
2: Common
3: No Connection