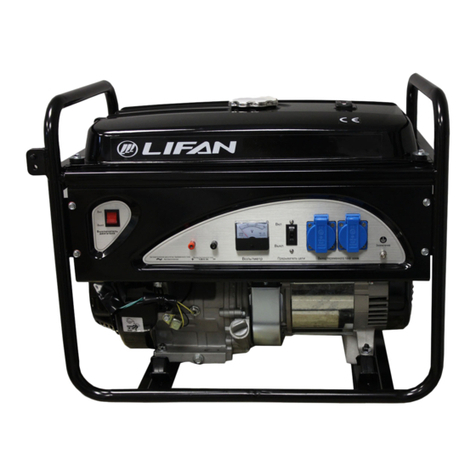
Lifan G12500E User manual

L'E'IN
OPE RATI N G I NSTRU GTI O T{S
FOR
GASOLIilE GENERATOR SET
10GF-4
G12500E(10GF-4)

PREFACE
Thank you for choosing the gasoline generator set produced by our Co'-j'
Based on the latest technology at home and abroad, our Co. has successfully developed the gasoline generator
set which adopts our seif-developed 2V78F-3 as its engine.
The manual gives information with respect to operation and maintenance of the gasoline generator, and be sure
to read it carefully first before operating. If any trouble occurs, call your dealer who will provide you with the best
after service.
All the materials and diagrams of this manual are in accordance wiih the newest products at the publishing time.
Due to revision and other change, the information descried in this manual may be a iittle different frorr the actual
stares. The copyright of this manual belongs to our Co., any group or individual is forbidden to reprint or copy any it'
The manual is subject to change without notice.

IMPORTANT NOTICES
Please pay special attention to statements preceded by the following words:
A TilARNING:
A warning is used to alert the user to fact that hazardous operating and maintenance procedures may
result in injury to or death ofpersonnel ifnot strictly observed.
CAUTION:
A caution is used to alert the user to fact that hazardous operation and maintenance procedures may
result in injury or death ofpersonnel if not strictly observed.
NOTE:
Give helpful information.
This manual should be considered as a permanent paft of the unit and should remain with the unit when resold.
2

Contents
1. GENERATOR SAFETY
2. NTROUCITONTO PARTS AND COMPONENTS.....
3. PRE.OPERATING INSPECTION........
4. STARTING TTM GENERATOR..........
5. STOPING T}IE ENGINE
7. BATTERY
8. TRANSPORTING AND STORAGE:
9. TROUBLESHOOTHING .,............
10. WIRING DIAGRAM
11. SPECIFICATONS
12. ASSEMBLY OF PARTS
J

1. GENERATOR SAFETY
1.1 Never operate it in an enclosed room. ,as its exhaust gas contains carbon monoxide. If operate it in an limited
room, please keep ventilate. ,-.:
1.2 Never connect to home circuit.
1.3 Do not operate it under wet circutnstance.
1.4 No smoking when {illing fuel
1.5 Place inflammables away from the unit at least one meter.
1.6 Always fill fuel after stopping it.
1.7 Do not spill out when filling fuel.
4

2. NTROUCITON TO PARTS AND COMPONENTS
21
34 5 6
10
I
I Fueltank
2 Generator end over
3 Handle
4 Muffler end cover
5 Generator end cover
7B
6 Wheel kit
7 Control panel
8 Pipe frame
9 Wheel
10 Generator
5

Control panel (10GF4)
iIt$ffi ieilÊfi6
l-: m
n* @ if* $4<*u
itr t&8 tt
O
ipil_ffii
0
*q;Îr$-jl|IgitË
dfiPnt
TffiËJ
s
ç" ! -Ëffi
@
llcrifl;tl ls
J
$
lË
a*6
lffilffil
ruru
@
ê
@
@
€c
r$4*
r*@r*
6@
sffi
i'x @ r*
&a@
@
#
I
@
rsÂ
s
@
{) @ffi @
()
6
a
w
o
tr

3. PRE.OPERATING INSPECTION
3.I ENGINE-OILLEVEL
3.1.1 Tum out the oil filler cap and clean the dipstick with a clear clothe. ?_:
3.1.2 Insert the dipstick back into the oil filler hole and turn it out to check oil level.
3.1.3 In the case that the oil level is below the lower level mark of the dipstick, filI oil to the upper level mark of the
dipstick.
3.L4 Reinstall the oil filler cap well.
3.2 FUELLEVEL
3.2.1 Open the fuel filler cap
3.2.2 Check the fuel level, and fiIl fuel if necessary
3.2.3 Fill fuel to the shoulder of the filter.
3.2.4 Reinstall the fuel filler cap well.
3,3 OILRECOMMENDATION
3 .3 . 1 Never use unclean or dirty fuel, keep water out of the tank
3.3.2 If hear crank sound when engine running unload, please refuel.
Note: The continuous crank sound will damage the generator
3.4 Air cleaner
3.4.1 Remove the cover
7

3.4.2 Dismantle the air housing
3.4.3 Clean the core in the cleansing solvent .Put the filter element in to the original position, install the cover and
secure it well.
4. STARTING THE GENERATOR
4.1 Turn on the fuel cock.
4.2 Switch off the circuit protector.
4.3 Pull out the chock, turn on the ignition switch until START position and hold on for 3 to 5 seconds. Start the
engine and excite the alternator at the same time during those 3 to 5 seconds. Push the chock back once after starting
the engine. Loosen the ignition switch and tlm back to ON position once after the generator generating electricity.
Note: l.Once the engine starts, loosen the ignition switch in order to protect electric start assy.
Do not use the ignition switch over 5 times continuously. If starts failed, release the ignition switch for cooling.
Then restart 5 minutes later;Z . Oil alarm system: if the oil is not added or the oil is insufficient, the machine
will automatically shut off in 1.8 seconds after starting . The oil alarm lamp will light up when the engine is
shut off. When the power is completely shut off, the oil alarm lamp will go out.
5. STOPING THE ENGINE
Note: To stop the generator in an emergency, turn the ignition switch to OFF.
5.1 Turn the AC protector switch to OFF.
5.2Tum the fuel cock to OFF and use up the fuel inside the carburetor to stop the generator
8
5.3 Tum the ignition switch to OFF.
6. MAINTERNANCE
User should service the unit according to the Maintenance Schedule as follows
6.1 Maintenance schedule '
Or first
month Or every
3 months Or every
6 months Or every
one Year
Engine oil check Check
Replace engine oil Replace Replace
Air cleaner check Check
Air cleaner wash Clean
Oil filter cup Clean
Battery electrolle level Clean
Spark plug Clean
Valve clearance Check, adjust
Cylinder cover wash Clean
Fuel tank wash Replace evety 3-year
9

6.2 Replacement of engine oil
Empty the engine oil from the crankcase.
6.2.1 Remove the oil filter and oil drain valve, drain the oil.
6.2.1 Unscrew the drain plug, and empty the engine oil from the crankcase
6.2.3 Screw on the drain plug.
6.2.4F|IL engine oil to the upper level mark of the dipstick.
A
Oil plug Fuel indicator
Upper level
Lower level
Drain plug
Don't pour containers and waste oil into the dustbin, or on the ground. W. ,""o*-.nd that you put the oil
into a closed container, sent to the local waste oil regeneration to stand, to protect the environment and health.
l0

6.3 Oil filter replacement
6.3.1 Empty the rest oil completely, screw the drain plug.
6.3.2 Remove the oil filter, drain the oil.
6.3.3 Clean the oil filter, put O ring, screw the tank cap.
6.3.4 Screw the new oil filter 7/8 circle to make the O ring to the groove
Note: Only our company engine oil filter or the one of the matched specification can be used. Otherwise, it will
lead to danger.
6.3.5 Add lube to crankcase.
6.3.6 Open engines to check the oil f,rlter
6.3.7 Check the oil capacity.
6.4 Maintenance of air cleaner
Warning: Flease don't use oil to clean subassembly of air cleaner.
Note: Prevent dirties and dusts into dust room.
If dusts fall into an engine, it will shorten the lifespan of the engine'
6.4.1 Open air cleaner cover
6.4.2Move foam and take down paper washer;
6.4.3 Cleaning dust laying parts;
11

Use warm soap water to clean foam plastic. Do not use volatile chemical reagent or diesel. Pâper washer can be
flapped by hand or be blown by compressed air. Don't use brush to brush it, or it will make dirties agglomerate in the
fiber. If it is too dirfy, change it.
6.4.4 Use wet cloth to clean the dust in dust room and the cover. Pay attentionnot to make dust into carburetor.
6.4.5 Install the cleaned cover of the air cleaner.
Air cleaner cover
toâm tllter e,enot
Fsper filter êlêment
Clamp air cleaner
Alr clÊaner ho!elnB
dt
t2

6.5 Spark plug
The advised mode: ZGR5A (NGK)
6.5.1 Offload the cap of a sparkplug
6.5.2 Offload a spark plug
6.5.3 Clean carbon
JI6CR-U (DENSO)
{, 0. 7-0, I mm
(0.028-0.031 in)
Spark plug wrench
Spark plug cap
6.5.4 Measure and adjust the gap of a spark plug
6.5.5 Install a spark plug and the cap of the spark plug.
Note:
o The spark plug must be screwed tightly. If it is not in the right place, it will lead to overheating of the
generator until it is burned down.
o It is an ought to use the spark plug of the recommended mode. If the spark plug is not matched, it will
l3

damage the generator.
6.6 The cleaning of a fuel valve
The fuel valve can prevent dirties and water into the carburetor. -
6.6.1 Tum offthe fuel valve and dismantle the cup of the fuel valve.
6.6.2 Cleanoil cup.
6.63 lnstall O-ring
6.7 Fuel hlter
6.7.1 Dismantle a dust cover and a clapboard;
6.7.2Dismantle the screw of dust cover and. the cleaning cover;
9.7.3 Remove the fuel filter from the dust cover.
6.7.4 Checkwhether there is the left oil or water in the fuelfilter. If there is no oil or water, install the fuel filter and
the cleaning cover.
6.8 Changing the fuse:
If the fuse melts, engine carurot start.
6.8.1 Turn off the engine switch.
6.8.2 Remove the protector and change the fuse. Use only 5Afuse.
Note: If it arises frequently that the fuse melts, check if the fuse is put correctly ahead of the each operation.
14

)ll
}j
@I
ù::
Circuit breaker
la Protector
7. BATTERY:
The 3A electric quantity will be provided to battery when engine is running. Regular maintenance for battery is
needed ifthe generator is operated regularly.
Lead-acid battery release 0.5%-1.0% electric quântity automatically every day. That is, battery will release 30%
electric quantity automatically if the generator does not work for one month. It makes engine stop working and
shortens the life-span of battery.
7.1 Charging the battery according to the following steps:
7.1.1 Remove the stand of battery;
7.1.2 Remove side lever.
7.1.3 Remove the negative lead of battery and connecting terminal on generator first, remove the positive lead of
battery.
l5

Positive lead
Negative lead
Clamping plate
battery
Upper line
Lower line
7.1.4 Remove battery;
7.1.5 Remove the cover of battery;
7.1.6 Check the electric quantity of each battery (level line of electrolyte)
7 .l .7 If electrolyte reach near the lower line, add distilled water.
Warning:
As battery contains sulfuric acid with toxicity and causticity, please wear protective clothing when
operating. If sulfuric acid gets on your body unexpectedly, flush with water and call a physician.
Warning:
As the hydrogen gas which is given off when battery running normally is flammable, keep heat, sparks,
and flame away. Wear protective clothing and a face shield when operating. And operate it by a professional
technician.
16

7.2 Charging:
Rated current of battery should be 14AH. Charging current is the rated current which should be I 0%A per hour.
The discharging quantity of charging battery should be adjusted to l4A. 1:
7.2.1 Remove the cover of battery and charge the battery according to the instruction manual.
7.2.2The duration of charging is 3-4 hours.
7.2.3 Checl<the electrolyte when charging is ending, and add the distilled water for demânds.
7.2.4 lnstall the outer cover of battery and clean it.
7.3 lnstallation:
7.3.1 tnstallthe battery on engine
7 .3.2 Connect the positive lead and the negative lead.
7.3.3 install the battery seat
8. TRANSPORTING AND STORAGE :
When transporling the generator, turn the engine switch and the fuel valve OFF, and keep the generator level to
prevent fuel spillage. Fuel vapor or spilled fuel may ignite. If the generator has been used, allow it cool for at least l5
minutes before loading the generator on the transport vehicle. Remnant waste-gas cân bum you or cause incidents.
8.1 When the generator will be stored for a long time:
8.1.1 Drain the fuel sediment cup. Change washer and tighten the sediment cup.
t7

8.1.2 Turn the fuel valve ON and drain the fuel from the fuel tank.
8.1.3 Loosen the carburetor drain screw and drain the gasoline from the carburetor
8.1.4 Remove the oil drain plug and drain the oil and reinstall the oil drain plug.
8.1.5 Be sure the storage area is free of excessive humidity and dust. =:
Carburetor
Screw
9. TROUBLESHOOTHING
9.I When the engine will not start:
9.1.1 Check if the engine switch is in the ON position
18

9.1.2 Check if there is fuel in the fuel tank.
9.1.3 Check if there is enough oil in the engine.
9.1.4 Check if there is a spark at the spark plug.
9. 1 .5 If the engine still does not start, take the engine to the after-service dàpartment of our company.
9.2 When appliance does not operate:
9.2.1 Chech if the ouçut indicator light is ON.
9.2.2 Checl< if the AC circuit breaker is ON.
g.2.3 If the appliance still does not operate, take the generator to the after-service departrnent of our company.
l9
This manual suits for next models
1
Table of contents
Languages:
Other Lifan Portable Generator manuals

Lifan
Lifan KP4500iE User manual

Lifan
Lifan PRO Series Assembly instructions

Lifan
Lifan 2.8GF-3/4 User manual

Lifan
Lifan 7000 Pro series User manual

Lifan
Lifan G1800 User manual

Lifan
Lifan ESI3600iER Assembly instructions

Lifan
Lifan G2300i User manual

Lifan
Lifan ES1500 Assembly instructions

Lifan
Lifan KP2300i-2 User manual

Lifan
Lifan LF3750 Assembly instructions