Lilin iMEGAPRO LR7022E User manual

IPR732ES
IPR722ES/LR7022E
D/N 3MP HD Infrared IP Camera
D/N 1080P HD Infrared IP Camera
66-LR7022CSM
Quick Installation Guide

CAUTION
Do not drop or strike this equipment
Do not install the equipment near any naked flames or heat
sources
Do not expose this unit to rain, moisture, smoke or dust
environment
Do not cover the opening of the cabinet with cloth and plastic
or to install this unit in poor ventilated places. Allow 10cm
between this unit and its surroundings
Do not continue to operate the unit under abnormal conditions
such as detection of smoke, strange smell or no display on
screen while power is turned on
Do not touch the power connection with wet hands
Do not damage the power cord or leave it under pressure
Do not operate this unit near magnet, speaker system, etc., to
avoid unnecessary magnetic interference
onnection cables should be grounded properly


Product Overview
English
Unit: mm
- 1 -

Top Cover
Bottom Chassis
Bracket
Pan Adjustment Screw
Tilt Adjustment Screw
Lens
RJ-45 Network Port (Support PoE)
DC12V Power Input Jack (DC12V±10%)
Reset Key
To restore the server to factory default setting.
Network Indicator LEDs
Green(LINK): Network connection. This LED lit.
Orange(A T): Data communications. This LED flashes.
Installation
1. Take out the IP camera from the box. onnect the network
cable to RJ-45 network port and connect power cable to D
power input jack of the IP camera (FIG.1). Then fix bracket to
the wall (FIG.2).
English
- 2 -

2. Loosen the pan and tilt adjustment screws on the bracket to
turn the camera body to the desired angle and then tighten the
screws (FIG.3).
System Architectures
For connecting HD IP cameras to the network, please follow one of
the system architectures:
(1). Use D 12V power adapter and a network switch to connect to
the network.
(2). Use a PoE network switch to connect to the network.
English
- 3 -

(3). Use a PoE power injector and a network switch to connect to the
network.
Emergency Factory Default
To restore factory default settings by hardware, please follow these
steps:
1. Hold “RESET Key” for 10 seconds, then release.
2. After about 40 seconds, the network LED light should turn off,
and the back on again.
3. This camera has completed the factory default settings, and can
then reboot.
4. Search for the IP device using the IPScan software.
5. Start the IP device via Internet browser.
6. Enter the default username “admin” and password “pass” to
operate.
NOTE:
For user convenience, restoring the factory default settings
will revert to the default IP address 192.168.0.200.
English
- 4 -

Before Accessing IP Cameras
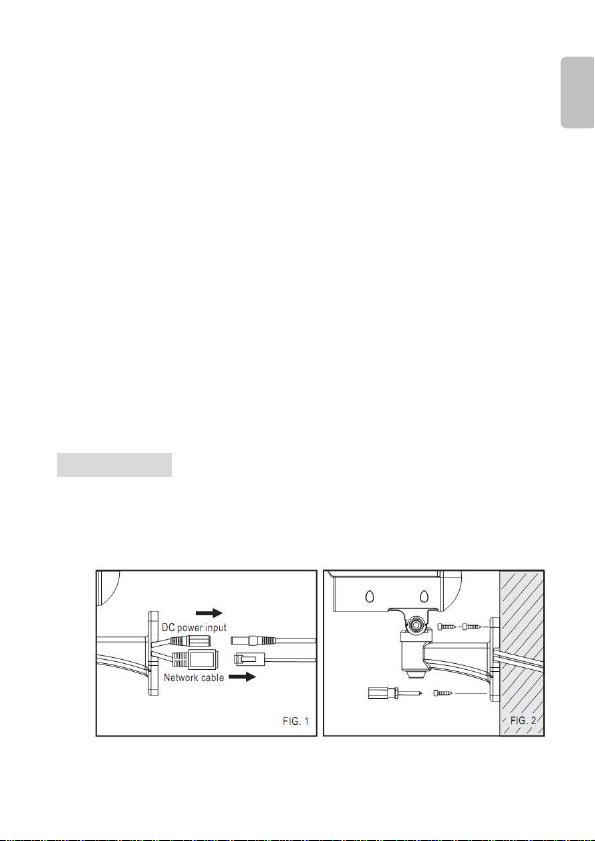
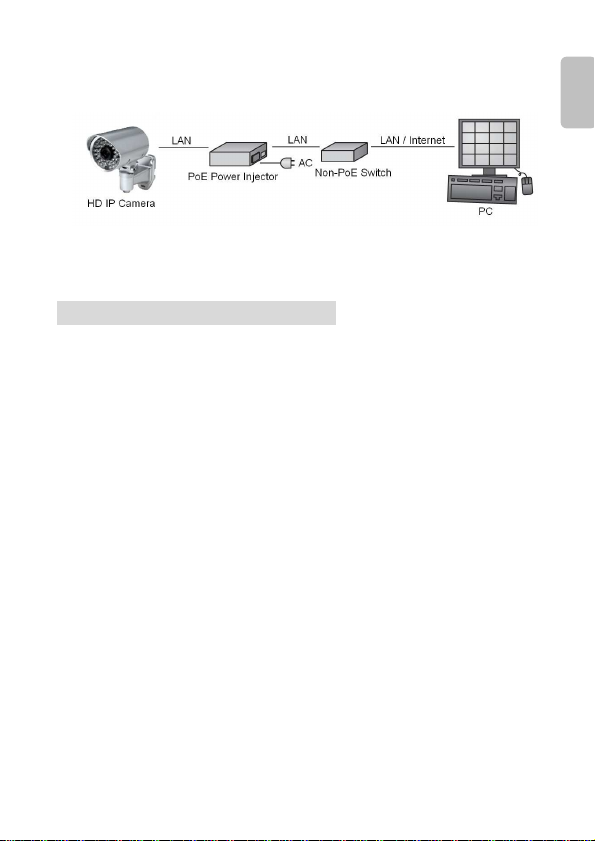
Before accessing the IP camera, make sure that the camera’s RJ-45
network, audio, and power cables are properly connected. To set the
IP address, consult your network administrator for an available IP
address. The default IP address for each IP camera is 192.168.0.200.
Users can use the default IP address for verifying the camera’s
network connection.
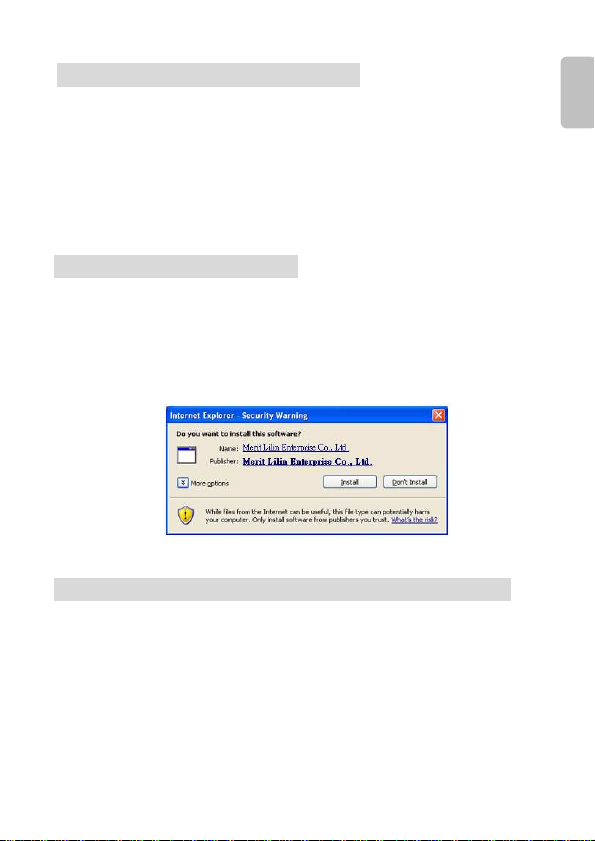
Software Requirements
Merit LILIN Universal ActiveX software components are required for
web interface display of JPEG or H.264 Full HD video. When you
login to the IP camera by Internet Explorer, the security warning
dialog box will prompt the installation of the LILIN Universal ActiveX.
lick Install to download it.
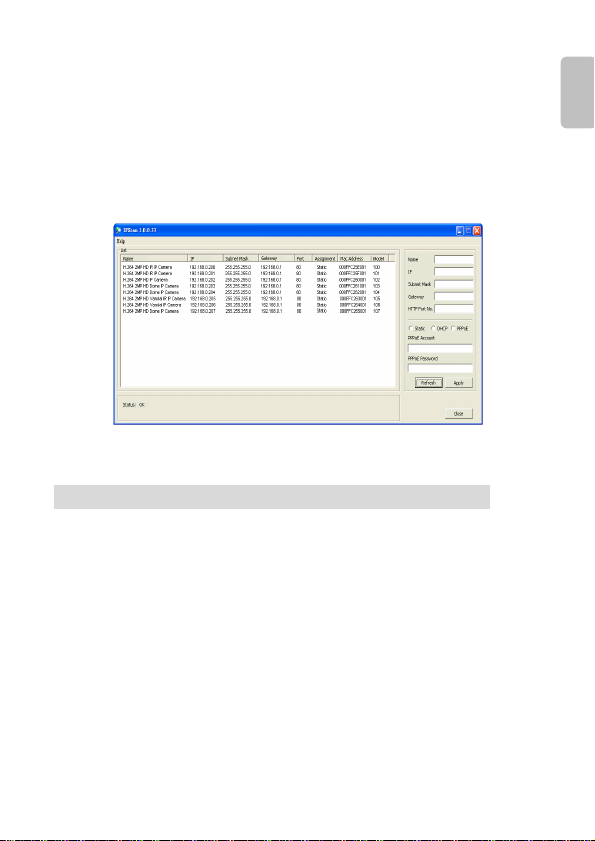
Configuring IP Addresses by IPScan Software
To configure an IP address using the IP scan tool, you can copy the
IPScan software from the installation D, and paste to your
computer. Alternatively, you can execute the IPScan software from
the installation D, or download the software from the Merit LILIN
website (www.meritlilin.com). To change the settings of the IP
address, subnet mask, gateway, or HTTP port, you can follow the
steps below:
English
- 5 -

1. Run the IPScan software.
2. lick Refresh. All available devices should be listed in the device
list.
3. Select your device from the list provided.
4. hange the IP address, subnet mask, gateway, or HTTP port for
the IP camera.
5. lick Apply to submit the settings.
6. lick Refresh to verify the settings.
Configuring IP Addresses via Web Interface
To change an IP address via web interface, type the default IP
address (192.168.0.200) in the Internet browser and follow the steps
below:
1. Login to the H.264 Full HD IP camera by the default username
“admin” and default password “pass”
2. lick Basic Mode configuration hyperlink.
3. lick Network->General hyperlink.
4. hange the IP address, subnet mask, gateway, or HTTP port for
the IP camera.
5. lick ubmit to verify the settings.
English
- 6 -

Internet Browser Settings & Application Required
Make sure your Internet browser allows the signed ActiveX plug-in
to work on your computer. Set “Download Signed ActiveX plug-in
controls” to “Prompt” and “Run ActiveX control and plug-in” to
“Enable”. You can set this option via Internet Explorer-> Tools->
Options-> Security Settings.
Once complete, you can access the IP camera’s live video by entering
the default IP address via your Internet browser. As the security
warning dialog box appears, click OK to download the ActiveX directly
from the IP camera.
English
- 7 -

Login
There are two levels of user authentication, including admin and
guest, that can access the IP camera. Administrator is authorized to
reset basic mode settings and see live video, while the guest is
allowed to see only live video.
The default usernames and passwords are as follows:
Administrator Viewer
Username admin guest
Password pass guest
To logon the H.264 FULL HD IP camera, please type username and
password in logon HTML page and click on Submit button to enter
the system.
English
- 8 -

Produktübersicht
Deutsch
Einheit: mm
- 9 -

Außenabdeckung
Gehäuseunterteil
Halterung
Schwenkeinstellschraube
Neigungseinstellschraube
Objektiv
RJ-45-Netzwerkanschluss (unterstützt PoE)
D 12V-Stromeingangsbuchse (D 12V ±10 %)
Reset-Taste
Mit dieser Taste kann der Server auf die werkseitigen
Standardeinstellungen zurückgesetzt werden.
Netzwerkanzeige-LEDs
Grün (LINK): Netzwerkverbindung. Diese LED leuchtet.
Orange (A T): Datenverkehr. Diese LED blinkt.
Installation
1. Schließen Sie das Netzwerkkabel an den RJ-45-Netzwerkanschluss
und das Netzkabel an die D -Stromeingangsbuchse der
IP-Kamera an (FIG.1). Befestigen Sie dann die Halterung an der
Wand (FIG.2).
Deutsch
- 10 -

2. Lösen Sie die Schwenk- und Neigungseinstellschrauben an der
Halterung, um die Kamera auf den gewünschten Winkel
einzustellen. Ziehen Sie dann die Schrauben wieder fest (FIG.3).
Systemarchitektur
Schließen Sie die HD IP-Kameras auf eine der folgenden Arten an
das Netzwerk an:
(1). Schließen Sie die Kamera über einen D 12V-Netzadapter und
einen Netzwerkswitch an das Netzwerk an.
(2).
Schließen Sie die Kamera über einen PoE-Netzwerkswitch an das
Netzwerk an.
Deutsch
- 11 -

(3). Schließen Sie die Kamera über einen PoE-Strominjektor und
einen Netzwerkswitch an das Netzwerk an.
Zurücksetzen der Standardeinstellungen
Um die Standardeinstellungen hardwaremäßig wieder herzustellen,
führen Sie die folgenden Schritte aus:
(1).
Drücken Sie 10 Sekunden lang auf die RESET-Taste.
(2).
Nach etwa 40 Sekunden erlischt die Netzwerk-LED kurz und
beginnt gleich wieder zu leuchten.
(3).
Die Kamera wurde auf die Werkseinstellungen zurückgesetzt
und kann jetzt neu gestartet werden.
(4).
Suchen Sie mit der IPScan-Software nach dem IP-Gerät.
(5).
Starten Sie das IP-Gerät über den Internetbrowser.
(6).
Geben Sie als Standardbenutzernamen “admin” und als
Passwort “pass” ein.
Hinweis:
Beim Zurücksetzen der Einstellungen auf die
Standardwerte wird auch die IP-Adresse auf die
Standardadresse 192.168.0.200 zurückgesetzt.
Deutsch
- 12 -

Vor dem Zugriff auf IP-Kameras
Stellen Sie vor dem Zugriff auf die IP-Kamera sicher, dass das RJ-45
Netzwerk, Audio und Stromkabel der Kamera richtig angeschlossen
ist. Wenden Sie sich an Ihren Netzwerkadministrator, um die
IP-Adresse einzustellen. Die Standard IP-Adresse für jede IP-Kamera
ist 192.168.0.200. Benutzer können die Standard IP-Adresse zur
Verifizierung der Netzwerkverbindung der IP Kamera benutzen.
Softwarevoraussetzungen
Merit LILIN Universal ActiveX Softwarekomponenten sind zur
Webanzeige von JPEG oder H.264 FULL-HD-Video erforderlich. Beim
ersten Einloggen der IP-Kamera mit Internet Explorer wird eine
Sicherheitswarnung als Dialogfenster zum Download von LILIN
Universal ActiveX angezeigt. Klicken Sie zum Herunterladen auf
“Install”.
Konfiguration von IP-Adressen mittels IP Scan
Programm
Zur Konfiguration der IP-Adresse mit dem IPScan-Programm
kopieren Sie IP Scan von der Installations- D auf Ihren lokalen P
oder Sie können die IP Scan Software direkt von der Installations- D
ausführen. Das IP Scan Programm kann auch von unserer
Unternehmenswebseite heruntergeladen werden. Um eine
IP-Adresse, Subnetzmaske, Gateway oder HTTP Port zu ändern,
folgen Sie den nachstehenden Schritten:
Deutsch
- 13 -

1. Lassen Sie das IP Scan-Programm ablaufen
2. Klicken Sie auf “Refresh” (Aktualisieren). Alle verfügbaren Geräte
werden in der Geräteliste aufgelistet
3. Wählen Sie das Gerät in der Geräteliste aus
4. Bearbeiten oder modifizieren Sie die Adressen im IP-,
Subnetzmaske, Gateway oder HTTP-Port-Bearbeitungsfenster.
5. Klicken Sie auf “Apply” (Übernehmen), um die Einstellungen zu
konfigurieren
6. Klicken Sie auf “Refresh” (Aktualisieren), um die Einstellungen zu
überprüfen
Konfigurieren der IP-Adressen mittels HTML Seite
Zur Änderung der IP-Adresse mit der HTML-Seite geben Sie die
Standard IP-Adresse (192.168.0.200) im Internet-Browser ein und
folgen Sie den nach- stehenden Schritten:
1. Melden Sie die H.264 Full HD IP Kamera mit dem Standard
Benutzernamen “admin” und Standardkennwort “pass” an.
2. Klicken Sie auf den Link “Basic Mode” (Basismodus)
3. Klicken Sie auf den Link “Network->General”
(Netzwerk->Allgemein)
4. Nutzen Sie die Bearbeitungsfelder, um Adressen, Subnetzmaske,
Gateway oder HTTP Port zu bearbeiten oder zu ändern.
5. Klicken Sie auf “Submit” (Senden)
Deutsch
- 14 -

Internetbrowser Einstellungen & benötigte
Softwarekomponenten
Stellen Sie sicher, dass Ihr Internetbrowser signierte ActiveX Plug-ins
auf Ihrem P akzeptiert. Stellen Sie “Download Signed ActiveX
plug-in controls” (ActiveX-Steuerelemente ausführen, die für
Scripting sicher sind) auf “Prompt” (Eingabeaufforderung) und “Run
ActiveX control and plug-in” (ActiveX-Steuerelemente und Plugins
ausführen) auf “Enable” (Aktivieren). Sie können dies unter Internet
Explorer->Tools->Options->Security Settings (Internet
Explorer->Extras->Internetoptionen->Sicherheit) einstellen.
Nach Abschluss können Sie auf das Live-Video der IP-Kamera durch
Eingabe der Standard IP-Adresse in Internet Explorer zugreifen. Eine
Warnmeldung wird angezeigt. Klicken Sie auf “OK” (OK), um ActiveX
direkt von der IP-Kamera herunterzuladen.
Deutsch
- 15 -

Login
Es gibt verschiedene Stufen der Benutzerauthentifizierung, darunter
Administrator und Gast.
Die Standareinstellungen von Benutzername und Kennwort sind wie
folgt beschriegen:
Administrator Gast
Benutzername admin guest
Kennwort pass guest
Zur Anmeldung der H.264 FULL-HD IP-Kamera geben Sie den
Benutzernamen und das Kennwort auf der HTML Seite ein und
klicken Sie auf “Submit” (Senden).
Deutsch
- 16 -

Présentation du produit
Français
Unité : mm
- 17 -
This manual suits for next models
2
Table of contents
Languages:
Other Lilin Thermographic Camera manuals