manuals.online logo
Brands
  1. Home
  2. •
  3. Brands
  4. •
  5. Lincoln Electric
  6. •
  7. Controllers
  8. •
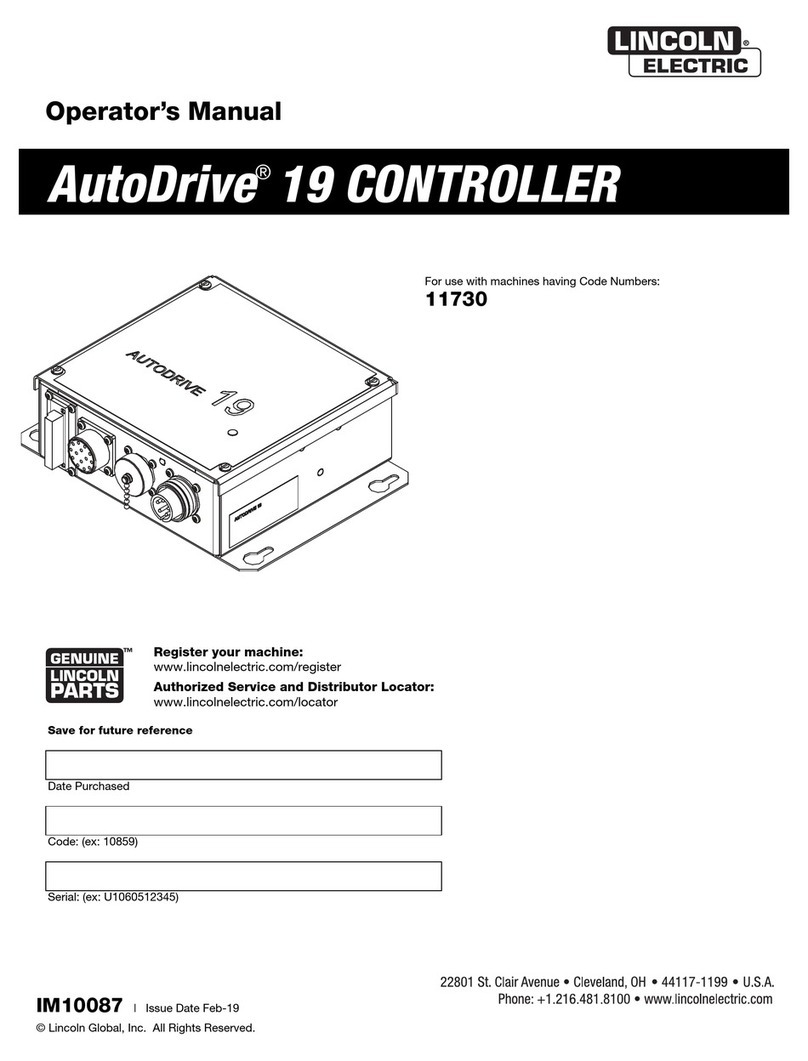
  9. Lincoln Electric POWER FEED IM849 User manual

Lincoln Electric POWER FEED IM849 User manual

• Sales and Service through Subsidiaries and Distributors Worldwide •
Cleveland, Ohio 44117-1199 U.S.A. TEL: 216.481.8100 FAX: 216.486.1751 WE SITE: www.lincolnelectric.com
• World's Leader in Welding and Cutting Products •
POWER FEED
™
10A CONTROLLER
OPERATOR’S MANUAL
IM849
June, 009
Safety Depends on You
Lincoln arc welding and cutting
equipment is designed and built
with safety in mind. However, your
overall safety can be increased by
proper installation ... and thought-
ful operation on your part. DO
NOT INSTALL, OPERATE OR
REPAIR THIS EQUIPMENT
WITHOUT READING THIS
MANUAL AND THE SAFETY
PRECAUTIONS CONTAINED
THROUGHOUT. And, most
importantly, think before you act
and be careful.
For use with machines having Code Numbers: 11139
Copyright © Lincoln Global Inc.
IP 21S
FOR ENGINE
powered equipment.
1.a. Turn the engine off before troubleshooting and maintenance
work unless the maintenance work requires it to be running.
____________________________________________________
1.b.Operate engines in open, well-ventilated
areas or vent the engine exhaust fumes
outdoors.
____________________________________________________
1.c.Do not add the fuel near an open flame
welding arc or when the engine is running.
Stop the engine and allow it to cool before
refueling to prevent spilled fuel from vaporiz-
ing on contact with hot engine parts and
igniting. Do not spill fuel when filling tank. If
fuel is spilled, wipe it up and do not start
engine until fumes have been eliminated.
____________________________________________________
1.d. Keep all equipment safety guards, covers and devices in
position and in good repair.Keep hands, hair, clothing and
tools away from V-belts, gears, fans and all other moving
parts when starting, operating or repairing equipment.
____________________________________________________
1.e. In some cases it may be necessary to remove safety
guards to perform required maintenance. Remove
guards only when necessary and replace them when the
maintenance requiring their removal is complete.
Always use the greatest care when working near moving
parts.
___________________________________________________
1.f. Do not put your hands near the engine fan.
Do not attempt to override the governor or
idler by pushing on the throttle control rods
while the engine is running.
___________________________________________________
1.g. To prevent accidentally starting gasoline engines while
turning the engine or welding generator during maintenance
work, disconnect the spark plug wires, distributor cap or
magneto wire as appropriate.
i
SAFETY
i
ARC WELDING CAN BE AZARDOUS. PROTECT YOURSELF AND OT ERS FROM POSSIBLE SERIOUS INJURY OR DEAT .
KEEP C ILDREN AWAY. PACEMAKER WEARERS S OULD CONSULT WIT T EIR DOCTOR BEFORE OPERATING.
Read and understand the following safety highlights. For additional safety information, it is strongly recommended that you
purchase a copy of “Safety in Welding & Cutting - ANSI Standard Z49.1” from the American Welding Society, P.O. ox
351040, Miami, Florida 33135 or CSA Standard W117.2-1974. A Free copy of “Arc Welding Safety” booklet E205 is available
from the Lincoln Electric Company, 22801 St. Clair Avenue, Cleveland, Ohio 44117-1199.
BE SURE T AT ALL INSTALLATION, OPERATION, MAINTENANCE AND REPAIR PROCEDURES ARE
PERFORMED ONLY BY QUALIFIED INDIVIDUALS.
WARNING
Mar ‘95
ELECTRIC AND
MAGNETIC FIELDS
may be dangerous
2.a. Electric current flowing through any conductor causes
localized Electric and Magnetic Fields (EMF). Welding
current creates EMF fields around welding cables and
welding machines
2.b. EMF fields may interfere with some pacemakers, and
welders having a pacemaker should consult their physician
before welding.
2.c. Exposure to EMF fields in welding may have other health
effects which are now not known.
2.d. All welders should use the following procedures in order to
minimize exposure to EMF fields from the welding circuit:
2.d.1.
Route the electrode and work cables together - Secure
them with tape when possible.
2.d.2. Never coil the electrode lead around your body.
2.d.3. Do not place your body between the electrode and
work cables. If the electrode cable is on your right
side, the work cable should also be on your right side.
2.d.4. Connect the work cable to the workpiece as close as
possible to the area being welded.
2.d.5. Do not work next to welding power source.
1.h. To avoid scalding, do not remove the
radiator pressure cap when the engine is
hot.
CALIFORNIA PROPOSITION 65 WARNINGS
Diesel engine exhaust and some of its constituents
are known to the State of California to cause can-
cer, birth defects, and other reproductive harm.
The engine exhaust from this product contains
chemicals known to the State of California to cause
cancer, birth defects, or other reproductive harm.
The Above For Diesel Engines The Above For Gasoline Engines
ii
SAFETY
ii
ARC RAYS can urn.
4.a. Use a shield with the proper filter and cover
plates to protect your eyes from sparks and
the rays of the arc when welding or observing
open arc welding. Headshield and filter lens
should conform to ANSI Z87. I standards.
4.b. Use suitable clothing made from durable flame-resistant
material to protect your skin and that of your helpers from
the arc rays.
4.c. Protect other nearby personnel with suitable, non-flammable
screening and/or warn them not to watch the arc nor expose
themselves to the arc rays or to hot spatter or metal.
ELECTRIC SHOCK can
kill.
3.a. The electrode and work (or ground) circuits
are electrically “hot” when the welder is on.
Do not touch these “hot” parts with your bare
skin or wet clothing. Wear dry, hole-free
gloves to insulate hands.
3.b. Insulate yourself from work and ground using dry insulation.
ake certain the insulation is large enough to cover your full
area of physical contact with work and ground.
In addition to the normal safety precautions, if welding
must e performed under electrically hazardous
conditions (in damp locations or while wearing wet
clothing; on metal structures such as floors, gratings or
scaffolds; when in cramped positions such as sitting,
kneeling or lying, if there is a high risk of unavoida le or
accidental contact with the workpiece or ground) use
the following equipment:
• Semiautomatic DC Constant Voltage (Wire) Welder.
• DC Manual (Stick) Welder.
• AC Welder with Reduced Voltage Control.
3.c. In semiautomatic or automatic wire welding, the electrode,
electrode reel, welding head, nozzle or semiautomatic
welding gun are also electrically “hot”.
3.d. Always be sure the work cable makes a good electrical
connection with the metal being welded. The connection
should be as close as possible to the area being welded.
3.e. Ground the work or metal to be welded to a good electrical
(earth) ground.
3.f.
aintain the electrode holder, work clamp, welding cable and
welding machine in good, safe operating condition. Replace
damaged insulation.
3.g. Never dip the electrode in water for cooling.
3.h. Never simultaneously touch electrically “hot” parts of
electrode holders connected to two welders because voltage
between the two can be the total of the open circuit voltage
of both welders.
3.i. When working above floor level, use a safety belt to protect
yourself from a fall should you get a shock.
3.j. Also see Items 6.c. and 8.
FUMES AND GASES
can e dangerous.
5.a. Welding may produce fumes and gases
hazardous to health. Avoid breathing these
fumes and gases. When welding, keep
your head out of the fume. Use enough
ventilation and/or exhaust at the arc to keep
fumes and gases away from the breathing zone. When
welding with electrodes which require special
ventilation such as stainless or hard facing (see
instructions on container or MSDS) or on lead or
cadmium plated steel and other metals or coatings
which produce highly toxic fumes, keep exposure as
low as possi le and within applica le OSHA PEL and
ACGIH TLV limits using local exhaust or mechanical
ventilation. In confined spaces or in some circum-
stances, outdoors, a respirator may e required.
Additional precautions are also required when welding
on galvanized steel.
5. b. The operation of welding fume control equipment is affected
by various factors including proper use and positioning of
the equipment, maintenance of the equipment and the spe-
cific welding procedure and application involved. Worker
exposure level should be checked upon installation and
periodically thereafter to be certain it is within applicable
OSHA PEL and ACGIH TLV limits.
5.c.
Do not weld in locations near chlorinated hydrocarbon
vapors
coming from degreasing, cleaning or spraying operations.
The heat and rays of the arc can react with solvent vapors
to
form phosgene, a highly toxic gas, and other irritating prod-
ucts.
5.d. Shielding gases used for arc welding can displace air and
cause injury or death. Always use enough ventilation,
especially in confined areas, to insure breathing air is safe.
5.e. Read and understand the manufacturer’s instructions for this
equipment and the consumables to be used, including the
material safety data sheet ( SDS) and follow your
employer’s safety practices. SDS forms are available from
your welding distributor or from the manufacturer.
5.f. Also see item 1.b.
Jan ‘09
iii
SAFETY
iii
FOR ELECTRICALLY
powered equipment.
8.a. Turn off input power using the disconnect
switch at the fuse box before working on
the equipment.
8.b. Install equipment in accordance with the U.S. National
Electrical Code, all local codes and the manufacturer’s
recommendations.
8.c. Ground the equipment in accordance with the U.S. National
Electrical Code and the manufacturer’s recommendations.
CYLINDER may explode
if damaged.
7.a. Use only compressed gas cylinders
containing the correct shielding gas for the
process used and properly operating
regulators designed for the gas and
pressure used. All hoses, fittings, etc. should be suitable for
the application and maintained in good condition.
7.b. Always keep cylinders in an upright position securely
chained to an undercarriage or fixed support.
7.c. Cylinders should be located:
• Away from areas where they may be struck or subjected to
physical damage.
• A safe distance from arc welding or cutting operations and
any other source of heat, sparks, or flame.
7.d. Never allow the electrode, electrode holder or any other
electrically “hot” parts to touch a cylinder.
7.e. Keep your head and face away from the cylinder valve outlet
when opening the cylinder valve.
7.f. Valve protection caps should always be in place and hand
tight except when the cylinder is in use or connected for
use.
7.g. Read and follow the instructions on compressed gas
cylinders, associated equipment, and CGA publication P-l,
“Precautions for Safe Handling of Compressed Gases in
Cylinders,” available from the Compressed Gas Association
1235 Jefferson Davis Highway, Arlington, VA 22202.
WELDING and CUTTING
SPARKS can
cause fire or explosion.
6.a.
Remove fire hazards from the welding area.
If this is not possible, cover them to prevent
the welding sparks from starting a fire.
Remember that welding sparks and hot
materials from welding can easily go through small cracks
and openings to adjacent areas. Avoid welding near
hydraulic lines. Have a fire extinguisher readily available.
6.b. Where compressed gases are to be used at the job site,
special precautions should be used to prevent hazardous
situations. Refer to “Safety in Welding and Cutting” (ANSI
Standard Z49.1) and the operating information for the
equipment being used.
6.c. When not welding, make certain no part of the electrode
circuit is touching the work or ground. Accidental contact
can cause overheating and create a fire hazard.
6.d. Do not heat, cut or weld tanks, drums or containers until the
proper steps have been taken to insure that such procedures
will not cause flammable or toxic vapors from substances
inside. They can cause an explosion even
though
they have
been “cleaned”. For information, purchase “Recommended
Safe Practices for the
Preparation
for Welding and Cutting of
Containers and Piping That Have Held Hazardous
Substances”, AWS F4.1 from the American Welding Society
(see address above).
6.e. Vent hollow castings or containers before heating, cutting or
welding. They may explode.
6.f.
Sparks and spatter are thrown from the welding arc. Wear oil
free protective garments such as leather gloves, heavy shirt,
cuffless trousers, high shoes and a cap over your hair. Wear
ear plugs when welding out of position or in confined places.
Always wear safety glasses with side shields when in a
welding area.
6.g. Connect the work cable to the work as close to the welding
area as practical. Work cables connected to the building
framework or other locations away from the welding area
increase the possibility of the welding current passing
through lifting chains, crane cables or other alternate cir-
cuits. This can create fire hazards or overheat lifting chains
or cables until they fail.
6.h. Also see item 1.c.
6.I. Read and follow NFPA 51B “ Standard for Fire Prevention
During Welding, Cutting and Other Hot Work”, available
from NFPA,1 Batterymarch Park, PO box 9101, Quincy, a
022690-9101.
6.j. Do not use a welding power source for pipe thawing.
Jan ‘09
Refer to http://www.lincolnelectric.com/safety for additional safety information.
iv
SAFETY
iv
PRÉCAUTIONS DE SÛRETÉ
Pour votre propre protection lire et observer toutes les instructions
et les précautions de sûreté specifiques qui parraissent dans ce
manuel aussi bien que les précautions de sûreté générales suiv-
antes:
Sûreté Pour Soudage A L’Arc
1. Protegez-vous contre la secousse électrique:
a. Les circuits à l’électrode et à la piéce sont sous tension
quand la machine à souder est en marche. Eviter toujours
tout contact entre les parties sous tension et la peau nue
ou les vétements mouillés. Porter des gants secs et sans
trous pour isoler les mains.
b. Faire trés attention de bien s’isoler de la masse quand on
soude dans des endroits humides, ou sur un plancher
metallique ou des grilles metalliques, principalement dans
les positions assis ou couché pour lesquelles une grande
partie du corps peut être en contact avec la masse.
c. Maintenir le porte-électrode, la pince de masse, le câble
de soudage et la machine à souder en bon et sûr état
defonctionnement.
d.Ne jamais plonger le porte-électrode dans l’eau pour le
refroidir.
e. Ne jamais toucher simultanément les parties sous tension
des porte-électrodes connectés à deux machines à souder
parce que la tension entre les deux pinces peut être le
total de la tension à vide des deux machines.
f. Si on utilise la machine à souder comme une source de
courant pour soudage semi-automatique, ces precautions
pour le porte-électrode s’applicuent aussi au pistolet de
soudage.
2. Dans le cas de travail au dessus du niveau du sol, se protéger
contre les chutes dans le cas ou on recoit un choc. Ne jamais
enrouler le câble-électrode autour de n’importe quelle partie
du corps.
3. Un coup d’arc peut être plus sévère qu’un coup de soliel,
donc:
a. Utiliser un bon masque avec un verre filtrant approprié
ainsi qu’un verre blanc afin de se protéger les yeux du ray-
onnement de l’arc et des projections quand on soude ou
quand on regarde l’arc.
b. Porter des vêtements convenables afin de protéger la
peau de soudeur et des aides contre le rayonnement de
l‘arc.
c. Protéger l’autre personnel travaillant à proximité au
soudage à l’aide d’écrans appropriés et non-inflammables.
4. Des gouttes de laitier en fusion sont émises de l’arc de
soudage. Se protéger avec des vêtements de protection libres
de l’huile, tels que les gants en cuir, chemise épaisse, pan-
talons sans revers, et chaussures montantes.
5. Toujours porter des lunettes de sécurité dans la zone de
soudage. Utiliser des lunettes avec écrans lateraux dans les
zones où l’on pique le laitier.
6. Eloigner les matériaux inflammables ou les recouvrir afin de
prévenir tout risque d’incendie dû aux étincelles.
7. Quand on ne soude pas, poser la pince à une endroit isolé de
la masse. Un court-circuit accidental peut provoquer un
échauffement et un risque d’incendie.
8. S’assurer que la masse est connectée le plus prés possible
de la zone de travail qu’il est pratique de le faire. Si on place
la masse sur la charpente de la construction ou d’autres
endroits éloignés de la zone de travail, on augmente le risque
de voir passer le courant de soudage par les chaines de lev-
age, câbles de grue, ou autres circuits. Cela peut provoquer
des risques d’incendie ou d’echauffement des chaines et des
câbles jusqu’à ce qu’ils se rompent.
9. Assurer une ventilation suffisante dans la zone de soudage.
Ceci est particuliérement important pour le soudage de tôles
galvanisées plombées, ou cadmiées ou tout autre métal qui
produit des fumeés toxiques.
10. Ne pas souder en présence de vapeurs de chlore provenant
d’opérations de dégraissage, nettoyage ou pistolage. La
chaleur ou les rayons de l’arc peuvent réagir avec les vapeurs
du solvant pour produire du phosgéne (gas fortement toxique)
ou autres produits irritants.
11. Pour obtenir de plus amples renseignements sur la sûreté,
voir le code “Code for safety in welding and cutting” CSA
Standard W 117.2-1974.
PRÉCAUTIONS DE SÛRETÉ POUR
LES MAC INES À SOUDER À
TRANSFORMATEUR ET À
REDRESSEUR
1. Relier à la terre le chassis du poste conformement au code de
l’électricité et aux recommendations du fabricant. Le dispositif
de montage ou la piece à souder doit être branché à une
bonne mise à la terre.
2. Autant que possible, I’installation et l’entretien du poste seront
effectués par un électricien qualifié.
3. Avant de faires des travaux à l’interieur de poste, la debranch-
er à l’interrupteur à la boite de fusibles.
4. Garder tous les couvercles et dispositifs de sûreté à leur
place.
Mar. ‘93
vv
TThhaannkk YYoouufor selecting a QUALITY product by Lincoln Electric. We want you
to take pride in operating this Lincoln Electric Company product
••• as much pride as we have in bringing this product to you!
Read this Operators Manual completely before attempting to use this equipment. Save this manual and keep it
handy for quick reference. Pay particular attention to the safety instructions we have provided for your protection.
The level of seriousness to be applied to each is explained below:
WARNING
This statement appears where the information must be followed exactly to avoid serious personal injury or loss of life.
This statement appears where the information must be followed to avoid minor personal injury or damage to this equipment.
CAUTION
Please Examine Carton and Equipment For Damage Immediately
When this equipment is shipped, title passes to the purchaser upon receipt by the carrier. Consequently, Claims
for material damaged in shipment must be made by the purchaser against the transportation company at the
time the shipment is received.
Please record your equipment identification information below for future reference. This information can be
found on your machine nameplate.
Product _________________________________________________________________________________
Model Number ___________________________________________________________________________
Code Number or Date Code_________________________________________________________________
Serial Number____________________________________________________________________________
Date Purchased___________________________________________________________________________
Where Purchased_________________________________________________________________________
Whenever you request replacement parts or information on this equipment, always supply the information you
have recorded above. The code number is especially important when identifying the correct replacement parts.
On-Line Product Registration
- Register your machine with Lincoln Electric either via fax or over the Internet.
• For faxing: Complete the form on the back of the warranty statement included in the literature packet
accompanying this machine and fax the form per the instructions printed on it.
• For On-Line Registration: Go to our
WEB SITE at www.lincolnelectric.com. Choose “Quick Links” and then
“Product Registration”. Please complete the form and submit your registration.
CUSTOMER ASSISTANCE POLICY
The business of The Lincoln Electric Company is manufacturing and selling high quality welding equipment, consumables, and cutting equip-
ment. Our challenge is to meet the needs of our customers and to exceed their expectations. On occasion, purchasers may ask Lincoln
Electric for advice or information about their use of our products. We respond to our customers based on the best information in our posses-
sion at that time. Lincoln Electric is not in a position to warrant or guarantee such advice, and assumes no liability, with respect to such infor-
mation or advice. We expressly disclaim any warranty of any kind, including any warranty of fitness for any customer’s particular purpose,
with respect to such information or advice. As a matter of practical consideration, we also cannot assume any responsibility for updating or
correcting any such information or advice once it has been given, nor does the provision of information or advice create, expand or alter any
warranty with respect to the sale of our products.
Lincoln Electric is a responsive manufacturer, but the selection and use of specific products sold by Lincoln Electric is solely within the control
of, and remains the sole responsibility of the customer. Many variables beyond the control of Lincoln Electric affect the results obtained in
applying these types of fabrication methods and service requirements.
Subject to Change – This information is accurate to the best of our knowledge at the time of printing. Please refer to www.lincolnelectric.com
for any updated information.
vi
vi TABLE OF CONTENTS Page
––––––––––––––––––––––––––––––––––––––––––––––––––––––––––––––––––––––––––––––––
Installation.......................................................................................................................Section A
Technical Specifications................................................................................................A-1
Safety Precautions........................................................................................................A-2
Welding Voltage, Mechanical Hazards .........................................................................A-2
Location and Mounting..................................................................................................A-2
High Frequency Protection............................................................................................A-2
Auxiliary Equipment Input Power Connection...............................................................A-2
Interfacing to the POWER FEED™ 10A CONTROLLER.......................................A-3 thru A-4
Controling Non-Lincoln Auxilliary Equipment ..................................................A-5 thru A-6
Connection Diagram System ........................................................................................A-7
Remote Sense Lead Specification................................................................................A-8
________________________________________________________________________________
Operation.........................................................................................................................Section B
Safety Precautions ............................................................................................................... -1
Design Features................................................................................................................... -1
Definitions of Welding Modes........................................................................................ -1
Common Welding Abbreviations................................................................................... -1
Product Description....................................................................................................... -2
Recommended Processes............................................................................................ -2
Locating Front Panel Controls and Input, Output Connections..................................... -3
Case Front Controls and Description....................................................................... -4 thru 5
Power-Up Sequence..................................................................................................... -5
Inch Wire Feed Speed Settings .................................................................................... -5
Changing Weld Modes.............................................................................................. -6
Mode Select Panel 4 (MSP4).................................................................................... -6
Weld Mode Description............................................................................................. -6
AC Control................................................................................................................. -7
Start Options ............................................................................................................. -7
End Options .............................................................................................................. -8
Weld Sequence Parameter List ................................................................................ -9
General Setup Mode Options.................................................................................. -10
Infrared (IR) Control ............................................................................................... -11
Lockout/Security..................................................................................................... -11
Memory Panel Description..................................................................................... -12
Limit Setting ........................................................................................................... -13
________________________________________________________________________________
Accessories .....................................................................................................Section C
General Options / Accessories..............................................................................C-1
________________________________________________________________________
Maintenance ....................................................................................................Section D
Safety Precautions ................................................................................................D-1
Routine..................................................................................................................D-1
Periodic..................................................................................................................D-1
Calibration Specification........................................................................................D-1
________________________________________________________________________
Troubleshooting..............................................................................................Section E
Safety Precautions.................................................................................................E-1
How to Use Troubleshooting Guide.......................................................................E-1
Troubleshooting Guide.............................................................................E-2 thru E-6
________________________________________________________________________
Wiring Diagram and Dimension Print............................................................Section F
________________________________________________________________________
Parts Lists...............................................................................................................P-506
________________________________________________________________________
A-1
GENERAL INFORMATION
POWER FEED™ 10A CONTROLLER
A-1
TEC NICAL SPECIFICATIONS: POWER FEED™ 10A CONTROLLER
SPEC.# TYPE 142:1 SPEED RATIO 95:1 SPEED RATIO
Wire Size Wire Size
POWER FEED™ 10A CONTROLLER Speed Solid Cored Speed Solid
Cored
with Power Feed 10SF
K2362-1 10-200 IPM 7/32 in. 5/32 in. 10-300 ipm 1/8 in. 5/32 in.
(0.25 -5.08 m/min.) (5.6 mm) (4.0 mm) (0.25 -7.62 m/min.) (3.2 mm) (4.0 mm)
INPUT VOLTAGE & CURRENT
P YSICAL SIZE• TEMPERATURE RATING
Dimensions
Model Voltage* Input Amps* Height Width Depth Weight Operating Storage
K2362-1
40VDC 1.0 15.0in. 13.0 in 4.0 in. 25 Lbs 4°F to 104°F -40°F to 185°F
(381 mm) (259 mm) (102 mm) (11.3 Kg.) (-20°C to 40°C)
(
-40°C to 85°C)
WELDING PROCESSES
Process Electrode Output Range Wire Feed Speed Range
Diameter Range (Amperes)
SAW 5/64 in. – 7/32 in (2.0 – 5.6 mm) 1000 Amps 10 - 300 ipm ( 0.254- 7.62 m/minute)
* When not driving a motor.
A-2
INSTALLATION
POWER FEED™ 10A CONTROLLER
A-2
SAFETY PRECAUTION
WELDING VOLTAGE
Wire feed parts are electrically live while welding and while
inching wire (with Touch Sense feature selection). The elec-
trically live parts are listed below:
Electrode Electrode Reel
Wire Drive Motor Drive Rolls
Gear ox Cross-seam Adjuster
Wire Straightener Welding Nozzle
Welding Cables Welding Cable Terminal
• Do not touch electrically live parts or elec-
trodes with your skin or wet clothing.
• Insulate yourself from the work and ground.
• Always wear dry insulating gloves.
MEC ANICAL AZARDS
• Welding fixture or wire feeder will move during weld-
ing or inching. Keep away from pinch points.
• Electrode reel and drive rolls turn during
welding or inching. Keep gloved hands
away from areas that may catch the glove.
-----------------------------------------------------------------
---------------
LOCATION AND MOUNTING
The POWER FEED™ 10A CONTROLLER will operate in
harsh environments. Even so, it is important that simple pre-
ventative measures are followed in order to assure long life
and reliable operation. The POWER FEED™ 10A CON-
TROLLER must be located where there is little risk of
impacts to the Controller.
ELECTRIC S OCK can kill.
• Only a qualified electrician should
connect the POWER FEED™ 10A
CONTROLLER. Installation should
be made in accordance with the
appropriate National Electrical
Code, the local codes and the infor-
mation in this manual.
• Turn off the input power to the
power source at the disconnect
switch or fuse box before working
on this equipment. Turn off the
input power to any other equipment
connected to the welding system at
the disconnect switch or fuse box
before working on this equipment.
• Do not touch electrically hot parts.
-----------------------------------------------------------------------------
IG FREQUENCY PROTECTION
Locate the POWER FEED™ 10A CONTROLLER away from
radio controlled machinery. The normal operation of the
POWER FEED™ 10A CONTROLLER may adversely affect
the operation of RF controlled equipment, which may result
in bodily injury or damage to the equipment.
AUXILIARY EQUIPMENT INPUT POWER CON-
NECTION
The POWER FEED™ 10A CONTROLLER has the ability to
control auxiliary equipment such as flux hoppers and travel
motors using solid state relays. There are three relays in the
POWER FEED™ 10A CONTROLLER, controlled by two
independent coil drivers. The coils of CR1 and CR2 are in
parallel, therefore, they must turn ON and OFF at the same
time. The CR1 and CR2 relays are designated for driving
travel motors to control motion. CR3 is driven separately,
and is designated to control flux hopper operation.
POWER FEED™ 10A CONTROLLER Relay Ratings:
Coil: 12Vdc, resistance = 86 ohms at 25° C
N.C. Contacts: 3A @ 277Vac
N.O. Contacts: 30A @ 277Vac
The POWER FEED™ 10A CONTROLLER does not provide
the input power to feed auxiliary equipment, therefore a sep-
arate power feed must be provided by the end user. The
POWER FEED™ 10A CONTROLLER has been shipped
standard with all of the wiring and connectivity to connect to
the Lincoln K325 TC-3 Travel Carriage (4-pin cable connec-
tor) and the Lincoln K219 Automatic Flux Hopper (3-pin
cable connector). The CR2 Relay is wired to the 4-pin travel
connector, and the CR3 Relay is wired to the 3-pin flux con-
nector, both located on the bottom of the POWER FEED™
10A CONTROLLER. 115Vac, 50/60Hz power is required for
the Lincoln auxiliary equipment.
If either of these is to be used with the POWER FEED™
10A CONTROLLER, the end-user must provide the 115Vac
input power to the terminal strip located inside the POWER
FEED™ 10A CONTROLLER. Access to the terminal strip
may be obtained via the 4 access holes in the bottom of the
POWER FEED™ 10A CONTROLLER. These access holes
are shipped with plug buttons installed.
Although input power to POWER FEED™ 10A CON-
TROLLER is turned off, the customer installed auxiliary
input may be energized! Ensure that all input power to
the POWER FEED™ 10A CONTROLLER is turned off
before opening the cover.
--------------------------------------------------------------------------------
WARNING
WARNING
CAUTION
A-3
INSTALLATION
POWER FEED™ 10A CONTROLLER
A-3
Auxiliary Input Power Connection Instructions:
1. Remove two Phillips Head screws on right side of
front panel of hinged door to access terminal strip.
2. Remove a plug button and install a box connector
to provide strain relief for the input power leads.
3. Use the appropriate size leads, at least 14 AWG –
2 wire with ground.
4. Using a flat-head screwdriver with a blade dimen-
sion of 0.137"(3.5mm) x 0.020"(.51mm), insert the
screwdriver into the square hole next to the mount-
ing hole to be used on the terminal strip. The
screwdriver should be inserted until it bottoms out.
This opens the screwless cage clamping style wire
insertion port. The insulation on the leads should
be stripped at least 0.25"(6.4mm). With the cage
clamp opened insert the wire into the round port
until it bottoms out. While holding the lead securely,
remove the screwdriver from the terminal block.
This closes the cage clamp onto the lead holding it
securely. Any open port on blocks #48, #49, and
#50 may be used.
5. The 4-terminal blocks, numbered #48, #49, and #50
are to be used to bring in auxiliary power. Terminal
block #50 is used for the input ground connection.
This terminal block is color-coded green and yellow
for easy identification. Terminal blocks #48 and #49
are to be used to connect the input power circuit.
(See figure A.1)
FIGURE A.1
Terminal blocks 48 and 49 are shipped connected to
CR2 and CR3 (532 and 531 leads) and these relays
are connected to the 3-pin and 4-pin connectors locat-
ed on the bottom of the POWER FEED™ 10A CON-
TROLLER. CR1 is available for a separate customer
connection, but it will turn ON and OFF with CR2.
Therefore, if Lincoln auxiliary equipment is to be used,
connecting 115Vac to the terminal strip is all that is
required to power the devices.
NOTE: The contacts of CR1 are not connected to ter-
minals #48 and #49 when shipped. Applying power
the #48 and #49 terminals will not transfer voltage to
the CR1 relay. Connect leads from the #48 terminal
to the #4 terminal and from the #49 terminal to the #3
terminal to supply power to the common contacts of
the relay.
Once input power is applied to the terminal strip, this
voltage is always on terminal strip blocks #3, #4 (if
connected), #11, #17, and #18. These are the inputs
to the solid-state relay contacts. Input voltage is also
present on terminal strip blocks #7, #8 (if connected),
#15, #21, and #22 due to the N.C. contacts on the
relays. When the CR1 relay is energized, input power
is transferred to terminal strip blocks #5 and #6 (if
connected). When the CR2 relay is energized, input
power is transferred to terminal strip block #13. When
the CR3 relay is energized, input power is transferred
to terminal strip blocks #19 and #20. CR1 and CR2
will be turned ON and OFF at the same time.
INTERFACING TO T E POWER FEED™
10A CONTROLLER
The POWER FEED™ 10A CONTROLLER is a versa-
tile controller. The Switch Panel can be removed and
made into a hand-held pendant. Most circuits can be
accessed through the screwless terminal strip. The
auxiliary relays can control standard Lincoln equip-
ment, or they can be used to control any other auxil-
iary equipment (see relay rating information above).
Custom controls or PLC interfacing to control starting,
stopping, motion, etc, can be accomplished with ease.
Converting Switch Panel to a remote pendant:
1. Remove all input power to the POWER FEED™
10A CONTROLLER including any auxiliary power
supplies.
2. Remove the fasteners from the Switch Panel and
disconnect the Switch Panel from the wire harness.
3. Jumper the wire harness connector (J2) to the mat-
ing 10-pin connector (P2P) that is floating inside the
control box (See Wiring Diagram).
INSERT
WIRE HERE INSERT SCREW
DRIVER HERE
# 1
# 3
REMOVE SCREW
DRIVER FROM CAGE
CLAMP HOLE.
# 2
CAGE CLAMP
VAC IN
NEUTRAL (31)
VAC IN
LINE (32)
A-4
INSTALLATION
POWER FEED™ 10A CONTROLLER
A-4
4. Replace the Switch Panel on the POWER FEED™
10A CONTROLLER with the blank panel included
with the pendant box.
5. Connect the Switch Panel to the mating 10-pin con-
nector inside the pendant box.
6. Fasten the Switch Panel to the pendant box.
7. Connect the 14-pin/9-pin pendant cable to the mat-
ing cable connector on the bottom of the POWER
FEED™ 10A CONTROLLER and the mating cable
connector on the pendant.
8. The remote pendant is now ready to be used.
Interfacing to the Switch Panel Controls:
The Switch Panel circuits can be accessed on the
screwless terminal strip. Easy access to these circuits
enables the POWER FEED™ 10A CONTROLLER to
interface with custom controls or PLC’s. These circuits
must see a contact closure to function properly.
1. Remove all input power to the POWER FEED™
10A CONTROLLER including any auxiliary power
supplies.
2. Remove the fasteners from the Switch Panel and
disconnect the Switch Panel from the wire harness.
The Switch Panel should be stored in a secure
place in the event that it is needed in the future.
The Switch Panel should not be left in the POWER
FEED™ 10A CONTROLLER if the switches are not
connected. This could cause a safety concern
due to the fact that the switches will not stop the
welding sequence, etc.
--------------------------------------------------------------------------------
3. Jumper the wire harness connector (J2) to the mat-
ing 10-pin connector (P2P) that is floating inside the
control box (See Wiring Diagram).
4. Replace the Switch Panel on the POWER FEED™
10A CONTROLLER with the blank panel included
with the pendant box.
5. Remove the wire duct cover to gain access to the
leads on the right side of the terminal strip.
6. Remove the leads going to the Pendant 14-pin con-
nector from the right side of terminal strip blocks
#39, #40, #41, #42, #43, #44, #45, #46, & #47.
(Note – see Auxiliary Input Power Connection
Instructions on how to remove/install wires to the
screwless terminal strip)
7. Remove one of the plug buttons located on the bot-
tom of the POWER FEED™ 10A CONTROLLER
control box and install some type of strain relief for
the interfacing leads.
8. Connect the interfacing leads to the Switch Panel
circuits on the terminal strip (see Wiring Diagram for
terminal strip designations). The supply for START,
STOP, and INCH UP comes from SWITCH GROUP
#1 SUPPLY on block #39. The supply for TRAVEL
AUTO, TRAVEL ON, FLUX FILL, and INCH DOWN
comes from SWITCH GROUP #2 SUPPLY on
block #43.
9. To activate any of the Switch Panel circuits, a con-
tact closure must be established between the sup-
ply and the particular circuit it is referenced to – for
instance, to start the weld sequence, a contact clo-
sure must be established momentarily between ter-
minal strip blocks #39 (SUPPLY) and #40 (START).
See FIGURE A.2.
10. The leads from the 14-pin connector that were
removed from the terminal strip can be taped and
secured in the wire duct located next to the termi-
nal strip.
CAUTION
A-5
INSTALLATION
POWER FEED™ 10A CONTROLLER
A-5
INCH DOWN #47
SWITCH GROUP
#2 SUPPLY
#43
TRAVEL AUTO #44
TRAVEL ON #45
INCH UP #42
SWITCH GROUP
#1 SUPPLY
#39
START #40
STOP #41
FLUX FILL #46
N
OTE: TRAVEL AUTO and TRAVEL ON should not be closed at the same time. Either one OR the other should
b
e closed at any time, and must remain closed to keep particular Travel Mode active. If neither switch is closed at
any time, travel will be turned OFF, regardless of the welding state. Inching and Flux switches will activate their
p
articular function when the switch is closed, and will cease when opened. The START and STOP switches are
MOMENTARY and only need to be closed for a short period of time to start or stop the weld sequence.
CONTROLLING NON-LINCOLN
AUXILIARY EQUIPMENT:
Custom motion control and/or other auxiliary equip-
ment can be powered using the terminal strip and
relays. To use non-Lincoln motion control and/or flux
hoppers, follow instructions below.
1. Remove all input power to the POWER FEED™
10A CONTROLLER including any auxiliary power
supplies.
2. Remove the wire duct cover to gain access to the
leads on the right side of the terminal strip.
3. Remove one of the plug buttons located on the bot-
tom of the POWER FEED™ 10A CONTROLLER
control box and install some type of strain relief for
the auxiliary control leads.
4. Remove the leads going from the terminal strip to
the corresponding connectors, i.e. terminal strip
blocks #11, #13, and #16 for the 4-pin TC-3 Travel
Carriage or terminal strip blocks #19, #20, and #23
for the 3-pin Automatic Flux Hopper.
5. These loose leads can be taped and secured in the
wire duct.
6. Any custom or non-Lincoln equipment can be pow-
ered by the normally open contacts from relays
CR1, CR2, or CR3. The normally open contacts for
CR1 are located on terminal strip blocks #5 and #6.
The normally open contacts for CR2 are located on
terminal strip blocks #12 and #13. The normally
open contacts for CR3 are located on terminal strip
blocks #19 and #20. CR1 and CR2 are OTH
turned ON when the weld sequence starts and are
OTH turned OFF when the weld sequence stops
as long as the TRAVEL MODE Switch is in the
AUTO position.
7. The input supply voltage to power these devices is
provided by the end user. As shipped, the PF-10A
has the auxiliary supply blocks (terminal strip blocks
#48 and #49) connected to the CR2 relay and CR3
relay inputs, respectively. When the end user con-
nects a supply to the AUX blocks #48 and #49, this
voltage will be jumpered to the CR2 and CR3 relay
inputs on terminal strip blocks #11, #17, and #18.
Note – the CR1 relay is not connected to the AUX
terminal strip blocks; the customer must connect
power to this relay if it is to be used. See relay rat-
ings listed earlier.
FIGURE A.2
A-6
INSTALLATION
POWER FEED™ 10A CONTROLLER
A-6
8. Connect input supply voltage per the Auxiliary Input
Power Connection Instructions listed earlier.
9. The relays could also be used to provide contact
closure for any interfacing signals out using the nor-
mally open contacts. An external auxiliary supply
voltage would not be necessary to use the relays as
hard contact closure out signals. NOTE - The CR1
relay as shipped does not have AUX leads connect-
ed to it. This relay has two normally open contacts
that close at the start of the weld cycle and open at
the end of the weld cycle. These hard contact clo-
sures could be used as a signal out when interfac-
ing to PLC’s or custom controls.
Shutdown Inputs:
The POWER FEED™ 10A CONTROLLER has two
shutdown inputs available on the terminal strip. These
are independent, normally closed inputs that can be
used for limit switches, PLC inputs, etc, in order to
shut down the welding operation for any reason.
Shutdown #1 is located on terminal strip blocks #24
and #25. Shutdown #2 is located on terminal strip
blocks #26 and #27.
1. Remove all input power to the POWER FEED™
10A CONTROLLER including any auxiliary power
supplies.
2. Remove the wire duct cover to gain access to the
leads on the right side of the terminal strip.
3. Remove one of the plug buttons located on the bot-
tom of the POWER FEED™ 10A CONTROLLER
control box and install some type of strain relief for
the auxiliary control leads.
4. Connect the external shutdown circuit to either of
the shutdown terminal blocks, #24 & #25, and/or
#26 & #27. A normally closed circuit must be con-
nected – the POWER FEED™ 10A CONTROLLER
will recognize an open circuit as a shutdown com-
mand.
5. Remove the shorting jumpers imbedded in the cen-
ter of the terminal strip with a small screwdriver for
the shutdown circuits to be used.
When a shutdown input is received, all welding will
stop and an error message will be displayed on the
POWER FEED™ 10A CONTROLLER. The shutdown
circuit must be closed before resetting Controller. To
reset the system, the Mode Select Panel display will
prompt the user to press the left Mode Select Panel
Pushbutton.
Shutdown #2 can be configured for Output Lockout
mode by enabling option P.21 in the Setup Menu
(Refer to Section , General Setup Mode Options).
when the input is opened, output is disabled, but cold
feed of wire is still possible.
Stop Input:
The POWER FEED™ 10A CONTROLLER has a Stop
Input available on the terminal strip. The Stop Input
will work just like pressing the STOP Pushbutton. This
circuit is in parallel with the STOP Pushbutton located
on the Switch Panel. Unlike the Shutdown Inputs,
which completely shutdown all welding and auxiliary
equipment, the STOP Input will allow all welding and
auxiliary motion to continue based on the END
OPTIONS configurations in the POWER FEED™ 10A
CONTROLLER.
1. Remove all input power to the POWER FEED™
10A CONTROLLER including any auxiliary power
supplies.
2. Remove the wire duct cover to gain access to the
leads on the right side of the terminal strip.
3. Remove one of the plug buttons located on the bot-
tom of the POWER FEED™ 10A CONTROLLER
control box and install some type of strain relief for
the auxiliary control leads.
4. Connect the external Stop Input circuit to terminal
blocks #28 and #29.
The Stop Input is not necessary if the POWER
FEED™ 10A CONTROLLER is configured for Remote
Interfacing, mentioned earlier, due to the fact that the
Stop circuit can be accessed, in this configuration, on
terminal strip blocks #39 and #41. The Stop Input was
intended to be used when the Switch Panel is still
included in the system, either on the Controller, or in
the Pendant.
Note: the STOP circuit only needs a momentary clo-
sure to be recognized by the POWER FEED™ 10A
CONTROLLER. If the STOP button is held, the
START and INCH buttons are not recognized.
A-7
INSTALLATION
POWER FEED™ 10A CONTROLLER
A-7
P
OWER WAVE
AC/DC 1000
K2344-1
K1543-XX ARCLINK CONTROL CABLE
WORK PIECE
ELECTRODE
SENSE LEAD
K1785-
x
x 14 —14 PIN FEEDER CABLE
ARC
ARC 1
CONTROL
CONTROL
POWER FEED 10A
CONTROLLER
CONTROL BOX
K2362-1
P
OWER FEED 10SF
WIRE DRIVE
K2312-1
W
ORK
W
ORK SENSE
LEAD
SUBARC CONTACT
NOZZLE
K231-xxx
123456
77
88
CONNECTION DIAGRAM SYSTEM
A-8
INSTALLATION
POWER FEED™ 10A CONTROLLER
A-8
REMOTE SENSE LEAD SPECIFICATIONS
Welding with Multiple Arcs
Special care must be taken when more than one arc
is welding simultaneously on a single part. Arc blow
and arc interference may occur or be magnified. Each
power source requires a work lead from the work stud
to the welding fixture. Do not combine all of the work
leads into one lead. Perform welding in the direction
away from the work leads. Connect all of the work
sense leads from each power source to the work
piece at the end of the weld, such that they are out of
the path of the weld current.
For the best results when pulse welding, set the wire
size and wire feed speed the same for all the arcs.
When these parameters are identical, the pulsing fre-
quency will be the same, helping to stabilize the arcs.
CONNECT ALL SENSE
LEADS AT THE END
OF THE WELD
CONNECT ALL
WORK LEADS AT
THE BEGINNING OF
THE WELD
DIRECTION
OF TRAVEL
B-1
OPERATION
B-1
POWER FEED™ 10A CONTROLLER
SAFETY PRECAUTIONS
R ad this ntir s ction of op rating instructions
b for op rating th machin .
ELECTRIC S OCK can kill.
• Do not touch l ctrically liv parts
or l ctrod s with your skin or w t
clothing.
• Insulat yours lf from th work and
ground.
• Always w ar dry insulating glov s.
• Do not us AC w ld r if your cloth-
ing, glov s or work ar a is damp or
if working on, und r or insid work-
pi c .
Us th following quipm nt:
-DC manual (stick) w ld r.
-AC w ld r with r duc d voltag
control.
• Do not op rat with pan ls
r mov d.
• Disconn ct input pow r b for s r-
vicing.
--------------------------------------------------------------------------------
ONLY QUALIFIED PERSONS SHOULD INSTALL,
USE OR SERVICE THIS EQUIPMENT. READ AND
FOLLOW THE MANUFACTURER’S INSTUCTIONS,
EMPLOYER’S SAFTEY PRACTICES AND MATERI-
AL SAFTEY DATA SHEETS (MSDS) FOR CONSUM-
ABLES.
--------------------------------------------------------------------------------
READ THIS WARNING, PROTECT YOURSELF &
OTHERS.
FUMES AND GASES can be
dangerous.
• K p your h ad out of fum s.
• Us v ntilation or xhaust at the arc,
or both,to keep fumes and gases from
your breathing zone and general area.
WELDING SPARKS can cause
fire or explosion.
• Do not w ld n ar flammabl mat rial.
• Do not w ld on contain rs which hav
h ld flammabl mat rial.
ARC RAYS can burn.
• W ar y , ar, and body prot ction.
WARNING
DESIGN FEATURES
• Mode Select Panel for easy control of all weld para-
meters.
• Memory Panel for easy storage and recall of weld
schedules.
• Weld parameter limit setting and lockout capabilities.
• Digital communications for accurate and reliable per-
formance.
• Infrared red (IR) port for transferring weld settings.
• PC boards are potted in epoxy for the ultimate in out-
door protection.
• Connectors are filled with environmental protective
grease.
• Designed for the Power Wave series of products for
the best arc in the industry.
• Wire feed speed accuracy calibrated to within 2%.
• Digital display of voltage and wire feed speed.
• Tachometer controlled wire drive motor.
• Flux Fill Switch.
• right, high intensity digital read-outs.
• Industrial Push utton Switches
• Switch panel can be removed and remoted into a
pendant.
DEFINITIONS OF WELDING MODES
NON-SYNERGIC WELDING MODES
• ANon-synergic welding mode requires all welding
process variables to be set by the operator.
SYNERGIC WELDING MODES
• A Synergic welding mode offers the simplicity of
single knob control. The machine will select the cor-
rect voltage and amperage based on the wire feed
speed (WFS) set by the operator.
COMMON WELDING ABBREVIATIONS
SAW
• Submerged Arc Welding
B-2
OPERATION
B-2
POWER FEED™ 10A CONTROLLER
PRODUCT DESCRIPTION
General Physical Description
The POWER FEED™ 10A CONTROLLER is a user
interface. The control is used to set all welding para-
meters and control any travel mechanisms. High-
speed digital cables connect the control, wire drive,
and the Power Wave power source together.
The POWER FEED™ 10A CONTROLLER is a self-
contained control box designed to control the entire
weld cell at one location. The control uses bright digi-
tal displays, encoders, and heavy-duty pushbuttons
designed for every-day industrial use.
The Mode Select Panel utilizes alphanumeric displays
for advanced text messaging providing the end user
with an intuitive interface allowing for easy set up and
real-time control of all welding parameters.
A six button Memory Panel has been included which
provides easy storage and recall of stored welding
parameters.
The Switch Panel can be removed from the control
box and turned into a Pendant for remote control near
the arc.
General Functional Description
• The POWER FEED™ 10A CONTROLLER is one of
the most versatile user interfaces ever created.
Easy to use features make it a snap to adjust the arc
for specific preferences.
• The new Mode Select Panel brightly displays essen-
tial welding information. Use the Mode Select Panel
to quickly adjust weld settings, arc starting parame-
ters, arc end parameters and set-up information.
• The Memory Panel allows for up to six weld sched-
ules to be stored and quickly recalled. The Memory
Panel along with the Mode Select Panel allows for
multiple levels of limits and lockouts.
• Digital communications to the power source provide
the most accurate and reliable operation possible.
• The POWER FEED™ 10A CONTROLLER is one of
the first user interfaces with an infrared red (IR) port.
Transferring weld settings from one user interface to
another is accomplished with a common Palm com-
puter.
• When the POWER FEED™ 10A CONTROLLER is
coupled to a Power Wave welding power source, the
result is a welding system with the best arc perfor-
mance on the market.
RECOMMENDED PROCESSES
• The POWER FEED™ 10A CONTROLLER is best
suited for submerged arc welding.
• SAW
PROCESS LIMITATIONS
• MIG processes
The Mode Select Panel does not support "Spot"
welding.
Not all weld modes or processes described in this manual are
available on all Power Wave power sources.
EQUIPMENT LIMITATIONS
• The POWER FEED™ 10A CONTROLLER does not
operate with the Power Wave 450.
• The POWER FEED™ 10A CONTROLLER does not
operate with any analog-based power sources (CV-
xxx machines, DC-xxx machines, etc.)
COMMON BASIC EQUIPMENT PACKAGES
asic Packages:
Power Wave 1000 AC/DC
Power Feed-10SF Wire Drive
asic Optional Kits:
Power Feed-10SM Motor Conversion Kit
(Converts Lincoln NA style wire drives)
Power Feed-10S Wire Drive (connects to
Lincoln TC-3 Travel Carriage)
System Interface (Phase Generator)
B-3
OPERATION
B-3
POWER FEED™ 10A CONTROLLER
LOCATING FRONT PANEL CONTROLS AND INPUT, OUPUT CONNECTIONS
5-PIN INPUT
RECEPTACLE
4-PIN TRAVEL
RECEPTACLE
14-PIN
RECEPTACLE
3-PIN FLUX
RECEPTACLE
CONTROL BOX
WIT OUT DOOR
CONTROL BOX
WIT DOOR
B-4
OPERATION
B-4
CASE FRONT CONTROL DESCRIPTIONS
1. DUAL DIGITAL DISPLAYS – right 7-segment dis-
plays showing welding parameter settings and actu-
al levels while welding.
2. ARC ESTABLIS INDICATOR – Illuminates when
a "true" arc has been established. (Flashes when
open circuit voltage is applied. Not availiable on all
units, upgrade software to include this feature.
3. Status LED - The status LED indicates system sta-
tus. Normal operation is a steady green light.
Note: During normal power-up, the LED may flash
red and/or green as the equipment performs self tests.
LED condition Definition
Steady green System okay. The power
source and wire feeder are
communicating normally.
POWER FEED™ 10A CONTROLLER
CASE FRONT CONTROLS
10
11
12
13
1
2
3
4
5
6
7
8
9
B-5
OPERATION
B-5
linking green Occurs during a reset and indi-
cates the power source is identify-
ing each component in the system.
This is normal for the first 10 sec-
onds after power-up, or if the sys-
tem configuration is changed dur-
ing operation.
Alternating green Non-recoverable system fault. If
the power source or wire feeder
status LED is flashing any combi-
nation of red and green, errors are
present in the system. Read the
error code before the machine is
turned off.
Instructions for reading the error
code are detailed in the Service
Manual. Individual code digits are
flashed in red with a long pause
between digits. If more than one
code is present, the codes will be
separated by a green light.
To clear the error, turn the power
source OFF, and then back ON to
reset. See troubleshooting sec-
tion.
Steady red Non recoverable hardware fault.
Generally indicates a problem with
the cables connecting the wire
feeder to the power source.
linking red Not applicable.
4. DUAL ENCODERS – Accurately adjust weld parameters
as pre-set values, or on-the-fly values while welding.
5. SWITC PANEL – Heavy-duty pushbutton switches that
control inching of the wire, starting and stopping of weld-
ing, travel and flux control. The Switch Panel can be
removed and turned into a remote pendant.
6. START – Activates the weld cycle.
7. STOP – Deactivates the weld cycle.
8. TRAVEL MODE:
ON – Activates travel.
OFF – Disables travel.
AUTO – Activates travel when the START
button is pressed. Disables travel when the
STOP button is pressed.
9. FLUX FILL – Activates the flux hopper.
10. INC UP – Feeds the wire upwards, away from the
work.
11. INC DOWN – Feeds the wire downward, toward the
work. NOTE: The Power Feed 10A includes an option in
the Setup Menu (P.15) to enable the touch sense circuit-
ry in the power source. Having this feature enabled will
stop the wire when it comes in contact with the work,
engaging the flux hopper on contact for automatic flux
fill. The flux hopper will disengage when the INCH
DOWN button is released.
• This “ ot Inch” feature enables the output. Avoid
touching any exposed parts as defined in the
“Installation Section A-2”.
--------------------------------------------------------------------------------
12. MEMORY PANEL – Enables the storage and recall of
up to 6 weld schedules. Enables weld parameter limit
setting.
13. MODE SELECT PANEL – The main user interface for
weld mode selection, welding parameter adjustment,
and multiple levels of user lockouts. right 7-segment
display and alphanumeric displays enable text messag-
ing for user friendly parameter setup.
POWER-UP SEQUENCE
When power is first applied to the machine, a lamp test is
performed. All discrete LED’s are turned on, all 7-segment
displays will show a pattern of "8." and all alphanumeric dis-
plays will show a hatch pattern where every-other pixel is
illuminated. The lamp test will last for two seconds, after
which all displays are turned back off. The 16-character
alphanumeric display will show "Initializing…" while waiting
for the Weld Sequencer to configure. The Mode Select
Panel alphanumeric displays will then display the name of
the weld table loaded in the attached power source while
the user interface prepares the machine for operation. After
all initialization is complete, the Mode Select Panel will dis-
play the weld mode information for the mode number that
was selected when the machine was last powered down.
WIRE FEEDER SETUP
Use the INCH UP / INCH DOWN pushbottons to insert wire
into feed mechanism. Prior to inserting the wire, make sure
the Touch Sense option is disabled (P.15 in the Setup
Menu).
INC WIRE FEED SPEED SETTING
While pressing either the Inch Up Pushbutton or the Inch
Down Pushbutton, the preset wire feed speed will be dis-
played on the Dual Display panel. This value can be
changed while inching wire by turning the WFS Encoder and
will be stored into memory.
POWER FEED™ 10A CONTROLLER
and red WARNING

This manual suits for next models

1

Other Lincoln Electric Controllers manuals

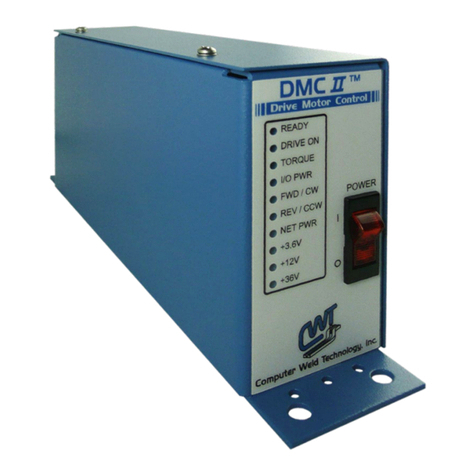
Lincoln Electric Computer Weld Technology DMC II User manual

Lincoln Electric

Lincoln Electric Computer Weld Technology DMC II User manual

Lincoln Electric POWER FEED 10 A User manual

Lincoln Electric

Lincoln Electric POWER FEED 10 A User manual

Lincoln Electric AutoDrive 19 User manual

Lincoln Electric

Lincoln Electric AutoDrive 19 User manual

Lincoln Electric HARRIS 705 Series User manual

Lincoln Electric

Lincoln Electric HARRIS 705 Series User manual

Lincoln Electric IM10023 User manual

Lincoln Electric

Lincoln Electric IM10023 User manual

Lincoln Electric NA-3S User manual

Lincoln Electric

Lincoln Electric NA-3S User manual

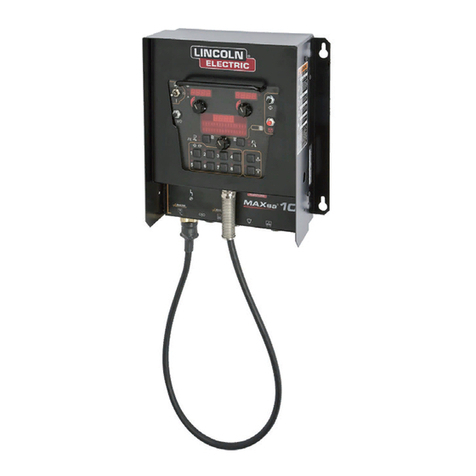
Lincoln Electric MAXsa 10 User manual

Lincoln Electric

Lincoln Electric MAXsa 10 User manual

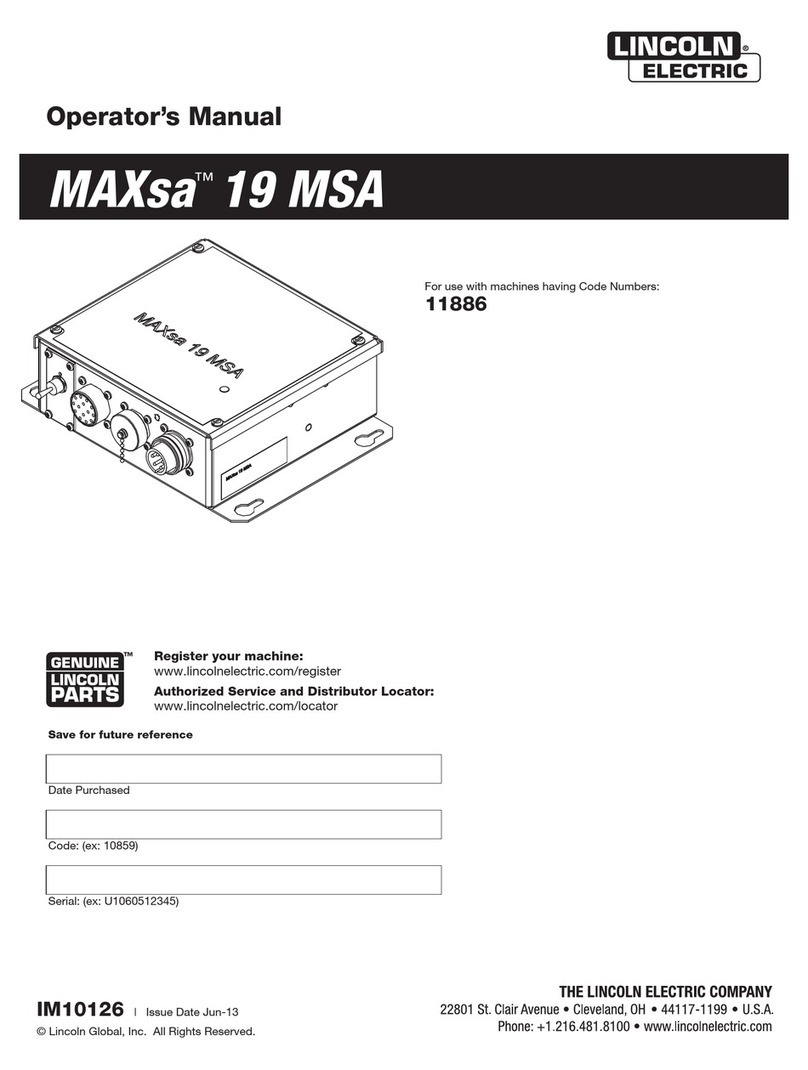
Lincoln Electric MAXsa 19 MSA User manual

Lincoln Electric

Lincoln Electric MAXsa 19 MSA User manual

Lincoln Electric FineLine BK300370 User manual

Lincoln Electric

Lincoln Electric FineLine BK300370 User manual

Lincoln Electric MAX 10 User manual

Lincoln Electric

Lincoln Electric MAX 10 User manual

Lincoln Electric MAXsa 19 User manual

Lincoln Electric

Lincoln Electric MAXsa 19 User manual

Lincoln Electric MAXsa 10 User manual

Lincoln Electric

Lincoln Electric MAXsa 10 User manual

Popular Controllers manuals by other brands

Siemens SIRIUS 3RW5 series manual

Siemens

Siemens SIRIUS 3RW5 series manual

Osram Regiolux CUA 2 Series instructions

Osram

Osram Regiolux CUA 2 Series instructions

Shenzhen FeiCan Technology Co. FC-PB-WIFI03 user manual

Shenzhen FeiCan Technology Co.

Shenzhen FeiCan Technology Co. FC-PB-WIFI03 user manual

Elko LIC-2 manual

Elko

Elko LIC-2 manual

Bodine 0790 Instructions for installation and operation

Bodine

Bodine 0790 Instructions for installation and operation

Vacon NX user manual

Vacon

Vacon NX user manual

Burkert 8025 Series installation manual

Burkert

Burkert 8025 Series installation manual

National Instruments NI 7340 Getting started

National Instruments

National Instruments NI 7340 Getting started

NovaStar MCTRL660 PRO user manual

NovaStar

NovaStar MCTRL660 PRO user manual

Epson S2R72V18 Technical manual

Epson

Epson S2R72V18 Technical manual

Sonelco PCP1275 manual

Sonelco

Sonelco PCP1275 manual

CLA-VAL CRL-60 Installation, operation & maintenance manual

CLA-VAL

CLA-VAL CRL-60 Installation, operation & maintenance manual

APV 5.2 operating manual

APV

APV 5.2 operating manual

Ultra Products Fan Commander ULT31810 Specifications

Ultra Products

Ultra Products Fan Commander ULT31810 Specifications

Grundfos DID BF1 Installation and operating instructions

Grundfos

Grundfos DID BF1 Installation and operating instructions

Danfoss PK37 quick guide

Danfoss

Danfoss PK37 quick guide

SEFRAM SPX50 manual

SEFRAM

SEFRAM SPX50 manual

Watts WFHC HCM 02 RF 230 user guide

Watts

Watts WFHC HCM 02 RF 230 user guide

manuals.online logo
manuals.online logoBrands
  • About & Mission
  • Contact us
  • Privacy Policy
  • Terms and Conditions

Copyright 2025 Manuals.Online. All Rights Reserved.