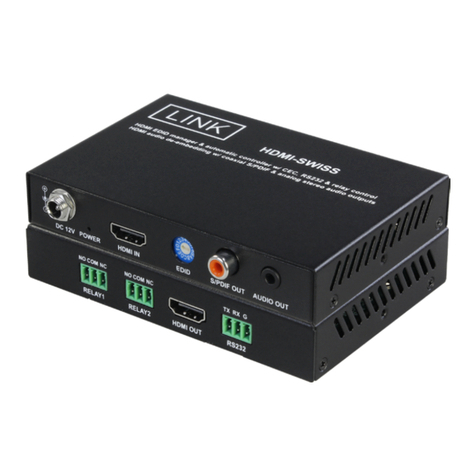
Link LM-TV04Q User manual

2x2 Video Wall Controller
4K@30Hz
Model No.: LM-TV04Q
User Manual

Catalog
Foreword ...........................................................................................1
1. Notes .............................................................................................2
2. Features ........................................................................................3
3. Technical parameter .....................................................................4
4. Packing Contents ......................................................................... 4
5. Interfaces ...................................................................................... 5
6. Connection Diagram .....................................................................6
7. Remote control key description ....................................................7
8. Function description ..................................................................... 8

1
Foreword
1. Welcome to use our products, thank you for your support to our products!
For the safety of you and the equipment, please be sure to read the product
manual carefully before using the equipment.
2. The product is labeled with fragile label, please pay attention to protection,
it will be used as a warranty certificate.
3. This product does not support direct point screen, the connected output is
HDMI interface.
4. If you have any questions during use, please read this manual first; there is
a detailed description of the operation of the device in the text, please operate
according to the specifications introduced in the book; if you still have
questions, please contact us, we will give you a satisfactory answer as soon as
possible.
5. If there is any version change in this manual, please understand without
notice!

2
1. Notes
1) Please use DC 12V-2A power supply, and make sure the whole
engineering system use the same protective ground.
2) Do not press and place objects on the power cable, signal cable,
communication cable and other cables, and should avoid the cable being
stepped on or squeezed to prevent the risk of leakage or short circuit.
3) equipment plugging, unplugging signal lines, the equipment needs to be
powered off operation, the damage caused by plugging and unplugging with
electricity is not covered by the warranty.
4) There may be openings on the outer surface of the equipment for heat
dissipation, do not block these openings to avoid heat accumulation leading to
damage to the equipment or cause fire and other dangers.
5) The working environment of the equipment should be dustproof and
moisture-proof, especially to prevent liquid immersion and splashing into the
interior of the equipment.
6) Use relative humidity: ≤ 80%, storage temperature: -10 ℃ - +80 ℃.
7) Use temperature: 0 ℃-+70 ℃.
8) The whole machine assembly and transportation process pay attention to
anti-static treatment.
9) The whole machine can be assembled under or side mounted, do not be
subjected to heavy pressure.
The connection line between this product and the supporting module board
should not be too long, otherwise it may affect the performance and image
quality.

3
2. Features
1. This product is a special LCD TV, ultra-narrow LCD screen, projector HD
screen splicing processor, a single unit supports 4 HDMI signal output,
connected to LCD TV or other display devices, can be customized according
to user needs of various splicing mode.
2. Support cascade, the maximum 255 signal output.
3. HD processing chip, up to support 4K @ 30HZ HDMI signal input.
4. Support infrared remote control, the user can remote control the splicer for
a key quick control and full function
Simple and convenient, the remote control adopts ultra-sensitive design, easy
to use.
5. Support 1 HDMI input signal to the large screen for splicing display.
6. Support audio independent output, support audio and video synchronous
output.
7. Support all models of splicing screen and 180 degree image rotation.
8. Support border fading technology, in the case of not using the border fading,
the image will appear visually stretched away; after the border fading
processing image without distortion, stretching, visual more natural and
realistic.
9. Intelligent fan cooling, product performance is more stable and reliable

4
3. Technical parameter
4. Packing Contents
1. 1x Video Wall Controller
2. 1x Remote control
3. 1x Power supply 12V 2A
4. 1x Manual
Item
Parameter
Specification
Input Signal
HDMI signal
HDMI1.4 HDMI with audio resolution support
640x480 to 3840x2160@30hz;
Output
Signal
HDMI1
Support 2x2 1x4 4x1 video wall mode, max
resolution upto 1920x1200/60hz;
HDMI2
Support 2x2 1x4 4x1 video wall mode, max
resolution upto 1920x1200/60hz;
HDMI3
Support 2x2 1x4 4x1 video wall mode, max
resolution upto 1920x1200/60hz;
HDMI4
Support 2x2 1x4 4x1 video wall mode, max
resolution upto 1920x1200/60hz;
Audio
Output
Audio
3.5 audio interface, supporting left and right
channel stereo, simultaneous switching of audio
and video signals.
Other
Control
IR remote
Power
DC12V - 2A
Video wall
mode
Simple type 4 HDMI out video wall
Power
consumption
15W
Carton box
size
Size
210mm(L)*160mm(W)*45mm(H)
Weight
1.2kg

5
5. Interfaces

6
6. Connection Diagram

7
7. Remote control key description
OFF
Power on
ON
Power off
DP
No function
HDMI
No function
DVI
No function
Volume reduction
Volume up
No function
SW/SP
Splicing / Decomposition
INPUT
No function
←
Leftward menu options
→
Right menu options
↑
Up Menu Options
↓
Down Menu Options
OK
OK
MENU
Menu options / Back to
previous level
EXIT
Exit Options
MUTE
Mute option
UPGRADE
No function
No 1-9
No function
AUTO
HDMI/DVI ouput switch

8
8. Function description
8.1 Setup Menu
8.1.1 2x2 splicing installation instructions
A. Connect the input signal (HDMI) to the input of the splicing box.
B. Connect the HDMI output of the splicing box to the four large screens.
C. Call out the splicing menu through the remote control or the button "MENU"
on the device panel, select "left" and "right" to position the menu to the splicing
menu (press "Up" and "Down" to select the corresponding options, and "Left"
and "Right" to adjust the parameters). Select "Splicing Mode Setting" as "2X2".
D, select the HDMI Port port and splicing number, and according to the prompt
on the upper left corner of the screen to adjust (for example: 2X2 mode, set the
corresponding HDMI Port 1, the splicing number 1 will be displayed in the

9
upper left corner of the 2 × 2 HDMI Port 1 Splice Index 1)

10
E, set up the remaining three screens in turn
F, set the completion of the splicing mode, splicing position, select splicing:
open, complete the splicing settings.
8.1.2 Border fading.
Border fade function: adjust the horizontal/vertical fade function, effective
when the image is in the splicing state, the default value is 0, adjust the value
to remove the border part of the image, adapt to different border size screen,
so that the overall image display more three-dimensional.
8.1.3 HDMI Port Rotation.
Corresponding to the output HDMI Port channel rotation, support 0/ 180
degrees rotation.
8.1.4 OSD Language.
Set the menu language, support Chinese/ English.
8.1.5 Blue Screen Mode.
Set no signal state blue screen/black screen display. On: Blue screen. Off:
black screen.
8.1.6 Reset
Restore factory reset.
8.2 Options menu:

11
8.2.1 OSD Timer
Set the closing time of OSD menu, default 15 seconds
8.2.2 Key light
Set the key light on, off, dynamic mode
8.2.3 Fan
Set the fan to be always on or always off, it is recommended to be always on to
avoid untimely heat dissipation, resulting in abnormal machine
8.2.4 HDMI output resolution
Set the output resolution of the output port, the default 1920 * 1080.
8.2.5 HDMI standard
Select the HDMI port output standard and set HDMI/DVI output.
8.3 Screen settings

12
Image mode: Default standard. Standard/Dynamic/Mild/User
Color temperature: default Medium. cool/Medium/warm
8.4 Sound Setting
Sound Mode: Default Standard. Standard/Movie/Music/Sports/User
Balance: Default 0. Parameters 0~100
8.5 No signal display
When there is no input signal, prompt NO SIGNAL display box

13
9. Common problems and solutions
- After normal link and start, the screen shows "No signal".
1. Please check whether the signal cable on the device is plugged in properly.
2. Try to restart the device and re-capture the signal.
3. Try to replace the signal cable.
4. Is the signal switched correctly.
- The remote control can not control the video wall controller
1. Check whether there is any abnormality in the remote control and whether there is
a battery.
2. Check whether the distance is too far and whether there is an obstacle in the
middle.
-When you find that the picture does not match after you finish wiring and start
splicing
1.Check whether the row and column position setting in the splicing setting is correct.
2. Check whether the screen serial number and splicing serial number correspond to
each other in the splicing setting.
- The screen is very blurred / splash screen heavy shadow
1. Check whether the input and output signal lines are normal.
2. Check whether the display device is working properly.
10. Warranty instructions
Products from the date of purchase, can enjoy a one-year warranty service. In
addition to postage, delivery and other miscellaneous charges, warranty service is
free of charge, the following cases are not in the warranty service: 1.
1. products due to accidental damage, unauthorized repair, improper storage, etc.,
resulting in mechanical failure, are not included in the scope of the warranty.
2. The company will refuse to provide warranty service if the fragile label attached to
the product is damaged.
Table of contents
Other Link Controllers manuals
Popular Controllers manuals by other brands

MPE
MPE SC2000 instruction manual

Advanced Illumination
Advanced Illumination Quad Controller Series user manual

Mitsubishi Electric
Mitsubishi Electric FX1N-2AD-BD user manual

Hitachi
Hitachi EHV+ Series Applications manual

Fuji Electric
Fuji Electric Micro Control X instruction manual

Sharp
Sharp Blue Treak LH75400 user guide