Link KN1007B User manual

1
User Manual
2 3
COMMERCIAL SAMPLE ROASTER
This appliance is suitable for professional use and is also intended to be used in
household and similar applications (such as staff kitchens in workplaces, farm
houses, and for client use within the hospitality industry), provided that either
(i) the user can manage the flow of smoke so that smoke detector alarms are
not activated, or (ii) the user can safely temporarily disable smoke detector
alarms in the vicinity of the appliance in accordance with the smoke detector
manufacturer’s or building owner’s instructions. This appliance is not suitable for
use in a building within range of smoke detectors that are directly connected to a
sprinkler system or to the fire service.
Model KN1007B - firmware version 7.7 or higher
SAFETY
This is an electrical appliance that contains sophisticated electronics. Like
other cooking appliances, such as a toaster, if something goes wrong it could
start a fire.
Thank you for joining the Link Community. We strive to empower our users to
Roast, Cup, and Brew Amazing coffee with ease.

4 5
This is an electrical appliance that contains sophisticated electronics. Like other cooking
appliances, such as a toaster, if something goes wrong it could start a fire.
1. Read all safety instructions before use.
2. For indoor use only.
3. Use upright on a solid level surface.
4. Do not overload.
5. Use only for roasting green coffee beans. Although it contains many safety
features, other substances – such as popcorn or nuts – could mislead the safety
checks and may result in fire or damage to the appliance.
6. If you operate the appliance on an induction cook top the appliance feet must be
at least 20mm above the cook top surface, e.g. by using a chopping board or thick
mat. This prevents the cook top from detecting the appliance as a pan.
7. Use only with adequate ventilation, preferably close to a kitchen extractor fan.
8. Use at least 100mm away from walls and 150mm away from curtains measured
horizontally.
9. Make sure that nothing blocks the air inlet (under the base) or outlet (at the top)
when the appliance is in use. Slowing the air down will cause it to heat faster. It will
ruin a batch of coffee if the safety systems shut it down midroast, and if the air is
completely blocked it could damage the appliance or start a fire.
10. Keep the area around the appliance free of spilled chaff and other loose material
that could be sucked into the roaster during operation.
11. Remain in the vicinity while the appliance is running.
12. This appliance is not intended to be operated by means of an external timer or
separate remote control system.
13. May trigger a smoke alarm during normal operation. Ensure that you follow the
smoke alarm manufacturer’s instructions if you need to temporarily disable a
smoke alarm during the operation of the coffee roaster. Do not use this appliance
in a commercial building where smoke detectors may trigger sprinklers, a building
evacuation or fire service call out.
14. Wait until the cool down part of the roasting cycle has finished before removing
the chaff collector.
15. Do not immerse the base unit in liquid. Use a damp cloth to wipe it down if
required. Water will damage the electronics. For more information on cleaning, see
the section on ‘Cleaning’.
IMPORTANT SAFETY
16. If liquid enters the roast chamber or any other part of the appliance, unplug
the power supply and allow 24 hours in a warm place for the interior of the
appliance to dry completely before attempting to use the appliance again.
17. If damaged, the supply cord must be replaced by a qualified technician.
18. Do not open the case. There are live wires in the appliance, so there is a risk of
electrical shock.
19. Contact the distributor if you see persistent error messages on the display.
20. The symbol means ‘Caution: hot surfaces.’
21. If a foreign substance (such as rice, flour or liquid) gets into the roast chamber
you should have a service technician strip and clean the appliance before you
attempt to use it again. This is because such substances can fit between the
fins and get onto the element or fan motor inside the appliance.
22. It is advisable to plug the roaster directly into the power supply without using
an extension cord.

6 7
PARTS LIST
Control Display
Control Buttons
On/Off Button
Hopper
Chaff Collector
Body
CONTENTS
Important Safety
Parts List
Control Panel
Accessories
Before First Use
Testing
The Basics
Aging the Coffee
Cleaning
Profiles
Logs
Memory Structure
Density Tube
Profiling App
Advanced Dial-in
Sample Profile Parameters
Timer Mode
Resetting
Updates
Link Software
DTR Activation
Further Information
Warranty
4
7
8
9
10
10
11
13
13
14
15
15
16
17
18
19
20
20
20
21
24
25
26

8 9
CONTROL PANEL
Travel Case
Dosing Cup Density Tube Tray
ACCESSORIES
Development % Roast
Temperature
Roast
Time
Minus Button
Reduce Selections
Plus Button
Increase Selections
Profile Button
Selects Profile
Play Button
Confirm Selection
or
Start Action
Menu Button
Opens Menu
00:22 10.2*
208 >213.8º[2.9]
62.6

10 11
BEFORE FIRST USE
TESTING
1. Remove all packaging including the interior packaging around the chimney
inside the chaff collector.
2. Go to the Nucleus website and activate your warranty.
3. Please read ‘The basics’ section below and familiarize yourself with the
‘Safety’ section above.
4. Download the Nucleus Link pro logging software to your computer desktop.
5. Download the Link Profile selector app.
The correct way to test the roaster is to start it with no beans. It will heat up for 10
to 20 seconds, reaching about 90 degrees.
Then a message will flash up: “Heat too fast. Please check beans.” At this point,
the machine doesn’t stop, but it begins the cool-down cycle and runs for another
10 to 20 seconds until it has cooled down to about 40 degrees. At this point, it
stops.
Running this test is a good way to be confident that everything is working as
expected. This test will also generate a log file so it can be used to check you have
set things up correctly for collecting roast logs.
Note: that at each 150 run motor hours unit is taken to your countries service
partner for a preventive Maintenance.
At 250 run motor hours, preventive maintenance has yet to be undertaken your
unit will notify you that this servicing is a must.
Failure to adhere to servicing requirements may void remaining the warranty on
your unit.
THE BASICS
STEP 1
Place the density tube on a scale and tare
the scale. Use a level dose of coffee into the
density tube and make note of the weight of
the beans.
STEP 2
Enter the weight of your coffee into the
Nucleus Density App and recieve a profile
and select the Processing and Varietial of the
Green coffee you are using.
STEP 3
Remove the chaff collector and load 100g of
the same green coffee into the roaster.

12 13
STEP 4
Put the chaff collector back on, select the profile that
the App has chosen for you and click the start ( )
button to begin roasting.
Ensure chaff collector lid is in place as shown in the
diagram.
STEP 5
When the roaster has stopped, take off the
chaff collector. Pick up the whole roaster
with both hands. Tip the roasted beans into a
bowl, jar or bag.
THE BASICS AGING THE COFFEE
CLEANING
Coffee changes flavour very rapidly during the first week after roasting, and the most rapid
changes take place in the first few days. Waiting before using the coffee is known as ‘Aging’ the
coffee.
The purpose of resting is to let the coffee degas allow clarity of qualities to be improved.
The Link core Profiles are designed to allow quick assessment if you’re in a rush. You can cup or
brew immediately post-roast with the certainty of a fair assessment.
Note that the Core profiles are designed to show their best 24-72hours post roast for cupping
and after 2 to 5 days resting if you intend to showcase them as a filter brew.
Brush off any loose chaff. Wipe the outside of the roaster with a damp non-abrasive cloth.
There will be a build-up of coffee oils in the roast chamber over time. We recommend that you
do not clean the roast chamber, but a dry cloth can be used if desired.
For regular cleaning of the inside of the inner glass of the chaff collector, use a paper towel.
For a deep clean, disassemble the chaff collector and soak the glass in a solution of a suitable
cleaner such as PulyTM Caff detergent, CafettoTM Espresso Clean, Simple GreenTM or other
non-caustic, non-abrasive cleaner. Reassemble the chaff collector before use.
IMPORTANT: You need to be particularly careful not to touch the sensitive tip of the
temperature probe that sticks into the roast chamber part way down. Do not clean
the tip of the probe.

14 15
PROFILES
A roast profile is a curve that tells the roaster the exact temperature required at each
time during the roast.
The profile does not specify when to end the roast. The end of the roast is controlled
by the roast level. Your roaster comes pre-loaded with a set of core profiles. Select a
different profile with the Profile ( ) button. To achieve the best results it is necessary
to match the profile and level to the beans.
Roast time & temperature logs are recorded automatically whenever you roast.
For help selecting a profile see The Nucleus Link profile App.
To load a new roast profile:
Plug the supplied Tether cable into the back of the roast unit and your computer
To select profiles from the unit click the Profile ( ) button second from the right.
Keep clicking the Profile ( ) button until the profile you want shows up on the display.
Press the Start ( ) button to load onto the roaster.
To load from your desktop, click on the connection icon in the link pro software that
is located next to the green tick. Then click the Profiles tab and select the right profile
that was suggested by the profile selection app. When the profile opens click the hand
icon in the bottom right corner to send to the roaster.
To start a roast click Start ( ).
Track the live roast progress with the Link Pro logging software to see the roast curve,
log colour change or development %. Alternatively, you can monitor the majority of
these basic functions directly on the unit display screen if you don’t wish to connect the
Tether to a desktopv.
LOGS
MEMORY STRUCTURE
A roast log will be saved to the internal memory. Roast logs are automatically saved in the
folder called Logs Open the log tab by clicking on the connection icon to see each roast
log file through Link Pro software. See the profile data breakdown or write notes in the
tasting notes section under the About this file tab. This file can be exported to pdf format
to be shared if needed.
The roaster does not date the log files; instead, it gives them sequential numbers. This
makes it easy to keep the files in order, but if you need to record the actual roast date you
must include it in the tasting notes.
You can verify that logs are beinggenerated by running a test roast (see the ‘Testing’
section above).
The internal memory will notify you when it is at 80% capacity, about 300 logs. At this point,
it will ask you for permission to begin to automatically override the oldest logs. Alternatively,
you can choose to manually store the logs in a separate place on your computer if you wish to
archive them longer.
To archive or delete click on the connection icon in the link pro software that is located next to
the green tick. Then click the log tab. At the top left of that screen, you will see an open folder
link in blue. Open this link and remove to bin or achieve the profiles you wish to delete/store.
Once complete, make sure to click the re-sync button in the middle of the top right-hand side.
wait for the connection tick to return green before switching off the unit or removing the tether
connection.
Failure to complete these steps when removing files may lead to the unit needing to be reset if
the unit is not synced correctly to the server.

16 17
DENSITY TUBE
The Density tube provided provides a key to navigate and choose the right sample
profile for each coffee with ease.
See below the steps for recommended density assessment:
1. Weigh out 100g sample into a dosing cup.
2. Remove the lid and zero off the empty density tube on a scale.
3. Place the density tube into a sample coffee tray or shallow dish.
4. Gently add your weighed-out green sample and overfill the density tube until
excess starts to fall into the tray below.
5. Invert the lid of the density tube so that the logo side is face down against the
coffee.
6. Gently press down to compact slightly before moving the lid back and forwards.
Pushing off excess coffee into the below tray.
7. Continue the movement until a level surface is achieved enabling the lid to sit
flush with the top of the tube.
8. Remove the lid and weigh the green coffee in the density tube.
9. This weight is the density number, ready to type into the profiling app.
10. For higher precision, we recommend repeating this measurement two-three times
and calculating the average number for the app.
PROFILING APP
The link app is your compass to guide you through the accurate selection of a recommended
start profile for any coffee.
Once you have completed the density assessment open your link app.
Select the profile section, then the new sample entry tab.
Fill out the 3 sections for your profile recommendation.
Density Reading:
Enter the number from your density assessment. Note the density information is drawn from a
0.5g-1g range so don’t be alarmed if you are 0.3-0.5g different in each reading.
Process:
Choose from the 7 options which are categorized into broad groups. Please select a group that
best represents the style of processing of that coffee sample.
Variety:
This last input is for the future development of the app. Please type in the sample coffee variety.
This input will allow Nucleus to further refine the profiling algorithm for the future. Currently, this
can be left blank if you wish.
Click Done:
You will now be shown the recommended profile for your sample.
Select this profile on your Link unit via the menu tab.
*Or if using a tethered connection, you can send the profile. Select New Profile in the Link Pro
software profile inbox. Click send to roaster button in the bottom right corner.
Add 100gm of your green coffee sample into the roaster. Secure chaff collector and press play.

18 19
ADVANCED DIAL-IN
This app feature is to be utilized after you run a new sample entry stage and perform a
roast based on the initial recommendation.
During this first log, It is best to take note of the time of Audible first crack (when it has
two or more consecutive “pops”).
Using the “new sample entry” function the profile suggested will have your sample
usually cracking between a range 5:50min and 6:30min
Please note some coffee samples or specific coffee species will not have an easy-
to-define first crack (these samples are best to leave the roaster running its auto-
programmed functions of the suggested profile in the first stage). As the advanced dial-in
mode needs a defined cracking point to further refine an exacting profile for your sample.
For suitable samples, once you have completed a roast and have the exact time
registered for crack, please go back into the profile selector and in the next screen select
Advanced dial in.
In the First line Enter the Minute on the left and the seconds on the right. Please enter
minutes as a single-digit number and seconds as a two-digit number (i.e. for 6:01min you
would enter “6” on the left in the minute box and “01” in the right second’s box).
Next please enter the Profile Number that the sample was roasted on in the start profile
box (i.e. if your new sample entry suggested 207, you would enter 207 into the start profile
box).
Once the 3 data boxes are populated, please select done.
The information will be run through the algorithm and a new solution for the suggested
profile with be shown on the next page.
Select this profile on your unit via the menu tab or send it to the roaster when the tether
connection is made by first selecting the new profile in the Link pro software profile inbox
and then clicking the send to roaster button in the bottom right corner.
Weigh out another 100g of the same green coffee from the first roast into your dosing
cup.
Place in the roaster and then put on the chaff collector and press play.
Your new suggestion should now have a more focused crack range between 5:55min
and 6:15min which will allow for the optimized development of Maillard, sugar browning
stages for a fully developed expression
SAMPLE PROFILE PARAMETERS
The link core profiles have a standardized roast time, temperature increase, and development
% for each core. to unlock an honest assessment of a coffee we strive to get as close to the
target with through the link profile selector app.
The standard range for a coffee sample is between 7-12% development 4-6c temperate
increase after 1st crack. The standard roast is between 6:30-7:00min. Recommended
development of 9-10% if manually terminating.
Allowing a core profile to run automatically you will generally sit within these parameters.
Expect coffee to have first “pops” between 5:50min and 6:10min.
And rolling the first crack to be around 6:00 – 6:20min.
For this unit call the point of crack at the rolling crack where there are 2 or more consecutive
pops and a continuation of the first crack from there. At this point click the FC button on
the logging software or by hitting the far-right menu button followed by the Play button to
activate the first crack development timer.
The rolling crack between in a window of 5:50-6:10. A user is recommended to manually
terminate a roast if the development counter is above 10.5% development and the auto
termination has not come into effect. This can be done by + and then – on the unit or simply
clicking end on the software.
If a rolling crack occurs after 6:30min you may want to consider Re-roasting the sample on
a higher-powered profile. Please consider that for every 5 seconds late, choose a profile 0.5
higher in the profile number.
• Eg a coffee rolling crack at 6min25 using 209.5 profile. Selecting profile 210.5 will speed
this up to approximately 6min15.
Alternatively, if a profile has an early rolling crack before 6:00min you may consider applying
the same principle in reverse. For every 5 seconds before 6:00min look to remove 0.5 in the
profile number.
• Eg a coffee rolling cracking 5:50 using a 209.5 profile I would suggest that 208.5 be used
for a correctly developed expression.

20 21
TIMER MODE
RESETTING
UPDATES
The roaster has a timer mode so that you can use it as a brew timer. Put the roaster
into timer mode by pressing both Profile and Menu ( + ) buttons together.
Press Profile & Menu ( + ) buttons together again to go back to automatic
roasting mode.
In timer mode, the Start ( ) button starts and stops the timer, but it does not
control the roaster.
Occasionally the memory where the profile details are stored can become corrupt, for
example, a power failure during a roast could cause this.
This can cause unusual characters to appear on the display and the roaster may
become unresponsive. To reset the roaster and restore factory defaults, hold down the
Start ( ) button while you turn the roaster on.
IN THE UNLIKELY EVENT OF AN EMERGENCY:
You can stop the roast early by pressing Start ( )then the Minus ( ) button
while it is roasting. Stopping the roast early puts the machine straight into cool
down. (Turning the machine off will also stop the roast – it will automatically
enter cool down if you turn it back on again straight away.)
Any New updates will be notified to you through a message popup when opening the
Nucleus Link software. Please follow the prompts to download and install new firmware
our profiling updates.
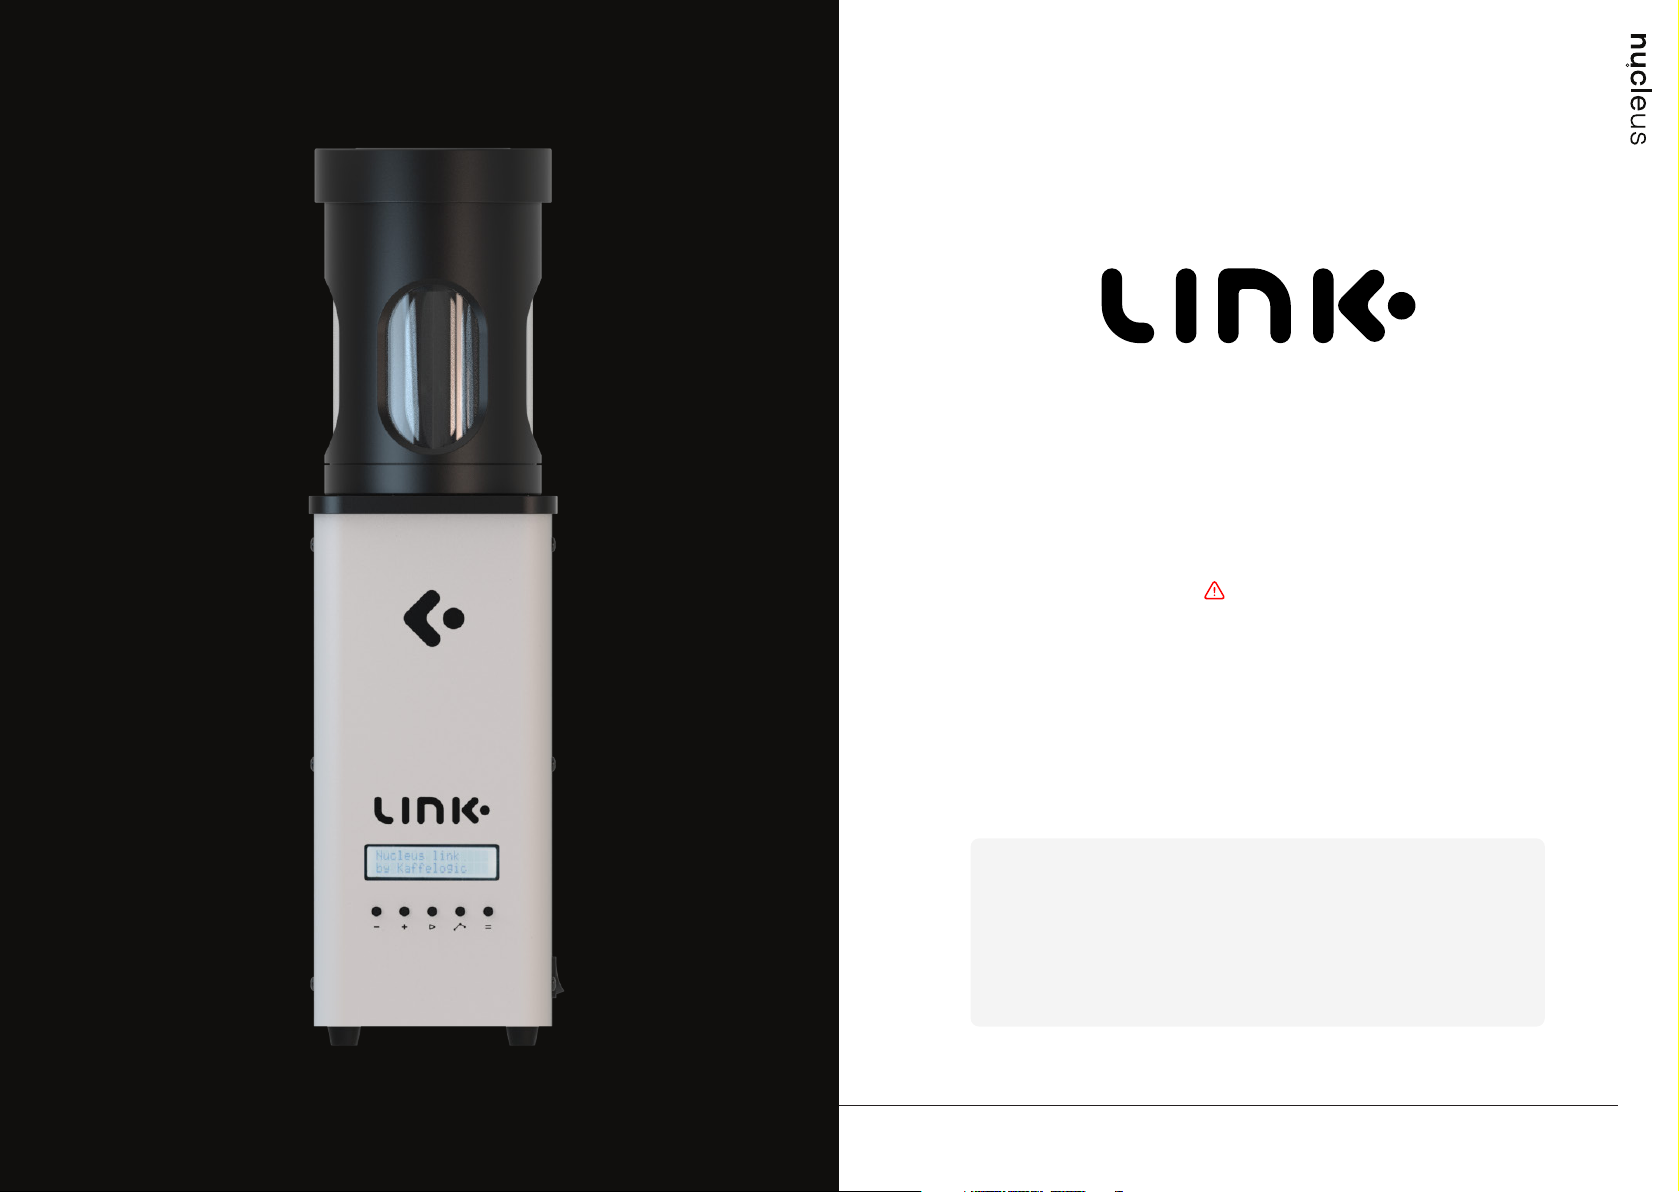
LINK SOFTWARE
The Link Pro software is the monitoring system used to log and create profiles for the Nucleus
link sample roaster. Please note that the 41 core profiles are locked to this unit. Npro profiles are
not compatible with any other Kaffelogic-manufactured product.
BASICS
You have a stable connection
between the unit and the computer
when the tick icon is green.
When the connection icon shows
as severed and a triangle with an
exclamation mark is shown you will
need to re-establish the connection.
You can reestablish connection by
switching the unit’s power off and on
again or by going to the menu bar
clicking on tools > connection tools >
and selecting re sync.
Once familiar to the software To give
yourself greater access to the link
software capabilities click on the
Options tab and select a different
difficulty setting to unlock more
features for manual profiling it is
recommended to follow all software
prompts and suggestions made and
not to tinker with settings the system
suggests you leave as is.
Note that you should not adjust
to core profiles back end setting
otherwise you rick corrupting the
functionality of the link profile
selection app.
TIMER MODE
Live Roasting Logging Functions
You will see several logging
functions on the live roast feature
here is a glossary of what they
mean and how to utilise them.
CC = Colour change
FC = First crack
END = Profile termination
FE = First crack end
SC = Second crack
SE = Second crack end

22 23
LOGGING STAGES
CC you click CC after the drying
phase is complete and when you
see the coffee bean colour starting
to change to a light straw through
the visual sight. This will log time
spent in the drying phase and
mallard reaction phase shown as
a proportion of the overall roast
% and total temperature increase
during each of those phases.
FC should be clicked at the first
clearly audible consecutive pops
that continue to crack from that
point. If you believe you call early
then re-click at the correct time to
override the original selection. Once
the clicked increases average, the
development % and time in the
development counter start.
END should be clicked when you
want to manually terminate a roast
earlier than the preset time for
that profile. Use development %
recommendation for suggestions
found in the core profile
explanation.
FE Is if you are manually profiling
an espresso log and the first crack
has ended.
SC is for dark roasts where you
are taking profiles into that very
dark range. This function will only
be utilized if someone has made
a custom profile with manually
altered level range in engineer
mode.
SE for full carbonized roasts
where the first crack is completed.
Intentionally Roasting to this level is
not recommended.
CLASSIC FUNCTION
For profile editing its recommended
that the profiles are balanced out
using the smooth point function
between adjustment nodes.
When editing a profile Predicting
the time of the first crack will
give a suggested development
percentage.
Adjusting the profile level adjusts
the temperature increase of the
profile from the point of the first
crack.
Clicking on an adjustment node
and moving the temperature click
function up or down is the easiest
way to make micro-adjustments to
a custom profile.
LINK SOFTWARE
Unlocking the full functionality of the link software.
1. Connect the tether cable to the roaster and turn on unit.
2. Open the link desktop software.
3. When open navigate to the top menu bar.
4. In the menu tab and select the option dropdown.
5. Navigate to difficulty and select your experience level with Link studio.
6. Basic is the default that allows a limited function to only the key operational
features.
7. Advanced and export modes allow the user to have more freedom to
the back-end parameters that control the heating phases, precision and
monitoring attributes of the roaster.
8. Engineer mode unlocks all attributes of the roaster. Please note that this
mode should only be utilised by someone with prior experience in kaffelogic
or link studio functionality.
9. In all modes, we advise you don’t deviate from the advice of recommended
settings the program will suggest for you.
10. If you don’t know what a setting do we strongly recommend that you leave
it as is.
11. Failure to follow advice may lead to damaging the unit and voiding a users
warranty.

24 25
DTR ACTIVATION
The link and link app profile suggestions were designed to function in DTR mode.
If it is not active, please follow the steps and re-activate it.
1. On the unit, press the far-right ( ) button until you get to a screen called
preference and push play ( ).
2. The options you should now see is - for levels and + for DTR.
3. Please select the ( ) button to activate DTR.
4. Confirmation should appear on the screen of DTR Activation.
5. The main screen now reflects the development percentage of a profile.
6. This is the target development percentage when the first crack is logged.
7. When you click the first crack logged it will terminate when it hits that point.
8. If you don’t log a first crack it will continue roasting to the default
parameters. Failure to follow advice may lead to damaging the unit and
voiding a users warranty.
This appliance is not intended for use by persons (including children) with reduced physical,
sensory or mental capabilities, or lack of experience and knowledge, unless they have been
given supervision or instruction concerning the use of the appliance by a person responsible for
their safety. Children should be supervised to ensure that they do not play with the appliance.
(Instruction for Australia and New Zealand only)
This appliance can be used by children aged from 8 years and above and persons with
reduced physical, sensory or mental capabilities or lack of experience and knowledge if they
have been given supervision or instruction concerning use of the appliance in a safe way and
understand the hazards involved. Children shall not play with the appliance. Cleaning and user
maintenance shall not be done by children without supervision.
(Instruction for EU countries only)
This appliance can be used by children aged from 8 years and above and persons with
reduced physical, sensory or mental capabilities or lack of experience and knowledge (person
in need of assistance) if they have been given supervision or instruction concerning use of the
appliance in a safe way and understand the hazards involved. Children shall not play with the
appliance. Cleaning and user maintenance shall not be made by children unless they are older
than 8 and supervise. Keep the appliance and its cord out of reach of children less than 8 years.
(Instruction for USA, Canada, and Japan only)
Visit the support pages at
nucleuscoffeetools.com/support
FURTHER INFORMATION

26 27
WARRANTY

28
nucleuscoffeetools.com
Table of contents
Popular Kitchen Appliance manuals by other brands

Fontana Forni
Fontana Forni MAESTRO 60 user manual

Hendi
Hendi KITCHEN LINE 551813 user manual

CTC Union
CTC Union CLATRONIC KK 3786 instruction manual

U-Line
U-Line Wine Captain Echelon Series installation guide

Lincat
Lincat PO89X Installation, operating and servicing instructions

Russell Hobbs
Russell Hobbs salton RHWU88 Instruction & guarantee


