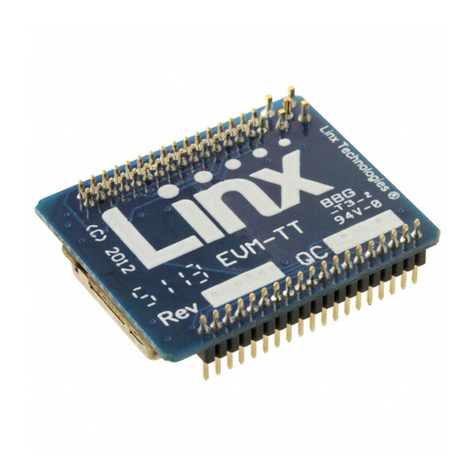
Linx HumRC User manual

HumRCTM Series
Basic Evaluation Kit
User's Guide

Table of Contents
1 Introduction
2 Ordering Information
3 HumRCTM Series Transceiver Carrier Board
3 HumRCTM Series Transceiver Carrier Board Objects
3 HumRCTM Series Transceiver Carrier Board Pin
Assignments
4 Remote Control Demo Board
4 Remote Control Demo Board Objects
5 Initial Setup
6 Using the Remote Control Demo Board
8 Carrier Board Schematic
9 Remote Control Demo Board Schematic
Warning: Some customers may want Linx radio frequency (“RF”)
products to control machinery or devices remotely, including machinery
or devices that can cause death, bodily injuries, and/or property
damage if improperly or inadvertently triggered, particularly in industrial
settings or other applications implicating life-safety concerns (“Life and
Property Safety Situations”).
NO OEM LINX REMOTE CONTROL OR FUNCTION MODULE
SHOULD EVER BE USED IN LIFE AND PROPERTY SAFETY
SITUATIONS. No OEM Linx Remote Control or Function Module
should be modified for Life and Property Safety Situations. Such
modification cannot provide sufficient safety and will void the product’s
regulatory certification and warranty.
Customers may use our (non-Function) Modules, Antenna and
Connectors as part of other systems in Life Safety Situations, but
only with necessary and industry appropriate redundancies and
in compliance with applicable safety standards, including without
limitation, ANSI and NFPA standards. It is solely the responsibility
of any Linx customer who uses one or more of these products to
incorporate appropriate redundancies and safety standards for the Life
and Property Safety Situation application.
Do not use this or any Linx product to trigger an action directly
from the data line or RSSI lines without a protocol or encoder/
decoder to validate the data. Without validation, any signal from
another unrelated transmitter in the environment received by the module
could inadvertently trigger the action.
All RF products are susceptible to RF interference that can prevent
communication. RF products without frequency agility or hopping
implemented are more subject to interference. This module does have
a frequency hopping protocol built in, but the developer should still be
aware of the risk of interference.
Do not use any Linx product over the limits in this data guide.
Excessive voltage or extended operation at the maximum voltage could
cause product failure. Exceeding the reflow temperature profile could
cause product failure which is not immediately evident.
Do not make any physical or electrical modifications to any Linx
product. This will void the warranty and regulatory and UL certifications
and may cause product failure which is not immediately evident.
!

– –
1
Introduction
The Linx HumRCTM Series Remote Control Transceiver modules offer
a simple, efficient and cost-effective method of adding remote control
capabilities to any product. The Basic Evaluation Kit provides a designer
with all the tools necessary to correctly and legally incorporate the module
into an end product. The boards serve several important functions:
• Rapid Module Evaluation: The boards allow the performance of the
Linx HumRC™ Series modules to be evaluated quickly in a user’s
environment. The development boards can be used to evaluate the
range performance of the modules.
• Prototype Development: The demo boards serve as a reference design
for the development of prototypes. Spare modules are also included for
use on the first prototype boards.
• Design Benchmark: The boards provide a known benchmark against
which the performance of a custom design may be judged.
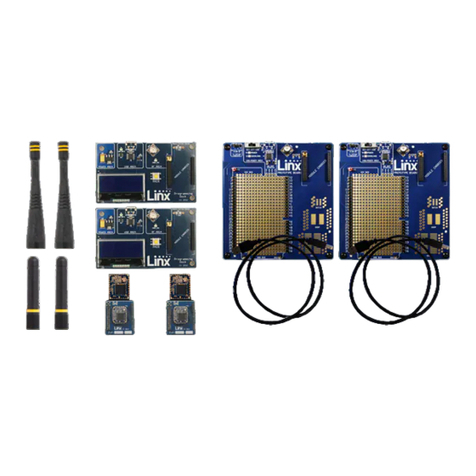
The Basic Evaluation Kit includes 2 Carrier Boards, 2 RC Demo Boards, 4
HumRC™ Series transceivers*, antennas, batteries and full documentation.
* One part is soldered to each Carrier Board
HumRCTM Basic Evaluation Kit
User's Guide
Figure 1: HumRCTM Series Basic Evaluation Kit
Revised 8/12/2015

– – – –
2 3
HumRCTM Series Transceiver Carrier Board Objects
1. HumRCTM Series Transceiver
2. MMCX RF Connector
3. Dual Row Header
4. Single Row Header
HumRCTM Series Transceiver Carrier BoardOrdering Information
Figure 2: Ordering Information
Figure 3: HumRCTM Series Transceiver Carrier Board
1
2
34
HumRCTM Series Transceiver Carrier Board Pin Assignments
Figure 4: HumRCTM Series Transceiver Carrier Board Pin Assignments (Top View)
7 MODE_IND
9 CMD_DATA_IN
11 LATCH_EN
13 ACK_EN
15 CMD_DATA_OUT
17 VCC
19 C0
21 C1
23 NC
25 NC
27 NC
29 NC
31 NC
33 NC
35 NC
37 NC
GND 6
RESET 8
PDN 10
NC 12
PAIR 14
LNA_EN 16
LVL_ADJ 18
PA_EN 20
NC 22
NC 24
NC 26
NC 28
NC 30
NC 32
NC 34
NC 36
41 S3
42 S4
43 S5
44 S6
45 S7
46 ACK_OUT
47 NC
48 NC
49 NC
50 NC
51 NC
52 NC
53 NC
54 NC
55 NC
56 NC
40 S2
39 S1
38 S0
ANTENNA 1 2-5 GND (RF Connector)
Ordering Information
Part Number Description
EVAL-***-RC HumRCTM Series Basic Evaluation Kit
MDEV-***-RC HumRCTM Series Master Development System
HUM-***-RC HumRCTM Series Remote Control Transceiver
HUM-900-RC-UFL HumRCTM Series Remote Control Transceiver, Certified, UFL
Connector
HUM-900-RC-CAS HumRCTM Series Remote Control Transceiver, Certified, Castella-
tion Connection
EVM-***-RC HumRCTM Series Carrier Board
EVM-900-RC-UFL HumRCTM Series Carrier Board with Certified module, UFL Con-
nector
EVM-900-RC-CAS HumRCTM Series Carrier Board with Certified module, Castellation
Connection
MDEV-DEMO-RC-A Development System Remote Control Demo Board, Type A
MDEV-DEMO-RC-B Development System Remote Control Demo Board, Type B
MDEV-PGDOCK Development System Programming Dock
MDEV-PROTO Development System Prototype Board
CON-SOC-EVM EVM Module Socket Kit
*** = Frequency; 900MHz, 2.4GHz

– – – –
4 5
1
Remote Control Demo Board
Board BBoard A
Remote Control Demo Board Objects
1. Carrier Board Socket
2. RP-SMA Antenna Connector
3. Power Switch
4. MODE_IND LED
5. CONFIRM LED
6. PAIR button
7. Status Line Output LEDs
8. Status Line Input Buttons
9. 4 AAA Batteries (Not shown, on the back of the boards)
Figure 5: Remote Control Demo Board
1
2
3
4
5
6
7
8
1
2
3
4
5
6
7
8
Initial Setup
There are two Carrier Boards that are included with the Evaluation Kit. The
Carrier Boards have a HumRCTM Series transceiver on a daughter board
with headers. These boards snap into sockets on the Remote Control
Demo Boards.
There are two Remote Control Demo Boards that are populated differently.
Board A has the buttons on the right column and board B has them on the
left column. These accept the Carrier Boards and are used to demonstrate
the remote control functionality of the HumRCTM Series. They can also be
used for range testing. These boards use hardware configuration, so if any
changes have been made to the modules using software then they may not
operate correctly. A restore to default configuration can be used to reset
the modules.
Warning: Installing or removing a Carrier Board while power is
applied could cause permanent damage to the module. Either turn
off power to the board or unplug the USB cable before installing or
removing a Carrier Board
!

– – – –
6 7
Range Testing
Several complex mathematical models exist for determining path loss in
many environments. These models vary as the transmitter and receiver are
moved from indoor operation to outdoor operation. Although these models
can provide an estimation of range performance in the field, the most
reliable method is to simply perform range tests using the modules in the
intended operational environment.
Range testing can be performed with the Remote Control Demo Boards.
To prepare the board for range testing, simply turn it on by switching the
power switch to the ON position. Pressing a status line button on one
board (the IU) activates an LED on the other board (the RU). The RU then
sends an acknowledgement back to the IU, which turns on the CONFIRM
LED. This indicates good bi-directional RF communications and lets the
user set one board down and walk with the other board.
As the maximum range of the link in the test area is approached, it is not
uncommon for the signal to cut in and out as the radio moves. This is
normal and can result from other interfering sources or fluctuating signal
levels due to multipath effects. This results in cancellation of the transmitted
signal as direct and reflected signals arrive at the receiver at differing times
and phases. The areas in which this occurs are commonly called “nulls”
and simply walking a little farther usually restores the signal. If the signal is
not restored, then the maximum range of the link has been reached.
To achieve maximum range, keep objects such as your hand away from
the antenna and ensure that the antenna on the transmitter has a clear and
unobstructed line-of-sight path to the receiver board. Range performance
is determined by many interdependent factors. If the range you are able to
achieve is significantly less than specified by Linx for the products you are
testing, then there is likely a problem with either the board or the ambient
RF environment in which the board is operating. First, check the battery,
switch positions, and antenna connection. Next, measure the receiver’s
RSSI voltage with the transmitter turned off to determine if ambient
interference is present. High RSSI readings while the transmitter off indicate
there is interference. If this fails to resolve the issue, please contact Linx
technical support.
Using the Remote Control Demo Board
Snap a Carrier Board onto the socket on each Remote Control Demo
Board as shown in Figure 6.
Insert 4 AAA batteries into the holders on the back of each board, connect
antennas and turn on power.
The modules come paired out of the box, but to Pair additional modules,
press the PAIR button on both boards. The MODE_IND LEDs flash to
indicate that the modules are searching for each other and exchanging
addresses. The MODE_IND has a quick flash while searching (100ms on,
900ms off) and a longer flash once Pairing is complete (400ms on, 100ms
off). This process only takes a few seconds. The pairing process takes the
status line input / output directions into account. If these are changed then
the modules should be paired again.
Once complete, pressing a button on one board (the Initiating Unit or IU)
causes an LED to light up on the other board (the Responding Unit or RU).
The RU sends an acknowledgement message to the IU. If the message is
valid, the IU turns on the CONFIRM LED.
Figure 6: Remote Control Demo Board with a Carrier Board
Note: The Remote Control Demo boards are designed for hardware
configuration. If the modules are changed through software configuration
then the boards may not operate as expected. A restore to default
configuration can be used to reset the modules.
Note: To restore the default configuration, push the PAIR button four
times and hold it down on the fifth press. The MODE_IND LED flashes
when it has reset.

– – – –
8 9
S7
38
39
40
41
42
43
44
45
46
47
48
49
50
51
52
53
54
55
56
ACK_OUT
S0
S1
S2
S3
S4
S5
S6
S7PAIR
MODE_IND
LATCH_EN
ACK_EN
RESET
PDN
LADJ
CMD_DATA_IN
CMD_DATA_OUT
LNA_EN
PAIR
PA_EN
RESETPDN
LADJ
LNA_EN
MODE_IND
LATCH_EN
ACK_EN
ACK_OUT
S0
S1
S2
S3
S4
S5
S6
S7 C0
C1
C0
C1
1
23
45
67
89
10 11
12 13
14 15
16 17
18 19
20 21
22 23
24 25
26 27
28 29
30 31
32 33
34 35
36 37
J1
Carrier Interconnect
CMD_DATA_OUT
CMD_DATA_IN
X1
X2
GND
GND
GND
GND
GND
GND
GND
GND
GND
GND
GND
GND
GND
GND
VCC
VCC
PA_EN
GND 17
VCC 21
GND 18
RESET 22
LNA_EN 23
PA_EN 24
CMD_DATA_OUT 26
CMD_DATA_IN 27
ACK_EN 28
PAIR 29
S6
2
GND 25
1
MODE_IND
30
ACK_OUT
31
LVL_ADJ
32
S5
3
S4
4
ANT 19
GND 20
S3
5
S2
6
S1
7
S0
8
C0
10
C1
11
POWER_DOWN
21
LATCH_EN
13
GND
9
GND 16
GND 15
GND 14
TR1 X3
GND
5.3nH
0 ohm
1.2pF
X2 X3X1
2.4GHz
900MHz
DNP
DNP
DNP
Figure 7: HumRCTM Series Transceiver Carrier Board Module Schematic
Carrier Board Schematic Remote Control Demo Board Schematic
Note: The Remote Control Demo boards are designed to accept carrier
boards for multiple module families. Some circuitry is not applicable for
some modules.
1
2
3
P2
Header 3
D4
D5
D6
1
2
3
4
P1
Header 4
D0
D1
D2
D3
GND
R2
330
VCC
D1
POWER GREEN
MODE_IND
GND
R3
330
D2
MODE_IND BLUE
CONFIRM
GND
R27
330
D20
CONFIRM RED
RF 1
GND
2-5
ANT1
CONREVSMA002
PAIR
MODE_IND
CONFIRM
LATCH_EN
D0
D1
D2
D3
D4
D5
ACK_EN
PDN
CMD_DATA_IN
CMD_DATA_OUT
D6
D7
SER_I/O
C0
C1
SEND
CRT_LRN
GND
GND
VCC
GNDGND
GND
GND
1
23
45
67
89
10 11
12 13
14 15
16 17
18 19
20 21
22 23
24 25
26 27
28 29
30 31
32 33
34 35
36 37
38
39
40
41
42
43
44
45
46
47
48
49
50
51
52
53
54
55
56
J1
Carrier Interconnect Female
LVL_ADJ IDENTITY
GND
X2
DNP
X1
1.8nH
ED_SEL
SEL_TIMER
D8
D9
D_CFG
A_CFG_0
A_CFG_1
BAUD_0
GND
SW1
SPDT
GND
VCC
B1
GND
Vin
1
GND
2
Vout3
U1
C1
0.47uF
GND
+C2
100uF
VDD
1
RA5
2
RA4
3
MCLR
4
RC5
5
RC4
6
RC3
7RC28
RC19
RC010
RA211
ICSPCLK 12
ICSPDAT 13
GND14
U2
PIC16F1824
VCC GND
PGD
PGC
MCLR
CMD_DATA_IN
CMD_DATA_OUT
IDENTITYCRT_LRN
MODE_IND
GND
SER_I/O
R14
330
GND
S9
RESTORE
D7
RESTORE COMPLETE GREEN
PIC A/B
R36
0
R33
0
VCC
GND
SW2
LVL_ADJ
ACK_EN
R32 0
VCC
R34 10K
GND
BAUD_0
IDENTITY
SEL_TIMER
SEND
LATCH_EN
PDN
R8 0
R38 10K
R37 10K
R35 10K
R9 10K
D8
D9
R41 10K
R42 10K
D_CFG
A_CGF_0
A_CFG_1
R6 10K
R5 10K
R4 10K
GND
VCC
S8
PAIR
R1
10K
PAIR CRT_LRN
REMOTE CONTROL AREA
POWER SUPPLY AREA RF MODULE AREA
MISC CIRCUITS
MICROCONTROLLER AREA
1
2
3
P3
Header 3
D7
VCC
GND1
2
3
4
J2
MCLR
PGD
5
6
PGC
VCC
GND
VCCS0
D0
SEND
D5
R12
330
D3
R10
10K
GND
GND
VCCS1
D1
SEND
R17
330
R15
10K
GND
GND
D10
D8
VCCS2
D2
SEND
R21
330
R19
10K
GND
GND
D14
D12
VCCS3
D3
SEND
R25
330
R23
10K
GND
GND
D18
D16
VCCS4
D4
SEND
R13
330
R11
10K
GND
GND
D6
D4
VCCS5
D5
SEND
R18
330
R16
10K
GND
GND
D11
D9
VCCS6
D6
SEND
R22
330
R20
10K
GND
GND
D15
D13
VCCS7
D7
SEND
R26
330
R24
10K
GND
GND
D19
D17
C0
C1 GND
VCC
R30 0 ohm
R31 0 ohm
ED_SEL R7 10K
R39 0 ohm GND
GND
PIC A/B
C0
C1
R28 0 ohm GND
VCC
R29 0 ohm
R40 0 ohm VCC
ED_SEL R43 10K VCC
PIC A/B
A Board B Board A Board
Figure 9: Remote Control Demo Board Power Supply Area Schematic
1
2
3
P2
Header 3
D4
D5
D6
1
2
3
4
P1
Header 4
D0
D1
D2
D3
GND
R2
330
VCC
D1
POWER GREEN
MODE_IND
GND
R3
330
D2
MODE_IND BLUE
CONFIRM
GND
R27
330
D20
CONFIRM RED
RF 1
GND
2-5
ANT1
CONREVSMA002
PAIR
MODE_IND
CONFIRM
LATCH_EN
D0
D1
D2
D3
D4
D5
ACK_EN
PDN
CMD_DATA_IN
CMD_DATA_OUT
D6
D7
SER_I/O
C0
C1
SEND
CRT_LRN
GND
GND
VCC
GNDGND
GND
GND
1
23
45
67
89
10 11
12 13
14 15
16 17
18 19
20 21
22 23
24 25
26 27
28 29
30 31
32 33
34 35
36 37
38
39
40
41
42
43
44
45
46
47
48
49
50
51
52
53
54
55
56
J1
Carrier Interconnect Female
LVL_ADJ IDENTITY
GND
X2
DNP
X1
1.8nH
ED_SEL
SEL_TIMER
D8
D9
D_CFG
A_CFG_0
A_CFG_1
BAUD_0
GND
SW1
SPDT
GND
VCC
B1
GND
Vin
1
GND
2
Vout3
U1
C1
0.47uF
GND
+C2
100uF
VDD
1
RA5
2
RA4
3
MCLR
4
RC5
5
RC4
6
RC3
7RC28
RC19
RC010
RA211
ICSPCLK 12
ICSPDAT 13
GND14
U2
PIC16F1824
VCC GND
PGD
PGC
MCLR
CMD_DATA_IN
CMD_DATA_OUT
IDENTITYCRT_LRN
MODE_IND
GND
SER_I/O
R14
330
GND
S9
RESTORE
D7
RESTORE COMPLETE GREEN
PIC A/B
R36
0
R33
0
VCC
GND
SW2
LVL_ADJ
ACK_EN
R32 0
VCC
R34 10K
GND
BAUD_0
IDENTITY
SEL_TIMER
SEND
LATCH_EN
PDN
R8 0
R38 10K
R37 10K
R35 10K
R9 10K
D8
D9
R41 10K
R42 10K
D_CFG
A_CGF_0
A_CFG_1
R6 10K
R5 10K
R4 10K
GND
VCC
S8
PAIR
R1
10K
PAIR CRT_LRN
REMOTE CONTROL AREA
POWER SUPPLY AREA RF MODULE AREA
MISC CIRCUITS
MICROCONTROLLER AREA
1
2
3
P3
Header 3
D7
VCC
GND1
2
3
4
J2
MCLR
PGD
5
6
PGC
VCC
GND
VCCS0
D0
SEND
D5
R12
330
D3
R10
10K
GND
GND
VCCS1
D1
SEND
R17
330
R15
10K
GND
GND
D10
D8
VCCS2
D2
SEND
R21
330
R19
10K
GND
GND
D14
D12
VCCS3
D3
SEND
R25
330
R23
10K
GND
GND
D18
D16
VCCS4
D4
SEND
R13
330
R11
10K
GND
GND
D6
D4
VCCS5
D5
SEND
R18
330
R16
10K
GND
GND
D11
D9
VCCS6
D6
SEND
R22
330
R20
10K
GND
GND
D15
D13
VCCS7
D7
SEND
R26
330
R24
10K
GND
GND
D19
D17
C0
C1 GND
VCC
R30 0 ohm
R31 0 ohm
ED_SEL R7 10K
R39 0 ohm GND
GND
PIC A/B
C0
C1
R28 0 ohm GND
VCC
R29 0 ohm
R40 0 ohm VCC
ED_SEL R43 10K VCC
PIC A/B
A Board B Board A Board
Figure 8: Remote Control Demo Board RF Carrier Area Schematic

– – – –
10 11
1
2
3
P2
Header 3
D4
D5
D6
1
2
3
4
P1
Header 4
D0
D1
D2
D3
GND
R2
330
VCC
D1
POWER GREEN
MODE_IND
GND
R3
330
D2
MODE_IND BLUE
CONFIRM
GND
R27
330
D20
CONFIRM RED
RF 1
GND
2-5
ANT1
CONREVSMA002
PAIR
MODE_IND
CONFIRM
LATCH_EN
D0
D1
D2
D3
D4
D5
ACK_EN
PDN
CMD_DATA_IN
CMD_DATA_OUT
D6
D7
SER_I/O
C0
C1
SEND
CRT_LRN
GND
GND
VCC
GNDGND
GND
GND
1
23
45
67
89
10 11
12 13
14 15
16 17
18 19
20 21
22 23
24 25
26 27
28 29
30 31
32 33
34 35
36 37
38
39
40
41
42
43
44
45
46
47
48
49
50
51
52
53
54
55
56
J1
Carrier Interconnect Female
LVL_ADJ IDENTITY
GND
X2
DNP
X1
1.8nH
ED_SEL
SEL_TIMER
D8
D9
D_CFG
A_CFG_0
A_CFG_1
BAUD_0
GND
SW1
SPDT
GND
VCC
B1
GND
Vin
1
GND
2
Vout3
U1
C1
0.47uF
GND
+C2
100uF
VDD
1
RA5
2
RA4
3
MCLR
4
RC5
5
RC4
6
RC3
7RC28
RC19
RC010
RA211
ICSPCLK 12
ICSPDAT 13
GND14
U2
PIC16F1824
VCC GND
PGD
PGC
MCLR
CMD_DATA_IN
CMD_DATA_OUT
IDENTITYCRT_LRN
MODE_IND
GND
SER_I/O
R14
330
GND
S9
RESTORE
D7
RESTORE COMPLETE GREEN
PIC A/B
R36
0
R33
0
VCC
GND
SW2
LVL_ADJ
ACK_EN
R32 0
VCC
R34 10K
GND
BAUD_0
IDENTITY
SEL_TIMER
SEND
LATCH_EN
PDN
R8 0
R38 10K
R37 10K
R35 10K
R9 10K
D8
D9
R41 10K
R42 10K
D_CFG
A_CGF_0
A_CFG_1
R6 10K
R5 10K
R4 10K
GND
VCC
S8
PAIR
R1
10K
PAIR CRT_LRN
REMOTE CONTROL AREA
POWER SUPPLY AREA RF MODULE AREA
MISC CIRCUITS
MICROCONTROLLER AREA
1
2
3
P3
Header 3
D7
VCC
GND1
2
3
4
J2
MCLR
PGD
5
6
PGC
VCC
GND
VCCS0
D0
SEND
D5
R12
330
D3
R10
10K
GND
GND
VCCS1
D1
SEND
R17
330
R15
10K
GND
GND
D10
D8
VCCS2
D2
SEND
R21
330
R19
10K
GND
GND
D14
D12
VCCS3
D3
SEND
R25
330
R23
10K
GND
GND
D18
D16
VCCS4
D4
SEND
R13
330
R11
10K
GND
GND
D6
D4
VCCS5
D5
SEND
R18
330
R16
10K
GND
GND
D11
D9
VCCS6
D6
SEND
R22
330
R20
10K
GND
GND
D15
D13
VCCS7
D7
SEND
R26
330
R24
10K
GND
GND
D19
D17
C0
C1 GND
VCC
R30 0 ohm
R31 0 ohm
ED_SEL R7 10K
R39 0 ohm GND
GND
PIC A/B
C0
C1
R28 0 ohm GND
VCC
R29 0 ohm
R40 0 ohm VCC
ED_SEL R43 10K VCC
PIC A/B
A Board B Board A Board
Figure 12: Remote Control Demo Board Remote Control Area Schematic
1
2
3
P2
Header 3
D4
D5
D6
1
2
3
4
P1
Header 4
D0
D1
D2
D3
GND
R2
330
VCC
D1
POWER GREEN
MODE_IND
GND
R3
330
D2
MODE_IND BLUE
CONFIRM
GND
R27
330
D20
CONFIRM RED
RF 1
GND
2-5
ANT1
CONREVSMA002
PAIR
MODE_IND
CONFIRM
LATCH_EN
D0
D1
D2
D3
D4
D5
ACK_EN
PDN
CMD_DATA_IN
CMD_DATA_OUT
D6
D7
SER_I/O
C0
C1
SEND
CRT_LRN
GND
GND
VCC
GNDGND
GND
GND
1
23
45
67
89
10 11
12 13
14 15
16 17
18 19
20 21
22 23
24 25
26 27
28 29
30 31
32 33
34 35
36 37
38
39
40
41
42
43
44
45
46
47
48
49
50
51
52
53
54
55
56
J1
Carrier Interconnect Female
LVL_ADJ IDENTITY
GND
X2
DNP
X1
1.8nH
ED_SEL
SEL_TIMER
D8
D9
D_CFG
A_CFG_0
A_CFG_1
BAUD_0
GND
SW1
SPDT
GND
VCC
B1
GND
Vin
1
GND
2
Vout3
U1
C1
0.47uF
GND
+C2
100uF
VDD
1
RA5
2
RA4
3
MCLR
4
RC5
5
RC4
6
RC3
7RC28
RC19
RC010
RA211
ICSPCLK 12
ICSPDAT 13
GND14
U2
PIC16F1824
VCC GND
PGD
PGC
MCLR
CMD_DATA_IN
CMD_DATA_OUT
IDENTITYCRT_LRN
MODE_IND
GND
SER_I/O
R14
330
GND
S9
RESTORE
D7
RESTORE COMPLETE GREEN
PIC A/B
R36
0
R33
0
VCC
GND
SW2
LVL_ADJ
ACK_EN
R32 0
VCC
R34 10K
GND
BAUD_0
IDENTITY
SEL_TIMER
SEND
LATCH_EN
PDN
R8 0
R38 10K
R37 10K
R35 10K
R9 10K
D8
D9
R41 10K
R42 10K
D_CFG
A_CGF_0
A_CFG_1
R6 10K
R5 10K
R4 10K
GND
VCC
S8
PAIR
R1
10K
PAIR CRT_LRN
REMOTE CONTROL AREA
POWER SUPPLY AREA RF MODULE AREA
MISC CIRCUITS
MICROCONTROLLER AREA
1
2
3
P3
Header 3
D7
VCC
GND1
2
3
4
J2
MCLR
PGD
5
6
PGC
VCC
GND
VCCS0
D0
SEND
D5
R12
330
D3
R10
10K
GND
GND
VCCS1
D1
SEND
R17
330
R15
10K
GND
GND
D10
D8
VCCS2
D2
SEND
R21
330
R19
10K
GND
GND
D14
D12
VCCS3
D3
SEND
R25
330
R23
10K
GND
GND
D18
D16
VCCS4
D4
SEND
R13
330
R11
10K
GND
GND
D6
D4
VCCS5
D5
SEND
R18
330
R16
10K
GND
GND
D11
D9
VCCS6
D6
SEND
R22
330
R20
10K
GND
GND
D15
D13
VCCS7
D7
SEND
R26
330
R24
10K
GND
GND
D19
D17
C0
C1 GND
VCC
R30 0 ohm
R31 0 ohm
ED_SEL R7 10K
R39 0 ohm GND
GND
PIC A/B
C0
C1
R28 0 ohm GND
VCC
R29 0 ohm
R40 0 ohm VCC
ED_SEL R43 10K VCC
PIC A/B
A Board B Board A Board
1
2
3
P2
Header 3
D4
D5
D6
1
2
3
4
P1
Header 4
D0
D1
D2
D3
GND
R2
330
VCC
D1
POWER GREEN
MODE_IND
GND
R3
330
D2
MODE_IND BLUE
CONFIRM
GND
R27
330
D20
CONFIRM RED
RF 1
GND
2-5
ANT1
CONREVSMA002
PAIR
MODE_IND
CONFIRM
LATCH_EN
D0
D1
D2
D3
D4
D5
ACK_EN
PDN
CMD_DATA_IN
CMD_DATA_OUT
D6
D7
SER_I/O
C0
C1
SEND
CRT_LRN
GND
GND
VCC
GNDGND
GND
GND
1
23
45
67
89
10 11
12 13
14 15
16 17
18 19
20 21
22 23
24 25
26 27
28 29
30 31
32 33
34 35
36 37
38
39
40
41
42
43
44
45
46
47
48
49
50
51
52
53
54
55
56
J1
Carrier Interconnect Female
LVL_ADJ IDENTITY
GND
X2
DNP
X1
1.8nH
ED_SEL
SEL_TIMER
D8
D9
D_CFG
A_CFG_0
A_CFG_1
BAUD_0
GND
SW1
SPDT
GND
VCC
B1
GND
Vin
1
GND
2
Vout3
U1
C1
0.47uF
GND
+C2
100uF
VDD
1
RA5
2
RA4
3
MCLR
4
RC5
5
RC4
6
RC3
7RC28
RC19
RC010
RA211
ICSPCLK 12
ICSPDAT 13
GND14
U2
PIC16F1824
VCC GND
PGD
PGC
MCLR
CMD_DATA_IN
CMD_DATA_OUT
IDENTIT
YC
RT_LRN
MODE_IND
GND
SER_I/O
R14
330
GND
S9
RESTORE
D7
RESTORE COMPLETE GREEN
PIC A/B
R36
0
R33
0
VCC
GND
SW2
LVL_ADJ
ACK_EN
R32 0
VCC
R34 10K
GND
BAUD_0
IDENTITY
SEL_TIMER
SEND
LATCH_EN
PDN
R8 0
R38 10K
R37 10K
R35 10K
R9 10K
D8
D9
R41 10K
R42 10K
D_CFG
A_CGF_0
A_CFG_1
R6 10K
R5 10K
R4 10K
GND
VCC
S8
PAIR
R1
10K
PAIR CRT_LRN
REMOTE CONTROL AREA
POWER SUPPLY AREA RF MODULE AREA
MISC CIRCUITS
MICROCONTROLLER AREA
1
2
3
P3
Header 3
D7
VCC
GND1
2
3
4
J2
MCLR
PGD
5
6
PGC
VCC
GND
VCCS0
D0
SEND
D5
R12
330
D3
R10
10K
GND
GND
VCCS1
D1
SEND
R17
330
R15
10K
GND
GND
D10
D8
VCCS2
D2
SEND
R21
330
R19
10K
GND
GND
D14
D12
VCCS3
D3
SEND
R25
330
R23
10K
GND
GND
D18
D16
VCCS4
D4
SEND
R13
330
R11
10K
GND
GND
D6
D4
VCCS5
D5
SEND
R18
330
R16
10K
GND
GND
D11
D9
VCCS6
D6
SEND
R22
330
R20
10K
GND
GND
D15
D13
VCCS7
D7
SEND
R26
330
R24
10K
GND
GND
D19
D17
C0
C1 GND
VCC
R30 0 ohm
R31 0 ohm
ED_SEL R7 10K
R39 0 ohm GND
GND
PIC A/B
C0
C1
R28 0 ohm GND
VCC
R29 0 ohm
R40 0 ohm VCC
ED_SEL R43 10K VCC
PIC A/B
A Board B Board A Board
Figure 10: Remote Control Demo Board Microcontroller Area Schematic
Figure 11: Remote Control Demo Board Miscellaneous Circuits Schematic

Disclaimer
Linx Technologies is continually striving to improve the quality and function of its products. For this reason, we
reserve the right to make changes to our products without notice. The information contained in this Data Guide
is believed to be accurate as of the time of publication. Specifications are based on representative lot samples.
Values may vary from lot-to-lot and are not guaranteed. “Typical” parameters can and do vary over lots and
application. Linx Technologies makes no guarantee, warranty, or representation regarding the suitability of any
product for use in any specific application. It is the customer’s responsibility to verify the suitability of the part for
the intended application. NO LINX PRODUCT IS INTENDED FOR USE IN ANY APPLICATION WHERE THE SAFETY
OF LIFE OR PROPERTY IS AT RISK.
Linx Technologies DISCLAIMS ALL WARRANTIES OF MERCHANTABILITY AND FITNESS FOR A PARTICULAR
PURPOSE. IN NO EVENT SHALL LINX TECHNOLOGIES BE LIABLE FOR ANY OF CUSTOMER’S INCIDENTAL OR
CONSEQUENTIAL DAMAGES ARISING IN ANY WAY FROM ANY DEFECTIVE OR NON-CONFORMING PRODUCTS
OR FOR ANY OTHER BREACH OF CONTRACT BY LINX TECHNOLOGIES. The limitations on Linx Technologies’
liability are applicable to any and all claims or theories of recovery asserted by Customer, including, without
limitation, breach of contract, breach of warranty, strict liability, or negligence. Customer assumes all liability
(including, without limitation, liability for injury to person or property, economic loss, or business interruption) for
all claims, including claims from third parties, arising from the use of the Products. The Customer will indemnify,
defend, protect, and hold harmless Linx Technologies and its officers, employees, subsidiaries, affiliates,
distributors, and representatives from and against all claims, damages, actions, suits, proceedings, demands,
assessments, adjustments, costs, and expenses incurred by Linx Technologies as a result of or arising from any
Products sold by Linx Technologies to Customer. Under no conditions will Linx Technologies be responsible for
losses arising from the use or failure of the device in any application, other than the repair, replacement, or refund
limited to the original product purchase price. Devices described in this publication may contain proprietary,
patented, or copyrighted techniques, components, or materials. Under no circumstances shall any user be
conveyed any license or right to the use or ownership of such items.
©2015 Linx Technologies. All rights reserved.
The stylized Linx logo, Wireless Made Simple, WiSE, CipherLinx and the stylized CL logo are trademarks of Linx Technologies.
Linx Technologies
159 Ort Lane
Merlin, OR, US 97532
Phone: +1 541 471 6256
Fax: +1 541 471 6251
www.linxtechnologies.com
Table of contents
Other Linx Transceiver manuals

Linx
Linx HumPRO Series User manual

Linx
Linx TRM-315-LT Instruction Manual

Linx
Linx HumDT Series User manual

Linx
Linx HumPRO Series Instruction Manual

Linx
Linx HUM-A-900-PRO-UFL Instruction Manual

Linx
Linx TRM-900-TT Instruction Manual

Linx
Linx NT Series Instruction Manual

Linx
Linx TT Series Instruction Manual

Linx
Linx NT Series User manual