Lionel VISION Line User manual

Featuring
78-1142-250
2/15
Lionel VISION
Steel-Sided Reefer Car
Owner’s Manual
Lionel VISION
Steel-Sided Reefer Car
Owner’s Manual

2
Congratulations!
Congratulations on your purchase of these Lionel VISION Steel-Sided Reefer Cars! On the outside,
these cars are accurately detailed to match the prototype. The sound car is equipped with the
latest technology to bring you realistic loading and unloading sounds, and true-to-life freight car
sounds. Many of the sounds are activated through your cab control unit, and many of them by the
actual movement of the reefer cars on your layout. It also comes equipped with an ElectroCoupler
on one end, so you can activate the coupler by your remote control cab unit anywhere on your
layout. Enjoy the realistic train sounds, and have lots of fun loading and unloading your reefer cars
while you listen to the 3 different loading scenarios and unloading scenario sounds! This 3-pack
includes one sound equipped reefer car and two without sound features.
All steel-sided reefers feature
• Die-cast metal sprung trucks and operating couplers
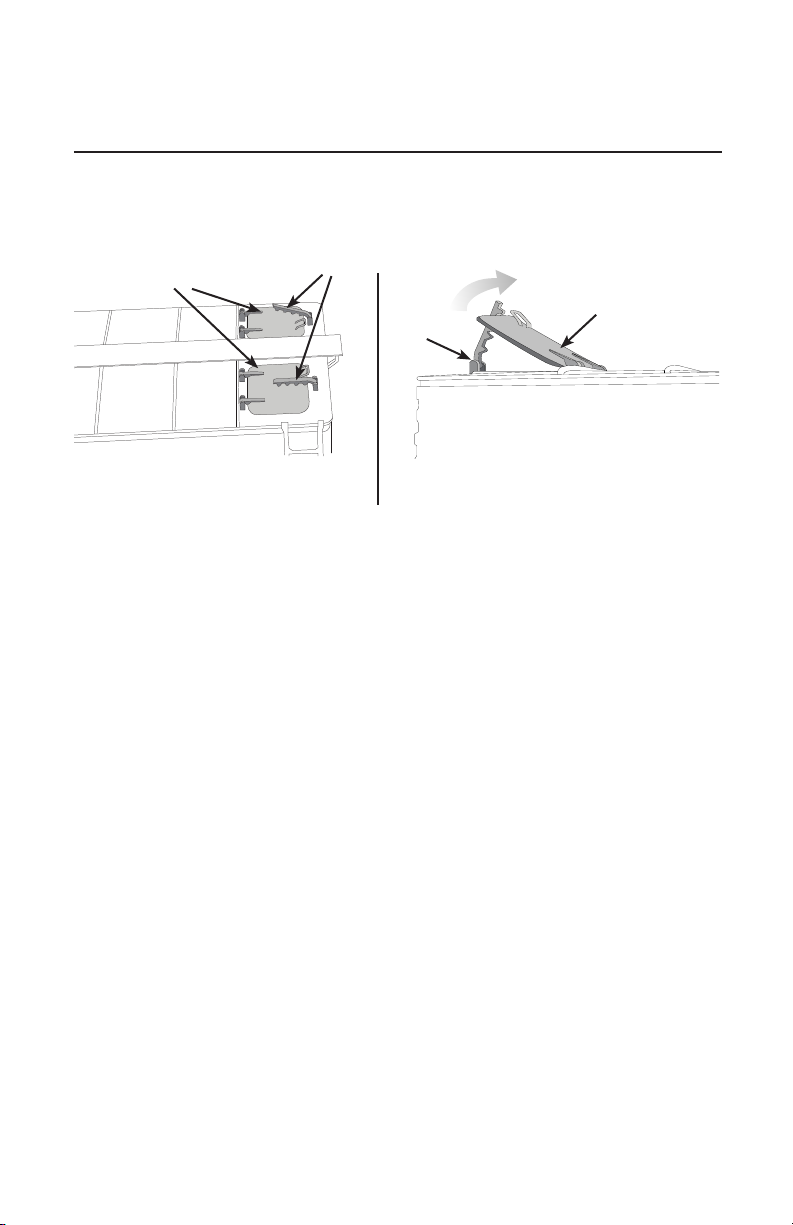
• Hidden uncoupling tabs
• Separately applied under frame details
• Wire formed individually applied grab irons and positionable ice hatches
• Minimum curve: O-31
The sound equipped Reefer features
• LEGACY Command Control operation including volume control, sound
activation, and minimum / maximum sound control.
• LEGACY Railsounds sound system with Reefer car, Freight, Train brake, and
Flat wheel sounds.
• 1 ElectroCoupler on brakewheel end of car.
• Play sounds in reaction to movement and track layout.
The following Lionel marks are used throughout this Owner’s Manual and are protected under
law. All rights reserved.
Lionel®, LionChief™, LionChief Plus™, LEGACY™, FasTrack®,TrainMaster®, Odyssey®, RailSounds®,
CrewTalk™, TowerCom™, DynaChuff™, StationSounds™, Pullmor®, ElectroCoupler™, Magne-
Traction®, CAB-1®Remote Controller, American Flyer®, Lionel ZW®, ZW®, MagniVision®, TMCC®,
Lionelville®, Wireless Tether™, Powerhouse™, LionMaster®, Conventional Classics™, Postwar
Celebration Series™, TruRail™, PH-1 Powerhouse®, Powermaster®, Powerstation-Powerhouse®,
Accessory Motor Controller™, AMC™, Accessory Switch Controller™, ASC™, Action Recorder
Controller™, ARC™, Track Power Controller 300™, TPC 300™, Track Power Controller 400™, TPC
400™, Block Power Controller™, BPC™, Operating Track Controller™, OTC™, FatBoy™, Lionel
Lines®, Joshua Lionel Cowen Series™, Lockon®, TrainSounds™, MultiHorn™, MultiWhistle™,
Choo-Choo™, SensorTrack™

3
Table of Contents
VISION Reefer Car basics
VISION Steel-Sided Reefer switch locations 4-5
Opening the roof hatches 6
LEGACY and Command Control remote operations
LEGACY control operations 7
Choosing an ID for your VISION Reefer 7
Setting up your VISION Reefer with your CAB-2 remote 8-11
The LEGACY CAB-2 remote controller 12
TrainMaster Command Control (TMCC) operations 13
Creating a Train with the original (grey) CAB-1 remote 13
Creating a Train with the CAB-1L (blue) remote 14
Operating your VISION Reefer with the CAB-1 or CAB-1L remote 15
CAB-1 remote controller commands 16
Adjusting the volume from your LEGACY remote 17
Adjusting the volume from your CAB-1 or CAB-1L remote 18
Shut down and Start up commands 18
Loading scenarios 1, 2, and 3 19-20
Unloading 21
Loading and Unloading in Conventional Operation only 21
Sound System operations
Freight Sounds 22
Rail Sounds 22
Grind 22
Bump 22
Flat Wheel 22
LEGACY Sound System operations
Train Brake 23
Limited Warranty/Lionel Service 24

4
VISION Steel-Sided Reefer switch locations
The sound equipped VISION Steel-Sided Reefer Car contains RailSounds programming switches.
Refer to Figure 1. The instructions below are specific to this particular refrig-
erator car; note that available features (and switches) may differ from other
refrigerator cars and rolling stock.
Program / Run Switch
Your reefer car is automatically assigned an ID#1 when you first receive it. Assign it a new ID
different from the locomotive pulling it. To assign a new ID # to the reefer car in LEGACY and
Command operation follow these steps:
1. Slide the Program/Run switch to the “PROG” position.
2. Place the reefer car on the track.
3. Connect the Command Base and plug it in.
4. Power up the track to 18 Volts AC (50 or 60 Hz).
5. Press ENG on your CAB controller.
6. Enter an unique ID#. Choose any number from 1 to 98 that has not been assigned to another
engine or freight car.
7. Press the SET button on your CAB controller.
8. Slide the Program/Run switch back to the RUN position.
The reefer’s ID# has been set. Be sure to record the new ID# for your reference.
Min/Max Switch
Used to make the sound, simulating the scraping and banging of the contents of the reefer car, less
or more active. When the switch is in the MIN position, the dialog and some background motion
sounds will turn off. This allows you to put more than one sound-equipped reefer car on the same
ID. To do this, set one car to MAX and then trigger loading/unloading. Sound effects will come
from all cars; however dialog will only come from one.
Volume Pot
To adjust the overall volume of sounds,open the hatch at the top of the reefer car, as shown
in Figure 2, insert a small Flathead screwdriver into the Volume Pot adjustment post and turn.
To increase the volume, turn the post clockwise. To decrease the volume, turn the post counter-
clockwise. Your CAB-remote can also adjust volume; the setting of this physical control will limit the
maximum volume your reefer car can produce.
Power your VISION Steel-Sided Reefer Car with an alternating-current (AC) transformer
only. Powering your reefer car with a direct-current (DC) transformer, or in excess of 19
volts AC, may result in damage to sensitive electronic components.
Note!
VISION Reefer Car basics

5
VISION Steel-Sided Reefer switch locations continued
Figure 1. Switch locations
MAX
RUNPROG
MIN
Program/Run
switch
Min/Max
switch
Figure 2. Volume Pot
VOLUME
CONTROL
BRAKE WHEEL
VISION Reefer Car basics

6
VISION Reefer Car basics
Opening the roof hatches
Your VISION Steel-Sided Reefer Car features four opening roof hatches, two on each end on the
top of the car. The hatches are supported with props that allow you to leave them open or closed
according to your preference. See Figure 3 for the roof hatch opening and location.
Figure 3. Hatch opening and location
ROOF HATCHES
TOP VIEW SIDE VIEW
ROOF HATCH
PROP
PROPS

7
LEGACY and Command Control Remote
Operations
1. Turn off track power, and then plug in the LEGACY Base and connect it to the
track.
2. Place your reefer car on the track.
3. Increase track power (no more than 18 volts AC). If a circuit breaker trips when you
turn on the Lionel power supply, check the wheels of your reefer car to make sure they are all
securely on the track. Check to make sure the track is free of all metals that may cause a short
circuit.
4. Moving your Vision Reefer after powering up the track automatically turns on
the sound.
LEGACY Control operations
Choosing an ID for your VISION Reefer
Your VISION Reefer Car is designed for operation with the Lionel LEGACY system. It will also
operate on the original Lionel Trainmaster System (TMCC1) with limited features and also
on the LEGACY Cab-1L / Base-1L operating system (again with reduced features.) Using a Lionel
LEGACY set (6-14295) will allow you to access ALL the features this reefer car has to offer.
Your commands are sent by the Remote Controller to the Command Base, which broadcasts a
radio frequency that is distributed through the outside rails of the track to your sound equipped reefer
car. Moving your train after you power up your track will turn the sounds on.
The VISION Reefer must be given a unique Engine ID. Use the Program / Run switch and follow
the instructions on Page 4. Setting it to the same LEGACY or TMCC ID as the locomotive pulling
it will result in undesired operation. Once a unique ID is set, the VISION Reefer should be assigned to
a train along with your locomotive.
If you have more than one VISION Reefer, for best results set them all to unique ID’s. You may
also choose to set them all to the same ID. In this case, set one reefer’s min/max switch to the MAX
position (see page 5) and all others to MIN.

8
LEGACY and Command Control Remote
Operations
Setting up your VISION Reefer in your CAB-2 remote
For best operation, your VISION Reefer car should be set to TYPE FRT (Freight Sounds). This will
display a special set of touch screen icons specifically designed for use with this type of car.
1. Press ENG and the 1 or 2 digit TMCC ID you assigned to your reefer following
the instructions on page 4.
2. Press INFO (see page 12 for button location).
3. Scroll the big red knob until you see the TYPE Tab (DSL STM DSW SSW)
4. Press the small black down-facing triangle to the right of SSW. This will scroll
down through several pages of engine types.
5. The third page includes Accessory, Passenger, BreakDown B Unit and Freight
(ACC PAS BDU FRT)
6. Choose FRT. Your screen should look like this:
7. Press INFO to complete the operation.

9
LEGACY and Command Control Remote
Operations
Setting up your VISION Reefer in your CAB-2 remote continued
Adding Your Reefer to a Train
For best operation, your VISION Reefer car should be assigned to a Train. Be sure it has a different
engine ID from any active locomotives on your layout.
To add a Reefer to a train:
1. Press the TR button and enter a 1 or 2 digit number for your new train. (2, in
this example)
2. Press the INFO button. Your screen will look like this:
3. Press BUILD.
4. Enter the TMCC ID of the locomotive that will head up this train. (20 in this
example)

10
LEGACY and Command Control Remote
Operations
Setting up your VISION Reefer in your CAB-2 remote continued
Adding Your Reefer to a Train
5. Press ADD to add a second member to the Train
6. Enter the TMCC ID of the freight car.
7. Press SET and wait for the Ready To Run message.
To move your locomotive, select the Train by its ID number and use the throttle, boost, and brake to
run it. Apply your CAB2 Train brake and hear the brakes operating on your VISION Reefer. For more
prototypical action, stopping with the train brake applied (in any amount) will keep your freight
consist stretched-out and prevents stress on the coupler when starting. Your train simulates this effect.
If you stop without using Train Brake, you’ll hear the impact of your freight car hitting the coupler in
front of it. And when you move the next time, you’ll hear another impact sound as the coupler slack
is taken up.

11
LEGACY and Command Control Remote
Operations
Setting up your VISION Reefer in your CAB-2 remote continued
Using Train Link
To send a command specifically to your VISION Reefer, such as a coupler command or to trigger
loading/unloading, press the Train Link button (see page 12 for button location).
Select one or more commands then press the Train Link button to continue controlling your train.
In order to send commands directly to your reefer, you must press Train Link. The
remote will show the screen above. In this mode, the train itself (ie. the engine) will not
respond because you are sending commands directly to the reefer.
Note!
REEFER COMMANDS
If you wish to control the train press Train Link again. In this mode you will be able to adjust speed,
apply the train brake, access TowerCom and CrewTalk, blow the engine’s horn or whistle, and ring the
engine’s bell.

12
LEGACY and Command Control Remote
Operations
Main Display
Displays real-time information about your railroad
system. Displays real-time feedback of operation.
Train Brake Slider
Reefer Car air brake
equipment sounds.
Select Button “A” On
Enable rail clatter sounds.
Select Button “A” Off
Disable rail clatter sounds.
Select Button <R>
Reset reefer car to initial settings
(unloaded).
Select Button
Raises the overall master
volume of your VISION
Reefer. To independently
adjust the level of the
background sounds only
(rail clatter, grinding and
bumping sounds), tap
AUX1 and then this key.
Select Button “controller”
Flat wheel sounds ON
(while running).
Info Button
Selecting the engine type and
building a train.
Select Button “arrow down”
Loading scenarios 1, 2 and 3.
See page 9 for explanation (only
when stationary).
Select Button “arrow up”
Unloading scenario (only when
stationary).
Select Button
Lowers the overall
master volume of your
VISION Reefer. To
independently adjust the
level of the background
sounds only (rail clatter,
grinding and bumping
sounds), tap AUX1 and
then this key.
Train Link Button
Displays buttons that
send commands to
your “Train Linked”
reefer car(s).”
Select Bell/Whistle Slider
Deeper metallic air
release sound (down)
No sound activation (up)
Select Button “No Sound”
Shutdown while stopped.
Select Button “B” On
Enable curve grind sounds.
Select Button “B” Off
Enable wheel flange grinding
sounds
Select Button “R” Coupler
Coupler activates, with coupler
sounds.
Select Button AUX 1
High metallic air release
sound.
The LEGACY CAB-2 Remote Controller

13
LEGACY and Command Control Remote
Operations
TrainMaster Command Control (TMCC) operations
For best operation, your VISION Reefer car should be assigned to a Train. The following sec-
tions explain how to create a Train using an original (grey) CAB-1 remote, or the newer (blue)
CAB-1L remote. Before proceeding, be sure you have assigned your reefer a unique ID following the
instructions on page 4 of this manual.
Creating a Train with the original (grey) CAB-1 remote
These examples show creating a train consisting of a single locomotive and single VISION
Reefer. A train may include multiple locos or reefer cars.
Note!
Assign the head-end locomotive to the Train:
Assign the VISION Reefer to the Train:
1. Be sure the VISION Reefer and the locomotive are on the track, powered up
and operational. Their RUN/PROGRAM switches should all be in the RUN
position.
2. Press the TR button and press a single digit from 1-9. This number will be the
ID of your new train.
3. Enter the one or two digit TMCC ID of the head locomotive.
4. Press the F coupler button. This identifies the locomotive as the Front of the
train.
5. Press the SET button, which is located under the plastic cover below your CAB-
1’s big red throttle knob. Listen for the locomotive to sound its whistle.
1. Press the TR button and press a single digit, 1-9. Use the same digit you chose
when assigning the head-end locomotive.
2. Enter the one or two digit TMCC ID of the VISION Reefer car.
3. (Optional Step) Press the R coupler button to set as Rear. When set to Rear,
your reefer’s coupler will be activated via the train address.
4. Press the SET button, located under the plastic cover below your CAB-1’s big
red throttle knob. Listen for the reefer to sound its reply (a metallic “thunk.”)

14
LEGACY and Command Control Remote
Operations
Creating a Train with the CAB-1L (blue) remote
Assign the head-end locomotive to the Train:
1. Be sure the VISION Reefer and the locomotive are on the track, powered up
and operational. Their RUN/PROGRAM switches should all be in the RUN
position.
2. Press the TR button and press two digits (from 01-99). This two-digit number
will be the ID of your new train. Be sure to include a leading zero for Train
ID’s 01-09. (Note: TMCC locomotives only support Train ID’s 1-9.)
3. Enter the one or two digit TMCC ID of the head locomotive.
4. Press the F coupler button. This identifies the locomotive as the Front of the
train.
5. Press the SET button, which is located under the plastic cover below your CAB-
1L’s big red throttle knob. Listen for the locomotive to sound its whistle.
Assign the Vision Reefer to the Train:
1. Press the TR button and press two digits (from 01-99). Use the same number
you chose when assigning the head-end locomotive.
2. Enter the one or two digit TMCC ID of the VISION Reefer car.
3. (Optional Step) Press the R coupler button to set as Rear. As Rear, your
reefer’s coupler will be activated via the train address.
4. Press the SET button, which is located under the plastic cover below your CAB-
1L’s big red throttle knob. Listen for the reefer to sound its reply (a metallic
“thunk.”)

15
Operating your VISION Reefer with your CAB-1 or CAB-1L remote
Running the Train
Triggering Loading and other Reefer Functions
1. Press TR
2. Enter the train ID
3. Use throttle, boost and brake to move the train. The Brake button will cause
brake squealing sounds to emanate from both the locomotive and your VISION
Reefer car.
1. Press ENG
2. Enter the reefer ID
3. Press the CAB key for the feature you want to trigger.
4. Press the TR button to return to Train operation.
LEGACY and Command Control Remote
Operations

16
LEGACY and Command Control Remote
Operations
CAB-1 Remote Controller commands
The CAB-1 Remote Controller commands are detailed below. The corresponding RailSounds
sound system effects are in bold italic type.
Select Button <1>
Volume up .
Select Button <AUX><2>
Flat wheel sounds ON (while running).
Select Button <AUX><3>
Loading scenarios 1, 2 and 3 See note below for
explanation (only when stationary).
Select Bell
No Sound Activation.
Select Button <6>
Unloading scenario (only when stationary).
Select Button <5>
Shutdown while stopped.
Select Button R coupler
Coupler activates, with coupler sounds.
Select Button <2>
Volume Down.
Select Button <0>
To reset reefer car to initial settings
(unloaded).
Select Button AUX 1
High metallic air release sound.

17
LEGACY and Command Control Remote
Operations
Adjusting the volume from your LEGACY remote
In addition to the physical volume control under the hatch of your VISION Reefer (see page 5),
your remote can be used to adjust the overall volume, or just the volume of the background sounds
(which include bump, grind, and rail clatter).
Pressing the volume up or down buttons (see pages 12 or 15) adjusts the overall volume of your
VISION Reefer car. A single bell ring will be heard each time the volume is raised or lowered, except
that no ring will be heard once the volume reaches the minimum or maximum levels.
Be aware that if your Min/Max switch is in the Min position, adjusting the master volume
or blend volume from your remote will have essentially the same result.
To adjust the overall volume of the reefer, follow the instructions above except do not
press AUX1. Only press the volume up or down buttons.
To adjust only the levels of the background sounds in LEGACY mode, such as rail clatter, bump and
grind sounds:
1. If assigned to a Train, press Train Link, or address your Reefer Car directly by pressing ENG and its
ID.
2. Press AUX1 first, then press the volume up or down keys on your remote.
3. Press the Train Link button to continue controlling your train.
In this case, a metallic clank sound will confirm the background or “blend” sound volume is being
adjusted. Again, this confirming sound will not be heard when the background/blend sound volume
reaches its minimum or maximum level.
Note!
Note!

18
To adjust the overall volume of the reefer, follow the instructions above except do not
press AUX1. Only press the volume up or down buttons.
To adjust only the levels of the background sounds in CAB-1 or CAB-1L mode, such as rail clatter,
bump and grind sounds:
1. Press ENG and enter the reefer ID.
2. Press AUX1 first, then press the volume up or down keys on your remote.
In this case, a metallic clank sound will confirm the background or “blend” sound volume is being
adjusted. Again, this confirming sound will not be heard when the background/blend sound volume
reaches its minimum or maximum level.
Note!
LEGACY and Command Control Remote
Operations
Adjusting the volume from your CAB-1L, or CAB-1 remote
Be aware that if your Min/Max switch is in the Min position, adjusting the master volume
or blend volume from your remote will have essentially the same result.
Note!
Shut down and Start up commands
Like a LEGACY locomotive, you can shut down the VISION Reefer to turn off the sounds. Refer to
pages 8 through 11 for LEGACY and 13-15 for TMCC.
To restart after shut down:
As illustrated in Figure 1, press ENG and 1 (if you have not already programmed
the reefer a different ID #) to address the reefer car with your LEGACY CAB-2,
CAB-1L, or CAB-1 Remote Controller.
Figure 4. LEGACY engine selection Figure 5. LEGACY start-up

19
LEGACY and Command Control Remote
Operations
Loading scenarios 1, 2, and 3
Reefers in reality underwent 3 different loading operations throughout the course of their delivery
service. The empty reefer was cleaned and initially loaded with ice (simulated by loading
scenario 1). The train of reefers was then moved from the ice dock to the warehouse where its
sensitive cargo was loaded, as well as additional ice loaded into the car (loading scenario 2). As the
train made its delivery across the desert basis it would make a stop at an icing dock to refresh the ice
in the car (loading scenario 3). Then, once the car arrived at its destination the cargo was unloaded
(unloading scenario).
To authentically replicate this operation, the VISION Reefer cycles through 3 different loading
scenarios. Once the unloading scenario is activated the loading scenario reverts back to scenario 1
to start the process again. Each of the three loading steps must be played in sequence. You can play
any loading sequence one or more times. To advance from one step to the next, play a loading scene
and then move your reefer to the next location (any distance). This motion will advance to the next
loading scene.
When the Min/Max swtich is in the Max position, your VISION Reefer car also goes
through these three unique loading steps. In the Min position, you will hear loading
sounds but the foreman dialog will be muted.
Load Step 1: Icing
With your VISION Reefer powered up and making sound (see page 7) move your train to the desired
location on your layout for ice loading. CAB-2 users should use Train Link (page 11), CAB-1L opera-
tors will need to enter the engine ID assigned your reefer.
Press the Train Link button then tap and release the load button on your LEGACY remote. Press the
Train Link button again to continue controlling your train. On your CAB-1 or CAB-1L remote, press
TR, ENG, and the reefer ID. Then push the 3 key. Press TR to return to controlling your train.
Listen as the foreman directs the crew to begin loading ice. Listen for the background sounds of men
working and large ice blocks tumbling into the reefer car bunkers. The loading sequence will run
about 6 seconds and include 2-3 lines of dialog from the foreman, concluding with an order to close
up and head to the produce warehouse.
By pressing and holding the Load button on your Legacy remote or 3 on your CAB-1 or CAB-1L
remote, you can extend the loading sequence indefinately. As the longer sequence plays, listen for a
variety of orders from the foreman. If he thinks the loading is taking too long, you’ll hear him order-
ing his crew to work faster.
Note!

20
LEGACY and Command Control Remote
Operations
Loading scenarios 1, 2, and 3 continued
Load Step 2: Produce
You must go through the first loading scene (adding ice) before you can add produce. Once ice is
loaded move the VISION Reefer to the next desired location on your layout. It’s OK to stop and start
more than once on the way to the produce warehouse.
Follow the instructions for Load Step 1, but this time the dialog will include orders to load produce.
Again, a tap of the load button plays a short scene, pressing and holding extended the loading
sequence as long as you like. But the foreman will complain if it takes too long! Repeat the produce
loading scene if you like, or move the train towards your final destination.
Load Step 3: Re-Icing
En-route to your destination you may want to add additional ice to replace what melted in transit.
The re-icing scene is triggered in the same way as the previous two scenes. Load Step 3 is the final
loading sequence and will repeat each time you trigger it, even if you move your VISION Reefer
between triggers. In order to reset the loading sequence back to Load Step 1, the car must be unloaded
(see next section). A reset command or removing track power will also reset the load sequence to the
first step.
Other manuals for VISION Line
2
Table of contents
Other Lionel Truck manuals