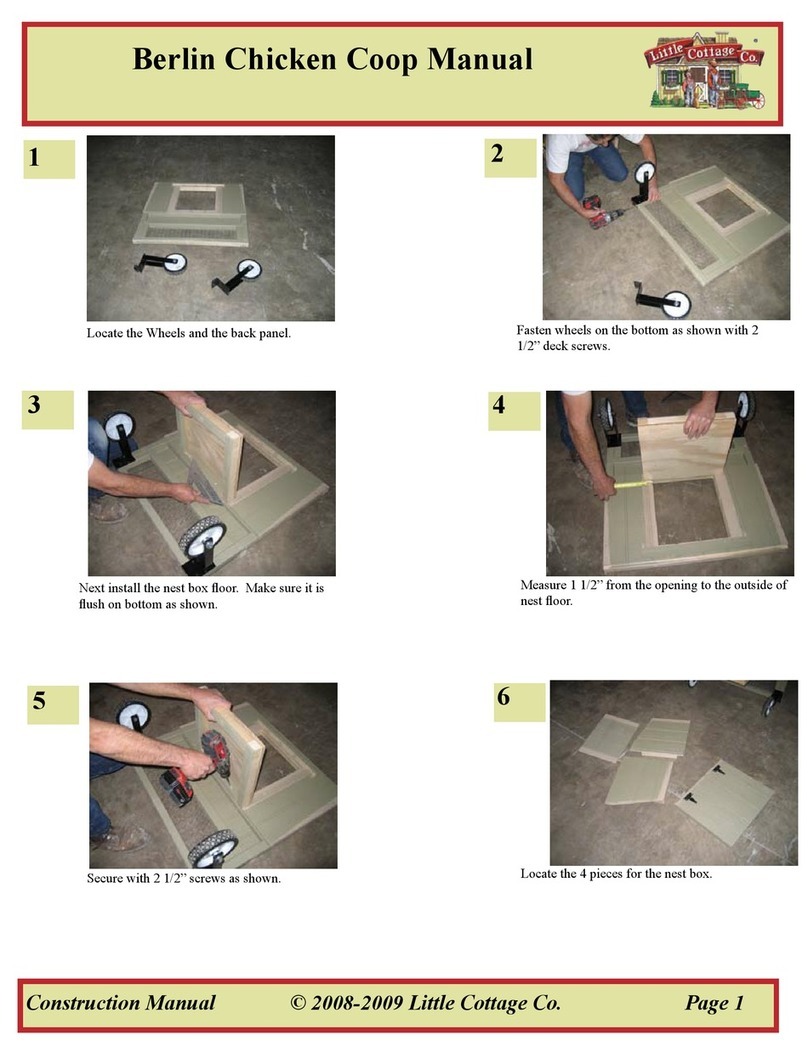
Little Cottage Round Roof Chicken Coop Instructions for use

Little Cottage Co.
PO Box 455
Berlin, OH 44610
330-893-4212
www.cottagekits.com
© 2011 Little Cottage Co.
Round Roof Chicken Coop Manual
®
Tools Needed:
-Cordless Drill (12V or higher)
-#2 Square Drive Bit
-Hammer
-6’ Step Ladder
-Tape Measure
-Square utility knife
w/ blade & hook blade
-Speed Square
-5/16” Wood Drill bit

Round Roof Chicken Coop Manual
Construction Manual © 2011 Little Cottage Co. Page 1
12
3 4
56
Starting with treated 4x4’s as shown. There are 5
runners divided up as shown.
Next layout 2x4’s for oor joist.
Use square to make sure joist is ush on top of
rim as shown and secure with 2 1/2” screws.
Joists are secured to rim.
Next make sure 4x4 is ush with rim as shown
and secure with 2 1/2” screws.
Continue with oor as shown.

Round Roof Chicken Coop Manual
Construction Manual © 2011 Little Cottage Co. Page 2
78
9 10
11 12
Continue all the way out around as shown so
2x4 is ush with 4x4 and secure with 2 1/2”
screws.
Next make sure 4x4’s are positioned in place
and secure with 2 1/2” screws as shown.
Next measure from corner to corner to make
sure oor is square.
After oor is squared up secure joist in center
rows with 2 1/2” screws 1 on each side.
Continue from last picture. Locate 5/8 CDX Flooring

Round Roof Chicken Coop Manual
Construction Manual © 2011 Little Cottage Co. Page 3
13 14
15 16
17 18
Start at corner as shown. Use square to make
sure plywood is ush and secure with 1 1/4”
screws as shown.
Secure all outside edges as shown.
Continue with oor until plywood is complete. We recommend inserting 1 1/4” screws every
8” to 10” .
The Floor is complete. Next locate walls and lay them out as shown.

Round Roof Chicken Coop Manual
Construction Manual © 2011 Little Cottage Co. Page 4
19 20
21 22
23 24
Set wall up and apply pressure on outside as
shown. Also make sure wall is ush on end as
shown. Secure with 2 1/2” screws.
Repeat from last picture.
Continue with walls as shown. Apply Pressure on outside and secure with 2
1/2” screws.
Install walls on opposite side and repeat. Make sure 2x4’s are ush where the 2 walls
meet.

Round Roof Chicken Coop Manual
Construction Manual © 2011 Little Cottage Co. Page 5
25 26
27 28
29 30
Locate 2x8 Top Plate. Next install top plates. Make sure plates are
ush on inside and at end as shown. Secure
with 2 1/2” screws.
Continue with top plates and make sure it is
ush on inside as shown.
Top Plates are complete.
Next locate end wall with window. Position wall in place and apply pressure on
outside as shown.

Round Roof Chicken Coop Manual
Construction Manual © 2011 Little Cottage Co. Page 6
31 32
33 34
35 36
While applying pressure on outside, secure wall
with 2 1/2” screws.
Make sure rafter is ush with 2x6 top plate and
secure with 2 1/2” screws.
Next install other section of gable wall. This is where the window opening meets. Make
sure plates are ush, secure with 2 1/2” screws.
Insert 3 to 4 2 1/2” screws, where 2x4’s meet
to tie wall together. Next locate 2x4 for above window.

Round Roof Chicken Coop Manual
Construction Manual © 2011 Little Cottage Co. Page 7
37 38
39 40
41 42
Insert 2x4 as shown. Use square to make sure 2x’s are ush as
shown and secure with 2 1/2” screw.
Also insert 2 1/2” screw from bottom of header
up into 2x4 as shown.
Secure all loose 2x4’s with 2 1/2” screws as
shown.
Insert 1 1/4” screw through siding into 2x6 Top
Plate.
Next secure corner with 1 1/4” screw every 10”.

Round Roof Chicken Coop Manual
Construction Manual © 2011 Little Cottage Co. Page 8
43 44
45 46
47 48
Next secure the bottom edge all the way around
with 1 1/4” screws 8” on center.
Next install front panels where adult door is.
Repeat from back wall. Apply pressure on the outside as shown and
secure with 2 1/2” screws.
Make sure all four corners are ush on outside
of top plate as shown.
Install last section of wall.

Round Roof Chicken Coop Manual
Construction Manual © 2011 Little Cottage Co. Page 9
49 50
51 52
53 54
Make sure you have a 36” opening. Now secure wall if opening is 36”
Install 2x4 above door brace. Repeat from
back wall.
Center ridge for roof. Make sure 2x4’s don’t
splice same as 2x6.
Lay out 2x6 and screw 2x4 on top. Stay even
with pencil mark.
Secure with 2 1/2” screw every 12” to 16” .

Round Roof Chicken Coop Manual
Construction Manual © 2011 Little Cottage Co. Page 10
55 56
57 58
59 60
Next ip 2x6 over and install 2x4 on bottom
side as shown.
Continue with 2x4’s on 2x6
Make sure bottom is ush. Next install ridge as shown.
Install with 2x4’s on bottom edge. Secure with 2 1/2” screws on each end.

Round Roof Chicken Coop Manual
Construction Manual © 2011 Little Cottage Co. Page 11
61 62
63 64
65 66
Locate Rafters. Install top rst and secure with 2 1/2” screws.
Once top is secured go to next picture for
details.
2x8 Top Plate is marked where to install truss.
Once truss is in position secure with 2 1/2”
screws.
One screw on outside and one on each side of
truss as shown.

Round Roof Chicken Coop Manual
Construction Manual © 2011 Little Cottage Co. Page 12
67 68
69 70
71 72
Trusses are all in place and ready for 1x6
sheeting.
Locate 1x6 sheeting for roof.
Start with short piece. 1x6 needs to overhang
6” from siding. Secure with 2 1/2” screws.
Make sure bottom of 1x6 is ush with 2x8 Top
Plate as shown.
Continue with 1x6 sheeting and keep bottom
ush with 2x8 as shown.
Install second piece and it will come out that is
will overhang.

Round Roof Chicken Coop Manual
Construction Manual © 2011 Little Cottage Co. Page 13
73 74
75 76
77 78
Start second row with short piece. Continue with 1x6 roof layout.
Continue going over the top as shown. Continue going over the top as shown.
Continue coming down from the top as
shown.
Make sure both ends measure close to
the same at bottom.

Round Roof Chicken Coop Manual
Construction Manual © 2011 Little Cottage Co. Page 14
79 80
81 82
83 84
Install last piece which had to be
ripped.
Next remove 2x3 braces on inside from
rafters.
This is what the inside looks like when
braces are removed.
Next locate the collar ties. They are cut
on each end.
Locate the center mark on collar tie and
make sure it center with 2x6 as shown.
Secure with 2 1/2” screws at center and
each end.
Collar ties are complete.

Round Roof Chicken Coop Manual
Construction Manual © 2011 Little Cottage Co. Page 15
85 86
87 88
89 90
Secure with 2 1/2” screws as shown. Locate rafter trim.
Next place rafter trim. You will have to bend it according to
the roof.
Use square to make sure rafter trim is
ush on bottom as shown. Secure with
1 1/4” screws.
Continue fastening rafter trim with 1 1/4”
screws as needed.

Round Roof Chicken Coop Manual
Construction Manual © 2011 Little Cottage Co. Page 16
91 92
93 94
95 96
This is what it should look like on top
peak of roof.
Repeat with rafter trim. Continue with rafter trim.
Locate 30x36 window.
Make sure window is centered in
opening and secure with 1 1/4” screws
as needed.
Securing window with 1 1/4” screw.

Round Roof Chicken Coop Manual
Construction Manual © 2011 Little Cottage Co. Page 17
97 98
99 100
101 102
Locate window trim. Place rst piece of trim as shown.
This shows how the trim needs to be
placed.
Secure with 1 1/4” screws as needed.
Continue with trim. Repeat from other side.

Round Roof Chicken Coop Manual
Construction Manual © 2011 Little Cottage Co. Page 18
103 104
105 106
107 108
Next install bottom piece. Measure 3” as shown at short point.
Secure with 1 1/4” screw. Continue with window trim.
Window trim is complete. Locate chicken ramp.

Round Roof Chicken Coop Manual
Construction Manual © 2011 Little Cottage Co. Page 19
109 110
111 112
113 114
Place ramp as shown. Find center mark at chicken hole.
Keep hinge ush on top of trim as
shown and secure with 1 1/4” screws.
Ramp is complete.
When ramp is not in use. Locate outside corner trim.
Other Little Cottage Farm Equipment manuals
Popular Farm Equipment manuals by other brands

AGI
AGI Batco FX 1500 Series Operator's manual

Producer's PRIDE
Producer's PRIDE 1299682 instruction manual

Dumor
Dumor HLF1710 Assembly manual

enorossi
enorossi RAKE CADDY Series User and maintenance manual

GREAT PLAINS
GREAT PLAINS MC5109 Max-Chisel Assembly manual

Haybuster
Haybuster 77 Operating Instructions and Parts Reference