Little Giant UVC9 User manual

Franklin Electric Co., Inc.
Oklahoma City, OK 73157-2010
www.lg-outdoor.com
UV CLARIFIER
MODELS UVC9/UVC18/UVC36
CLARIFICATEUR UV MODÈLES
UVC9/UVC18/UVC36
CLARIFICADOR UV
MODELOS UVC9/UVC18/UVC36
ENGLISH
ENGLISH
EN
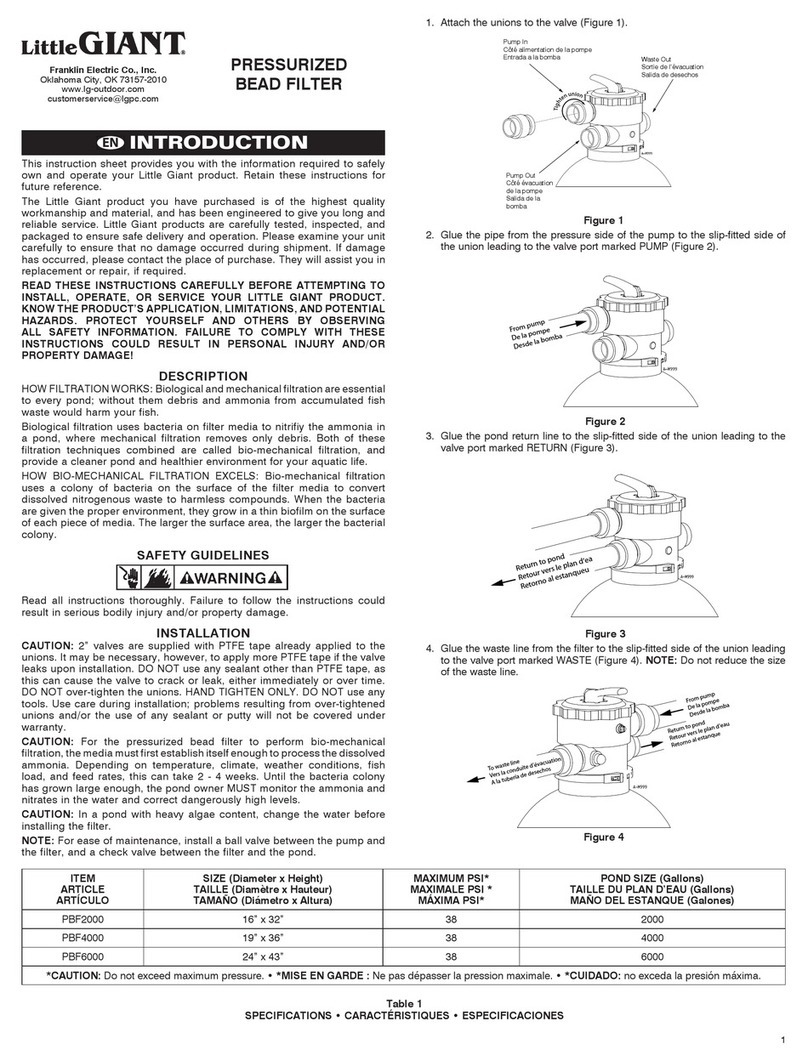
This instruction sheet provides you with the information required to
safely own and operate your product. Retain these instructions for
future reference.
The product you have purchased is of the highest quality
workmanship and material, and has been engineered to give you
long and reliable service. These products are carefully tested,
inspected, and packaged to ensure safe delivery and operation.
Please examine your item(s) carefully to ensure that no damage
occurred during shipment. If damage has occurred, please
contact the place of purchase. They will assist you in replacement
or repair, if required.
READ THESE INSTRUCTIONS CAREFULLY BEFORE
ATTEMPTING TO INSTALL, OPERATE, OR SERVICE
YOUR PRODUCT. KNOW THE PRODUCT’S APPLICATION,
LIMITATIONS,ANDPOTENTIALHAZARDS.PROTECTYOURSELF
AND OTHERS BY OBSERVING ALL SAFETY INFORMATION.
FAILURE TO COMPLY WITH THESE INSTRUCTIONS COULD
RESULT IN PERSONAL INJURY AND/OR PROPERTY DAMAGE!
DESCRIPTION
The UVC-series clarifiers use ultraviolet (UV) light to help keep
aquarium and pond water free of floating algae and reduce water-
borne pathogens, ensuring clear water and a healthy aquatic
environment for fish and aquatic plants. NOTE: While UV light will
impare algae, a pond filter is necessary to remove the dead algae.
UV clarifiers will not affect string algae.
The UVC-series clarifiers consist of:
• Transparent screw cap with power cord
• Protective quartz sleeve
• UV bulb
• Intake housing
• Discharge housing
• Support brackets (2)
• Hose connectors (2), gaskets (2), and O-rings (2)
SAFETY GUIDELINES
WARNING: RISK OF ELECTRICAL SHOCK! Interfacing electrical
equipment must have a grounding-type power cord plug. To
reduce the risk of electrical shock, connect only to a properly
grounded, grounding-type outlet with a Class A ground fault
circuit interrupter (GFCI).
WARNING: UV radiation is dangerous to the eyes and skin.
Do not look directly at the unshielded UV bulb as damage to
the eyes may occur. To safely check the operation of the UV
bulb, look through the transparent screw cap after the clarifier
is assembled.
DO NOT submerge the clarifier in water.
Disconnect power supply immediately if the clarifier or the power
cord becomes damaged.
The power cord, cap, or ballast cannot be replaced. If damaged, the
entire clarifier must be replaced.
CAUTION: To prevent overheating, disconnect the power supply
when no water is flowing through the unit.
ASSEMBLY AND INSTALLATION
WARNING: Install the UV clarifier outside the pond or aquarium.
Make sure that it cannot become immersed in water.
CAUTION: DO NOT touch the UV bulb; the oil on your skin will
damage it. If you do touch the bulb, clean it with rubbing alcohol
before resuming service.
Model
No.
Maximum
Flow Rate
(GPH)
Maximum
Internal
Pressure
Pond
Size
(Gallons)
Tubing
Size
UVC9 500 21.7 psi (50 ft) 1000 1" and 1-1/2"
UVC18 1000 21.7 psi (50 ft) 2000 1" and 1-1/2"
UVC36 2000 21.7 psi (50 ft) 4000 1" and 1-1/2"
Note: Must be fully assembled before plugging in.
1. Table 1 contains specifications for proper operation of your
UV light. To optimize light effectiveness, keep flow rates at the
recommended values or below.
2. Verify the components shown in figure 1 are packed with your
UVC kit.
3. Unscrew the transparent screw cap in a counter-clockwise
1
Housing
Caisslon
Carcasa
Transparent
Screw Cap
Ballast
Ballast
Balasto
Gaskets
Joints d'étanchéité
Juntas
UV Bulb
(Packaged Separately)
Hose
Connectors
Support
Brackets
Culot à vis
Transparent
Ampoule UV
(Emballé Séparément)
Connecteurs
de Tuyau
Supports
Tapón de Rosca
Transparente
Bombilla UV
(Embalado por Separado)
Connecteurs
de Tuyau
Soportes
FIGURE 1
Screw
Cap
Quartz
Sleeve
Manchon
en Quartz
Funda de
Cuarzo Culot à Vis
Tapón de
Rosca
FIGURE 2
TABLE 1

2
direction, and remove the cap with quartz sleeve attached
(figure 2).
4. Carefully remove the quartz sleeve from the cap with a pulling/
turning motion. Use caution not to drop the 2 O-rings attached
to the quartz sleeve (figure 3).
5. Locate the UV bulb, packaged separately in your light kit.
6. Remove bulb from its shipping carton. Grasp the plastic
base of the bulb, attempting not to contaminate the glass
with your hands.
7. Insert the UV bulb into the socket of the screw cap. If necessary,
carefully clean the bulb glass with isopropyl alcohol to remove
any contamination from your hands.
8. Verify (2) O-rings are still attached to quartz sleeve
(figure 3).
9. Insert the quartz sleeve over the bulb/screw cap assembly,
using a pushing/turning motion. Carefully clean the glass
sleeve with isopropyl alcohol to remove any contamination
from your hands.
10. Insert the sleeve/bulb/cap assembly into the housing and
hand tighten the screw cap securely to provide a water-tight
connection.
11. Place a gasket into the female threads of each hose
connector.
12. Screw one connector onto the intake and one onto the
discharge, and hand-tighten securely to provide a water-tight
connection.
13. Cut each connector to the desired hose diameter. For optimum
performance, use 1” hose with the UVC9 and UVC18, and
1-1/2” hose with the UVC36. The intake and discharge should
be the same size.
14. Attach the two support brackets to the housing (Figure 4) Note:
each bracket also has mounting features, if desired, to secure
the unit to a surface (Figure 5).
15. Locate the clarifier in a dry area, away from the pond or
aquarium edge and inaccessible to children. Ensure that
moisture will not get into the plug and socket.
16. Connect the intake and discharge lines to the hose adapter
(figure 4).
OPERATION
CAUTION: To prevent overheating, disconnect the clarifier when no
water is flowing through the unit.
NOTE: To keep clarifier maintenance and cleaning to a minimum
use a filter with your pond pump.
1. Turn on the pump and check to ensure that all clarifier
connections are watertight.
2. Connect the clarifier power cord to a GFCI-protected electrical
outlet. When the clarifier is working, a purple ultraviolet light
can be seen through the transparent screw cap.
How efficiently the clarifier works depends on the condition of the
pond, such as the number of plants and fish, the amount of sun
exposure, and the water flow rate. For most ponds with normal
levels of green water, the cleaning process can take from 1-3 weeks.
For best results, leave the clarifier on throughout the pond season.
Before the onset of winter (or when temperatures fall below 50
degrees F) remove the clarifier to prevent it from freezing.
Used continuously, the UV bulb should last for an entire pond season
(6000 hours). We recommend that you replace the bulb every spring.
MAINTENANCE
WARNING: When performing any maintenance disconnect the
clarifier from electrical power. Clean the UV clarifier 2 - 3 times per
year to keep it operating properly:
1. Disconnect the clarifier and the pump from power.
2. Remove the intake and discharge hoses and drain the water
O-Rings
Quartz
Sleeve
Manchon
en Quartz
Anneaux
Funda de
Cuarzo
Juntas Tóricas
FIGURE 3
Discharge
Evacuation
Descarga
Support
Brackets
Supports
Soportes
Intake
Admission
Toma Transparent
Screw Cap
Culot à Vis
Transparent
Tapón de Rosca
Transparente
FIGURE 4
FIGURE 5

before cleaning.
3. Carefully remove the quartz sleeve from the bulb/cap assembly.
4. Wash the quartz sleeve with warm, soapy water, remove any
lime scale with vinegar, and rinse thoroughly. CAUTION: DO
NOT touch the UV bulb; the oil on your skin will damage it. If
you do touch the bulb, clean it with isopropyl alcohol before
resuming service.
5. When pond algae densities are high, clean the clarifier every
3 - 5 days until the problem is under control.
6. Reassemble all parts in reverse order, making sure the
O-rings are properly positioned on the quartz sleeve (Figure
3). Use a small amount of petroleum jelly for lubrication if
necessary. Carefully clean UV bulb and Quartz Sleeve with
isopropyl alcohol.
7. Before the onset of winter (or when temperatures fall below
50 degrees F) remove the clarifier to prevent it from freezing.
FRANÇAIS
FR
Cette fiche d'instructions vous fournit les informations nécessaires
pour entretenir et faire fonctionner votre produit. Conservez ces
instructions pour référence future.
Le produit que vous avez acheté a bénéficié d'une fabrication et
de matériels de première qualité, et a été conçu pour vous offrir un
service fiable et durable. Les produits ont été soigneusement testés,
vérifiés et emballés pour garantir une livraison et un fonctionnement
sûrs. Veuillez examiner votre (vos) article(s) soigneusement pour
vérifier qu'aucun dommage n'est survenu pendant le transport. En
cas de dommages, veuillez contacter le revendeur. Il vous aidera à
remplacer ou réparer le produit si nécessaire.
LISEZ ATTENTIVEMENT CES INSTRUCTIONS AVANT
D'INSTALLER, DE FAIRE FONCTIONNER OU DE REPARER
VOTRE PRODUIT. INFORMEZ-VOUS SUR L'APPLICATION,
LES LIMITES ET LES DANGERS RELATIFS A CE PRODUIT.
PROTEGEZ-VOUS ET LES AUTRES EN RESPECTANT TOUTES
LES INFORMATIONS DE SECURITE. LE NON-RESPECT DE CES
INSTRUCTIONS POURRAIT PROVOQUER DES BLESSURES ET
/ OU DOMMAGES MATERIELS !
DESCRIPTION
Les clarificateurs de série UVC utilisent des ultraviolets (UV)
pour aider à garder l'eau d'aquarium et l'eau d'étang exemptes
d'algues flottantes et pour réduire les agents pathogènes de l'eau,
assurant une eau claire et un environnement aquatique sain pour
les poissons et les plantes aquatiques. REMARQUE : Même si la
lumière UV détériore les algues, un filtre d'étang est nécessaire pour
enlever les algues mortes.
Les clarificateurs UV n’affecteront pas les algues filamenteuses.
Les clarificateurs de série UVC se composent de :
• Culot à vis transparent avec cordon d'alimentation
• Manchon protecteur en quartz
• Ampoule UV
• Caisson d'admission
• Caisson d'évacuation
• Supports (2)
• Connecteurs de tuyau (2), joints d'étanchéité (2), et anneaux (2)
DIRECTIVES DE SECURITE
WARNING
AVERTISSEMENT
AVERTISSEMENT
AVERTISSEMENT : RISQUE DE CHOC ELECTRIQUE !
L'équipement électrique interconnecté doit avoir une prise de
cordon d'alimentation avec mise à la terre. Pour réduire le risque de
choc électrique, connecter uniquement à une prise avec mise à la
terre, bien mise à la terre, équipée d'un interrupteur de circuit de
défaut de mise à la terre de Classe A (GFCI).
AVERTISSEMENT : Les rayons UV sont dangereux pour les yeux
et la peau. Ne pas fixer directement l'ampoule UV non blindée du
regard car des dommages au niveau des yeux peuvent se produire.
Pour vérifier en toute sécurité le fonctionnement de l'ampoule UV,
regardez à travers le culot à vis transparent après l'assemblage du
clarificateur.
NE PAS immerger le clarificateur dans l'eau.
Débranchez l'alimentation immédiatement si le clarificateur ou le
cordon d'alimentation est endommagé.
Le cordon d’alimentation, la tête, ou le ballast ne peuvent pas être
remplacés. S’ils se trouvent endommagés, le clarificateur entier doit
être remplacé.
ATTENTION : Pour éviter la surchauffe, débranchez l'alimentation
électrique lorsque l'eau ne circule pas à travers l'appareil.
ASSEMBLAGE ET INSTALLATION
WARNING
AVERTISSEMENT
AVERTISSEMENT
AVERTISSEMENT : Installez le clarificateur UV à l'extérieur de
l'étang ou de l'aquarium. Assurez-vous qu'il ne peut pas être
immergé dans de l'eau.
ATTENTION : NE TOUCHEZPAS l'ampoule UV ; l'huile sur votre
peau l'endommagera. Si vous touchez l'ampoule, nettoyez-la avec
de l'alcool à 90° avant de la faire remarcher.
Num. de
Modèle :
Débit Maximum
(LPH)
(Liters Par Heure)
Pression
Interne
Maximum
Taille de
l'Etang
(Liters)
Taille de Tubage
UVC9 1890 1.5 kg/cm23785 1" and 1-1/2"
UVC18 3785 1.5 kg/cm27570 1" and 1-1/2"
UVC36 7570 1.5 kg/cm215140 1" and 1-1/2"
TABLEAU 1
Remarque: Doit être entièrement réuni avant de brancher.
1. Le tableau 1 contient les spécifications pour le bon
fonctionnement de votre lampe UV. Pour optimiser l'efficacité
lumineuse, gardez les débits aux valeurs recommandées ou en
dessous.
2. Vérifiez que les composants montrés dans la figure 1 sont
emballés avec votre kit UVC.
3. Dévissez le culot à vis transparent dans le sens des aiguilles
d'une montre, et enlevez le culot avec le manchon en quartz
attaché (figure 2).
4. Retirez délicatement le manchon en quartz du culot en tirant /
tournant. Soyez prudent de ne pas faire tomber les 2 anneaux
attachés au manchon en quartz (figure 3).
5. Localisez l'ampoule UV, emballée séparément dans votre kit
d'éclairage.
6. Retirez l'ampoule de son carton. Saisissez la base en plastique
de l'ampoule, en essayant de ne pas contaminer le verre avec
vos mains.
7. Insérez l'ampoule UV dans la douille du culot à vis. Si
nécessaire, nettoyez soigneusement le verre de l'ampoule avec
REPLACEMENT PARTS
Item No. Description
UVC9RB UV 9-WATT REPLACEMENT BULB
UVC18RB UV 18-WATT REPLACEMENT BULB
UVC36RB UV 36-WATT REPLACEMENT BULB
92311-9 QUARTZ SLEEVE, WITH 2 O-RINGS 9W
92311-18 QUARTZ SLEEVE, WITH 2 O-RINGS 18W
92311-36 QUARTZ SLEEVE, WITH 2 O-RINGS 36W
3

de l'alcool isopropylique pour éliminer toute contamination de
vos mains.
8. Vérifiez que les (2) anneaux sont encore attachés au manchon
en quartz (figure 3).
9. Insérez le manchon en quartz sur l'ensemble ampoule / culot à vis,
en poussant / tournant. Si nécessaire, nettoyez soigneusement
le manchon en verre avec de l'alcool isopropylique pour
éliminer toute contamination de vos mains.
10. Insérez l'ensemble manchon / ampoule / culot dans le caisson
et serrez fermement le culot à vis à la main pour fournir une
connexion étanche à l'eau.
11. Placez un joint d'étanchéité dans les filets femelles de chaque
connecteur de tuyau.
12. Vissez un connecteur sur l'admission et un sur l'évacuation, et serrez
fermement à la main pour fournir une connexion étanche à l'eau.
13. Coupez chaque connecteur au diamètre de tuyau désiré. Pour
des performances optimales, utilisez un tuyau de 1" avec UVC9
et UVC18, et un tuyau de 1-1/2" avec UVC36. L'admission et
l'évacuation doivent être de la même taille.
14. Fixez les deux supports au caisson (Figure 4) Remarque :
chaque support a également des caractéristiques de montage,
si désiré, pour fixer l'unité sur une surface (Figure 5).
15. Mettez le clarificateur dans un endroit sec, loin du bord de
l'étang ou de l'aquarium et inaccessible aux enfants. Assurez-
vous que l'humidité ne pourra pas entrer dans la fiche et la prise.
16. Connectez les lignes d'admission et d'évacuation à l'adaptateur
de tuyau (figure 4).
FONCTIONNEMENT
WARNING
AVERTISSEMENT
AVERTISSEMENT
ATTENTION : Pour éviter la surchauffe, débranchez le clarificateur
lorsque l'eau ne circule pas à travers l'appareil.
REMARQUE : Pour garder l'entretien et le nettoyage du clarificateur
à un minimum, utilisez un filtre avec votre pompe de bassin.
1. Mettez la pompe en marche et vérifiez que toutes les connexions
du clarificateur sont étanches.
2. Branchez le cordon d'alimentation du clarificateur à une prise
électrique protégée par GFCI (disjoncteur de fuite à la terre).
Lorsque le clarificateur fonctionne, une lumière ultraviolette
pourpre peut être vue à travers le culot à vis transparent.
Le niveau d'efficacité du clarificateur dépend de l'état de l'étang,
comme le nombre de plantes et de poissons, l'exposition au soleil,
et le débit d'eau. Pour la plupart des étangs avec des niveaux
normaux d'eau verte, le processus de nettoyage peut prendre 1-3
semaines.
Pour de meilleurs résultats, laissez le clarificateur allumé pendant
toute la saison d'étang.
Avant le début de l'hiver (ou lorsque les températures tombent en dessous
de 50 degrés F), enlevez le clarificateur pour l'empêcher de geler.
Si utilisée en continu, l'ampoule UV devrait durer une saison entière
d'étang (6.000 heures). Nous vous recommandons de remplacer
l'ampoule à chaque printemps.
ENTRETIEN
WARNING
AVERTISSEMENT
AVERTISSEMENT
AVERTISSEMENT : Lorsque vous effectuez un entretien,
débranchez le clarificateur de l'alimentation électrique. Nettoyez le
clarificateur UV 2 – 3 fois par an pour faire en sorte qu'il continu à
fonctionner correctement :
1. Débranchez le clarificateur et la pompe de l'alimentation électrique.
2. Retirez les tuyaux d'admission et d'évacuation et évacuez l'eau
avant de nettoyer.
3. Retirez délicatement le manchon en quartz de l'ensemble
ampoule / culot.
4. Lavez le manchon en quartz à l'eau chaude savonneuse,
enlevez tout le tartre avec du vinaigre, et rincez abondamment.
ATTENTION : NE TOUCHEZ PAS l'ampoule UV ; l'huile sur votre
peau l'endommagera. Si vous touchez l'ampoule, nettoyez-la
avec de alcool isopropylique avant de la faire remarcher.
5. Lorsque les densités d'algues d'étang sont élevées, nettoyez le
clarificateur tous les 3 – 5 jours jusqu'à ce que le problème soit
contrôlé.
6. Remontez toutes les pièces en ordre inverse, en vous
assurant que les anneaux sont correctement positionnés sur
le manchon en quartz (Figure 3). Utilisez une petite quantité
de gelée de pétrole pour la lubrification si nécessaire. Nettoyez
soigneusement l'ampoule UV et le manchon en quartz avec de
l'alcool isopropylique.
7. Avant le début de l'hiver (ou lorsque les températures tombent
en dessous de 50 degrés F), enlevez le clarificateur pour
l'empêcher de geler.
PIÈCES DE RECHANGE
Num. d'Article Description
UVC9RB AMPOULE DE RECHANGE UV DE 9-WATT
UVC18RB AMPOULE DE RECHANGE UV DE 18-WATT
UVC36RB AMPOULE DE RECHANGE UV DE 36-WATT
92311-9 MANCHON EN QUARTz, AVEC 2 ANNEAUX 9W
92311-18 MANCHON EN QUARTZ, AVEC 2 ANNEAUX 18W
92311-36 MANCHON EN QUARTz, AVEC 2 ANNEAUX 36W
ESPANOL
ES
Este instructivo proporciona la información necesaria para utilizar
y almacenar el producto de forma segura. Conserve estas
instrucciones para referencia futura.
El producto adquirido cuenta con mano de obra y material de la
más alta calidad y se diseñó para brindarle un servicio confiable
y duradero. Los productos se prueban, inspeccionan y embalan
cuidadosamente para asegurar su arribo en perfectas condiciones.
Examine los artículos cuidadosamente para asegurarse de que no se
hayan dañado durante el envío. Si se produjeron daños, póngase en
contacto con el lugar de compra. Ellos lo ayudarán con el reemplazo
o la reparación, de ser necesario.
LEA ESTAS INSTRUCCIONES ATENTAM ENTE ANTES DE
INSTALAR, OPERAR O REPARAR EL PRODUCTO. CONOZCA
ACERCA DE LA APLICACIÓN, LAS LIMITACIONES Y LOS
PELIGROS POTENCIALES DEL PRODUCTO. PROTÉJASE Y PRO
TEJA A LOS DEMÁS RESPETANDO TODA LA INFORMACIÓN
DE SEGURIDAD . ¡LA FALTA DE CUMPLIMIENTO DE ESTAS
INSTRUCCIONES PODR ÍA CAUSAR LESIONES PERSONALES
Y/O DA ÑOS MATERIALES!
DESCRIPCIÓN
Los clarificadores de la serie UVC utilizan luz ultravioleta (UV) para
ayudar a mantener el agua del acuario y del estanque libre de algas
flotantes y para reducir los agentes patógenos del agua, lo que
garantiza un agua limpia y un entorno saludable para peces y plantas
acuáticas. NOTA: Debido a que la luz UV perjudica a las algas, será
necesario utilizar un filtro de estanque para retirarlas una vez muertas.
Los clarificadores UV no afectan a las algas filamentosas.
Los clarificadores de la serie UVC constan de:
• Tapón de rosca transparente con cable de alimentación
• Funda de cuarzo de protección
• Bombilla UV
• Carcasa de la toma
4

• Carcasa de la descarga
• Soportes (2)
• Conectores de manguera (2), juntas (2) y juntas tóricas (2)
ORIENTACIONES DE SEGURIDAD
ADVERTENCIA
ADVERTENCIA: ¡RIESGO DE DESCARGA ELÉCTRICA! La
interconexión de equipos eléctricos debe contar con un enchufe
con conexión a tierra. A fin de reducir el riesgo de descarga
eléctrica, conéctelo solamente a un tomacorriente de tipo puesta a
tierra correctamente conectado a tierra con un interruptor de
circuito con pérdida a tierra (GFCI) Clase A.
ADVERTENCIA: La radiación UV es peligrosa para los ojos y la
piel. No mire directamente a una bombilla UV sin blindaje, ya que
podría ocasionarle daños en los ojos. Para comprobar sin riesgos
el funcionamiento de la bombilla UV, mire a través del tapón de
rosca transparente después de haber vez montado el clarificador.
NO sumerja el clarificador en agua.
Desconecte la corriente eléctrica inmediatamente si el clarificador o
el cable de alimentación se encuentran dañados.
No se pueden reemplazar el cable de alimentación, el tapón o el
balasto. Si se dañan, deberá reemplazarse el clarificador completo.
PRECAUCIÓN: Para evitar sobrecalentamiento, desconecte la
corriente eléctrica cuando ya no pase agua a través de la unidad.
MONTAJE E INSTALACIÓN
ADVERTENCIA
ADVERTENCIA: Instale el clarificador UV afuera del estanque o
acuario. Asegúrese de que no puede sumergirse en agua.
PRECAUCIÓN: No toque la bombilla UV; la grasitud de la piel
puede dañarla. Si toca la bombilla, límpiela friccionándola con
alcohol antes de reanudar su uso.
N.º de
Modelo
Tasa Máxima
de Flujo
(LPH)
Máxima Presión
Interna
Tamaño del
Estanque
(Litros)
Tamaño de
Tubería
UVC9 1890 1.5 kg/cm23785 1" and 1-1/2"
UVC18 3785 1.5 kg/cm27570 1" and 1-1/2"
UVC36 7570 1.5 kg/cm215140 1" and 1-1/2"
TABLA 1
Nota: Debe ser montado completamente antes de enchufar.
1. La Tabla 1 contiene especificaciones para el funcionamiento
correcto de su luz UV. Para optimizar la efectividad, mantenga las
tasas de flujo en los valores recomendados o incluso por debajo.
2. Verifique que los componentes ilustrados en la figura 1 se
encuentran dentro de su juego UVC.
3. Desenrosque el tapón de rosca transparente en sentido
contrario a las agujas del reloj y retire el tapón con la funda de
cuarzo acoplada (figura 2).
4. Retire cuidadosamente la funda de cuarzo del tapón, girando y
tirando hacia afuera. Tome precauciones para evitar que se caigan
las 2 juntas tóricas acopladas a la funda de cuarzo (figura 3).
5. Ubique la bombilla UV, embalada por separado en su juego de luz.
6. Retire la bombilla de su caja de embalaje. Agarre la base
plástica de la bombilla, tratando de no contaminar el vidrio con
las manos.
7. Inserte la bombilla UV dentro del enchufe del tapón de rosca.
En caso necesario, limpie cuidadosamente la bombilla de
vidrio con alcohol isopropílico para eliminar cualquier tipo de
contaminación de sus manos.
8. Verifique que las (2) juntas tóricas todavía estén acopladas a la
funda de cuarzo (figura 3).
9. Inserte la funda de cuarzo por encima del conjunto de bombilla/
tapón de rosca, girando y empujando hacia adentro. Limpie
cuidadosamente la funda de vidrio con alcohol isopropílico
para eliminar cualquier tipo de contaminación de sus manos.
10. Inserte el conjunto de funda/bombilla/tapón dentro de la
carcasa y ajuste manualmente el tapón a rosca con firmeza
para proveer una conexión de agua estanca.
11. Coloque una junta dentro de las roscas hembra de cada
conector de manguera.
12. Enrosque un conector sobre la toma y uno sobre la descarga,
y ajuste manualmente con firmeza para proveer una conexión
de agua estanca.
13. Corte cada conector con el diámetro de manguera requerido.
Para un óptimo rendimiento, utilice una manguera de 1" con el
UVC9 y UVC18, y una manguera de 1-1/2" con el UVC36. La
toma y la descarga deben tener el mismo tamaño.
14. Acople los dos soportes a la carcasa (Figura 4) Nota: si lo desea,
recuerde que cada soporte también cuenta con características
de montaje para asegurar la unidad a una superficie (Figura 5).
15. Ubique el clarificador en una zona seca, lejos del borde del
estanque o acuario e inaccesible para los niños. Asegúrese de
que no entre humedad en el enchufe ni en el tomacorriente.
16. Conecte las líneas de toma y descarga al adaptador de
manguera (figura 4).
FUNCIONAMIENTO
ADVERTENCIA
PRECAUCIÓN: Para evitar sobrecalentamiento, desconecte el
clarificador cuando ya no pase agua a través de la unidad.
NOTA: Para minimizar las tareas de mantenimiento y limpieza del
clarificador, utilice un filtro con la bomba del estanque.
1. Encienda la bomba y controle que todas las conexiones del
clarificador estén estancas.
2. Conecte el cable de alimentación a una toma de corriente con
protección GFCI. Cuando el clarificador está en funcionamiento, puede
observarse una luz violeta a través del tapón de rosca transparente.
La eficiencia del funcionamiento del clarificador dependerá de las
condiciones del estanque, como la cantidad de plantas y peces,
la cantidad de exposición solar y la tasa del flujo de agua. En la
mayoría de los estanques con niveles normales de agua verde, el
proceso de limpieza puede tomar de 1 a 3 semanas.
Para obtener mejores resultados, deje encendido el clarificador
durante toda la temporada de estanque.
Antes de la llegada del invierno (o cuando las temperaturas desciendan
por debajo de 50 °F), retire el clarificador para evitar su congelamiento.
Usada de manera continua, la bombilla UV puede durar una
temporada de estanque completa (6000 horas). Recomendamos
que reemplace la bombilla cada primavera.
MANTENIMIENTO
ADVERTENCIA
ADVERTENCIA: Cuando se estén realizando tareas de
mantenimiento, desconecte el clarificador de la energía eléctrica.
Limpie el clarificador 2 o 3 veces por año para conservarlo en
condiciones de funcionamiento adecuadas.
1. Desconecte el clarificador y la bomba de la energía eléctrica.
2. Retire las mangueras de toma y descarga y vacíe el agua antes
de limpiar.
3. Retire cuidadosamente la funda de cuarzo del conjunto de
bombilla/tapón.
4. Lave la funda de cuarzo con agua jabonosa tibia, retire todo depósito
5

de cal con vinagre y enjuague minuciosamente. PRECAUCIÓN: NO
toque la bombilla UV; la grasitud de la piel puede dañarla. Si toca la
bombilla, límpiela con alcohol isopropílico antes de reanudar su uso.
5. Cuando las densidades de algas del estanque sean elevadas,
limpie el clarificador cada 3 - 5 días hasta que el problema esté
bajo control.
6. Monte nuevamente todas las piezas en sentido inverso,
asegurándose de que las juntas tóricas estén correctamente
posicionadas sobre la funda de cuarzo (Figura 3). En caso de
ser necesario, utilice una pequeña cantidad de vaselina para
lubricar. Limpie cuidadosamente la bombilla UV y la funda de
cuarzo con alcohol isopropílico.
7. Antes de la llegada del invierno (o cuando las temperaturas
desciendan por debajo de 50 °F), retire el clarificador para evitar
su congelamiento.
N.° de artículo Descripción
UVC9RB BOMBILLA UV DE REPUESTO DE 9 VATIOS
UVC18RB BOMBILLA UV DE REPUESTO DE 18 VATIOS
UVC36RB BOMBILLA UV DE REPUESTO DE 36 VATIOS
92311-9 FUNDA DE CUARZO CON 2 JUNTAS TÓRICAS 9 VATIOS
92311-18 FUNDA DE CUARZO CON 2 JUNTAS TÓRICAS 18 VATIOS
92311-36 FUNDA DE CUARZO CON 2 JUNTAS TÓRICAS 36 VATIOS
LIMITED WARRANTY
THIS WARRANTY SETS FORTH THE COMPANY’S SOLE OBLIGATION
AND PURCHASER’S EXCLUSIVE REMEDY FOR DEFECTIVE PRODUCT.
Franklin Electric Company, Inc. and its subsidiaries (hereafter “the Company”)
warrants that the products accompanied by this warranty are free from
defects in materials or workmanship of the Company that exist at the time of
sale by the Company and which occur or exist within the applicable warranty
period. Any distributor, sub-distributor, recipient, end-user and/or consumer
agrees that by accepting the receipt of the products, the distributor, sub-
distributor, recipient, end user and/or consumer expressly agrees to be
bound by the terms of the warranty set forth herein.
I. Applicable Warranty Period
The products accompanied by this warranty shall be covered by this
Limited Warranty for a period of 12 months from the date of original
purchase by the consumer. In the absence of suitable proof of purchase
date, the warranty period of this product will begin to run on the product's
date of manufacture.
II. Instructions Applicable to this Limited Warranty
1. Consumers wishing to submit a warranty claim must return the products
accompanied by this warranty to the point of purchase for warranty
consideration.
2. Upon discovery of a defect, any personal injury, property damage or
any other type of resulting damage, if applicable, shall be reasonably
mitigated to the extent possible.
3. At its discretion, the Company may inspect products either at its facilities
or in the field, and after determination of a warranty claim, will, at its
option, repair or replace defective parts. Repaired or replaced parts will
be returned freight prepaid by the Company.
4. This warranty policy does not cover any labor or shipping charges.
The Company shall not be liable for any costs or charges attributable
to any product testing, maintenance, installation, repair or removal,
or for any tools, supplies, or equipment needed to install, repair, or
remove any product.
III. Limitations Applicable to this Limited Warranty
THIS WARRANTY DOES NOT APPLY TO ANY OF THE FOLLOWING:
1. Light bulbs.
2. Any product that is not installed, applied, maintained and used in
accordance with the Company's published instructions, applicable codes,
applicable ordinances and/or with generally accepted industry standards.
3. Any product that has been subject to misuse, misapplication,
neglect, alteration, accident, abuse, tampering, acts of God (including
lightning), acts of terrorism, acts of war, fire, improper storage or
installation, improper use, improper maintenance or repair, damage or
casualty, or to an excess of the recommended maximums as set forth
in the product instructions.
4. Any product that is operated with any accessory, equipment, component,
or part not specifically approved by the Company.
5. Use of replacement parts not sold by the Company, the unauthorized
addition of non-Company products to other Company products, and the
unauthorized alteration of Company products.
6. Products damaged by normal wear and tear, normal maintenance
services and the parts used in connection with such service, or any
other conditions beyond the control of the Company.
7. Any product that has been used for purposes other than those for which
it was designed and manufactured.
8. Any use of the product where installation instructions and/or instructions
for use were not followed.
The Company reserves the right at any time, and from time to time, to
make changes in the design and/or improvements upon its product
without thereby imposing any obligation upon itself to make corresponding
changes or improvements in or upon its products already manufactured
and/or previously sold. The Company further reserves the right to
substitute parts or components of substantially equal quality in any
warranty service required by operation of this Limited Warranty.
This written Limited Warranty is the entire warranty authorized and offered
by the Company. There are no warranties or representations beyond
those expressed in this document.
THIS WARRANTY AND REMEDY IS IN LIEU OF ALL OTHER WARRANTIES
AND REMEDIES INCLUDING WITHOUT LIMITATION, WARRANTIES OF
MERCHANTABILITY AND/OR FITNESS FOR A PARTICULAR PURPOSE,
WHICH ARE HEREBY SPECIFICALLY DISCLAIMED AND EXPRESSLY
EXCLUDED. CORRECTION OF NON-CONFORMITIES, IN THE MANNER AND
FOR THE PERIOD OF TIME AS SET FORTH ABOVE, SHALL CONSTITUTE
FULFILLMENT OF ALL LIABILITY OF THE COMPANY TO THE PURCHASER
WHETHER BASED ON CONTRACT, NEGLIGENCE, OR OTHERWISE.
THE COMPANY SHALL NOT BE LIABLE FOR INCIDENTAL,
CONSEQUENTIAL OR SPECIAL DAMAGES SUCH AS, BUT NOT
LIMITED TO:
DAMAGE TO OR LOSS OF OTHER PROPERTY OR EQUIPMENT, LOSS
OF USE OF EQUIPMENT, FACILITIES OR SERVICE, LOSS OF PROFIT
OR SALES, COST OF PURCHASES OR REPLACEMENT GOODS,
CLAIMS OF CUSTOMERS OF THE PURCHASER, FAILURE TO WARN
AND/OR INSTRUCT, LOSS OF OTHER PRODUCTS, OR COSTS OF
ENVIRONMENTAL REMEDIATION, OR DIMINUTION IN PROPERTY
VALUE. THE REMEDIES OF THE PURCHASER SET FORTH HEREIN
ARE EXCLUSIVE, AND THE LIABILITY OF THE COMPANY SHALL NOT,
EXCEPT AS EXPRESSLY PROVIDED HEREIN, EXCEED THE PRICE OF
THE PRODUCTS UPON WHICH SUCH LIABILITY IS BASED. DAMAGES
AS SET FORTH IN THIS PARAGRAPH SHALL BE REASONABLY
MITIGATED TO THE EXTENT POSSIBLE. THIS PARAGRAPH SHALL
ALSO APPLY TO ALL DAMAGES RESULTING FROM CONDITIONS
SET FORTH IN SECTION III ABOVE AND (1) DEFECTS IN PRODUCT
PROTOTYPES OR REPLACEMENT PART PROTOTYPES THAT HAVE
NOT BEEN PUT INTO PRODUCTION, CIRCULATED AND SOLD BY THE
COMPANY, AND/OR (2) DEFECTS THAT WERE NOT FOUND AT THE
TIME OF SALE DUE TO SCIENTIFIC AND TECHNOLOGICAL REASONS.
This Limited Warranty gives you specific legal rights. You may have other
rights, which vary according to the applicable laws and regulations. Where
any term of this warranty is prohibited by such laws, it shall be null and
void, but the remainder of this warranty shall remain in full force and effect.
DISCLAIMER: Any oral statements about the product made by the seller,
the Company, the representatives or any other parties, do not constitute
warranties, shall not be relied upon by the user, and are not part of the
contract for sale. Seller’s and the Company’s only obligation, and buyer’s
only remedy, shall be the replacement and/or repair by the Company of
the product as described above. Before using, the user shall determine the
suitability of the product for his intended use, and user assumes all risk
and liability whatsoever in connection therewith.
GARANTIE LIMITEE
CETTE GARANTIE ENONCE LA SEULE OBLIGATION DE L'ENTREPRISE ET
LE RECOURS EXCLUSIF DE L'ACHETEUR POUR LE PRODUIT DEFECTUEUX.
Franklin Electric Company, Inc. et ses filiales (ci-après “la Société”) garantissent
que les produits accompagnés de cette garantie sont exempts de défauts
de matériaux ou de fabrication de la Société qui existent au moment de la
vente par la Société et qui se produisent ou existent dans le délai de garantie
applicable. Tout distributeur, sous-distributeur, destinataire, utilisateur final et/
ou consommateur, en acceptant la réception des produits, convient que le
distributeur, sous-distributeur, destinataire, utilisateur final et/ou consommateur
accepte expressément d'être lié par les termes de la garantie qui y sont énoncés.
I. Période de Garantie Applicable
Les produits accompagnés par cette garantie doivent être couverts par cette
6

Garantie Limitée pour une période de 12 mois à compter de la date d'achat
originale par le consommateur. En l'absence de preuves concrètes de la date
d'achat, la période de garantie de ce produit commencera à partir de la date
de fabrication du produit.
II. Instructions Applicables à cette Garantie Limitée
1. Les consommateurs qui souhaitent soumettre une réclamation de
garantie doivent retourner les produits avec cette garantie au point de
vente pour considération de garantie.
2. En cas de découverte d'un défaut, une lésion corporelle, un dommage
matériel ou tout autre type de dommages en résultant, le cas échéant,
doivent être raisonnablement atténués dans la mesure du possible.
3. A sa discrétion, la Société peut inspecter les produits, soit à ses
installations, soit au site, et après détermination d'une réclamation
de garantie, à sa discrétion, fera réparer ou remplacer les pièces
défectueuses. Les pièces réparées ou remplacées seront retournées
avec frais de transport prépayés par la Société.
4. Cette politique de garantie ne couvre pas les frais de main d'oeuvre ou
d'expédition. La Société ne sera pas responsable des coûts ou des frais
imputables à tout essai, entretien, installation, réparation ou enlèvement
de produit, ou pour tout outil, fourniture, ou équipement nécessaire pour
installer, réparer ou enlever tout produit.
III. Limitations Applicables à cette Garantie Limitée
CETTE GARANTIE NE S'APPLIQUE PAS AUX SUIVANTS :
1. Ampoules.
2. Tout produit qui n'est pas installé, appliqué, entretenu et utilisé
conformément aux instructions publiées par la Société, aux codes et
règlements applicables en vigueur et/ou aux normes généralement
acceptées de l'industrie.
3. Tout produit qui a fait l'objet d'une utilisation anormale, d'une mauvaise
application, de négligence, d'altération, d'accident, d'abus, de modification,
d'actes de Dieu (y compris la foudre), d'actes de terrorisme, d'actes
de guerre, d'incendie, d'un mauvais entreposage ou installation, d'une
mauvaise utilisation, d'un mauvais entretien ou d'une mauvaise réparation,
de dommages ou pertes, ou d'une utilisation au-delà des maximums
recommandés, comme énoncés dans les instructions du produit.
4. Tout produit qui est utilisé avec un accessoire, matériel, composant, ou
pièce non expressément agréés par la Société.
5. L'utilisation de pièces de rechange non vendues par la Société,
l'addition non autorisée de produits ne provenant pas de la Société
à d'autres produits de la Société, et la modification non autorisée des
produits de la Société.
6. Les produits endommagés par l'usure normale, les services habituels
d'entretien et les pièces utilisées dans le cadre de ces services, ou toute
autre condition hors du contrôle de la Société.
7. N'importe quel produit qui a été utilisé à des fins autres que celles pour
lesquelles il a été conçu et fabriqué.
8. Toute utilisation du produit pour laquelle les instructions d'installation et/
ou les instructions d'utilisation n'ont pas été suivies.
La Société se réserve le droit, à tout moment, et de temps à autre, d'apporter
des changements à la conception et/ou des améliorations à ses produits sans
pour autant imposer une quelconque obligation sur elle-même d'apporter des
modifications ou des améliorations correspondantes dans ou sur ses produits
déjà fabriqués et/ou déjà vendus. La Société se réserve également le droit de
remplacer des pièces ou des composants d'une qualité sensiblement égale
dans tout service de garantie exigé par l'exécution de cette Garantie Limitée.
Cette Garantie Limitée écrite est l'entière garantie autorisée et offerte par
la Société. Il n'existe aucune garantie ou représentations autres que celles
exprimées dans ce document.
CETTE GARANTIE ET CE RECOURS SONT EN LIEU ET PLACE DE TOUTES
LES AUTRES GARANTIES ET RECOURS Y COMPRIS, SANS S'Y LIMITER,
AUX GARANTIES DE VALEUR MARCHANDE ET/OU D'ADAPTATION A UN
USAGE PARTICULIER, QUI SONT ICI SPECIFIQUEMENT REJETES ET
EXPRESSEMENT EXCLUS. LA CORRECTION DES NON-CONFORMITES,
DE LA FACON ET POUR LA PERIODE DE TEMPS COMME ENONCEES
CI-DESSUS, CONSTITUE LA REALISATION DE TOUTE LA RESPONSABILITE
DE LA SOCIETE ENVERS L'ACHETEUR QUE CELA SOIT SUR LA BASE D'UN
CONTRAT, D'UNE NEGLIGENCE OU AUTRE.
LA SOCIETE NE SERA PAS RESPONSABLE DES DOMMAGES DIRECTS,
INDIRECTS OU SPECIAUX COMME, MAIS SANS S'Y LIMITER :
DOMMAGES A OU PERTES D'AUTRES BIENS OU EQUIPEMENTS, PERTE
D'UTILISATION D'EQUIPEMENT, INSTALLATIONS OU SERVICES, PERTE
DE BENEFICES OU DE VENTES, COUT D'ACHATS OU DE PRODUITS DE
RECHANGE, RECLAMATIONS DES CLIENTS DE L'ACHETEUR, OMISSION
D'AVERTIR ET/OU DE NOTIFIER, PERTE D'AUTRES PRODUITS, OU
COUTS D'ASSAINISSEMENT DE L'ENVIRONNEMENT, OU DIMINUTION DE
LA VALEUR DE LA PROPRIETE. LE RECOURS DE L'ACHETEUR ENONCE
DANS LE PRESENT DOCUMENT EST EXCLUSIF ET LA RESPONSABILITE
DE LA SOCIETE NE PEUT EXCEDER, SAUF STIPULATION CONTRAIRE
EXPRESSE, LE PRIX DES PRODUITS SUR LESQUELS CETTE
RESPONSABILITE REPOSE. LES DOMMAGES COMME ENONCES DANS
CE PARAGRAPHE DOIVENT ETRE RAISONNABLEMENT ATTENUES
DANS LA MESURE DU POSSIBLE. CE PARAGRAPHE S'APPLIQUERA
EGALEMENT A TOUS LES DOMMAGES RESULTANT DES CONDITIONS
ENONCEES DANS LA SECTION III CI-DESSUS ET (1) AUX DEFAUTS
DANS LES PROTOTYPES DE PRODUIT OU LES PROTOTYPES DE PIECE
DE RECHANGE QUI N'ONT PAS ETE MIS EN PRODUCTION, DISTRIBUES
ET VENDUS PAR LA SOCIETE, ET / OU (2) AUX DEFAUTS QUI N'ONT
PAS ETE TROUVES AU MOMENT DE LA VENTE POUR DES RAISONS
SCIENTIFIQUES ET TECHNOLOGIQUES.
Cette Garantie Limitée vous donne des droits légaux spécifiques. Vous pouvez
avoir d'autres droits, qui varient selon les lois et règlements applicables. Si
toute stipulation de cette garantie est interdite par ces lois, elle sera nulle et
sans effet, mais le reste de la présente garantie demeurera en vigueur.AVIS
DE NON-RESPONSABILITE : Les déclarations orales concernant le produit
effectuées par le vendeur, la Société, les représentants ou toutes autres parties,
ne constituent pas une garantie. L'utilisateur ne doit pas s'y fier, et elles ne font
pas partie du contrat de vente. La seule obligation du vendeur et du fabricant, et
l'unique recours de l'acheteur, est le remplacement ou la réparation du produit
selon les modalités décrites précédemment. Avant l'utilisation, l'utilisateur
doit déterminer l'aptitude du produit pour son utilisation prévue, et l'utilisateur
assume tous les risques et la responsabilité dans n'importe quel cadre avec
lequel le produit sera associé.
GARANTÍA LIMITADA
LA PRESENTE GARANTÍA ESTABLECE LA OBLIGACIÓN EXCLUSIVA DE
LA EMPRESA Y LA SOLUCIÓN EXCLUSIVA DEL COMPRADOR ANTE UN
PRODUCTO DEFECTUOSO.
Franklin Electric Company, Inc. y sus filiales (de aquí en adelante, “la Empresa”)
garantizan los productos que acompañan la presente garantía contra defectos
de material o mano de obra de la Empresa que estén presentes al momento de
la venta por parte de la Empresa y que se presenten o existan dentro del período
de garantía en vigor. Todo distribuidor, subdistribuidor, destinatario, usuario
final y/o consumidor acuerda que al dar acuse de recibo de los productos, el
distribuidor, subdistribuidor, destinatario, usuario final y/o consumidor acuerda
estar sujeto a los términos de garantía que se establecen aquí.
I. Período de garantía en vigor
Los productos que acompañan la presente garantía estarán cubiertos por
la presente Garantía Limitada durante un período de 12 meses a partir de
la fecha de compra original por parte del consumidor. En caso de ausencia
de prueba adecuada de la fecha de compra, el período de garantía de este
producto comenzará a contarse desde la fecha de fabricación del producto.
II. Instrucciones aplicables a la presente Garantía Limitada
1. Los consumidores que deseen presentar un reclamo de garantía deben
devolver los productos, acompañados por la presente, al punto de
compra para que se considere su garantía.
2. En caso de descubrirse algún defecto, las lesiones personales, daños
materiales u otro tipo de daño resultante serán razonablemente
subsanadas en la medida de lo posible.
3. La Empresa, a su criterio, puede inspeccionar los productos, ya sea
en sus instalaciones o en campo y, luego de determinar el reclamo
de garantía, se reserva el derecho de optar entre reparar o reemplazar
las piezas defectuosas. Las piezas reparadas o reemplazadas serán
regresadas con flete pagado por la Empresa.
4. La presente póliza de garantía no cubre ningún gasto de mano de obra
o de envío. La Empresa no se responsabilizará por ningún gasto o costo
atribuible a tareas de prueba, mantenimiento, instalación, reparación o
remoción del producto, o por herramientas, suministros o equipamiento
que fueren necesarios para instalar, reparar o retirar cualquier producto.
III. Limitaciones aplicables a la presente Garantía Limitada
LA PRESENTE GARANTÍA NO SE APLICA EN NINGUNO DE LOS
SIGUIENTES CASOS:
1. Las bombillas.
2. Cualquier producto que no se haya instalado, aplicado, mantenido
o utilizado de conformidad con las instrucciones publicadas por la
Empresa, códigos, ordenanzas y/o estándares aceptados normalmente
por la industria.
3. Cualquier producto que haya sido sometido a uso indebido, aplicación
incorrecta, negligencia, alteración, accidente, abuso, manipulación, casos
de fuerza mayor (incluso rayos), actos de terrorismo, actos de guerra,
incendio, almacenamiento o instalación inapropiados, uso, mantenimiento
7

For technical assistance, please contact ...............1.888.956.0000
Pour l’aide technique, entrez s’il vous plaît en contact ....1.888.956.0000
Para la ayuda técnica, por favor póngase en contacto ....1.888.956.0000
www.lg-outdoor.com
Form 998510 - 06/2014 Rev. 003
© 2012 Franklin Electric Co., Inc.
Little Giant®is a registered trademark of Franklin Electric Co., Inc.
o reparación inadecuados, daño o siniestro, o exceso de los máximos
recomendados según se establecen en las instrucciones del producto.
4. Cualquier producto que se opere con accesorios, equipos, componentes
o piezas no aprobados específicamente por la Empresa.
5. Utilización de piezas de repuesto no vendidas por la Empresa, adición
no autorizada de productos no pertenecientes a la Empresa a otros
productos de la Empresa y alteración no autorizada de productos de
la Empresa.
6. Productos dañados por desgaste y rotura normales, servicios de
mantenimiento normales y las piezas utilizadas en conexión con
dichos servicios, u otras condiciones que excedan el control de
la Empresa.
7. Cualquier producto que se haya utilizado para fines que no son para
los que fue diseñado y fabricado.
8. Cualquier uso del producto donde no se siguieron las instrucciones
de instalación y/o uso.
La Empresa se reserva el derecho, en cualquier momento o de forma
periódica, a realizar cambios en el diseño y/o mejoras en el producto
sin que ello constituya una obligación en sí misma para realizar
los cambios o mejoras correspondientes en o sobre sus productos
ya fabricados y/o previamente vendidos. La Empresa se reserva el
derecho de sustituir piezas o componentes de calidad sustancialmente
igual en cualquier servicio de garantía requerido por efecto de la
presente Garantía Limitada.
La presente Garantía Limitada escrita es la garantía total autorizada y
ofrecida por la Empresa. No existen garantías o representaciones más
allá de las expresadas en el presente documento.
LA PRESENTE GARANTÍA Y SOLUCIÓN SE OFRECE EN LUGAR
DE TODA OTRA GARANTÍA Y SOLUCIÓN INCLUIDAS, ENTRE
OTRAS, GARANTÍAS DE COMERCIABILIDAD Y/O APTITUD PARA
UN FIN PARTICULAR, LAS CUALES QUEDAN ESPECÍFICAMENTE
RECHAZADAS Y EXPRESAMENTE EXCLUIDAS. LA RECTIFICACIÓN
DE NO CONFORMIDADES, EN LA FORMA Y DURANTE EL
PERÍODO ESTABLECIDOS ANTERIORMENTE, CONSTITUIRÁ EL
CUMPLIMIENTO DE TODA RESPONSABILIDAD DE LA EMPRESA
FRENTE AL COMPRADOR, YA SEA EN BASE A CONVENIO,
NEGLIGENCIA U OTRO.
LA EMPRESA NO SE HARÁ RESPONSABLE POR DAÑOS
INCIDENTALES, CONSECUENCIALES O ESPECIALES, ENTRE LOS
QUE SE INCLUYEN:
DAÑO O PÉRDIDA SUFRIDOS POR BIENES O EQUIPOS, PÉRDIDA DE USO
DEL EQUIPO, INSTALACIONES O SERVICIO, PÉRDIDA DE BENEFICIOS
O VENTAS, COSTO DE COMPRAS O MERCADERÍAS DE REPUESTO,
RECLAMOS DE CLIENTES AL COMPRADOR, FALTA DE ADVERTENCIA
Y/O INSTRUCCIÓN, PÉRDIDA DE OTROS PRODUCTOS O COSTOS DE
REHABILITACIÓN DEL MEDIO AMBIENTE O DISMINUCIÓN EN EL VALOR
DE LA PROPIEDAD. LAS SOLUCIONES DEL COMPRADOR ESTABLECIDAS
EN LA PRESENTE SON EXCLUSIVAS, Y LA RESPONSABILIDAD DE
LA EMPRESA NO EXCEDERÁ, EXCEPTO DONDE SE ESTIPULE LO
CONTRARIO, EL PRECIO DE LOS PRODUCTOS EN LOS QUE SE BASA
DICHA RESPONSABILIDAD. LOS DAÑOS, TAL COMO SE ESTABLECEN
EN ESTE PÁRRAFO, SERÁN RAZONABLEMENTE SUBSANADOS EN LA
MEDIDA DE LO POSIBLE. ESTE PÁRRAFO TAMBIÉN SE APLICARÁ A
TODOS LOS DAÑOS RESULTANTES DE CONDICIONES ESTABLECIDAS
EN LA SECCIÓN III Y (1) DEFECTOS EN PROTOTIPOS DE PRODUCTOS O
PROTOTIPOS DE PIEZAS DE REPUESTO QUE NO SE HAYAN PUESTO EN
MARCHA, CIRCULADO Y VENDIDO POR LA EMPRESA Y (2) DEFECTOS
QUE NO SE PRESENTABAN AL MOMENTO DE LA VENTA DEBIDO A
MOTIVOS CIENTÍFICOS O TECNOLÓGICOS.
La presente Garantía Limitada le otorga derechos legales específicos. Es
posible que usted tenga otros derechos que pueden variar según las leyes
y regulaciones en vigor. Cuando alguno de los términos de la presente
garantía estén prohibidos por dichas leyes, será considerada nula y sin
efecto, pero las partes restantes continuarán plenamente vigentes.
DESCARGO DE RESPONSABILIDAD: Todas las afirmaciones verbales acerca
del producto realizadas por el vendedor, la Empresa, los representantes o
cualquier otra parte no constituyen garantías, no deben ser tenidas en cuenta
por el usuario y no forman parte del contrato de compraventa. La única
obligación del comprador y de la Empresa, y la única solución del comprador,
será el reemplazo y/o la reparación del producto por parte de la Empresa, tal
como se describe anteriormente. Antes de usar el producto, el usuario debe
determinar si éste es adecuado para el uso que se le desea dar, y el usuario
asume todo riesgo y responsabilidad en conexión con dicho uso.
This manual suits for next models
5
Table of contents
Languages:
Other Little Giant Water Filtration System manuals
Popular Water Filtration System manuals by other brands
Graf
Graf Optimax-Pro Installation and maintenance instructions
Injectidry Systems
Injectidry Systems INTERCEPTOR HEPA Operation guide

Newa Pond
Newa Pond PREXO advance Instructions and guarantee

Hydac
Hydac OLSW Operation and maintenance instructions
US Water Systems
US Water Systems Fusion Oxi-Gen 089-FSF OG Series Installation, operation and maintenance manual
Brita
Brita Mypure Instructions for use
