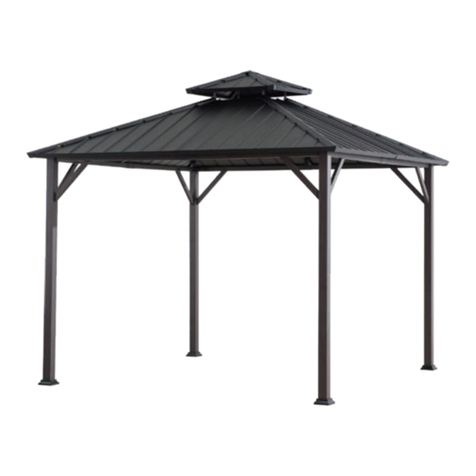
Living Accents 8014537 User manual

8014537
10 ft x10 ft Hardtop Gazebo
Please check to make sure you have the following:
No.
Description
Qty
No.
Description
Qty
A
Post
4
S
Hook
1
B
Base
4
T1
Small top roof panel
4
C
Base cover
4
U1
Big roof panel cover 1
4
D1
Slanting bar connector
4
V3
Big roof panel cover 2
4
E1
Beam connector
4
V4
Big roof panel cover 3
4
F1
Left top screen
4
W3
Big roof panel cover 4
4
F2
Right top screen
4
W4
Big roof panel cover 5
4
G
Support bar
4
X
Big roof panel cover (Corner)
4
H1
Big top bar
4
Y
Big roof panel cover (Middle)
4
J1
Big top connector
4
Z
Mosquito netting pipe
8
K1
Small top support beam
4
AA
Bolt M6 * 15
72
L
Small top roof cover
4
BB
Flat washer M6
277
M1
Small top connector
1
CC
Bolt M6*20
152
N1
Top slanting bar
4
DD
Nut M6
16
P1
Top beam
4
EE
Bolt M6*40
24
Q4
Big roof top beam (Short Side)
8
FF
Bolt M6*60
13
Q5
Big roof top beam (Middle Part)
8
HH
Stake Φ8*180
8
Q6
Big roof top beam (Long Side)
8
WW
Spring washer
32
R
Small top cover
1
Z1
Wrench M6
2
Need help? Please contact our service department at 1-866-578-6569, Monday through Friday, between 8:30
a.m. and 8:30 pm, Eastern Standard Time or email us at ace@sunjoygroup.com

PREPARATION
Please read instructions thoroughly before assembly. Familiarize yourself with the inventory of parts and the accompanying illustrations to assure
safe and proper assembly.
·Remove all parts from packaging. Examine all packing material before discarding, shortages may occur from parts left in the packing material.
Check the parts quantity mentioned on the parts list.
·Spread out parts on a soft level surface to avoid scratching the parts.
·Assemble the item on soft, non-abrasive surface to avoid damage to the item. Item is heavy. Use care when handling.
·May require two adults for safe assembly.
·Keep children away from assembly area.
IMPORTANT:
1. Keep all children and pets away from assembly area. Children and pets should be supervised when they are in the area of pavilion
construction.
2. The area for assembly should not be less than 6 feet from any obstruction such as fence, garage, house, overhanging branches, laundry
line or electrical wires.
3. This unit is heavy. Do not assemble this item alone. Six people are recommended for safe assembly.
4. Some parts may contain sharp edges. Wear protective gloves if necessary during assembly.
5. When assembling and using this product, basic safety precautions should always be followed to reduce the risk of personal injury and
damage to equipment. Please read all instructions before assembly and use.
6. For outdoor use only. Install on level ground. 16 stakes are provided to secure the pavilion in the ground. If you wish to secure the pavilion
to a wood deck or concrete surface, you will need to purchase fasteners appropriate for these surfaces. These are readily available at your
local hardware store or home center.
7. Check all bolts for tightness before and during usage.
8. Please check your state and local regulations prior to purchasing. Some jurisdictions may require permits for, or otherwise regulate,
installation and use.
9. While this pavilion is manufactured to withstand gale force winds utilizing only the supplied ground stakes, in areas subject to frequent
severe weather, securing the pavilion to a deck, concrete patio or footings should be considered.
10. Your pavilion has been engineered to accommodate winter snow loads incurred in most areas. Removal of accumulated snow on the
pavilion roof with a roof rake is recommended. In areas that are regularly subject to blizzard conditions however, removal of the roof panel
is suggested. The assembled roof structure can simply be left intact until warmer conditions return.
NOTE: The gazebo’s roof and structure are not guaranteed against extreme weather conditions (storms, high winds, etc.).
Please dismantle gazebo for the winter season.
AA CC EE FF
HH
BB WW DD Z1

Fig.1: Insert the posts (A) into the base covers (C), and then install the bases (B) to the bottoms of posts (a) with bolts (AA) &
flat washers (BB).
Fig.2: Fix Slanting beam connector (D1) to post (A) with bolt (CC) & washer (BB).
Fig.3: Connect left top screen (F1) and right top screen (F2) with bolt (CC), washer (BB), spring washer (WW) and nut (DD).
Fig.4: Fix slanting beam connector (E1) to left top screen (F1) with bolt (CC), flat washers (BB) and spring washer (WW).
Fig.5: Fix mosquito netting pipe (Z) to left /right left top screen (F1/F2) with bolts (AA) & flat washers (BB).
Fig.6: Fix left /right left top screen (F1/F2) to post (A) with bolt (CC) & flat washers (BB) and spring washer (WW)..
Fig.7: Fix support bar (G) to left /right left top screen (F1/F2) with bolt (CC) & flat washers (BB) and spring washer (WW).

Fig.8: Fix big top bar (H1) to big top connector (J1) with bolt (CC) and flat washers (BB).
Fig.9-1: Fix the top slanting bar (N1) to big top connector (J1) with bolts (CC), flat washers (BB).
Fig.9-2: Fix the top slanting bar (N1) to slanting bar connector (D1) with bolts (AA), flat washers (BB).
Fig.10-1: Fix top beam (P1) to big top bar (H1) with bolts (CC), flat washers (BB).
Fig.10-2: Fix the end side of top beam (P1) to beam connector (E1) with bolts (FF), flat washers (BB) and nut (DD).
Fig.11:Attach the small top support beam (K1) to the small top connector (M1) using bolts (FF) with flat washers (BB) and
nut (DD) through the assembly. Attach the hook (S) to the bottom center of the small top connector (M1) by screwing it
counterclockwise.
Fig.12: Fix small top support beam (K1) to big top connector (J1) with bolts (CC), flat washers (BB).
Fig.13-1&13-2: Fix big roof top beam (Short
Side) (Q4) to top beam (P1) and top slanting
bar (N1) with bolts (CC), flat washers (BB).
Repeat it to big roof top beam (Middle Part)
(Q5) and big roof top beam (Long Side) (Q6).

Fig.14: Fix small top roof panel (T1) to small top support beam (K1) with bolts (AA), flat washers (BB).
Fig.15: Fix small top roof cover (L) to small top support beam (K1) with bolts (EE), flat washers (BB).
Fig.16: Fix small top cover (R) to small top connector (M1) with bolts (FF), flat washers (BB).
Fig.17: Button up the big roof panel cover 1 (U1) on the big roof panel cover 2/3 (V3/V4). Repeat it to the other sides.
Fig.18-1: Fix big roof panel cover 1 (U1) to top slanting bar (N1) and top beam (P1) with bolts (AA), flat washers (BB). Repeat it
to the other sides of the big roof panel cover 1 (U1)
Fig.18-2: Fix big roof panel cover 2/3 (V3/V4) to top slanting bar (N1) and top beam (P1) with bolts (AA), flat washers (BB).
Repeat it to the other sides of the big roof panel cover 2/3 (V3/V4).
Fig.18-2: Fix the big roof panel cover 4/5 (W3/W4) to top slanting bar (N1) and top beam (P1) with bolts (AA), flat washers
(BB). Repeat it to the other sides of the big roof panel cover 4/5 (W3/W4).
Fig.19-1: Insert the big roof panel cover (Corner) (X) into big top connector (K1).
Fig.19-2: Fix big roof panel cover (Corner) (X) to top slanting bar (N1) with bolts (EE) and flat washers (BB).
Fig.20:Fix big roof panel cover (Middle) (Y) to top beam (P1)
with bolts (EE) and flat washers (BB).
Fig.21: Lift the base covers (C) and insert stakes (HH) through
holes on base (B) to secure assembly to the ground

Care and Maintenance
Before using, clean gazebo frame completely with a dry towel. Keep all flame and heat sources away from the gazebo fabric. To maintain the frame finish,
apply a fine automotive wax after each cleaning. Never use a solvent type cleaning solution. Put away your gazebo during heavy snow or strong gale to avoid
damage.
Limited Half Year Warranty
What is covered under this warranty?
This product is covered under the Manufacturers Limited Warranty. To ensure your complete satisfaction, this warrants to the original purchaser that this
furniture is free from defects in material and workmanship as of the date of purchase and that it will, under normal use and proper care, remain so for half year
after the date of purchase. Replacement of missing or initially defective parts will be sent at no charge for a period of 10 days from date of purchase. The
manufacturer and retailer will not be responsible for missing parts and/or hardware after 10 days from date of purchase.
Warranty does not cover:
Freight and packaging charges to and from our customer service center remain the customer’s responsibility. Labor or material charges to remove or replace
parts are not covered under this warranty. Any floor sample sales or clearance sales from the store are not covered by this warranty. Furniture used for
commercial purposes; failures caused by improper care; unreasonable or abusive use; damage by modification or alteration; freeze damage; acts of nature;
rust; fabric stains; ripping or fading; purchased parts; or return freight and packaging charges are not covered under this warranty. Proof of purchase (dated
register receipt) is required for warranty claims. Rusting is a normal occurrence when iron is exposed to the elements and is not included in this warranty.
How to obtain service:
If you have any questions or concerns please call toll free at: 1-866-578-6569, Monday through Friday, between 8:30 a.m., and 8:30 p.m., Eastern Standard
Time or by emailing us at ace@sunjoygroup.com
Printed in China for
AHC Trading Co.
Other Living Accents Outdoor Furnishing manuals