Living & Co BM1356-SA User manual

BREAD MAKER
INSTRUCTION MANUAL
MODEL: BM1356-SA

Contents
IMPORTANT SAFETY INSTRUCTIONS
-
PRODUCTOVERVIEW
CLEANING AND MAINTENANCE
10
11
1
1
INTRODUCTION TO BREAD INGREDIENTS
INGREDIENT MEASUREMENT
TROUBLE SHOOTING GUIDE
16 17

IMPORTANT SAFETY INSTRUCTIONS
Before using the electrical appliance, the following basic precautions should always be followed:
1. READ ALL INSTRUCTIONS.
2. Before using check that the voltage of wall outlet corresponds to that shown on the
rating plate.
3. Do not operate any appliance with a damaged cord or plug or after the appliance malfunctions,
or it is dropped or damaged in any manner. Have the appliance checked by your
nearest authorised service agent for repair or electrical or mechanical adjustment.
4. Do not touch hot surfaces.
5. To protect against electric shock, do not immerse cord, plugs, or housing in water or
other liquid.
6. Unplug from outlet when not in use, before putting on or taking off parts, and before cleaning.
7. Do not let cord hang over edge of table or hot surface.
8. The use of accessory attachments not recommended by the manufacturer or not provided with
the appliance at the time of purchase, may cause injuries.
9. Do not place on or near a hot gas or electric burner, or in a heated oven.
10. Do not attempt to touch any moving or spinning parts of the machine when baking.
11. Never switch on the appliance without correct placement of the bread pan
filled with ingredients.
12. Never beat the bread pan on the top or edge to remove the contents as this may damage
the bread pan.
13. Metal foils or other materials must not be inserted into the bread maker as this could give
rise to the risk of a fire or short circuit.
14. This appliance is not intended for use by persons (including children) with reduced physical,
sensory or mental capabilities, or lack of experience and knowledge, unless they have been
given supervision or instruction concerning use of the appliances by a person responsible for
their safety.
15. Children should be supervised to ensure that they do not play with the appliance.
16. Never cover the bread maker with a towel or any other material, heat and steam
must be able to escape freely. A fire can be caused if it is covered by, or comes into
contact with combustible material.
2

17. Do not operate the appliance for other than its intended use.
18. Always use the appliance on a secure, dry level surface.
19. Do not use outdoors.
20. This appliance has been designed with a grounded (earthed) plug (Class I). For safety
reasons, please ensure the wall outlet in your house is well earthed.
21. This appliance is intended to be used in household and similar applications such as:
– Staff kitchen areas in shops, offices and other working environments;
– Farm houses;
– By clients in hotels, motels and other residential type environments;
22. Bed and breakfast type environments.
22. The appliance is not intended to be operated by means of an external timer or separate
remote-control system.
23. Do not operate the unit without bread pan placed in the chamber to avoid damaging the
appliance.
24. Keep this manual with the appliance. If the appliance is to be used by a third party, this
instruction manual must be supplied with it.
The safety instructions do not by themselves eliminate any danger completely and proper
accident prevention measures must always be used. No liability can be accepted for any
damage caused by non-compliance with these instructions or any other improper use or
mishandling.
3
IMPORTANT SAFETY INSTRUCTIONS (CONTINUED)

PRODUCT OVERVIEW
Note: Images are for indicative purposes only and may vary from the actual product.
Viewing window
Lid
Control panel
Digital display (LCD)
Fruit & Nut dispenser container
Release lever for dispenser container
Measuring Spoon
Hook
Measuring Cup
4
Detachable kneading blade
Detachable baking
(bread) pan

Note: Images are for indicative purposes only and may vary from the actual product.
OPERATION
AFTER POWER-UP
As soon as the bread maker is plugged into the power supply, the digital display (LCD) will be
illuminated whilea beep noise will be heard. If no function / control button is pressed within
20 seconds, then the LCD will switch off and go into standby. The default setting of 900g
and MEDIUM. “BASIC” time “3:00” are displayed on LCD.
START / STOP
For starting and stopping the selected baking program;
To start a program, press the “START/STOP” button for approximately 1 second. A short beep
will be heard and the two dots in the time display will begin to flash and the program will start.
To stop the selected baking program;
To stop the program, push the “START/STOP” button for approximately 2 seconds until a beep
confirms that the program has been switched off.
TIME
COLOUR
MENU
BAKE(shortcut
key for menu 8)
START/STOP
GRAM DIY (shortcut key fo menu 13)
NUT
MIX DOUGH (shortcut key for menu 11)
5
CONTROL PANEL OVERVIEW
GRM
COL

PAUSE
After commencement of a program, push the “START/STOP” button once to interrupt at any time,
the operation will be paused but the program setting will be memorised, the remaining
operational time will display (flash) on the LCD. Push the “START/STOP” button again or within
10 minutes without touching any other button, the program will continue from where it was
paused.
MENU
Use the Menu button to select the different programs. The function of the 13 different programs is
summarised as follows:
1. BASIC: kneading, rising and baking normal bread. You may also add Fruit or Nuts (using the
dispenser function) to add flavour.
2. QUICK: kneading, rising and baking loaf with baking soda or baking powder. Bread baked on
this setting is usually smaller with a more dense texture.
3. FRENCH: kneading, rising and baking with a longer rise time. The bread baked in this
program will typically have a crisper crust and lighter texture.
4. ULTRA FAST: kneading, rising and baking loaf in the shortest time. Typically the bread is
smaller and rougher than that that made with the QUICK program.
5. WHOLE WHEAT: kneading, rising and baking of whole wheat bread. This setting has longer
preheating time to allow the grain to soak up the water and expand. It is not advised to use the
delay function as this can produce poor results.
6. CAKE: kneading, rising and baking. Rise with soda or baking powder.
7. DOUGH: kneading and rising, but without baking. Remove the dough and shaping it to make
bread rolls, pizza, steamed bread, etc.
8. BAKE: only baking, no kneading and rising. Also used to increase the baking time on selected
settings
9. SANDWICH: kneading, rise and baking sandwich bread. For baking light texture bread with
a thinner crust.
10. JAM: For boiling jams and marmalades, mash up fruit or vegetables before putting them in
bread pan.
11. MIX STIR: Specifically for kneading dough only.
12. GLUTEN FREE: The ingredients to create gluten-free breads are unique. While they are
“yeast breads,” the dough is generally wetter and more like a batter. It is also important not to
over-mix or over-knead gluten-free dough. There is only one rise cycle and due to the high
moisture content, baking time is increased.
13.DIY: This enables you to self-program, to select kneading, rising, baking and keep
warm durations. Use the relevant buttons to step through and make your desired selection.
COLOUR
There are three colour options that can be selected for the bread crust, these are LIGHT,
MEDIUM or DARK. Press “COLOUR” (COL) button to select your desired colour.
This option is unavailable for the programs Dough, Jam and Mix Stir.
LOAF SIZE
There are two different loaf sizes of 700g and 900g that can be selected. Please note the
total operation time may vary with the different loaf size.
This option is unavailable for the programs Quick, Ultra Fast, Cake, Dough, Bake,
Jam, Mix Stir and DIY.
Note: select your desired loaf size by pressing the “GRM” (Gram) button.
6

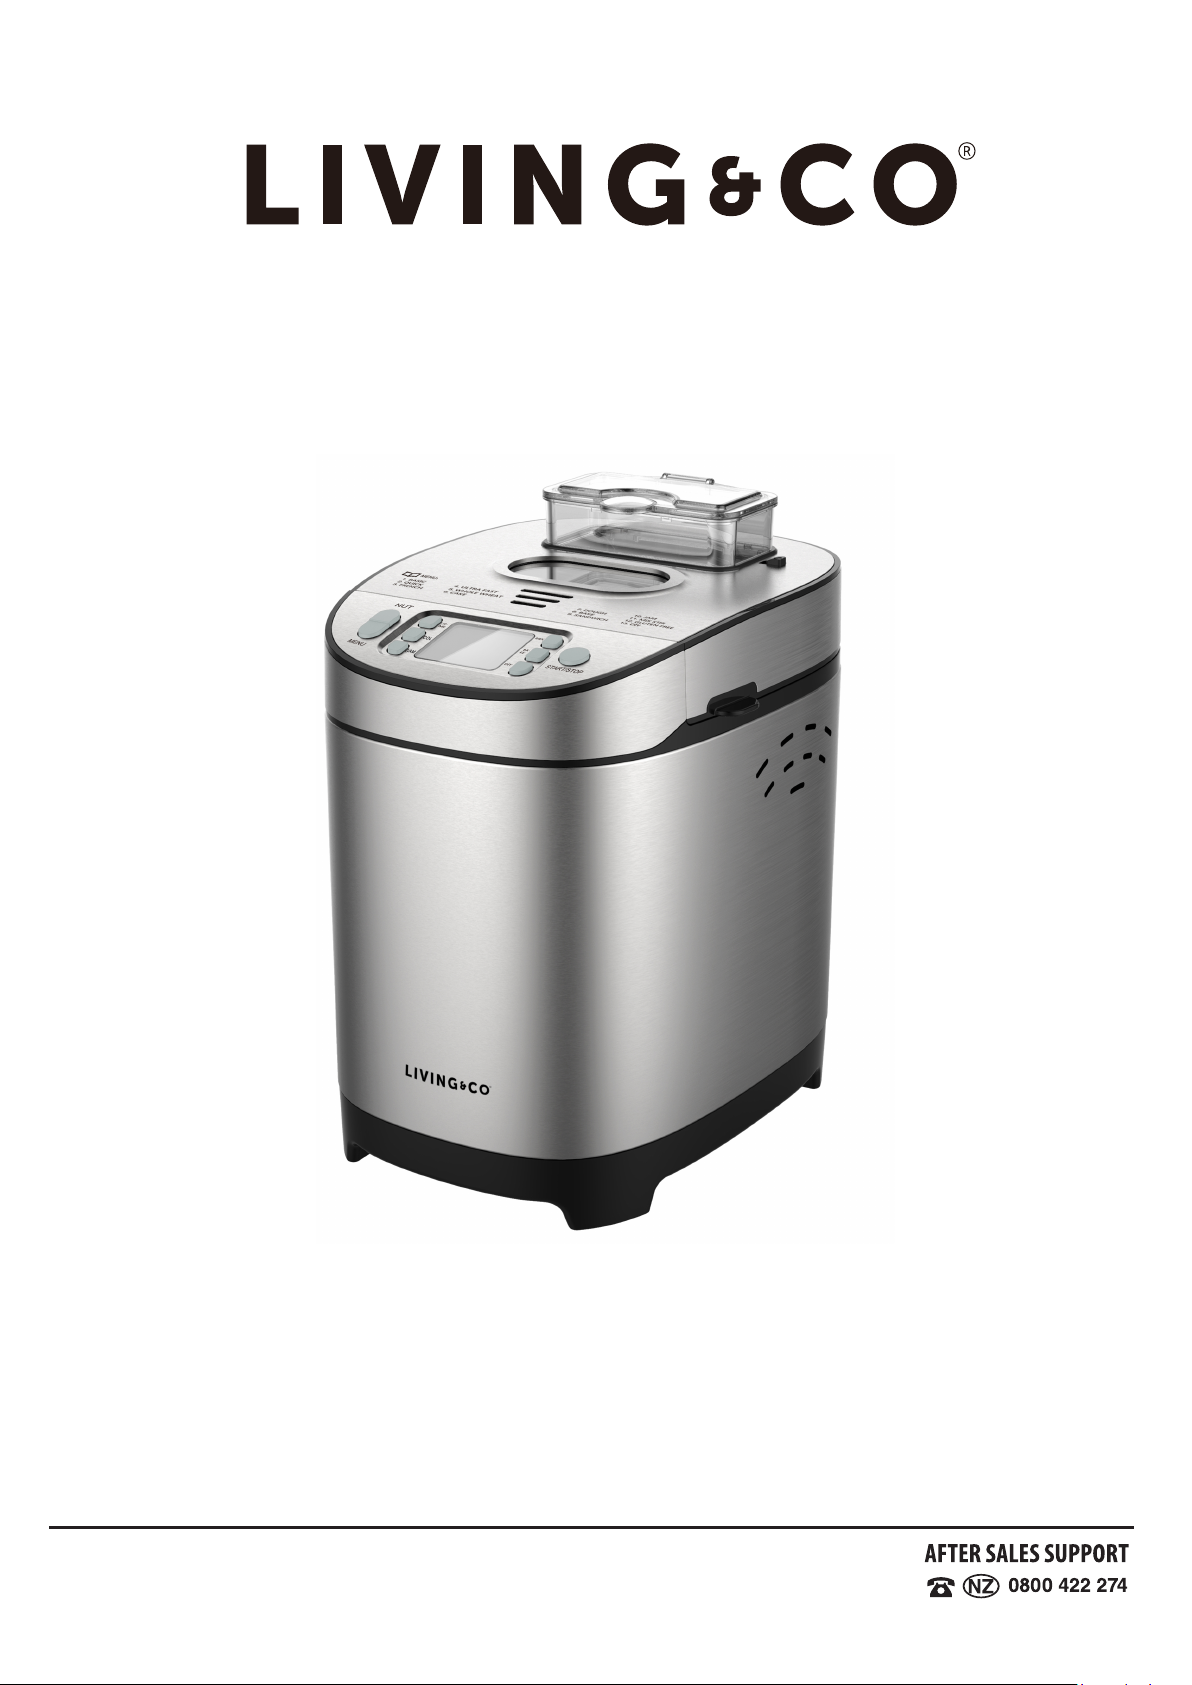
FRUIT & NUT DISPENSER
Once the desired program has been selected, press the NUT button to select if using auto add
ingredient function. The default setting is on “√”, switch to off “×” by pressing the button again
When selecting auto add ingredient function, the program will automatically release the contents
of the dispenser container at the correct stage during the baking process.
Before making bread, detach the dispenser container by pressing the release lever (slide right)
whilst lightly pulling to remove. Open the lid on the dispenser container, insert ingredients (nuts /
fruit etc) and then replace clip back into place on the bread maker.
NOTE: This function is available during the BASIC, QUICK, FRENCH, ULTRA FAST, WHOLE
WHEAT, CAKE, SANDWICH, GLUTEN FREE and DIY programs only.
DELAY FUNCTION
If you want the appliance to operate at a later time, you can set the delay time.
You need to decide how long it will be before your bread is ready by pressing “TIME” button.
Please note the delay time should include the baking time of the selected program. That is, at the
completion of delay time, the bread baking is complete.
At first, the program and degree of browning must be selected, then press the “TIME” button to
increase or decrease the delay time in increments of 10 minutes. When increased to the max
delay time 13 hours (inclusive of baking time), press “TIME” button again and the delay time will
revert to the original default time of each program.
Example: Now it is 8:30p.m, if you would like your bread to be ready the next morning at 7a.m,
i.e. in 10 hours and 30 minutes. Select your desired menu program, crust colour, loaf size then
press the “TIME” button to add the time until 10:30 appears on the LCD. Then press the
START/STOP button to activate this delay program. You can see the display dot flashing and the
LCD will count down to show the remaining time. You will have fresh bread at 7:00am, if you
don’t want to take out the bread immediately, the ‘keep warm’ time of 1 hour will activate.
Note: 1. This function is not available for the Menu programs :JAM, ULTRA FAST, BAKE,
MIXSTIR.
Note: 2. For time delayed baking, do not use any easily perishable ingredients such as
eggs, fresh milk, fruits, onions, etc.. as they will remain at room temperature until baking
commences.
KEEP WARM
Bread can be automatically kept warm for 60 minutes after baking. If you would like to take the
bread out, switch the program off with the START/STOP button.
MEMORY
If the power supply to the bread maker has been interrupted during the course of bread making
(ie accidental removal of the power lead from the plug or a brief power cut), the process will be
continued automatically within 10 minutes, even without touching the “START/STOP” button.
If the interruption time exceeds 10 minutes, the memory will not retain and the program will reset.
In this case, the bread maker must be restarted, but if the dough is no further than the kneading
phase when the power is interrupted, touch the “START/STOP” button to continue the program
from the beginning.
7

ENVIRONMENT
The machine may work well in a wide range of ambient temperatures, however there could be a
difference in loaf size between a very warm room and a very cold room. We suggest the room
temperature should be between 15℃and 34℃.
WARNING DISPLAY
1. If the display shows “HHH” after the program has been started (accompanied by 5 beep
sounds), the temperature inside the baking cavity is still too high. The program must be
stopped. Open the lid and let the machine cool down for 10 to 20 minutes.
2. If the display shows “LLL” after pressing the START/STOP button (except for the programs
JAM and BAKE), it means the temperature inside is too low (accompanied by continuous
beep sounds). Press the START/STOP button to return to the default setting of the machine
and the beeping sound will stop. Then select the BAKE program which will make the
temperature inside the chamber increase rapidly.
NOTE: The temperature in the bread maker is lower than room temperature if placing
bread maker in cooler place (such as air conditioning room, cold storage) after a period
of time and then moving it to a normal room temperature.
3. If the display shows “Err” after you have pressed START/STOP, this indicates a malfunction
with the electronics (thermal sensor) and the appliance will need repair or replacement.
FOR THE FIRST USE
The appliance may emit a little smoke and a characteristic smell when turning it on for the first
time. This is normal and is due to lubricants that may come into contact with heated parts during
manufacturing, this will only occur for a brief period and will soon stop. Make sure the appliance
has sufficient ventilation.
1. Please check if all parts and accessories are received and free of damage.
2. Clean all the parts according to the latter section “Cleaning and Maintenance”.
3. Set the bread maker in baking mode and bake empty for about 10 minutes. After cooling it
down, clean once more.
4. Dry all parts thoroughly and reassemble them, the appliance is then ready for use.
8

USING YOUR BREAD MAKER
1. Place the appliance on a stable, flat and level surface away from other objects such as
curtains, food, other appliances.
2. Before making bread, prepare and weigh the ingredients you need.
3. The baking pan can be removed from the cooking cavity by opening the main lid, folding the
pan carry handle up and gently rotating anticlockwise to unlock. It can then be lifted away. To
reinsert, place the baking pan centrally in position, turn it clockwise until it clicks and locks in
position.
4. Fix the kneading blade onto the drive shaft within the baking pan by sliding it into position
(note this is keyed to fit in one orientation). It is recommended to place a small amount of
heat-resisting margarine or cooking oil into the hole of the kneading blade prior to placing on
the shaft, this helps to avoid the dough sticking below the kneader and helps to allow the
kneading blade to be easily removed.
4. Place ingredients into the baking pan. Usually the water or liquid substance should be put in first,
then add sugar, salt and flour, always add yeast or baking powder as the last ingredient. (See
image below):
Note: the maximum quantity of flour is 520 grams and yeast is 4 tbsp.
5. With your finger, make a small indentation on one side of the flour. Add yeast to indentation,
ensure it does not come into contacting with the liquid ingredients or salt. Close the lid gently.
6. Plug the power cord into a wall socket outlet and switch on.
7. Press the “MENU” button until your desired program is selected.
8. Press the “COL” (Colour) button to select the desired crust colour.
9. Press the “GRM” (Gram) button to select the desired size (700g or 900g).
10. Set the delay time by pressing “TIME” button. This step may be skipped if you want the
bread maker to start working immediately.
11. Press the START/STOP button to start working.
12. For the programs of BASIC, QUICK, FRENCH, ULTRA FAST, WHOLE WHEAT,
CAKE, SANDWICH, GLUTEN FREE and DIY, put the fruit / nut ingredients into the
dispenser container and then close the lid.
NOTE: During operation, the ingredients in the dispenser container will be automatically
poured into the baking pan.
13. Once the process has been completed 10 beeping sounds will be heard. Touch
START/STOP button for approximately 2 seconds to stop the process and take out the bread.
Open the lid while wearing oven mitts, firmly grasp the baking pan handle. Turn the pan
anti-clockwise and gently pull the pan straight up and out of the machine.
NOTE: Before replacing the baking pan, allow it cooling down completely.
水或液体
干的配料
酵母或苏打
Yeast or soda
Dry ingredients
Water or liquid
9

14. Use non-stick spatula to gently loosen the sides of the bread from the pan.
CAUTION: The Baking pan and bread may be very hot! Always handle with care and use
oven mitts.
15. Turn bread pan upside down onto a clean counter top and gently shake until bread falling out
onto rack.
16. Remove the bread carefully from the pan and cool for about 20 minutes before slicing.
17. If leaving the room or not touching the START/STOP button at the end of operation, the
bread will be kept warm automatically for one hour.
18. When not in use or after complete operation, unplug the power cord.
CAUTION: Before slicing the loaf, use the hook to remove the kneading blade hidden on the
bottom of loaf. Never attempt to remove by hand if the kneading blade or loaf is hot. NOTE: If
bread has not been completely eaten after initially serving, it is advised to store the remaining
bread in a sealed plastic bag or airtight container. Bread can be stored for about three days
at room temperature. If more storage time is required, pack it in a sealed plastic bag or
vessel and then place it in the refrigerator, storage time is at most ten days. As home-
made bread does not include preservative, generally the storage time is less than that of
commercially made bread.
SPECIAL NOTE FOR QUICK PROGRAM
With the QUICK program, the bread maker can finish making a loaf within shorter period with
baking powder or soda in place of yeast. To obtain perfect quick bread, it is suggested that all
liquid ingredients are placed at the bottom of the bread pan and dry ingredients on the top, but
during the initial kneading, some dry ingredients may collect in the corners of the pan, so in order
to avoid flour clumps, you may use a rubber spatula to help to knead dough.
CLEANING AND MAINTENANCE
Disconnect the machine from the power supply socket and let it cool down prior to cleaning.
1. Baking pan: Rub inside and outside with a damp cloth. Do not use any sharp or
abrasive agents in order to prevent damage to the non-stick coating. The pan must be dried
completely prior to installing.
2. Fruit and Nut Dispenser container: Wash the container in warm water and dry thoroughly,
then replace to drawer and close the drawer. Do not use any rough scouring pad or cleanser
on part or finish. Do not wash in a dishwasher.
3. Kneading blade: If the kneading blade is difficult to remove from the shaft, fill the container
with warm water and allow it to soak for approximately 30minutes.The kneading blade can
then be easily removed for cleaning. Also wipe the blade carefully with a damp cotton cloth.
Please note that the bread pan, kneading blade are dishwasher safe components.
4. Lid and viewing window: Clean the lid inside and outside with a slightly damp cloth.
5. Housing: Gently wipe the outer surface of housing with a wet cloth. Do not use any abrasive
cleaner to clean as this would degrade the high polish of the surface. Never immerse the
housing into water for cleaning.
6. Before the bread maker is packed away for storage, ensure that it has completely cooled
down, clean and dry, put the spoon and the kneading blade in the pan, and close the lid.
10

INTRODUCTION TO BREAD INGREDIENTS
1. Bread flour
Bread flour is a kind of high-gluten flour, also called as high-protein flour containing high protein,
which has good flexibility and can prevent loaf from being sunken during rising. As typically the
content of its gluten is higher than that in plain flour, it can be used for making loaves having a
large size and good inner fiber texture. Bread flour is the most important ingredient to make a
loaf.
2. Plain flour
Plain flour is a blend of refined soft and hard wheat, and especially applicable to make quick
bread or cake.
3. Whole-wheat flour
Whole-wheat flour, which is ground from whole wheat, contains bran and wheat germ. It is
heavier and richer in nutrition than plain flour. Usually the bread made of whole wheat flour is
smaller in size, so in many recipes the whole wheat flour and bread flour are combined in order
to achieve best results.
4. Black wheat flour
Black wheat flour, also named as “rough flour”, is a kind of high fiber flour similar to whole-wheat
flour. To obtain the larger size of bread during rising, it should be used in combination with a high
proportion of bread flour.
5. Self-rising flour
A type of flour that contains baking powder, it is commonly used for making cakes.
6. Corn flour and oatmeal flour
Corn flour and oatmeal flour are ground from corn and oatmeal separately. They are the additive
ingredients of making rough bread, which are used for enhancing the flavour and texture.
7. Sugar
Sugar is very important for crust colour and flavour of bread. It also helps to ferment bread.
Usually white sugar is used, however brown sugar, powder sugar or cotton sugar may be used
for special purpose
8. Yeast
The purpose of yeast is to ferment dough by producing carbon dioxide that expands the bread
and then softens inner fiber texture, however fast breeding of yeast needs carbohydrate in sugar
and flour as nutriment. Usually there are three types of yeast: fresh yeast, active dry yeast and
instant yeast. Instant yeast is used more frequently, traditional active dry yeast may be used to
obtain a better fermentation effect, but instant yeast operates faster than active dry yeast.
Conversion relation between instant yeast and active dry yeast is as follows:
1 tsp. active dry yeast = 3/4 tsp. instant yeast
1.5 tsp. active dry yeast = 1 tsp. instant yeast
2 tsp. active dry yeast = 1.5 tsp. instant yeast
Importantly, yeast shall be stored in a refrigerator as it may be killed at high temperatures. Before
using yeast ensure that it is fresh by checking the expiration date. Store it back in the refrigerator
as soon as possible after each use. Usually bread or dough, which fails to rise, is due to stale
yeast being used.
11

The test described below will allow you to check whether your yeast is fresh and active or not.
(1) Pour 1/2 cup warm water (45-50°C) into a measuring cup
(2) Add 1 tsp. white sugar into the cup and stir, then sprinkle 2tsp. yeast over the water.
(3) Put the measuring cup in a warm place for about 10min. Do not stir the water.
(4) The froth generated by yeast shall come up to the 1-cup mark, otherwise the yeast may be
stale or inactive.
9. Salt
Salt is necessary to improve bread flavor and crust colour. But salt can also restrain yeast from
rising. Never use too much salt in a recipe. If you don't want to use salt, omit it, but bread would
be a bit larger.
10. Egg
Eggs add richness and a soft texture to bread dough and cakes.
11. Butter
Butter can make bread soften and delay storage life. Butter should be melted or chopped to
small particles before using.
12. Baking powder
Baking powder is a raising agent mainly used in making the Ultra Fast bread and cakes. It does
not require fermentation time before baking as the chemical reaction works during baking
process.
13. Soda
The same as above, it can also be used in combination with baking powder.
14. Water and other liquid
Water is essential ingredient for making bread. Generally, water temperature between 200C and
250C is ideal. But for making Ultra Fast bread, the water temperature should be within 45-500C in
order to enhance fermentation rate. The water may also be replaced by fresh milk, or water
mixed with 2% milk powder, which may enhance bread flavor and improve crust colour. Some
recipes call for juices (such as apple juice, orange juice, lemon juice and etc.) in order to add
flavor to the bread.
12
Yeast test

INGREDIENT MEASUREMENT
An important step for making good bread is to measure ingredients accurately. It is
recommended to use a measuring cup or measuring spoon to obtain an accurate
measurement, otherwise the bread will be largely influenced. IMPORTANT: Do not exceed the
maximum flour and raising agent quantities specified in the recipes supplied.
1. Liquid ingredient measurement
Water, fresh milk or similar liquids should be measured with a measuring cup. When reading
amount, the measuring cup shall be placed on a horizontal flat surface and keep at eye level, the
liquid level line must be aligned with the mark of measurement. Before measuring oil or other
ingredients, clean the measuring cup thoroughly.
2. Dry ingredient measurement
Dry ingredient should be kept in natural loose condition and measured with measuring spoon or
cup, dry measuring should be done by gently spooning ingredients into the measuring cup and
once filled, level off with knife to ensure accurate measurement.
3. Ingredient adding sequence
Usually ingredients shall be added according to the following sequence: liquid ingredients, eggs,
salt and milk powder etc. The yeast shall be placed on top of the dry flour. Pay special attention
that yeast does not come in contact with salt. When you use timer delay function, never make
bread that contains perishable ingredients such as eggs or fruit.
13

TROUBLE SHOOTING GUIDE
No.
Problem
Cause
Solution
1
Smoke from ventilation
holes when baking
Some ingredients may adhere
to or near the heating element.
Before first use, oil may remain
on the surface of the heating
element.
Unplug the bread maker and
clean the heating element,
but be careful not to burn
yourself, during the first use,
dry operate and open the lid.
2
Bread bottom crust is
too thick
Bread left in the bread pan on
keep warm for too long so that
too much moisture is lost.
Take bread out sooner
without using keep warm
function.
3
It is very difficult to take
kneading blade out
Kneading blade adheres tightly
to the shaft in bread pan
After taking bread out, put
hot water into bread pan and
immerse kneading blade for
10 minutes, then take it out
and clean.
4
Blended ingredients
not evenly dispersed
and uneven baking
Selected program menu does
not align with recipe.
Select the proper program
menu.
During operating, the cover is
opened several times and
bread is dry, no brown crust
colour.
Don’t open cover at the last
rise.
Blend resistance is too high so
that kneader almost can’t
rotate and stir adequate.
Check kneader hole, then take
bread pan out and operate
without load, if not normal,
contact an authorised service
facility.
5
Display “HHH” after
pressing start button
The temperature in bread
maker is too high to make
bread.
Press stop button and
unplug bread maker, then
take bread pan out and open
cover until the bread maker
cools down
6
Hear noise from the
motor but dough isn’t
stirred
Bread pan is not fixed properly
or dough is too much to be
blended
Check whether bread pan is
fixed properly and dough is
made according to recipe
and the ingredients are
weighed accurately
7
Bread size expands
too much as to push
against the top lid
Too much yeast, flour or water.
Environment temperature is
too high
Check the ingredients and
baking program to ensure
accurate.
8
Bread size is too small
or bread has no rise
No yeast or not enough yeast.
Yeast may have a poor activity.
Water temperature too high.
Yeast is less active due to
being mixed with salt.
Check the amount and
performance of yeast,
Increase temperature. Avoid
direct contact between yeast
and salt when placing
ingredients.
9
Dough expands too
much so as to overflow
the baking pan
Too much liquid has been used
causing the dough to be too
soft, in addition the yeast
content may be excessive.
Reduce the amount of
liquids and improve dough
rigidity
14

10
Bread collapses in the
middle part when
baking dough
The flour is old or weak and
can’t make dough rise
Use fresh bread flour.
Yeast rate is too rapid or yeast
temperature is too high
Use yeast at room
temperature.
Excessive water makes dough
too wet and soft.
Adjust water on recipe
11
Bread weight is very
large and too dense
Too much flour or not enough
water
Reduce flour or increase
water
Too many fruit ingredients or
too much whole wheat flour
Reduce the amount of
corresponding ingredients
and increase yeast
12
Middle parts are hollow
after cutting bread
Excessive water or yeast or no
salt
Reduce properly water or
yeast and check salt
Water temperature is too high
Check water temperature
13
Bread surface is
adhered to dry powder
There is strong glutinosity
ingredients in bread such as
butter and bananas etc.
Do not add strong glutinosity
ingredients into bread.
Not stirred adequately or short
of water
Check water and that knead
blade is correctly fitted
14
Crust is too thick and
baking colour is too
dark when making
cakes or food with high
level of sugar
Different recipes or ingredients
have great effect on making
bread, baking colour will
become very dark because of
high levels of sugar
Press START/STOP button
to interrupt the program 5-10
min before intended finishing
time. Before removing the
bread or cake keep in bread
pan for about 20 minutes
with cover closed.
15
The display shows
“LLL” after pressing
the START/STOP
button it means the
temperature inside is
too low (accompanied
by continuous beep
sounds).
The bread maker may have
been stored in a cool
environment prior to operation.
Press the START/STOP
button to return to the default
setting of the machine and
the beeping sound will stop.
Then select the BAKE
program which will make the
temperature inside the
chamber increase rapidly.
16
The display shows
“Err” after you have
pressed the START/
STOP button.
This indicates a malfunction
with the electronics (thermal
sensor).
The appliance will need
repair or replacement.
BREAD MAKER PROGRAM TIMES
Program Hours : Minutes (Defaulted to 900gram sized loaf)
1.Basic 3:00 2.Quick 2:35
3.French 3:50 4.Ultra Fast 2:05
5.Whole Wheat 3:45 6.Cake 1:50
7.Dough 1:30 8.Bake 0:10
9.Sandwich 3:05 10.Jam 1:20
11.Mix Stir 0:25 12.Gluten Free 2:55
13. DIY 2:56
15

RECIPES
The following recipes are for reference only, you may adjust them depending on ingredients,
own taste and experiments. Do not exceed the maximum flour and raising agent quantities
specified in the recipes supplied. Maximum flour quantity for this appliance is 520g, maximum
dry yeast quantity for this appliance is 4 teaspoons.
BREAD MAKER COOKBOOK GUIDE
1 CUP = 250 ml
1 tablespoon = 3 teaspoons
1 tablespoon = 15ml
1 teaspoon = 5ml
1 Packet Dry yeast = 8g
1. WHITE BREAD
LOAF SIZE 700grams 900grams
Water 250ml 300ml
Salt 1.5 tsp 2 tsp
5. TRADITIONAL WHITE BREAD
LOAF SIZE 700grams 900grams
Water 250ml 330ml
Margarine or butter 1tbsp 1 1/2tbsp
Sugar 2 tbsp 2.5 tbsp Salt 1tsp 1 3/4 tsp
Durum wheat semolina 120g 150g Dry milk
Bread flour 270g 350g Sugar
1 1/4tsp 1 1/2 tsp Bread flour
Dry Yeast
Oil 2tbsp 2 1/2tbsp Dry yeast
1 1/2 tbsp 2tbsp
1 1/2tbsp 2 tbsp
450g 520g
1 1/4tsp 1 1/2 tsp
Program: FRENCH
2. NUT & RAISIN BREAD
LOAF SIZE 700grams 900grams
Water or milk 250ml 330ml
Margarine or butter 2tbsp 21/2tbsp
Program: BASIC
6. ITALIAN WHITE BREAD
LOAF SIZE 700grams 900grams
Salt 1tsp 1tsp
Water 220ml 280ml
Margarine or butter 2 1/2tbsp 3tbsp
Salt 1 1/2 tsp 2 tsp
Sugar 2 1/2 tsp 3 tsp
21/2tbsp
Bread flour 300g 400g
Sugar 2 tbsp
Bread flour 450g 520g
Corn semolina
Dry yeast 1 1/5tsp 1 1/2tsp
Dry yeast
80g 100g
1 1/2tsp 1 3/4tsp
Raisins 50g 75g
Program: SANDWICH
Crushed walnuts 30g 40g
Program: BASIC
3. COARSE WHITE BREAD 7. IRISH SODA BREAD
LOAF SIZE 700grams 900grams LOAF SIZE 700grams
Butter milk 220ml
Milk 280ml 330ml
Margarine or butter 1 1/2tbsp 2tbsp Eggs 2
Salt 1 tsp 1tsp Oil 2tbsp
Sugar 2 tbsp 3tbsp All-purpose flour 500g
Sugar 1/2Cup
Baking soda 1tbps
Salt 1/2tsp
Raisin 1Cup
Program: QUICK
Coarse Bread flour 380g 510g Dry
yeast 1 tsp 1 1/2 tsp
Program: BASIC
4. WHOLEMEAL BREAD 8. ULTRA -FAST PESTO BREAD
LOAF SIZE 700grams 900grams LOAF SIZE 700grams 900grams
Water 250ml 320ml Water, 48deg (warm) 270ml 340ml
Margarine or butter 11 /2tbsp 2tbsp Prepared pesto 3tbsp 1/2cup
Salt 1 tsp 1 tsp Dry milk
Sugar 1 tsp 1 tsp Sugar
1 1/3tbsp 2tbsp
1 1/3tbsp 2tbsp
Bread flour 200g 260g Salt 1/2tsp 2/3tsp
Bread flour
Dry yeast
380g 500g
3tsp 4tsp
Wheat wholemeal flour 200g 260g
Dry yeast 1tsp 1 1/4tsp
Program: WHOLE-WHEAT Program: ULTRA-FAST
16

9. SANDWICH BREAD
LOAF SIZE 700grams 900grams
Water 220ml 300ml
Margarine or butter 11/2tbsp 2tbsp
Salt 11/2tsp 2tsp
Sugar 1tbsp 1 1/2tbsp
Bread flour 380g 500g
Dry yeast 1 1/4tsp 1 1/2tsp
Program: Sandwich
10. CAKE
LOAF SIZE SMALL / LARGE
Egg 5 6
Sugar 8 tbsp 10 tbsp
Cake oil 1 1/2 tbsp 2 tbsp
Self-raising flour 1 1/2 cups 2 cups
Lemon Juice 1 1/2 tbsp 1 3/4 tbsp
Yeast 4/5 tsp 1 tsp
Program: CAKE
1. Add eggs and sugar in container and stir the mixture by hand mixer to produce foam. Then add cake oil and continue to stir.
2. Pour self-rising flour,Lemon Juice and Yeast to the mixture and stir evenly.
3. Pour the mixture into bread pan, then use CAKE menu to make cake.
DOUGH PREPARATION
You can easily prepare dough with the DOUGH program of your bread baking machine. The dough can be further worked and baked in your
oven.
During the 2nd kneading phase add the ingredients when you hear the beeping sound. In the Dough program there are no differences in the
baking levels. Here are a two example recipes:
French Baguette
LOAF SIZE 700grams 900grams
Water 260ml 330ml
Dried wheat leaven 25g 50g
Salt 1tsp 1/2tsp
Sugar 1tsp 1/2tsp
Bread flour 340g 420g
Durum wheat flour 45g 60g
Dry yeast 1/2packet 3/4packet
Program: DOUGH .
Divide the dough when ready into 2-4 parts, form long loaf shapes and leave them to rest for 30-40 minutes.
Make a series of diagonal cuts on the top surface and put the bread to bake in the oven.
Wholemeal Pizza
LOAF SIZE 700grams 900grams
Water 250ml 330ml
Salt 1/2tsp 1tsp
Olive oil 2tbsp 3tbsp
Wheat wholemeal flour 380g 500g
Wheat germ 1tbsp 11/2tbsp
Dry yeast 1/2packet 3/4packet
Program : DOUGH
Spread the dough, make round forms and leave them to rest for 10 minutes.
Spread pizza sauce on the dough and the desired filling. Bake for 20 minutes.
JAM
It is easy to make jams or marmalades with the bread maker. Add 900g of fruit with 500g of 2:1 jellifying sugar and mix well. Select Jam
program and start, program runs automatically for 1hr 20 minutes. When complete, take the baking pan out of the appliance with oven
gloves and pour into glass jars and close them well.
For more recipes it is recommended to search the internet or consult a bread maker cook book.
17

Warranty
We pride ourselves on producing a range
of quality home appliances that are both packed with features,
and completely reliable. We are so confident in our products,
we pack them up with a 2 year warranty.
Now you too can relax knowing that you are covered.
Customer Helpline NZ: 0800 422 274
This product is covered by a 2 year warranty when
Accompanied by proof of purchase.
IM Version 1.0 – Oct, 2020
Table of contents