LLOYTRON F2102GR User manual

MODEL: F2102GR
OPERATING INSTRUCTIONS
800w
Quartz Heater

2
FEATURES
thank you
Thank you for the purchase of this quality LLOYTRON product. Used carefully and in accordance with the
instructions enclosed, it should give you trouble free service over a long period of time. Please keep these
instructions for future reference.
SPECIFICATIONS
Operating Voltage: 220-240v ~ 50Hz
Power Consumption: 400w or 800w
• Powerful,EfcientHeating
• Two Heat Settings: 400w, 800w
• Tip-over Safety Protection
• Slimline, Compact, Lightweight Construction
• Integral Carrying Handle
• Operate on 220-240V~50Hz AC Mains

3
IMPORTANT SAFEGUARDS AND PRECAUTIONS
SAVE THESE INSTRUCTIONS
• Save these instructions.
• Read all instructions carefully
• For Household Use only. Not intended for commercial use.
• Only for use indoors.
• Do not use outside or in damp conditions.
• Before plugging into mains socket, check whether supply line voltage and current rating are in
compliance with the rated electrical parameters shown on the rating label.
• Keep away from hot surfaces, such as gas or electric hobs and ovens etc
• Do not use for any purposes other than the appliances intended use.
• This appliance is not intended to be operated by means of an external timer or separate remote control system.
• To prevent damage to the mains cord, do not let it pass over sharp corners, edges or hot surfaces.
• If the supply cord is damaged, do not use. Check before each use!
• The supply cord cannot be replaced. If the cord is damaged the appliance should be scrapped.
• Do not use if any part of this appliance is damaged in any way.
• Always unplug when not in use.
• To prevent against the risk of electric shock, do not submerge any part of this appliance in water, unless
advised in this manual.
• Thisapplianceshouldonlybeusedonaatsurface.
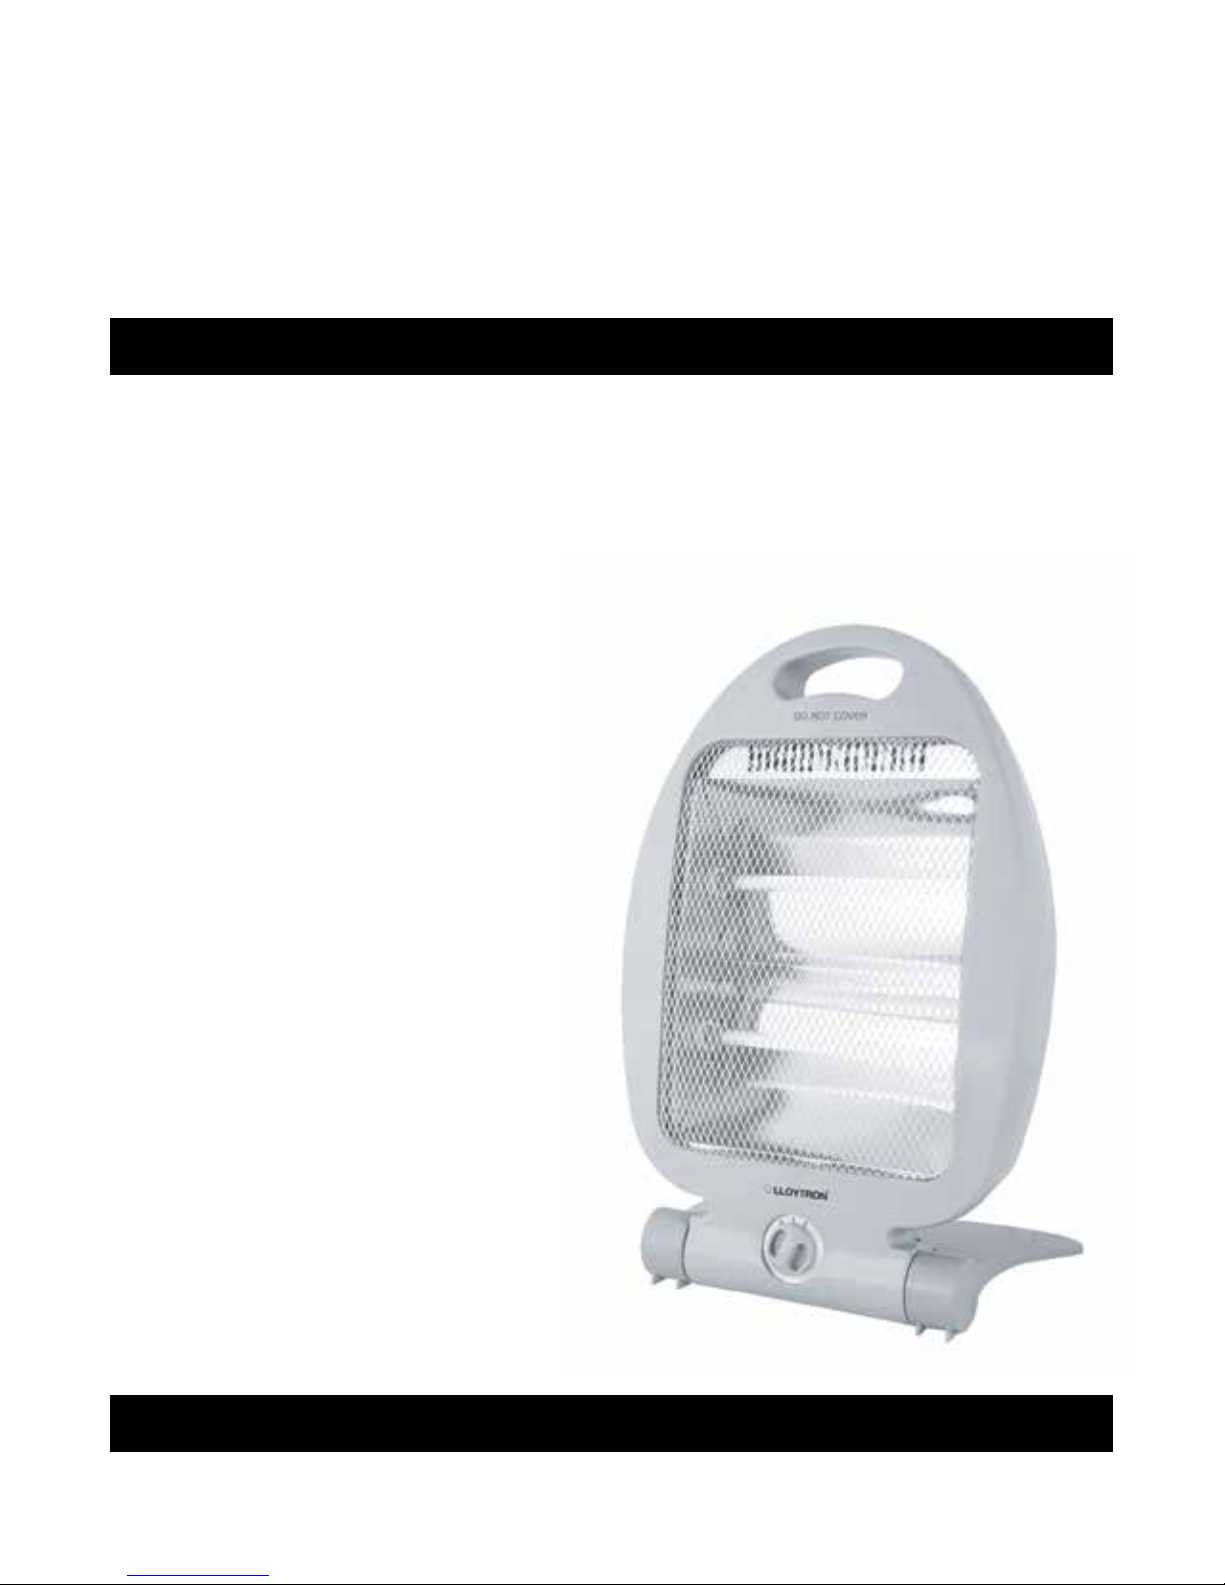
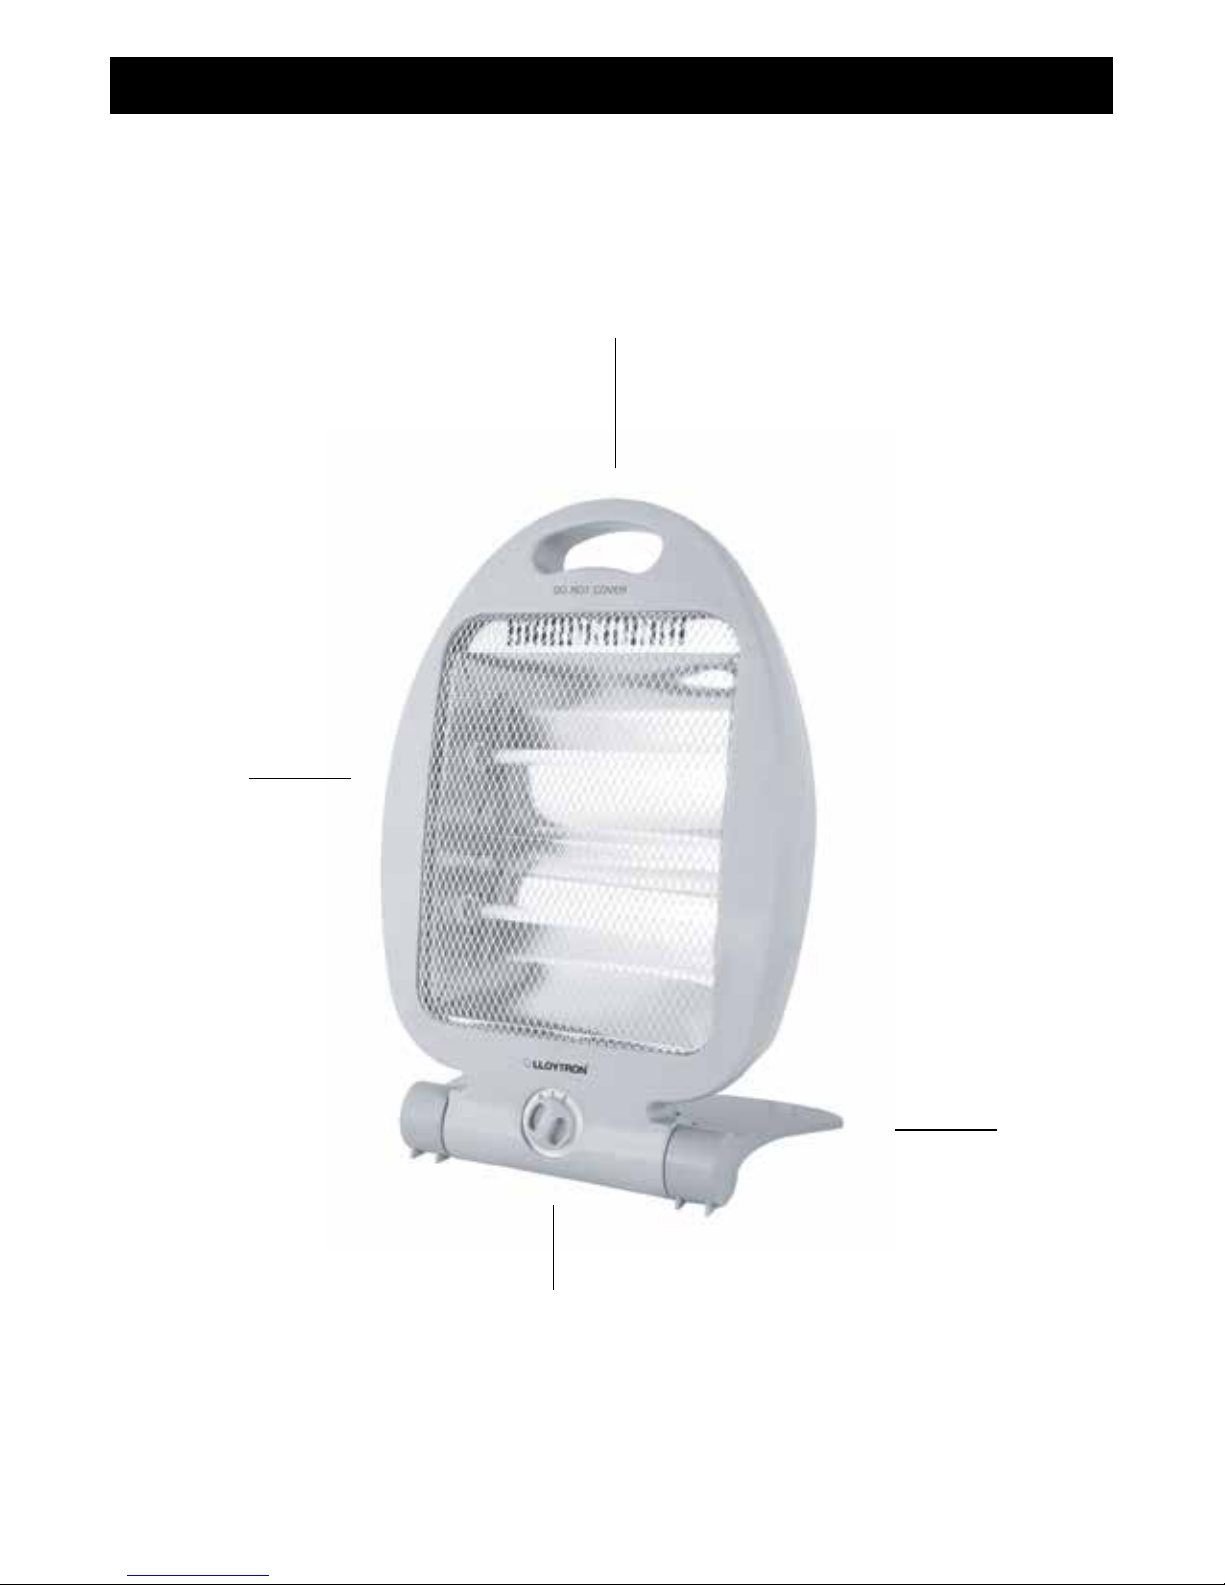
• Do not cover the appliance whilst in operation.
WARNING! To avoid overheating, DO NOT COVER the heater!
- Do not use in bathrooms or in the vicinity of a bathtub, shower, or near a washbasin.
- Do not use near water.
- Do not use in vehicles.
- Donotusenearcombustibleitems,suchasgasoline,paint,ammableliquids,clothes,furnitureor
curtains etc.
- Keep at least 100cm away from any wall or other objects, including people.
- Do not use this heater with a programmer, timer or any other device that switches the heater on
automatically,sinceareriskexistsiftheheateriscoveredorpositionedincorrectly.
-Alwayskeeponoor.
- Do not use with extension lead unless rated at 15A or higher.
- Always check the product for transit damage before operation. If damaged, DO NOT USE!
- Caution should be heeded near hot surfaces on this appliance.
- Keep away from children.
• This appliance can be used by children aged from 8 years and
above and persons with reduced physical, sensory or mental
capabilities or lack of experience and knowledge if they have
been given supervision or instruction concerning use of the
appliance in a safe way and understand the hazards involved.
• Children shall not play with this appliance.
• Cleaning and user maintenance shall not be made
by children without supervision.

4
LOCATION OF CONTROLS
1. Carry Handle
2. Heating Element
3. Heat Control Dial
4. Rotatable Collapsible Stand
4
2
1
3

5
WARNING! First use may create smoke or vapour as protective oil on the elements is burnt off.
This is normal and will only last for approximately 10 seconds. The oil and vapour is harmless but it is
recommended to keep away from sensitive skin!
ASSEMBLY
Rotate the foot panel from the front grille underneath the unit so as to create a stand.
OPERATION:
1. Ensure that your mains outlet has a current carrying capacity of at least 10Amps.
2. Gently plug the mains plug into the 220-240V ~ 50Hz AC mains outlet.
3. Turn Control Dial to desired heat setting. Each heat setting adds an additional 400w of heating power.
NOTE: DO NOT FOLD FLAT IF UNIT IS STILL WARM OR HOT TO TOUCH!
SAFETY PROTECTION
This unit has been provided with a safety protection against “tip-over” that turns ‘OFF’ the unit.
If this happens, you must;
• Turn the Control Dial to ‘0’ and pull out the plug.
• Make sure the unit is standing straight up (not tilted in any direction) so that the tip-over
safety switch rod is not actuated.
Note:Youmustalwaystakecarethatthereissufcientdistanceforsafety(atleast100cm)betweenthe
heaterandthewallortheotherobjects.Theairowmustnotbeimpededbyanything.
IMPORTANT NOTICE
There are NO SERVICEABLE parts on this appliance. Heating Elements are not replaceable.
DO NOT COVER
OPERATION

6
MAINTENANCE:
This appliance has been designed to operate over a long period of time with a minimum of maintenance.
Continuous satisfactory operation depends upon proper care and regular cleaning.
WARNING! Before performing any maintenance or cleaning on this appliance, disconnect the appliance
from the electricity supply.
MAINTENANCE:
1. Any ventilation slots should be occassionally cleaned with a clean, dry paint brush.
2. The exterior surface should be cleaned with a damp cloth only.
DO NOT USE STEEL WOOL, SCOURING PADS OR ABRASIVE CLEANERS ON NON-STICK SURFACES.
CLEANING AND CARE

7
WEEE/ENVIRONMENTAL PROTECTION
Disposal of Electrical and Electronic Equipment
Do not dispose of this product with household waste. For the proper treatment, recovery and
recycling please take this product to the appropriate waste collection point. If you are unsure
where this may be, please contact your local authority. Improper disposal may be harmful to
the environment.
Yourapplianceoperateson220-240V~50HzACMainsandcomesttedwitha3-pinBSIApprovedplug,so
thatitisreadyforusebysimplypluggingintoACMains.Shouldyouneedtochangeorretaplug,proceed
as follows: -
IMPORTANT:
The wires in the mains lead are coloured in accordance with the following code:
BLUE: NEUTRAL (N)
BROWN: LIVE (L)
GREEN AND YELLOW: EARTH (E)
As the colours of the wires in the mains lead of this appliance may not correspond with the coloured markings
identifying the terminals in your plug, proceed as follows:
The BLUE wire must be connected to the terminal which is marked with the letter “N” or coloured BLACK.
The BROWN wire must be connected to the terminal which is marked with the letter “L” or coloured RED.
The GREEN AND YELLOW wire must be connected to the terminal which is marked with the letter “E”, the
symbol or coloured GREEN.
DO NOT CONNECT EITHER WIRE TO THE EARTH TERMINAL OF A 3-PIN PLUG
Always ensure that the Mains Cord is located into the Plug through the Cord Guard or Cable Clamp, and that
the Cord Guard screws are tightened to clamp the Cord (outer sheath and inner coloured wires) in position
inthePlug.MakesurethePlugtopisalsottedsecurely.
The supply cord cannot be replaced. If the supply cord is damaged, the appliance should be scrapped.
13A FUSE
(L) LIVE
(N) NEUTRAL
(E) EARTH
UK PLUG REWIRING
This appliance must be protected by a 13 Amp fuse in a 13 Amp type (BS1363) plug.
Should you need to replace the fuse, use only an ASTA approved BS1362 fuse.

call: 08454 81 8808
email: [email protected]
web: www.lloytronhelpdesk.com
If you have any queries about this product, there are three ways to contact our customer service department:
TondmoredetailsonawiderangeofLloytronproductspleasevisitourwebsiteatwww.lloytron.com
Lloytron plc, Laltex House, Leigh Commerce Park, Greenfold Way, Leigh, Lancashire, WN7 3XH. England, U.K
CUSTOMER SERVICES
2011/65/EC
This manual suits for next models
1
Table of contents
Other LLOYTRON Heater manuals
Popular Heater manuals by other brands

Ventair
Ventair MANROSE MRHGXBL installation instructions

Empire Heating Systems
Empire Heating Systems SR-6-3 Installation instructions and owner's manual

Honeywell
Honeywell HZ-2110 - All Metal Heater owner's manual

Smokin Solutions
Smokin Solutions Eco-Quartz instructions

Olimpia splendid
Olimpia splendid AIR PRO Instructions for use and maintenance

Phormalab
Phormalab Hotdoor HCB01 Assembly instructions