www.lmicorporation.com 4
1.4 PRECAUTIONS
Read the following precautions to prevent the digital indicator from being damaged and to
ensure proper functioning.
IMPORTANT
•Do not drop or apply excessive force to the indicator
•Do not subject the indicator to blows or knocks
•Do not disassemble or modify the indicator; warranty will be forfeited
•Do not use sharp objects to press the keys; this could damage the keys and void your warranty
•Avoid excessively cold or hot climates
-Allow sufficient time for the indicator to thermally stabilize if the indicator has moved
between environments with different temperatures; Allow approximately 2 hours at room
temperature to stabilize
-Operating temperature: 10 ~ 40 degree C (50 ~ 104 degree F)
-Storing temperature: -10 ~ 50 degree C (14 ~ 122 degree F)
•Protect data ports with rubber cap when not in use
•Avoid using around high voltage equipment
•Do not apply excessive force to spindle
•Use alcohol and soft cloth to clean spindle
•Do not put oil on spindle
•Dirt or debris will interfere with the movement of the spindle
Safety and Precautions on LCD and Battery Disposal
•A Liquid Crystal Display (LCD) is used in this product; When disposing, follow the ordinances or
regulations of the respective local government
•The Liquid Crystal Display contains irritating substances; Should the substance accidentally come
into contact with the eye or skin, rinse with clean, running water; If the substance gets into the
mouth, immediately rinse out the mouth, and contact a local physician; DO NOT SWALLOW THE
SUBSTANCE.
•Batteries supplied are not rechargeable
•Keep batteries away from heat and fires, which may cause batteries to leak or explode
•Do not mix battery types
•ONLY USE AAA alkaline batteries
•Make sure polarities are correct when installing new batteries
•Remove batteries if indicator will not be used for long periods of time
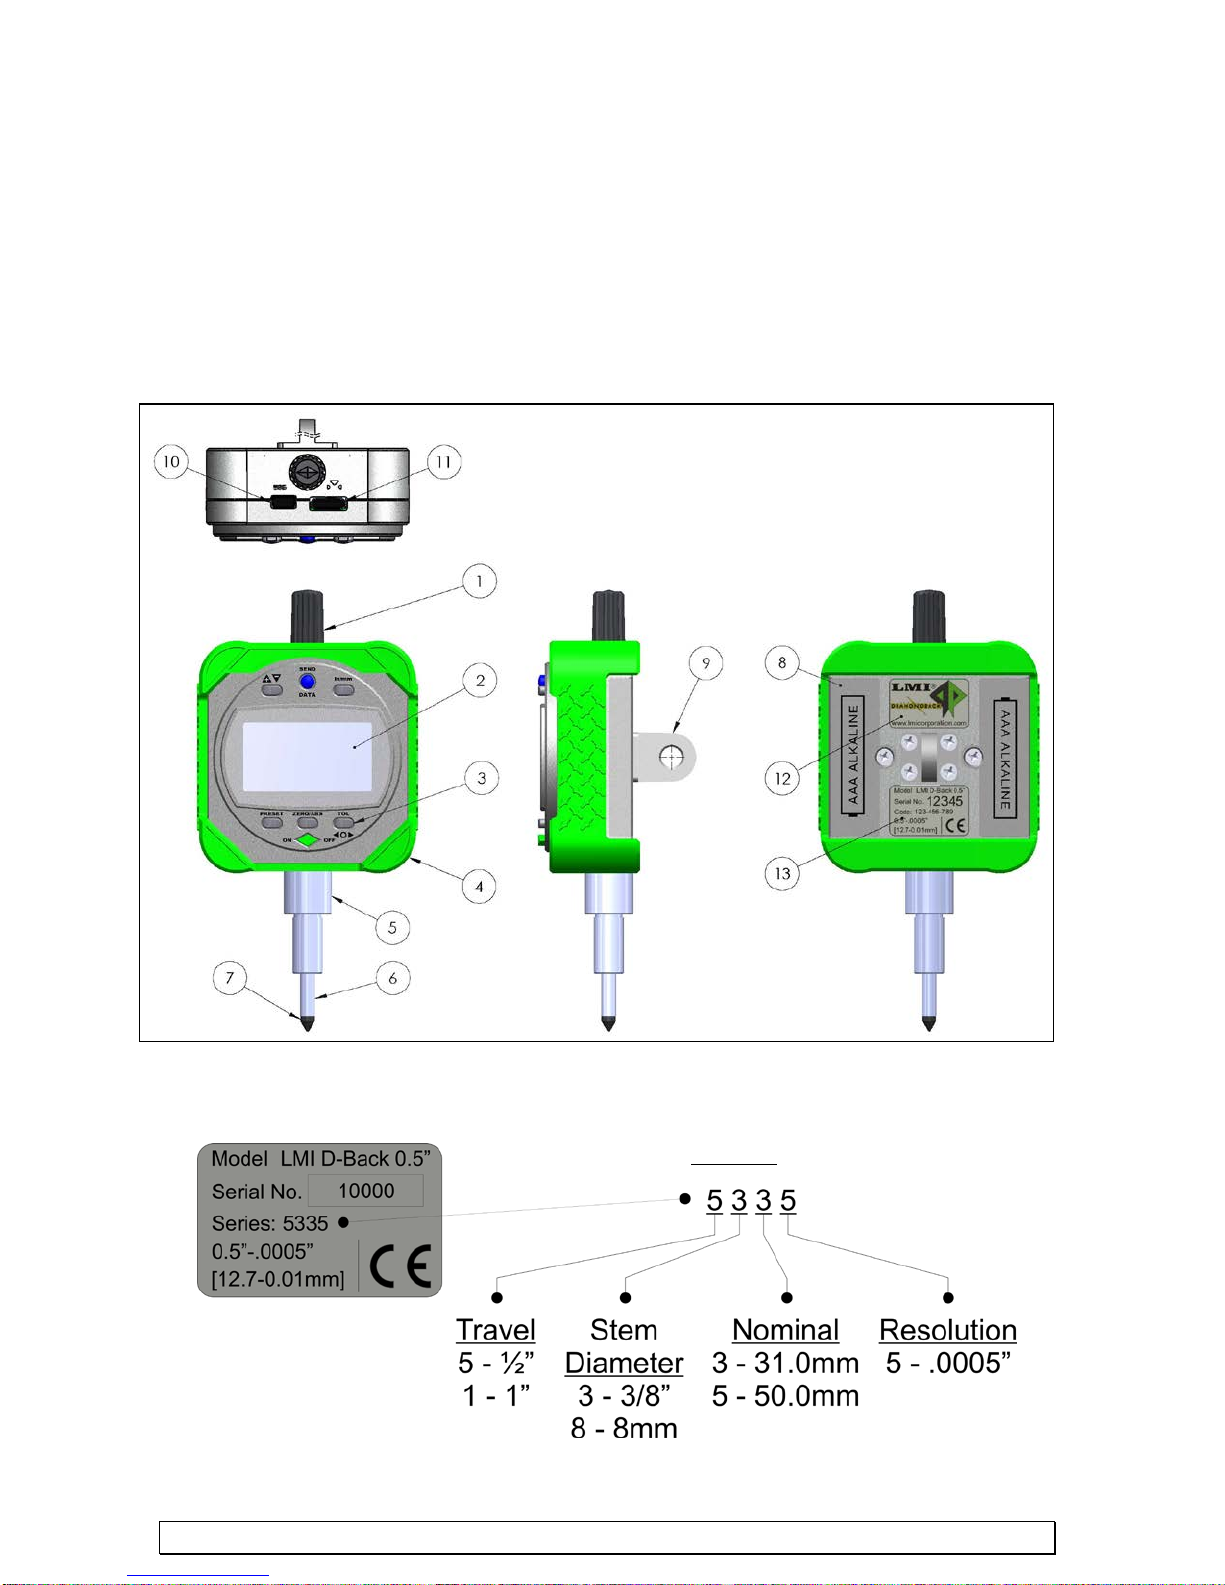
1.5 PACKAGING CONTENTS
The package should be inspected immediately to verify that all of the parts are accounted for and no
damage exists. If anything is missing or damaged, contact LMI Corporation immediately. The
package should consist of the following:
oLMI Diamondback Digital Indicator
oCD-ROM consisting of a user manual and important USB drivers
oCertificate of Calibration
o(2) AAA Alkaline Batteries