*Lock bound with app
Send E-Key By App
The user can send a bluetooth key to others, and has the right
to select a limited time, permanent or one-time Bluetooth key.
The key is sent to the recipient’s mobile phone or email and the
recipient will get the key and authority of the lock in the TTLock
App.
Administrators can manage all the keys they send out, including
clearing keys, resetting keys, sending keys, adjusting the time limit
of the keys, and viewing the access records.
Passage Mode
In the main interface of the app, select Settings then passage
mode to set the date, start time & end time of the passage
mode. After the passage mode is activated, everyone can
directly unlock the door without any access permission during
the time & date’s selected. The passage mode can be turned o
in Settings.
Art. ELEV64
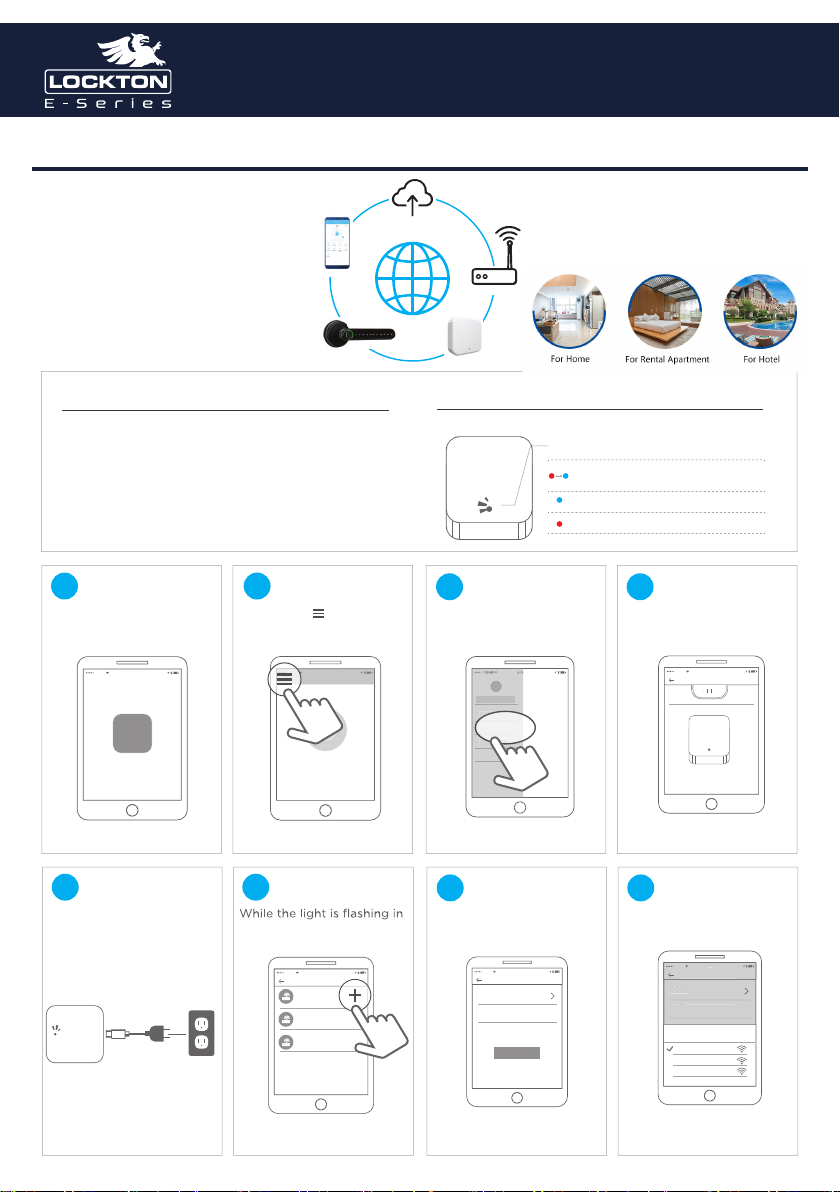
Registration and Login By App
In the main interface of the TTLock App,
select Generate Passcodes to add users &
pin codes for limited time or permanent
access. Passcodes can be changed at
anytime by selecting Passcodes on the main
interface.
Fingerprints can be added & Deleted
through the Fingerprint selection to add
users & pin codes for limited time or
permanent access on the TTLock main
interface.
Unlock & Lock Using the App
On the main interface screen Bound
Locks Can be easily Unlocked or Locked
by pressing the Large Padlock icon.
If more than one lock is bound hit the
back arrow in the Top Left corner to view
& Select the required Lock.