Lovibond TC Series User manual

www.lovibond.com
Lovibond®Water Testing
Tintometer®Group
TC 140 G / TC 256 G
Thermostatschränke TC-Serie
GB Instruction Manual
Page 10 – 17
Thermostatschränke
Vor Inbetriebnahme die Gebrauchsanweisung lesen
Thermostatically controlled incubators
Read the operating instructions before switching on for the first time
Etuves réfrigérées
Lire le mode d'emploi avant la mise en service
Armarios termostaticos
Leer las instrucciones de manejo antes de la puesta en servicio
Estufas reguladas por termóstato
Antes da colocação em funcionamento, ler o manual de utilização

TC 140 G / TC 256 G_1 04/2014
10
Safety instructions and warnings
•Topreventinjuryordamagetotheunit,theapplianceshouldbe
unpackedandsetupbytwopeople.
•Intheeventthattheapplianceisdamagedondelivery,contact
thesupplierimmediatelybeforeconnectingtothemains.
•Toguaranteesafeoperation,ensurethattheapplianceissetup
andconnectedasdescribedintheseoperatinginstructions.
•Disconnecttheappliancefromthemainsifanyfaultoccurs.Pull
outtheplug,switchofforremovethefuse.
•Whendisconnectingtheappliance,pullontheplug,notonthe
cable.
•Anyrepairsandworkontheapplianceshouldonlybecarriedout
bythecustomerservicedepartment,asunauthorisedworkcould
provehighlydangerousfortheuser.Thesameappliestochanging
themainspowercable.
•Donotallownakedflamesorignitionsourcestoentertheappli-
ance.Whentransportingandcleaningtheappliance,ensurethat
therefrigerantcircuitisnotdamaged.Intheeventofdamage,
make sure that there are no ignition sources nearby and keep the
roomwellventilated.
•Donotstandontheplinth,drawersordoorsorusethemtosup-
portanythingelse.
•Thisappliancecanbeusedbychildrenof8yearsoldandover,and
alsobypersonswithrestrictedphysical,sensoryormentalcapacity
orlackofexperienceandknowledge,iftheyaresupervisedor
have been instructed on safe use of the appliance and understand
theresultingrisks.Childrenmustnotbeallowedtoplaywiththe
appliance.Cleaningandusermaintenancemustnotbecarried
outbychildrenwithoutsupervision.
•Avoidprolongedskincontactwithcoldsurfacesorchilled/frozen
food.Thiscouldcausepain,numbnessandfrostbite.Inthecase
ofprolongedskincontact,protectivemeasuresshouldbetaken,
e.g.glovesshouldbeworn.
•Donotstoreexplosivesorspraysusingcombustiblepropellants
suchasbutane,propane,pentane,etc.intheappliance.Electrical
componentsmightcauseleakinggastoignite.Youmayidentify
suchspraysbytheprintedcontentsoraflamesymbol.
•Ifyouhavealockableappliance,donotkeepthekeynearthe
applianceorwithinreachofchildren.
•Theapplianceisdesignedforuseinenclosedareas.Donotoperate
theapplianceoutdoorsorinareaswhereitisexposedtosplash
waterordampconditions.
•Donotplaceitemswithtoohightemperatureintheinterior.
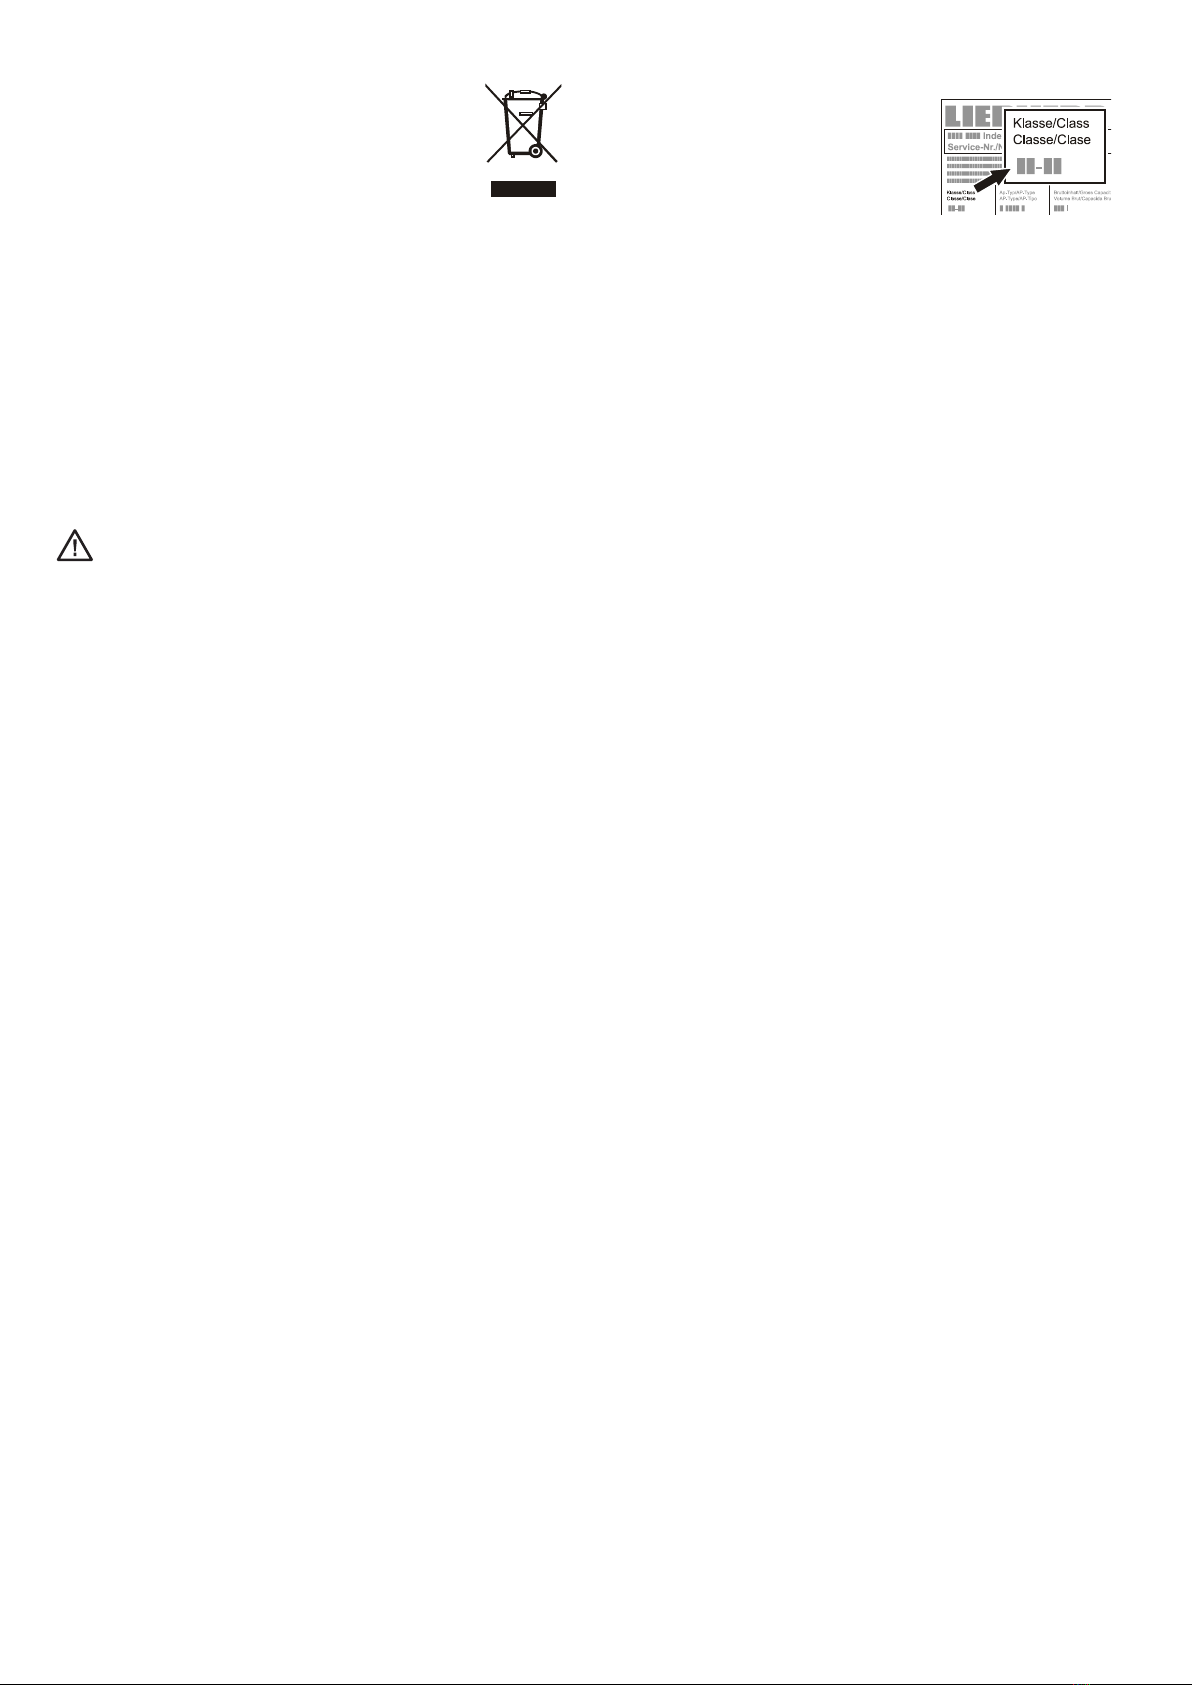
Disposal notes
The appliance contains reusable materials and should be
disposedofproperly-notsimplywithunsortedhousehold
refuse.Applianceswhicharenolongerneededmustbe
disposedofinaprofessionalandappropriateway,in
accordancewiththecurrentlocalregulationsandlaws.
Whendisposingoftheappliance,ensurethattherefrigerantcircuit
is not damaged to prevent uncontrolled escape of the refrigerant
itcontains(dataontypeplate)andoil.
Do not vent R134a into atmosphere.
R134a is a fluorinated greenhouse gas, covered by
Kyoto Protocol, with a Global Warming Potential
(GWP) = 1300.
•Disabletheappliance.
•Pulloutthemainsplug.
•Cutthroughtheconnectioncable.
•Disablesafetylock.
WARNING
Dangerofsuffocationduetopackingmaterialandplasticlm!
Donotallowchildrentoplaywithpackagingmaterial.Takethe
packagingmaterialtoanofcialcollectionpoint.
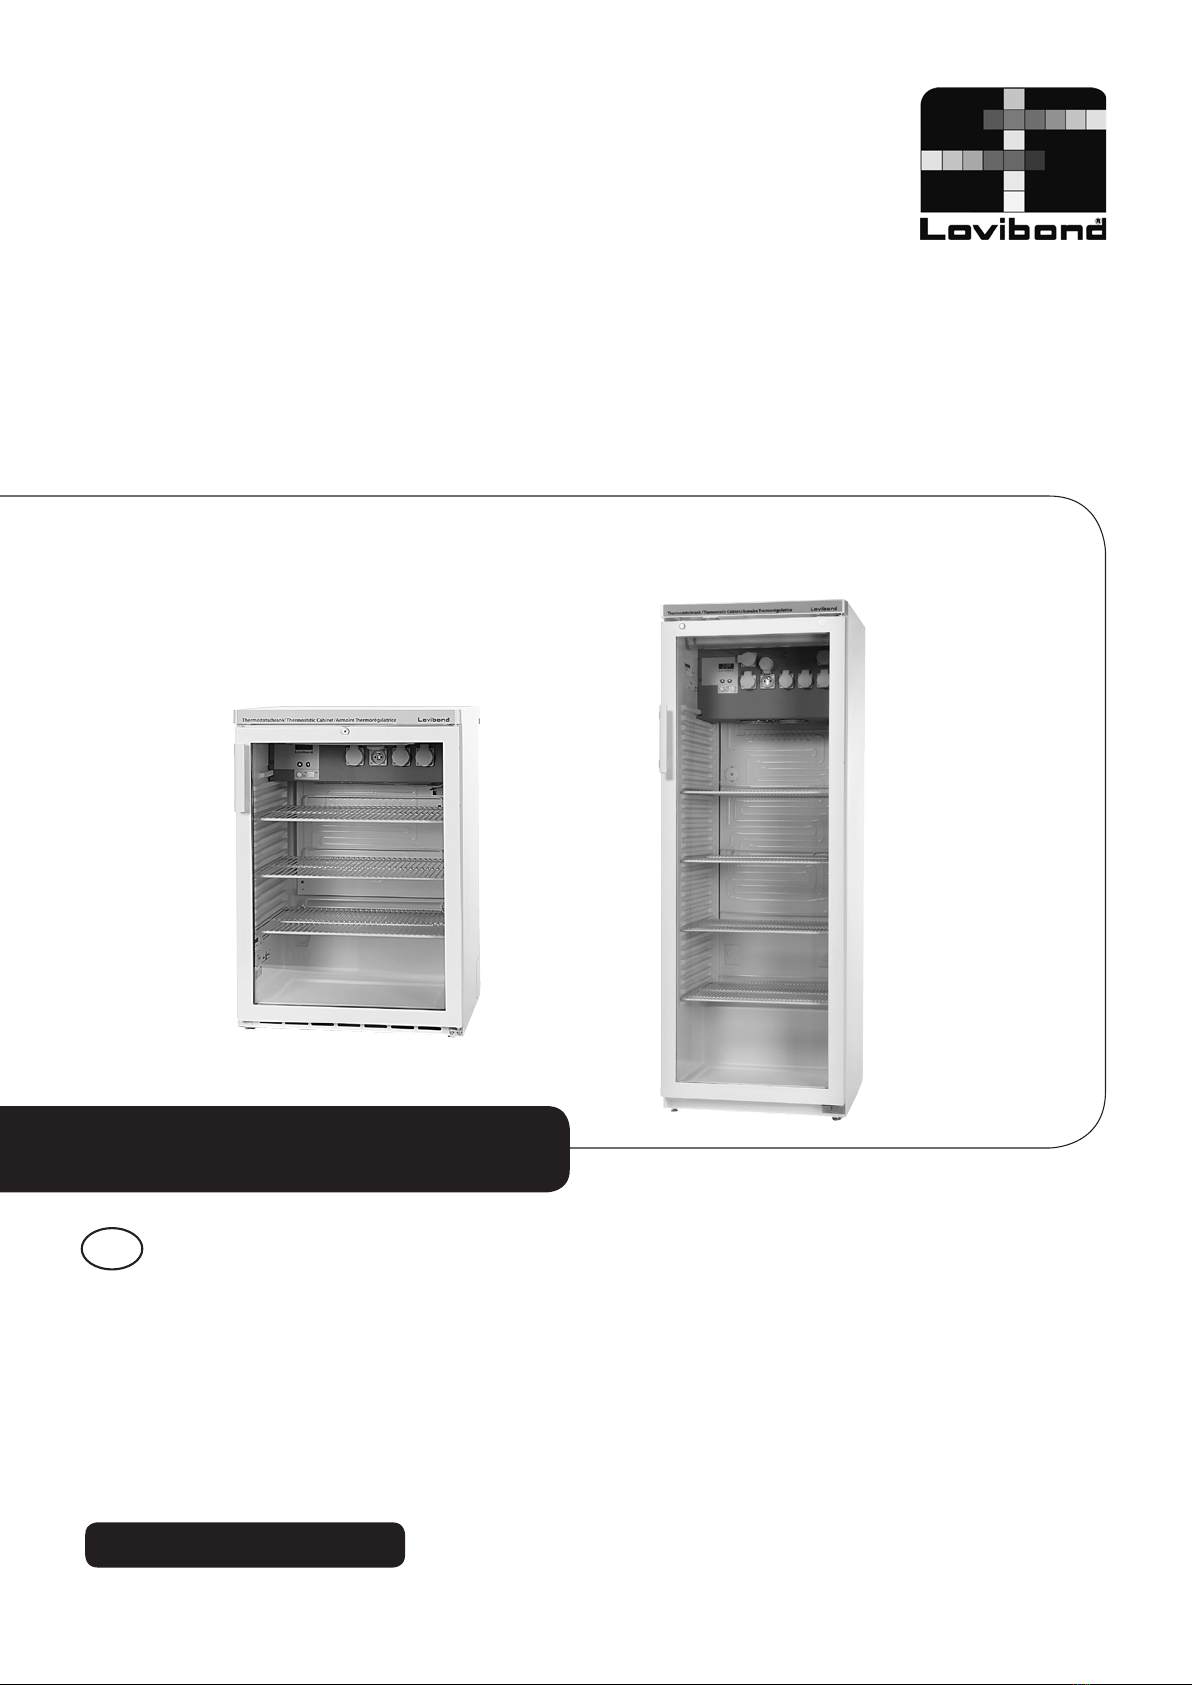
Range of appliance use
Thethermostat-controlledincubatorsaredesignedtoallowcontinu-
ousregulationoftemperatureforvariousfieldsofapplication,e.g.
•20°CBOD5measurement
andresearchpurposesat:
•4°Cstorageofsewagesamples
•25°Cenzymeactivity(TTC-test)
•37°Ccolonycount
•Microbiology
•Foodindustry
•Laboratories
Alltemperaturecontrolproblemsintheusualrangeof2°Cto40
°Caresolvedbythefactorysetuniversalplug-incontrollerwhich
ismaintenance-freeandreliable.Thisapplianceisnotsuitablefor
storingflammableliquids,acidsandlyes.
Function
The inner temperature of the fully insulated incubator is controlled
exactlybyanintergratedcorrosion-prooftemperatureprobewhich
connects or switches-off either the cooling unit or the heating
element.
Themeasuredinnertemperatureisdirectlyindicatedbyadisplay.
Thetemperaturerangeof2°Cto40°Ccanbesetinincrements
of0,1°Cwiththeaidoftwotactileresponsekeys.Thekeyboardis
protectedbyaruggedfoil.Aircirculationisprovidedby2axialflow
fanswithadischargewidthof160cm2and an output of 300 m3/h.
Noise emissions from the appliance
Thenoiselevelwhiletheapplianceisoperatingisbelow70dB(A)
(relativenoiselevel1pW).
Climate rating
The climateratingindicatesthe roomtempera-
tu re atw hi ch th ea pp lia nc ema yb eo p era te din
ordertoachievefullrefrigerationperformance.
Theclimateratingisindicatedonthetypeplate.
Climate rating Room temperature
4 (SN) +10°C to +32°C
4 (N) +16°C to +32°C
4+ (ST) +16°C to +38°C
4+ (SN-ST) +10°C to +38°C
5 (T) +16°C to +43°C
5 (SN-T) +10°C to +43°C
Donotoperatethe applianceoutsidethespeci-
fied room temperature range.

TC 140 G / TC 256 G_1 04/2014 11
GB
Setting up
•Donotplacetheapplianceindirectsunlightornear
cookers,radiatorsandsimilarsourcesofheat.
•Theflooronwhichtheappliancestandsshouldbe
horizontalandlevel.Compensateforunevenfloors
withtheadjustablefeet.
•Donotcoverventilationopeningsor
grille.
•Always install the appliance directly
againstthewall.
•Wellventilatedrooms
Appliance dimensions
A B C D E
TC 140 G 850 mm 600 mm 600 mm 648 mm 1153 mm
TC 256 G 1640 mm 600 mm 610 mm 650 mm 1180 mm
Installing beneath a worktop TC 140 G
F o r c o n t i nu o u s w o r k t o p s t h e r e f r i g e r a to r ‘ s t a b l e t o p c a n b e d e t a c h e d .
Therefrigeratorcanthenbepushedundertheexistingworktop.
•Totakeofftabletopremovescrews➊.
• A cross-section of min. 200 cm2 is required in the
worktopforventilationoftherearoftheappliance.
Electrical connection
Onlyoperatetheappliancewithalternating current (AC).
Thepermissiblevoltageandfrequencyareindicatedonthetypeplate.
Thesocketmustbeproperlyearthedandprotectedbyafuse.
Thetrippingcurrentofthefusemustbebetween10Aand16A.
The socket must not be situated behind the appli-
anceandmustbeeasilyaccessible.
Donotconnecttheapplianceusinganexten-
sioncableorextensionsocket.
Donotusestand-aloneinverters(conversionof
directcurrenttoalternatingcurrent/three-phase
current)orenergy-savingplugs.Riskofdamage
totheelectroniccontrolsystem!
Safety lock TC 140 G
Thelockintheappliancedoorisequippedwithasafetymechanism.
Locking the appliance
•Insertthekeyasshownby
arrow1.
•Turnthekey90°.
Tounlocktheappliance,thesame
procedure must be repeated in the
sameorder.
Safety lock TC 256 G
Thelockintheappliancedoorisequippedwithasafetymechanism.
Locking the appliance
•Insertthekeyasshownby
arrow1.
•Turnthekey90°.
Tounlock the appliance,thesame
procedure must be repeated in the
sameorder.
Important
TC 140 G, TC 256 G
Themaximumloadpergridshelfis45kg.
Important
Whenunpackingandsettingupuseprotectivegloves.

TC 140 G / TC 256 G_1 04/2014
12
Adjustment and operation
TheunitisswitchedonandoffviatheOn/Offswitch.
The „Up“ key is used to increase the temperature
The „Down“ key is used to decrease the temperature
Theillustrationshowstheactual
temperatureof20.0°C.
Setting the temperature values
Whentheunitisswitchedon,thedisplaywillinitiallyshowbriey
thetype of oven and aversionnumber.It willthendisplaythe
preset temperature, together with the symbol for the specied
gure(3horizontallines).After5seconds,thiswillbereplacedby
thecurrent,actualtemperature.
Theunitispresetinthefactorytoaworkingtemperatureof20°C.
Ifthisisrequiredtobe25°C,forexample:
Pressthe„⬆“keyonce.Thedisplaywillshowthespeciedgure
whichhas beenset,togetherwiththesymbolforthespecied
gure (3 horizontal lines). Now press the „⬆“ key again, or
hold it down until the display shows the new gure required
(25°Cinthisexample).Thenreleasethekey.Thedisplaywillshow
the new setting for5 secondsand will then displaythe actual,
currenttemperature.
Ifalowerworkingtemperatureisrequired,thesameprocedure
applies,usingthe„“key.Thetemperaturecanbeadjustedin
stepsof0.1°Cbetween2°Cand40°C.
Ifyouwishtoreadthespeciedtemperaturebutwithoutchanging
it,simplypressthe„⬆“or„“keyonceandreleaseit,sothatthe
displayshowsthespeciedgureinsteadofthecurrenttemperature.
Thespeciedgurecannotbechangedunlessoneofthekeysis
pressedwhilethedisplayisalreadyshowingthespeciedgure.
Thepresettemperaturewillnotbelostifthereisapowerfailure
ofiftheunitisswitchedoff.Thedataarestoredinaninternal
electronicmemoryandarecalledupautomaticallywhenpoweris
restoredortheunitisswitchedon.
Detecting a power failure
Whentheunitisrstswitchedon,thedisplaywillash.Pressing
the„⬆“or„“keywillcauseittostopashingandremainper-
manentlylit.
Ifthereisapowerfailure,thedisplaywillstarttoashagain.Thismay
indicate that the temperature in the oven can no longer be held at
theworkingtemperature,ifthepowerisoffforanextendedperiod.
Thecontrolswillcontinuetooperatenormally,evenifthedisplay
isashing.Theashingmerelyindicatesthat theunithasbeen
switchedoffandthenbackonagain,orthatthepowersupply
failedforatimeandnokeyhasbeenpressedsincethen.
Itisimportanttonotethatthedisplaywillash,evenifthepower
supplyhasfailedforaveryshortperiod.Itdoesnotnecessarily
meanthatthetemperatureintheovenhasdeviatedsignicantly
fromthespeciedlevel.
Temperature control and accuracy
Thethermostaticallycontrolledincubatorsarenotspeciedaccor-
dingASTM E 145(9-point-measurement)or DIN 12880, part2
(27-point-measurement).
Specicationsarebasedonaone-point-measurement.
Test procedure
1. Placeasamplebottlelledwith500mlwaterwithastirring
rodonastirringplaceandplaceitinthemiddleofagrid(5th
insertfromthebottom).
2. Completelyimmersetheprobeofthemeterinthewatersample
(accordingtothespecicationsofthemeter).Theprobeshould
nottouchthebottlewall.
Specicationsofthemeter: Accuracyatleast0.5°C
Resolutionatleast0.1°C
3. Thetemperatureisreadafter4hours.
Trouble shooting
Ifthevericationofthetemperatureaccuracyisnotsuccessfulthe
followingshouldbetakenunderconsideration:
- The ambient temperature of the thermostatically controlled
incubatormustmatchtheclimaterate(typeplate).
- Acertaincirculationofairisnecessaryforthecompressorto
workproperly.
- Theincubatorshouldnotbeopenedtooftenand/orforlonger
periodoftime.
- Checkthefunctionofthetwofansbyvisualinspection.
- Checkthecoolingdevicebysetting10°Candwaitforasigni-
cantchangeofthetemperatureinthesampletowards10°C.
- Checktheheatingdevicebysetting40°Candwaitforasigni-
cantchangeofthetemperatureinthesampletowards40°C.
- Dependingonthesampletemperatureitcantakeupto7hours
fortemperaturestabilityattheset-value.
Important
Theairtemperatureinthecabinetmayuctuatebyseveraldegrees
centigrade. Nevertheless the actual temperature of the sample
uctuatesonlybyamaximumof±0.5°C.
Other operation controls
On the front side of the temperature control unit there are
covered shock-proof sockets for the connection of BOD's
appliances or stirring apparates. The total load on the sockets
must not exceed 4,5 amps.
The thermostatically controlled oven and laboratory sockets are
protectedbyafuse(6.3AT)whichisaccessiblefromthefront
paneloftheunit.
Thecontrolunitisconnectedbymeansofa4-poleplugonthe
bottomoftheincubator.

TC 140 G / TC 256 G_1 04/2014 13
Cleaning
Clean the appliance at least twice per year.
Before cleaning always switch off the appliance. Pull out the
mains plug or switch off or unscrew the fuse.
•Clean the inside, equipment and outer walls with
lukewarmwaterandalittledetergent.Donotuse
abrasiveoracidcleanersorchemicalsolvents.
•Ensure that no cleaning water penetrates into the
electricalcomponentsorventilationgrille.
•Thedustshouldberemovedfromtherefrigeration
unitandheatexchanger-metalgridatthebackof
theappliance-onceayear.
•Donotdamageorremovethetypeplateonthein-
sideoftheappliance.Itisveryimportantforservicing
purposes.
•Important! The compressor and other parts may
stillbehotfromoperation.
Do not use steam cleaners because of the risk
of injury and damage.
Defrosting
Whenoperatingataverycoldthermostatsetting,theinteriorrear
wallmayiceup.
Inthiscase,theappliancemustbedefrostedmanually.
•Pull out the mains plug!
•Leavethedooroftheapplianceopenwhiledefrosting.
Defrostedwatercollectsinanevaporatortrayandis
evaporatedautomatically.Attentionmustbepaidthat
thedefrostedwatercandrainofffreelythroughthe
drainageopeninginthebackpaneloftheincubator.
The drainage opening should, when necessary be
cleanedwiththeaidofasuitabledevice(e.g.bottle
brush).Afterdefrostingmopuptheremainingwater
andcleantheappliance.
Do not use any mechanical devices or other
artificial aids for defrosting other than those
recommended by the manufacturer.
Shutting your appliance down
Ifyourapplianceistobeshutdownforanylengthoftime,switch
itoffanddisconnecttheplugorswitchofforunscrewthefuse.
Cleantheapplianceandleavethedooropeninordertoprevent
unpleasantsmells.
The permissible room temperature for storing the appliance
after decommissioning is between -10°C and +50°C.
Storing the appliance outside this temperature range can
damage the appliance and cause it to malfunction.
Theappliancecomplieswiththerelevantsafetyregulationsand
ECDirectives2004/108/ECand2006/95/EC.
Malfunctions
Ifamalfunctionoccursduringoperation,checkwhetheritisdue
toanoperatingerror.
You may be able to rectify the following faults yourself:
•Appliance does not function:
–Istheapplianceswitchedon?
–Istheplugcorrectlyfittedinthemainssocket?
–Isthefuseintact?Ifnecessary,replacewithanew6.3A(slow).
•Loud running noise:
–Istheappliancesetupfirmlyonthefloor?
–Doestheappliancecausenearbyitemsoffurnitureorobjectsto
vibrate?Pleasenotethatnoisescausedbytherefrigerantcircuit
cannotbeavoided.
•Correct display of inside temperature but no regulation to the
temperature setpoint:
–Isthetemperaturesettingcorrect(see"Settingthetemperature")?
–Istheventilationsystemworkingproperly?
–Istheappliancesetuptooclosetoaheatsource?
Ifnoneoftheabovecausesapplyandyoucannotrectifythefault
yourself.Contactyourdealerorsupplier,ifnecessarysendinthe
controlunitorthermostat-controlledincubatorforrepair(original
packingifpossible!).
GB
Changing over door hinges TC 140 G
•Unscrewhingebracket1.
•Pullthedooroutatthebottomandliftoff.
•Transfercover3 totheoppositeside.
•Transferhingepin2 on hinge bracket 1 to the op-
positeside.
•Transferhingepin4 totheoppositeside.
•Transferdoorhandle5and plugs 6 totheotherside.
•Mountdooronhingepin4 andclose.
•Inserthingebracket1 inlowerdoormountingand
screwintoplace.
Important
Before undertaking any repair work disconnect plug from
mains! Only trained specialists should work on electrical
devices.

TC 140 G / TC 256 G_1 04/2014
14
Changing over door hinges TC 256 G
Door hinges should only be changed by a trained expert.
Changing the door hinges must be done by two people.
2. Openthedoorapprox.45°
andliftupwards.
Important
Asaresultofitsheavyweight,the
door must be held secure by one
person.
3. Pushthepinupwardsusing
yourfingertip.
4. Pull the door to the front
andremoveitdownwards.
1. Remove screw from
lowerhingebracket.
1
2
3
4
7.Insertthekey.
Turnthekey90°.
8. Removecover.
9. Removescrew.
10. Turnthelockapprox.
3°clockwise.
11.Removepin.
8
9
10
11
7
5
5. Transfer door handle and
plugstotheotherside.
6. Insertkey.
6
12. Removebushing.
13. Turn back the lock
90°anticlockwise.
12
13

TC 140 G / TC 256 G_1 04/2014 15
GB
16
16. Transfer covers to the
oppositeside.
17. Transfer plug and
bushing.
14.Removelock.
15. Reinsert hinge bush-
ing. 14
15
17
18. Removebushing.
19. Insertthelockasshown
intheillustration.
19
18
22. Turnthelockfurther-
approx.3°clockwise.
23.Insertpin.
Noteonpoint23
Afterinsertion,thepin'scrosspinmust
beengagedinthegrooveofthecatch.
24. Screw in the screw
and attach the cover
cap.
25.Insertthekey.
Turnthekey90°.
20. Turnthelock90°clock-
wise.
21. Reinsert hinge bush-
ing.
24
25
20
21
22
23

TC 140 G / TC 256 G_1 04/2014
16
31.Insertthepinintotheleft-handdoormount-
ing.
Useyourindexfingertoholdthepinwhile
youareassemblingthedoor.
32. Locate the door on the upper
pinasshownintheillustration
andguideittothelowerhinge
bracket.
Important
Asaresultofitsheavyweight,thedoor
mustbeheldsecurebyoneperson.
33.Liftthedoorupwardsandturn
the pin until it fits into the bore
holeofthehingebracket.
Slowly lower the door down-
wards.Thelowerpartofthepin
must be fully engaged in the bore
holeofthehingebracket.
34.Screwthescrewinto
the pin again and
tighten.
29. Remotethecover,turnitthrough
180°andre-fititontheopposite
side.
28. Unscrew hinge
bracket.
26. Unscrewthepin.
Usethespannerprovided.
27. Screwinthepinontheopposite
side.
30.Screwhingebracketinto
place.
31
32
33
28
29
30
34
26
27

TC 140 G / TC 256 G_1 04/2014 17
Construction fully insulated incubator
withuniversalplug-in
temperature.Door,double
glazedinsulatedinABS
frame
Control unit operationrobust,waterprotectedfoil
frontpanel,2keyswith
tactileacknowledgement
Range of adjustment 2°Cto40°C,adjustablein
0.1°C-increments
Constancy of temp.
20°C,±1.0°C
Climate class
the climate rating is indicated
on the type plate
Display 3 digit for actual and target
temperature,resolution0.1°C
Refrigerating unit compressor-system
Heating unit heating element
Fan axial,discharge
capacity 320 m3/h
Power requirement 220-240V/50Hz
Sockets CEE7/5,typeE,withhinged
lid,230V/16A,2p+E,IP44
Coolant R134a
TC 140 G(4sockets)
Net capacity 140Ltr.
Power consumption 275VA
1.77kWh/24h
(ambienttemperatur25°C,
targettemperature20°Cwith
interiorlightingswitchedon)
Overall dimensions 600Wx600Dx850Hmm
withworktop
600Wx600Dx819Hmm
withoutworktop
Inside dimensions 513Wx441Dx702Hmm
(with3retractablegrids
and 1 bottom grid)
Weight 48.0kg
Order Code 2 43 82 10
TC 256 G(7sockets)
Net capacity 255Ltr.
Power consumption 340VA
1.56kWh/24h
(ambienttemperatur25°C,
targettemperature20°Cwith
interiorlightingswitchedon)
Overall dimensions 600Wx610Dx1640Hxmm
Inside dimensions 470Wx440Dx1452Hmm
(with4retractablegrids
and 1 bottom grid)
Weight 77.0kg
Order Code 2 43 82 35
Technical Data
GB
Adjusting the lateral tilt of the door
Ifthedoorisatanangle,adjusttheangle.
35.Remove middle screw from hinge
bracket.
Thisscrewisnolongerneeded.
36. Undo screws and slide
hinge bracket to the right
orleft.
Tightenscrews.
36
35

Technical changes without notice
Printed in Germany 04/14
No.: 00 38 56 85
Lovibond®and Tintometer®
are Trademarks of the
Tintometer Group of Companies
Tintometer China
Room1001,ChinaLifeTower
16ChaoyangmenwaiAvenue,
Beijing,100020
Tel.:+861085251111App.330
Fax:+861085251001
China
Tintometer South East Asia
UnitB-3-12,BBTOneBoulevard,
LebuhNilam2,BandarBukitTinggi,
Klang,41200,SelangorD.E
Tel.:+60(0)333252285/6
Fax:+60(0)333252287
lovibond.asia@tintometer.com
www.lovibond.com
Malaysia
Tintometer GmbH
Lovibond®WaterTesting
Schleefstraße8-12
44287Dortmund
Tel.:+49(0)231/94510-0
Fax:+49(0)231/94510-20
sales@tintometer.de
www.lovibond.com
Germany
Tintometer AG
Hauptstraße2
5212HausenAG
Tel.:+41(0)56/4422829
Fax:+41(0)56/4424121
info@tintometer.ch
www.tintometer.ch
Switzerland
The Tintometer Limited
LovibondHouse/SolarWay
SolsticePark/Amesbury,SP47SZ
Tel.:+44(0)1980664800
Fax:+44(0)1980625412
water.sales@tintometer.com
www.lovibond.com
UK
Tintometer Inc.
(dbaOrbeco-HelligeInc.)
6456ParklandDrive
Sarasota,FL34243
Tel:941.756.6410
Fax:941.727.9654
www.orbeco.com
USA
sales@novatech-usa.com
www.novatech-usa.com
Tel: (866) 433-6682 Fax: (866) 433-6684
Tel: (281) 359-8538 Fax: (281) 359-0084
This manual suits for next models
2
Table of contents
Other Lovibond Laboratory Equipment manuals
Popular Laboratory Equipment manuals by other brands

PerkinElmer
PerkinElmer OPERA PHENIX PLUS manual

Gema
Gema OptiFlow IG06-BN Operating instructions and spare parts list

J.P. SELECTA
J.P. SELECTA DIGITAL-S instruction manual

LABBOX
LABBOX EASY 60+ user manual

Bio-Science
Bio-Science Ampulmatic-10 Purge Gas Injector Operation and maintenance manual

Planet
Planet IPOE-162 user manual