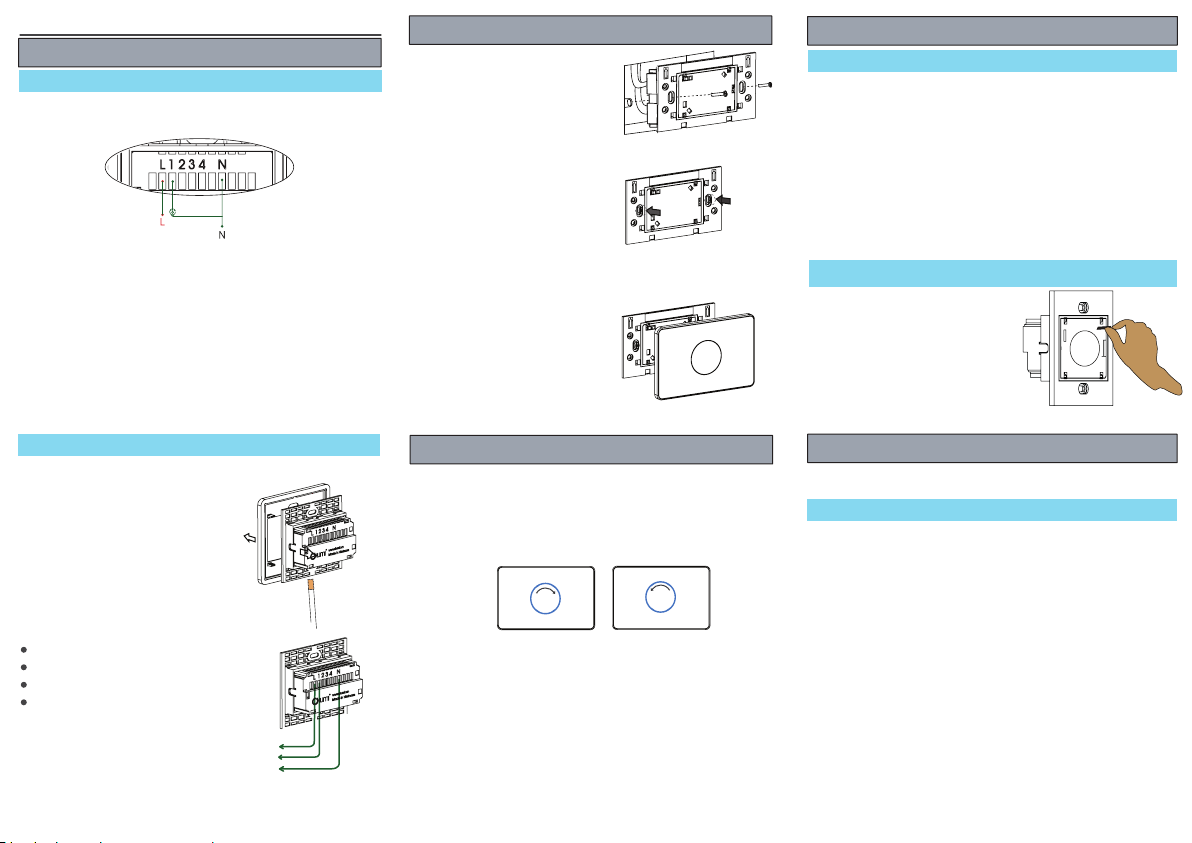
Wiring diagram for Dimming device
Line wire
Load’s wire
Neutral wire
Usage
1. Turning On/Off and dimming device.
- Tap on touch panel to change state off electric devices. Led is bright
Red mean On, Led is bright Blue Off.
- Touch on border of sensor area and rotate follow clockwise to
increase brightness. Rotate follow counter clockwise to decrease
brightness.
Increase brightness Decrease brightness
Reset device
For reset and get device get out the
Zigbee network, user click config
button 5 times. If device still enable on
Zigbee network, after reseting process
pink led will blink 2 times to inform
reseting process was successfully.
Then pink Led will blink 2 more times
and red led will blink 3 times to inform
device was on adding mode
2. Locking touch panels:
Quick click config button 10 times. On locking mode - Red Leds blink
5 times. On Unlocking mode - Blue Leds blink 5 times.
3. Change the light intensity of Led indication:
Press and hold the down config button for 5 seconds until luminous
of Led indication changes (Has 2 modes: high & low intensity)
WIRING INSTRUCTION AND USAGE
Wiring diagram
Wiring diagram
Installation
Step 1: Place the back part of a switch
to the position of the junction on a
wall.
Step 2: Tighten two screws
Step 3: Push glass on the back part to
finish
24 months of warranty for all Lumi’s products based on time written on
stamp.
- Damage caused by disaster, fire, lightning, unstable power supply.
- Damage caused by Usage in wrong way different from the user guide.
- Damage or scratch caused by strong collision.
- Damage caused by installation in a wet environment.
- Damages caused by faulty electrical installation by the customer,
including the use of incorrect fuses
- Just being warranted in the warranty time.
Warranty will not be accepted in some cases.
Warranty
Using advanced function
Adding the device
User downloads App Lumi Life on App Store (iOS) or CH Play
(Android). Log in App Lumi Life -> Select Setup -> Setup Devices ->
Zigbee -> Adding Devices. After supplying power for device, the pink
led blinks 2 times. Then there are 2 cases.
- If device was configured, pink led will blink 3 times (NOTE: In case of,
the device was not displayed on App, user should try to reset device to
return adding mode).
- If device was not configured, red led will blink 3 times, after that
device will find Zigbee network to join. When device joins into Zigbee
network successfully, pink led will blink 3 times.
User can configure rules/scenes/schedules for devices on App Lumi
Life.
Wiring to load
Step 1: Using a screwdriver to
remove the glass surface from the
switch.
Note: There is a small hole on the
body of the aluminum border to
open glass easy.
Bước 2: Wire connection
Line wire to L terminal
Neutral wire to N terminal
Line wires of dimmer to 1 terminal
Neutral wire of load to N terminal.


