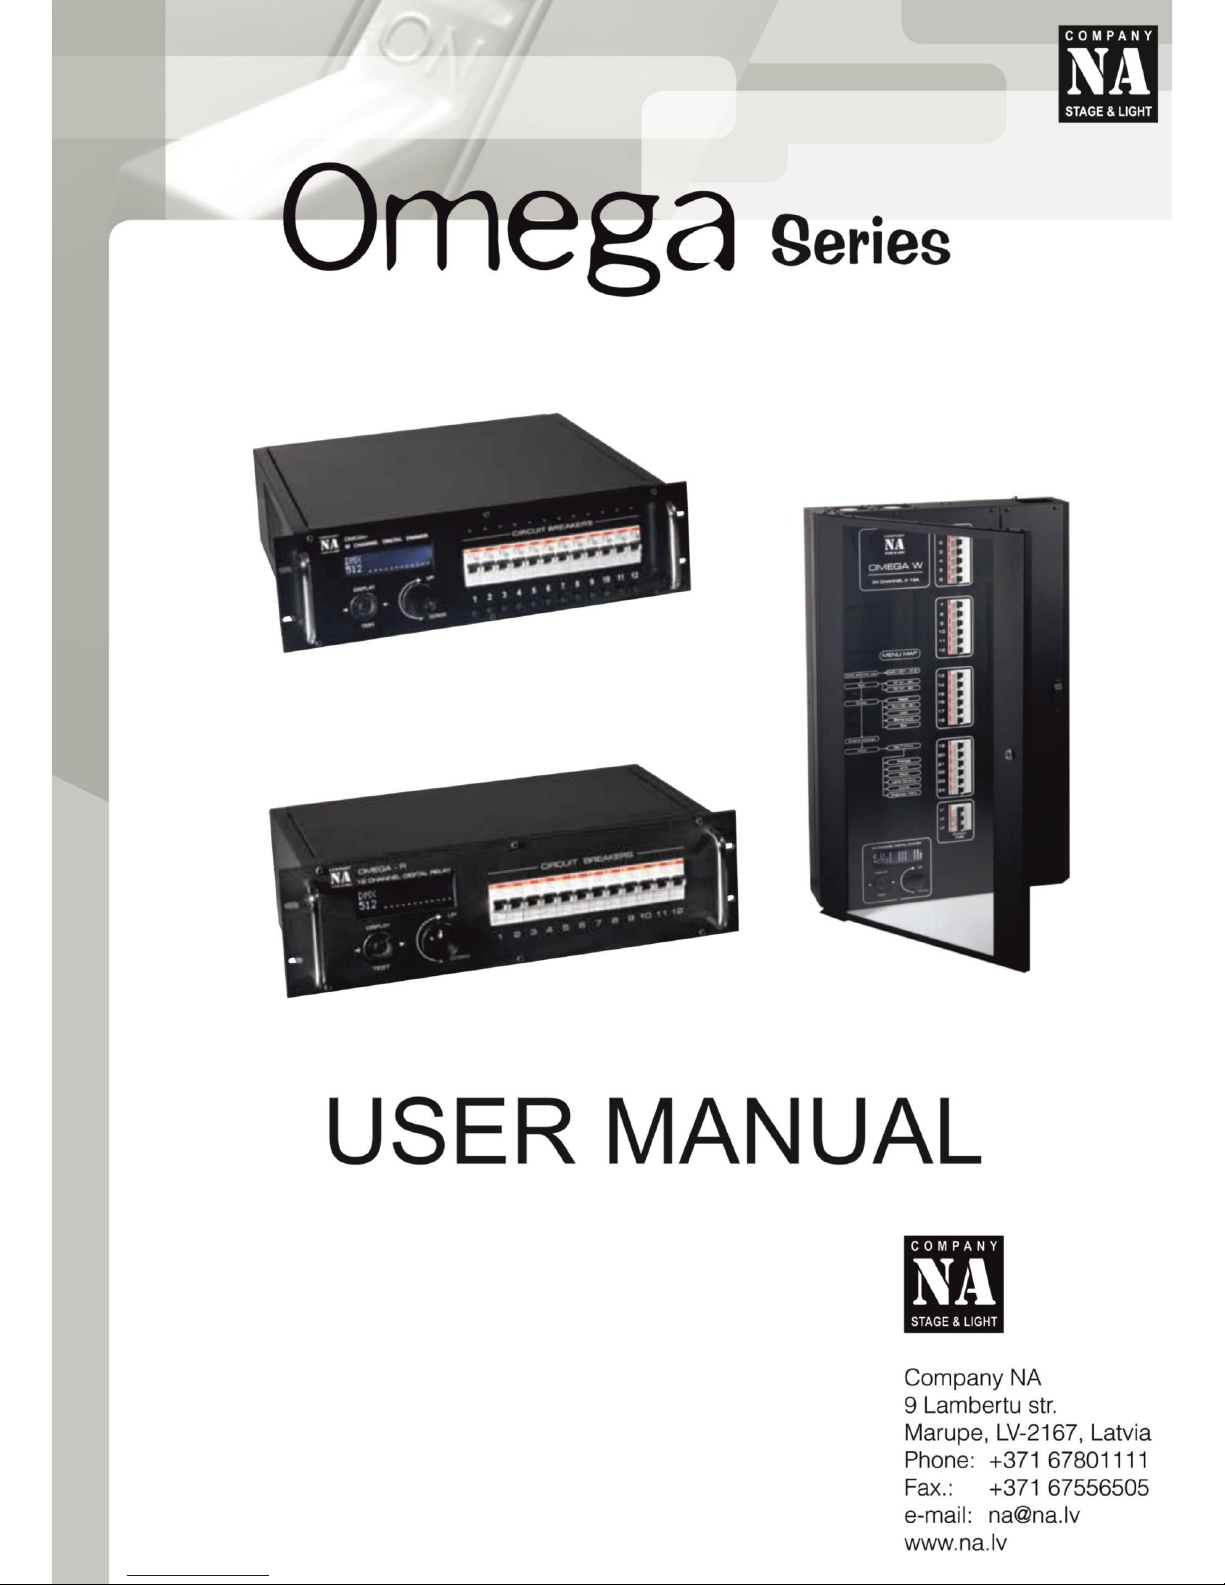
NA OMEGA + User manual


Omega Dimmer series User manual version 1.0 09.2011
2
TABLE OF CONTENT
1. BEFORE YOU BEGIN 3
What is included 3
Unpacking 3
Power 3
Contact us 3
Safety Instructions 4
2. INTRODUCTION 5
Device description 5
Product owerveiw 5
Features 6
3. SETUP 7
Installation Guide 7
Specification of system OMEGA 7
Setup 7
Power suply 7
Power requirements 8
Cooling 8
OMEGA dimmer package 8
Check transportation damage 8
Package content 8
Instalation 8
Preperation of the necessary components 8
Assembly of main cable 8
Starting the system 9
Check incoming power cords 9
Check power cords 9
Turning on 9
Channel output check 9
4. OPERATING INSTRUCTIONS 10
Manual Control 10
Base screen mode 10
User sub-menu 12
Technical setup menu 13
Engineering menu, default settings 14
5. APPENDIX 16
DMX-512 Protocol 16
Maintenance 18
Returns procedure 19
Tehnical Specificatons 20

Omega Dimmer series User manual version 1.0 09.2011
3
1. BEFORE YOU BEGIN
What is included
►1 xOMEGA series dimmer unit
►1x Warranty Card
►1x User Manual
Unpacking
After receiving a package, carefully unpack the it, check the contents to ensure that all
parts are present, and have been received in good condition. Notify the shipper immediately and retain
packing material for inspection if any parts appear damaged from shipping or the carton it self shows
signs of mishandling. Save the carton and all packing materials.In the event that a fixture must be
returned to the factory, it is important that the fixture be returnedin the original factory box and
packing.
Power Before powering on the unit is to make sure the line voltage you are applying is within the
range of accepted voltages. This fixture will accommodate 3 phase 230V AC power connected in
phased bases L1+L2+L3+N+E. Fixture must be powered directly off a switched circuit and can not run
off a rheostat (variable resistor) or dimmer circuit, even if the rheostat or dimmer channel is used
solely for a 0% to 100% switch.
Contact us
General Information
Company NA
9 Lambertu str.
Marupe, LV-2167, Latvia
Phone: +371 6780 1111
Fax: +371 6755 6505
web: www.na.lv

Omega Dimmer series User manual version 1.0 09.2011
4
Safety Instructions
●Please keep this User manual for future consultation. If you sell the unit to another user, be sure
that they also receive this instruction broshure.
● Always make sure that you are connecting to the proper voltage.
● Make sure there are no flammable materials close to the unit while operating.
●Always disconnect from power source before servicing or replacing fuse and be sure to replace
with same fuse source.
● Maximum ambient temperature (Ta) is (+40°C). Its not recomended to operate device at
temperature higher than maximum ambient.
● In the event of a serious operating problem, stop using the unit immediately. Never try to repair
the unit by yourself. Repairs carried out by unskilled people can lead to damage or malfunction.
Please contact the nearest authorized technical assistance center. Always use the same type
spare parts.
● Make sure the power cable is never crimped or damaged.
● Never disconnect the power cord, pulling the wire.
● The addition of the power cord, a voltage must be disconnected.
Caution!
There are no user serviceable parts inside the unit. Do not open the housing or attempt any repairs
yourself. In the unlikely event your unit may require service, please contact
„Company NA” at: +371 6780 1111.
Please read instruction carefully, which includes important
information about the installation, usage and maintenance of
thisproduct.

Omega Dimmer series User manual version 1.0 09.2011
5
2. INTRODUCTION
Device description
The OMEGA, OMEGA+ and OMEGA W are a "Company NA" manufactured dimmers. The
Omega series dimmers are designed for controlling incandescent lamp brightness. The dimmers has
12 or 24 output channels. Its operating principle is based on triac ignition phase regulation.
The dimmer's output channel control is DMX-512 or manually from the front panel using the
“Test” or “Chase” modes. Operating the dimmer in “Test” mode, the output levels can be set with the
use of the graphic display independently of the DMX input. The “Test” mode allows for two output
signal set sizes –single channel (C) or group (G). Operating the dimmer in “Chase” mode replays a
prerecorded sequence independently of the DMX input. Six seperate sequences can run with control
of the sequence speed and direction, as well allowing the setting of backdrop levels. The settings
programmed in “Chase” mode operate only in this mode.
The OMEGA series dimmers front panel includes: display, operating controls, a digital
potentiometer, as well as 13 A or 16A circuit breakers for each individual regulated channel.
The OMEGA display graphically shows the DMX address set and input signal for 12
channels.
OMEGA - rackmount 12 channel dimmer owerveiw

Omega Dimmer series User manual version 1.0 09.2011
6
OMEGA + - rackmount 12 channel dimmer owerveiw
OMEGA and OMEGA + - rackmount back panel owerveiw

Omega Dimmer series User manual version 1.0 09.2011
7
OMEGA W - wallmount 24 channel dimmer owerveiw

Omega Dimmer series User manual version 1.0 09.2011
8
Features
● 12 or 24 output channels
● Control: DMX-512 or Manual settings
● Maximum output power per channel 4.0 kW
● Rated output power per channel 1.0 kW
● Maximum Current 63A per phase
● Power Protection Type - automatic switch (C-curve)
● Propagation current protection 13 A or 16 A switch
● Surge Protection lamp off at 285 V
● The full allowable voltage range 180-380 V
● The full operating temperature range - 25 / +40 C°
● Ambient Humidity ............................... 10-85%
Additional Features
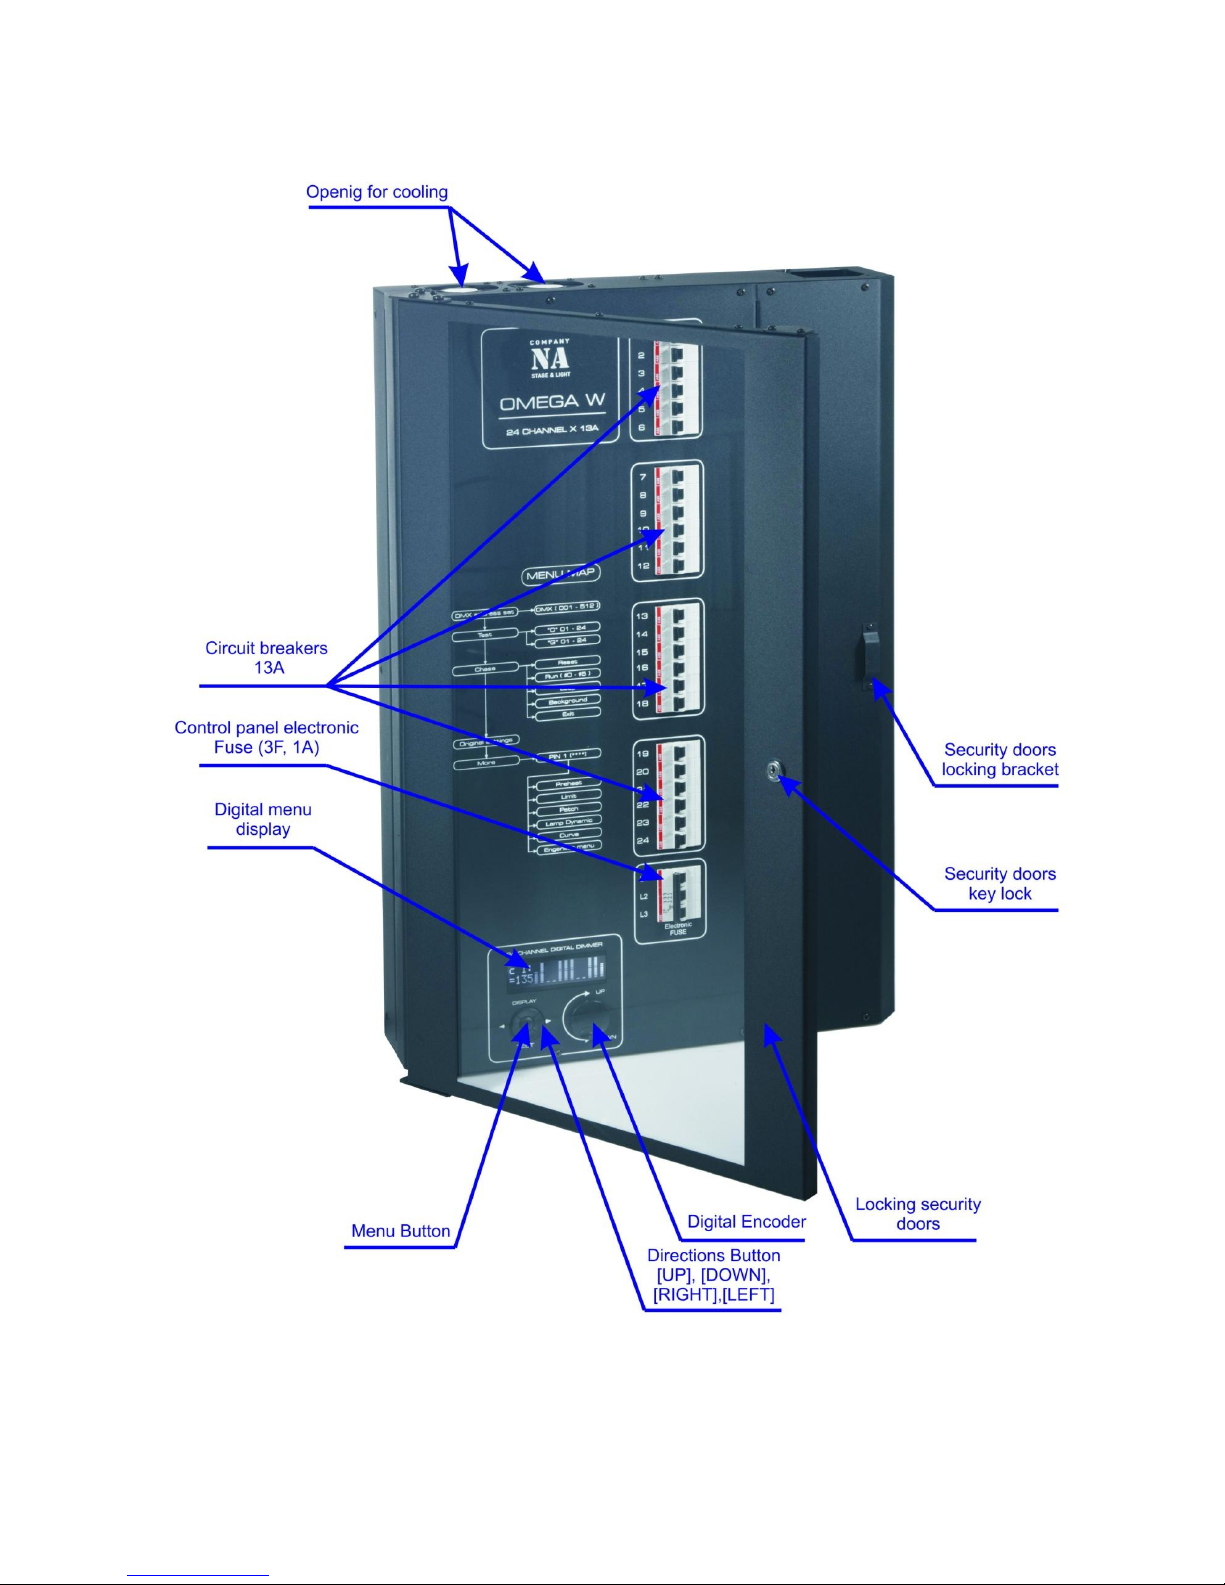
● Available in black
● Control panel with display
● Menu setup with bottons and digital potentiometer encoder wheel
● DMX start adress setup for all channels in one unit and sperate individual adress for idividual
channels in same DMX 512 universe (patch function )
3. Setup
Installation Guide
These installation instructions is to explain the OMEGA system installation specifics.
However, this instruction is not a wiring regulation. Before the installation of the system need to
find a local state of wiring and installation options.
Installation instructions are divided into three parts:
- System Positioning specification,
- Installation guide,
- Appendix department, with other useful information.
Before the installation of the system read the first two chapters
Specification of system OMEGA dimmers
Setup
Dimmer OMEGA is designed for installation in the 19' rack or wallmount. Dimmer can be
installed on the stage or away from them, as well as for use in the touring. It is not advisable to
install the system in a public place where there is no possible access to the equipment without
disturbing the show. It is not advisable to place these devices close to the sound hardware.
Like any other dimmer, the OMEGA emit heat, so it must permit normal air circulation on
site. OMEGA system maximum operating temperature is +40 º C.
Power suply
OMEGA dimmer system must have 3 - Phase, 5 core supply the place of installation of the
following: 3 - Phase, 5 core phase to phase supply to the TN-S wiring system (connection
scheme L1 + L2 + L3 + N + E). Connection cable size depends on the dimmer fuse size
(cutting size) and it can be up to 35mm2 copper wire (see: the power cable characteristics).
Neutral cable should be large enough to lead the neutral current resulting from a phase shift as
a result of the dimmer is used part-intensity (typically up to 130% of the maximum possible
power phase). Strongly not recommended for smaller neutral cable, as it requires a dimmer
system for feeding.

Omega Dimmer series User manual version 1.0 09.2011
9
Maximum fuse (switches) Dimensions:
Mono frame, with or without mains isolators
125A D-type auto fuse or equivalent (which
may be a fuse switch)
Double frame system without mains
isolators
250A D-type auto fuse or equivalent (which
may be a fuse switch)
Double frame system is equipped with
mains isolators
160A D-type auto fuse or equivalent (which
may be a fuse switch)
Power requirements
Wire size and load to the circuit wiring should comply with the rules. Dimmer fuse (switch)
size must comply with local cable overall dimensions (16A C-curve, or the 32A C-curve). If the
run size of one channel is up to 6mm2, the dimmer system is used to 16A C-curve fuse on one
channel, but if the run size is 10mm2, the system is used dimmers 32A C-curve fuse for each
channel.
Cooling
To provide cooling OMEGA and OMEGA + dimmers are equipped with two-high speed
internal fans, casing on the left side of unit corps. Fresh air is injected through holes in the left
side of corps, but warm air is discharged through holes located on the right side of corps.
Instalation
Preperation of the necessary components
Dimmer OMEGA is shipped with out a cable that is secured in place. In order to properly
carry out the installation of a dimmer prepare the section below details:
● Remove the wire connecting terminals by unscrewing two screws and at the same time
holding the DIN cable path. Then remove the wire connecting blocks.
● Disconnect the cable from the main arrivals cable connecting the frame (to move the cable to
the fuse side of 15mm, and move horizontally on 20mm)
● If the input cable is provided for detachable cable to the plate, remove it now.
Assembly of main cable
Mains power cable attach to a cable input terminal at the rear of the hull. The main power
cable assembly can be connected to a five-strand copper cable with conductor sizes up to
35mm2. To do so requires a straight blade screwdriver with a width of 4mm. Insert the screw-
blade main power cable assembly and press it. Now may be removed and a screwdriver with
both hands, insert the main power cable to connect the strands in the block hole. Make sure
the wires are placed correctly and outside the conductor connecting clamps are not visible
purified cable conductor parts.
Dimmer Omega phase wires marked by their color:

Omega Dimmer series User manual version 1.0 09.2011
10
red
yellow
blue
black
green/yellow
Phase L1
Phase L2
Phase L3
neutral
earth
Complete DMX cable plug
Connect the DMX input/output sockets on the back of the hull
Starting the system
Check incoming power cords
Check the incoming wires are connected properly and securely tightened,
Check whether the wires have the correct contact sockets.
Using a multimeter check the short circuit between phases, neutral and earth.
Check power cords
Make sure all cables are properly connected and isolated and complies with both ends of
the connection.
Make sure all ground wires are connected properly.
Using a multimeter check short circuit between phases, neutral and earth.
Turning on
Turn off all circuit breakers.
Turn on the main switch of sufficient capacity fuse.
Make sure the LED indicators show the proper interconnection.
Management screen, main menu appears with all the channels.
Channel output check
a) Push the menu button,
b) with [up]/[down] direction buttons find [Test], [enter] (with menu button),
c) 1st channle is blinking, roll encoder, 1st column rise a level up,
d) with [LEFT]/[RIGHT] direction buttons change the channels.
Unplug power before service.
Always use the same type of parts for service.

Omega Dimmer series User manual version 1.0 09.2011
11
4. OPERATING INSTRUCTIONS
Manual Control
On the front panel of hull is placed 4-way buttons - [UP] [DOWN] [LEFT] [RIGHT] and
approval or menu button - [MENU]. To serve numerical values of the input use rotary encoder.
All activities are reflected in the 16x2 character display. Dimmer operates three basic regime -
the base screen mode, the test sub menu and service functions. Referred to as button names
are given in square brackets, but the lettering on the display - in quotation marks.
Base screen mode.
In the dysplay you can see DMX adress and value of incoming DMX input for 12 channels
With bottons [DOWN],[RIGHT] and [UP] you can chose aditional modes.
[RIGHT] - look next 12 channels, if the channel count is more than 12.
Shows status of
DMX signal.
If label is bliking,
DMX signal input is
not connected
Shows DMX adress
from 1 till 5 12
Values of incoming
DMX input signal
for each output
channel
Shows number of
1st channel in
active display

Omega Dimmer series User manual version 1.0 09.2011
12
[UP] - Look aditional information about Omega dimmer system.
Frequency and Voltage in each phase:
"F = 50.00 Uabcs="
"220 223 229 8"
Fan seed and teperature of radiator:
nc. -breakege of temperature sensor,
sc. - temperature sensor short circuit.
"Fan speed = 100%"
"T1= 25 T2=nc. C"
Software version, date
"Prog vers 5.00 "
"Date feb 29 2008"
DMX Parameters
DMX –adress,
Max –adress count,
FPS –frames per second,
Err –count oferrors in last 10 sec.
"DMX= 1 Max=512 "
"FPS= 25 Err= 0 "
the maximum and minimum fixed-line voltages in each phase
during the last switching on time:
"Max= 229 238 234"
"Min= 202 223 198"
[Down] - go to TEST menu
Activation mode
Channel (C) or group
of channels (G)
Last activated channel

Omega Dimmer series User manual version 1.0 09.2011
13
User MENU setup.
Press and hold [MENU] button for 3 seconds to enter USER MENU SETUP.
"DMX address set" - DMX address setup. For numerical parameter setup, use rotary encoder, or
buttons [UP] and [DOWN] - addresses changes in the value of + / - 1. Press [MENU] -
to confirm planted DMX address.
"Test" –Channel Output editor regardless of the DMX input.
Button functions:
[LEFT], [RIGHT] - chose next channel or add channel to the group.
[UP] –change (C) channel or (G)roup mode,
[MENU], [DOWN] –leave the Test mode
All output levels change with encoder.
In Test mode channel output levels stays only at test mode, if you exit from Test mode, output levels are
dropped down.
"Chase" –pre-recorded step chase playback and editing. Contains the following functions (which
may be added):
"Reset" –reset all chases to manufacturer defaults;
"Run" –start chase, chose one of 6 preprogrammed chases. "Chase" No. #0 is
background output channel levels. Use butons [LEFT], [RIGHT] to chose "Chase"
number . Use encoder to set speed and drirection of each "Chase".
"Loop" –automaticly change "Chase" each 20 seconds (except #0, because it is
background channel levels) ;
c # 3
s + 1 0
Shows value of channel our group 0 - 255
Channels (c) or
channel group
(G) label.
Chase selection 1 - 5
Chase speed selection 0 - +/-99
Channels (c)
or channel
group (G)
label.
Chase selection 1 - 5

Omega Dimmer series User manual version 1.0 09.2011
14
"Background" –Setup background channel levels. Works together with "Chase"
function, HTP.
"Exit" –Exit "Chase" mode to base screen mode
In "Chase" mode channel output levels stays only in this mode, if you exit from "Chase" mode, chases
and background levels are dropped down.
"Default setings" –Restore to manufacturers default settings.
"More ..."- technical setup menu. Requires PIN1 code (****). pin1 code: 1234
Technical setup menu.
"Preheat" –Preheat setup for idividual channel using graphical editor. Limit from 0-15%
Preheat, Limit, Curve parameters affect each other and converts DMX input value or
test value against the baseline.
"Limit" - Setup the maximum size of each individual output channel using the graphical editor. The
c 1 :
= 0
c # 5
s + 1 0
Chase speed selection 0 - +/-99
Channels (c)
or channel
group (G)
label.
Number of controllable channel
Controllable channel level 0-255.

Omega Dimmer series User manual version 1.0 09.2011
15
limits from 50 to 100%.
"Patch" - DMX channel setup for each output channel individually. Use buttons and encoder to
asigne each output a specific DMX address:
Example:
"Output 7"
"DMX in 401"
"Lamp Dynamic" - a lamp on / off time settings. For lamp life increasing. Settings are set equal
for all output channels:
- for DMX Control from DMX input,
- for test mode,
- and from external analogue encoders.
"Lamp ON time "
"= 30 msec " - default
"Lamp OFF time "
"= 0 msec " - default
"Curve " –Lamp control curve selection. The first 5 options corresponding to different lamp
management curves, but the last ("Non-dim") - for Relay mode:
"Square "
"Linear " - default
"Lin-Law"
"NACurve"
"S-Curve"
"Non-dim" - for Relay mode
"Engineer menu" - engineering settings. PIN2 required (****).
Engineering menu, default settings
"Total channels" - Output channel count. Actual count of connected outputs. The limit from 1 to
48.
"NonDimm setting" - Relay mode setup individually for each output channel using the graphical
editor.
"Period register" - Phase control period. Default = 580th
"Fan control" - Fan control. Are set the following parameters:
"Fan slow Temp" –Minimum speed temperature,
"= 45 C " - default
"Fan fast Temp" –Maximum speed temperature,
"= 70 C " -default
"Lamp off Temp" –Regulators shut-off temperature,
"= 95 C " -default
"Minimum speed" - Minimum speed (20 - 100 %)
"= 33 % " -default
"Fan off delay" –Fan off time delay (0-30 min).

Omega Dimmer series User manual version 1.0 09.2011
16
"= 3 min " -default.
"Phase sequence" - Output Channels connected to phase setup. Specifies in what order the
phases are connected to the channels:
Example:
AAAABBBBCCCC;
ABCABCABCABC - default ;
AAAAAAAAAAAA.
"DMX unplug" - DMX input signal is lost setup. Allows you to select the state, which occurs when
DMX signal is lost:
"Blackout" - all outputs = 0;
"Signal Hold Last" - remains last incoming DMX signal values, until the signal is not
renewed (default).
"Potentiometers" - Output channels analogue potentiometer settings.
"Voltage history" - Deleting history of overvoltage. Request code PIN3 (****).

Omega Dimmer series User manual version 1.0 09.2011
17
5. Appendix
DMX-512 Protocol
DMX-512 protocol has 512 channels in one universs. Channels (adress) can be
committed in any way depending on the device. To operate equipment with DMX-512 protocol is
necessary one channel or multiple channels in a row depending on type of device. User sets up the
address of the equipment, which coincides with the light control panel installed. There are a lot of
equipment, which can be controlled via DMX-512 protocol, and they may have different
DMX channel number, so the start address must be selected in advance. DMX channels should
never overlap with each other. If the DMX channels are overlapping, equipment can run wrongly. If
you use the same type of equipment can impose a range of facilities with the
same starting address, only take into account that the installation will work exactly the
same and you will not be able to drive one of these machines separately.
Important:
EIA-485 standard requires that the device can be connected to one DMX univers with a
series circuit. In accordance with the provisions of the standard in one DMX series circuit can connect
only 32 devices. To be able to connect more than 32 devices in one DMX univers, you need to use the
DMX signal splitter vith the recovery function, which inputs and outputs are optically isolated.
Otherwise, the DMX-512 signal may be distorted and device management from the light control panel
will not be possible.
DMX Ddata cable
Use a Belden© 9841 or equivalent cable which meets the specifications for EIA RS-485
applications. Standard microphone cables cannot transmit DMX data reliably over long
distances. The cable will have the following characteristics:
2-conductor twisted pair plus a shield
Maximum capacitance between conductors –30 pF/ft.
Maximum capacitance between conductor and shield –55 pF/ft.
Maximum resistance of 20 ohms / 1000 ft.
Nominal impedance 100 –140 ohms
CABLE CONNECTORS
Cabling must have a male XLR connector on one end and a female XLR connector on the other
end.
DMX connector configuration

Omega Dimmer series User manual version 1.0 09.2011
18
CAUTION Do not allow contact between the common and the fixture’s chassis
ground. Grounding the common can cause a ground loop, and your fixture may
perform erratically. Test cables with an ohm meter to verify correct polarity and
to make sure the pins are not grounded or shorted to the shield or each other.
3-PIN TO 5-PIN CONVERSION CHART
NOTE ! If you use a console with a 5 pin DMX output connector, you will need to use a
5 pin to 3 pin adapter. The chart below details a proper cable conversion:
3-PIN TO 5-PIN CONVERSION CHART
Conductor
3 Pin Female (output)
5 Pin Male (Input)
Ground / Shield
Pin 1
Pin 1
Data ( -) signal
Pin 2
Pin 2
Data ( + ) signal
Pin 3
Pin 3
Do not use
Do not use
Do not use
Do not use
Maintenance
To maintain optimum performance of equipment and reduce wear and tear, it is advisable
to clean them regularly. Frequency of usage and environmental exposure (dust, smoke, fluids), are
factors that contribute to equipment depreciation. It is recommended that equipment be cleaned at
least twice a year. Equipment overlap with dust may cause equipment overheating in case of
insufficient aeration. This leads to reduced equipment life and increase the use of mechanical
equipment wear. Before cleaning, disconnect it from power. Use a vacuum or air compressor and a
soft brush to remove dust from outer parts of the set, as well as internal components of the equipment.
Cleaning frequency depends on the environment in which the facility is operating: damp, smoky or
particularly dirty surroundings can cause greater accumulation of dirt.

Omega Dimmer series User manual version 1.0 09.2011
19
Return Procedure
Returned merchandise must be sent prepaid and in the original packing, call tags will not be
issued. Package must be clearly labeled with a Return Merchandise Authorization Number (RMA
#). Products returned without an RMA # will be refused. Call Company NA and request RMA #
prior to shipping the fixture. Be prepared to provide the model number, serial number and a brief
description of the cause for the return. Be sure to properly pack fixture, any shipping damage
resulting from inadequate packaging is the customer’s responsibility. Company NA reserves the
right to use its own discretion to repair or replace product(s). As a suggestion, proper UPS
packing or double-boxing is always a safe method to use.
Note: If you are given an RMA #, please include the following information on a piece of
paper inside the box:
1) Your name
2) Your address
3) Your phone number
4) The RMA #
5) A brief description of the symptoms
Claims
Damage incurred in shipping is the responsibility of the shipper; therefore the damage must be
reported to the carrier upon receipt of merchandise. It is the customer's responsibility to notify and
submit claims with the shipper in the event that a fixture is damaged due to shipping. Any other
claim for items such as missing component/part, damage not related to shipping, and concealed
damage, must be made within seven (7) days of receiving merchandise.

Omega Dimmer series User manual version 1.0 09.2011
20
OMEGA Technical Specification
WEIGHT & DIMENSIONS
Length ...........................................................................................................482.6 mm
Width ..............................................................................................................400 mm
Height ...........................................................................................................133.2 mm
Weight ...............................................................................................................26.2 kg
Body .......................................................................................................19' rackmount
POWER
Input Voltage ................................................................................ 220V AC, 3 phase
Input Plot ...................................................................................L1 + L2 + L3 + N + E
Power Outputs ...................................................................................... 12 channels
Max. Output per channel ...............................................................................4.0 kW
Max. Current per phase...................................................................................63.0 A
Current Safety Switch ................................................ automatic switch 16 A (C-line)
Max. Current per phase...................................................................................63.0 A
Surage Protection .............................................................. lamps turned off at 285V
Full Voltage Range ................................................................................. 180 - 380 V
THERMAL
Maximum ambient temperature............................................................................+40°C
Minimum ambient temperature........................ .....................................................-20°C
Operating Humidty ......................................................................................... 10 - 85 %
Cooling ............................................... .................................................... air cooled fan
CONTROL & PROGRAMMING
Control ................................................................... DMX-512 , "Test" or "Chase" mode
DMX Channels ............................................................................................12 channels
Test....................................................... ( C ) each channel or ( G ) channels group test
Chase ................. 5 recordable - editable chases and 1 background output level scene
DMX input ..................................................................... locking 5-pin XLR male socket
DMX output ................................................................ locking 5-pin XLR female socket
DMX pin config. ...........pin 1 shield, pin 2 (-), pin 3 (+), pin 4 don’t use, pin 5 don’t use
WARRANTY INFORMATION
Warranty................................................................................... 2-year limited warranty
This manual suits for next models
1
Table of contents