LUNA OPTICS LN-G3-M44 User manual

1
LN-G3-M44
GEN-3 HD DIGITAL TECHNOLOGY
DAY & NIGHT MONOCULAR 5-30x44
INSTRUCTION MANUAL
SOFTWARE VERSION M5/2021/06/17
IMPORTANT: Please read this manual in its entirety
prior to using this device!

2
DIGITAL NIGHT VISION TECHNOLOGY:
1. Your night vision viewer operates with batteries. Unlike a daylight
binocular, where you see the image due to light traveling through the
glass and the prisms, the digital night vision device works by
projecting the image onto an OLED display screen. While the Image
Sensor and the OLED display are the crucial components of your
viewer, the optical parts of the unit are also very important, as they
gather the light into the Image Sensor and then bring the projected
image from the OLED screen to your eye. Since the image is projected
on the display screen, just like any TV, it has certain limited resolution,
so your digital night viewer cannot provide the same crystal clear
image, as you see through your daylight binoculars.
2. Another important point –your digital night vision viewer has
option of full-color, night vision green and black & white image –
why? Because, while full-color image is an excellent choice during
daylight, it sometimes washes out the details in the dark and will not
be as effective as monochrome image during nighttime conditions.
The night vision green color was chosen because green color shows
more details than any other color in the palette and black & white
image is especially useful when reading text or building signs or car
plates during nighttime.
3. Your digital viewer is safe to operate during daylight and
nighttime hours. IT IS NOT SAFE FOR YOUR EYES TO LOOK DIRECTLY
AT THE SUN THROUGH THIS PRODUCT! Please note that during
daylight you will have to reduce the brightness level of the unit to
prevent the image from becoming totally washed out. You should
also utilize Color Enhancing Filter, supplied with the unit for daylight
operation in order to view more vibrant colors. (Filter is attached to
the front lens and also acts as a protective lens cover)
4. For more details on how to operate your viewer, please read this
manual completely to ensure proper operation.
YOUR SYSTEM INCLUDES THE FOLLOWING:
1. LN-G3-M44 Monocular
2. 8GB Micro SD-card (installed into the SD-card slot)
3. Color Enhancing Filter (installed onto the front lens –daylight
use only –remove in the dark)
4. Carry case & Wrist Strap (strap is installed on the monocular)
5. USB Cable, HDMI cable & Micro-SD Card USB Adapter
6. 2xCR123A batteries (optional –NON-RECHARGEABLE!)

3
Please identify all the parts of the device PRIOR to operation! (50mm
lens shown, 44mm version is identical in all parts except the lens size)
1
4
2
5
3
8
9
5
1
8
6
3
4
7
10
11
11-c
11-b
11-a

4
GLOSSARY:
1 –Objective Lens Focusing Wheel 8 –Folding Eyecup
2 –IMAGE Button 9 –Menu Super Controller
3 –CAMERA Button 10 –Power / IR Indicator Lights
4 –POWER & IR Button 11 –Connection Area:
5 –Ocular Focusing Wheel 11-a) Micro-SD Card Slot
6 –Battery Compartment Cover 11-b) Micro-USB Connector
7 –Infrared Illuminator 11-c) Micro-HDMI Output
INSTALLING THE BATTERIES:
Your device operates on two 3V Lithium type batteries, known as CR123A type
commonly available in Electronics/Camera/Convenience stores. NOTE: it is
possible to use rechargeable batteries (CR123R) but please make sure each
battery peak voltage is equal to or less than 4.2V
WARNING: batteries supplied with the unit are not
rechargeable –do not charge or recharge these batteries!
WARNING: Use only compatible battery chargers with
overcharge protection to charge any rechargeable CR123
batteries.
To install the batteries, unscrew the battery compartment cover (6), and install
two CR123A batteries into compartment inserting the positive (+) end first.
Once the batteries are inside, replace the cover by rotating it all the way to the
end until the stop (do not use force or over-tighten!).
DAYLIGHT COLOR ENHANCING FILTER:
Your monocular is equipped with a unique daytime color
enhancing filter, which provides vibrant and accurate
colors rendition (digital image sensors are known to distort
colors and provide an unnatural color image during
daytime. The filter comes attached to the objective lens
and we strongly recommend keeping it on during daytime
use. During nighttime you will need to remove the filter (by unscrewing it
counter-clockwise). Please keep the filter in the carrying case when removed
from monocular to prevent accidental loss.

5
TURNING THE UNIT ON AND OFF:
Your night vision unit has one-touch push-buttons. To turn the unit ON, press
the POWER Button (4) momentarily once. The LED Power Indicator (10) located
on the back of the unit should light up in green color. Look through the eyecup
(8) –you should see the Welcome screen for a few seconds, followed by image.
Even if the image is not yet sharp, the unit is operating. To turn the unit OFF,
press and hold the POWER Button for 2 seconds. The image will disappear if
you turn the unit off correctly. We suggest to always replace the daytime color
filter / protective lens cover after the unit is turned off and no longer in use.
IMPORTANT: When turning the unit ON or when switching between various
modes (Video, Photo etc.) or when operating the unit with Wi-Fi stream
activated, it is normal to see some image flickering in the display. This is
normal and does not affect the unit. If the flickering does not disappear once
the affecting functions are no longer active, please re-start the unit. If
ON-SCREEN DISPLAY ICONS:
Video Recording Counter Video Resolution
Camera Mode
IR Power Level Time Power source
Image Magnification

6
OPERATING FROM A USB POWER BANK:
Your digital viewer can also operate from the commonly available 5V USB
Power Bank chargers. Please make sure the output of the Power Bank is at
least 2A, otherwise it may fail to power the unit especially when the IR
illuminator is activated. To connect the Power Bank, open the Connection Area
(11) rubber cover by gently pulling it outward and then swing it counter-
clockwise to the right and locate the Micro-USB connector (11-b). Connect the
small end of the USB cable (included) to the connector and then connect the
large end of the cable into Power Bank output. You may need to activate the
power bank first, prior to turning the viewer on. There is no need to remove
batteries if power bank is utilized.
FOCUSING THE UNIT:
To obtain the sharp image, you must first rotate the Ocular (Eyepiece) Focusing
Ring (5) in either direction, until you notice in which position you can see the
on-screen display icons well. After that, rotate the Objective Lens Focusing
Wheel (1) focusing at the object you are trying to view until the image is at its
best. You may have to repeat the process again, until the image is sharp. Once
sharp image is obtained, you will no longer need to adjust the eyepiece, just
the front objective lens to adjust the distance to the object you are viewing.
SUPER CONTROLLER / MENU FUNCTIONS:
Your monocular features a unique and user-
friendly adjustment called Super Controller
(9). It incorporates various operating
functions and makes navigating and adjusting
menu functions fast, easy and natural without
having to take your eyes off the eyepiece in
the field. It is especially useful when using in
the dark conditions where button location
may be particularly difficult. Super Controller
activates the Main Menu by pressing onto it
for approx. 2 sec.
Once activated, all Menu navigation is done the following way:
-Scrolling through the menu contents: rotate the Super Controller in
either direction (each click scrolls the menu by one step)
-Selecting and confirming function: short-press onto the Super
Controller
-Return from selected function to Main Menu: Long-Press onto Super
Controller (2 sec)
-Exiting the Main Menu: Long-Press onto the Super Controller (2 sec)

7
MAIN MENU consists of the following selections:
MODE:
-Video: this mode allows you to record videos when CAMERA button
(3) is pressed during operation
-Photo: this mode allows you to capture still images when CAMERA
button (3) is pressed during operation
-Playback: this mode allows you to playback videos and photos stored
on your SD card
RESOLUTION:
-FHD 1080P@30: Video record in Full-HD (Blue-Ray quality) at 30fps
-HD 720P@60: Video record in HD at 60fps (preferred at nighttime)
-HD 720P@30: Video record in HD at 30fps
-WVGA 480P@60: Video record at DVD quality at 60fps
IMAGE COLOR:
IMPORTANT: IMAGE COLOR CAN BE QUICKLY SELECTED BY SHORT-PRESSING
ONTO MENU CONTROLLER (9) DURING EITHER VIDEO OR PHOTO MODE
-Normal: Image is displayed in Full-Color (best for daytime or well-lit
room –keep the red filter on the front lens)
-B&W: Image is B&W (good for nighttime city setting)
-Green: Image is traditional night vision green (good for nighttime field
use)
-Amber: Image is amber color (good for all daytime/nighttime settings
and especially where light glare might be an issue or whenever extra
contrast is desired)
WI-FI:
-ON: Turns the Wi-Fi signal ON. See page-13 for instructions
-OFF: Turns the Wi-Fi single OFF
DATE/TIME:
-Please see Page-9 on how to set the date/time on your monocular
FORMAT:
-Cancel: Exit formatting
-OK: Format your SD-card (all files will be erased!)
DEFAULT SETTINGS:
-Cancel: Exit to main menu
-OK: Returns monocular to factory settings
VERSION:
-Displays current software version installed in your device
ELECTRONIC IMAGE MAGNIFICATION ZOOM:
Your unit is also equipped with electronic zoom function, which allows you to
change image magnification from 5x to 30x. To increase the image

8
magnification rotate the Menu Super Controller (9) to the right (clockwise) and
look into the ocular –you will see the image magnification increase with each
rotation click by a certain increment. See next the magnification chart
according to each rotation:
5x –7.5x –10x –12.5x –15x –17.5x –20x –22.5x –25x –27.5x –30x
You can observe the current magnification level on the bottom left corner of
the image display once you start rotating the Super Controller. To decrease the
image magnification, rotate the Super Controller to the left (counter-clockwise)
and image magnification will decrease with each rotation. Factory default
setting is 5x
NOTE: During any image magnification adjustments, please avoid
pressing onto the Super Controller, as this may activate the device main
menu.
SHORTCUTS (MULTIPLE BUTTON FUNCTIONS):
The three top buttons can be used to skip the main menu navigation and
provide quick shortcuts to the most popular functions:
POWER & IR BUTTON (4):
a) Initial short-press –turns the power ON
b) When power is ON, single short press activates 1st
power level of IR illuminator. There are 3 IR power
levels –each consecutive short-press increases the
power by one level. 4th short-press turns the IR
illuminator OFF
c) When power is ON, long-press shuts the power OFF
CAMERA BUTTON (3)
a) Factory default setting is VIDEO. Short-press activates
video recording
b) Long-press activates Mode selection. Once activated
each single long-press selects between VIDEO /
PHOTO / PLAYBACK modes
c) Once selection is changed single short-press on this
button will either activate Video recording, Still Image capture or
Playback function
IMAGE BUTTON (2)
OLED display brightness. Each short-press increases the display
brightness by one level. There are 7 brightness levels and the
factory default setting is level-2. See page-11 for more image
brightness adjustment information

9
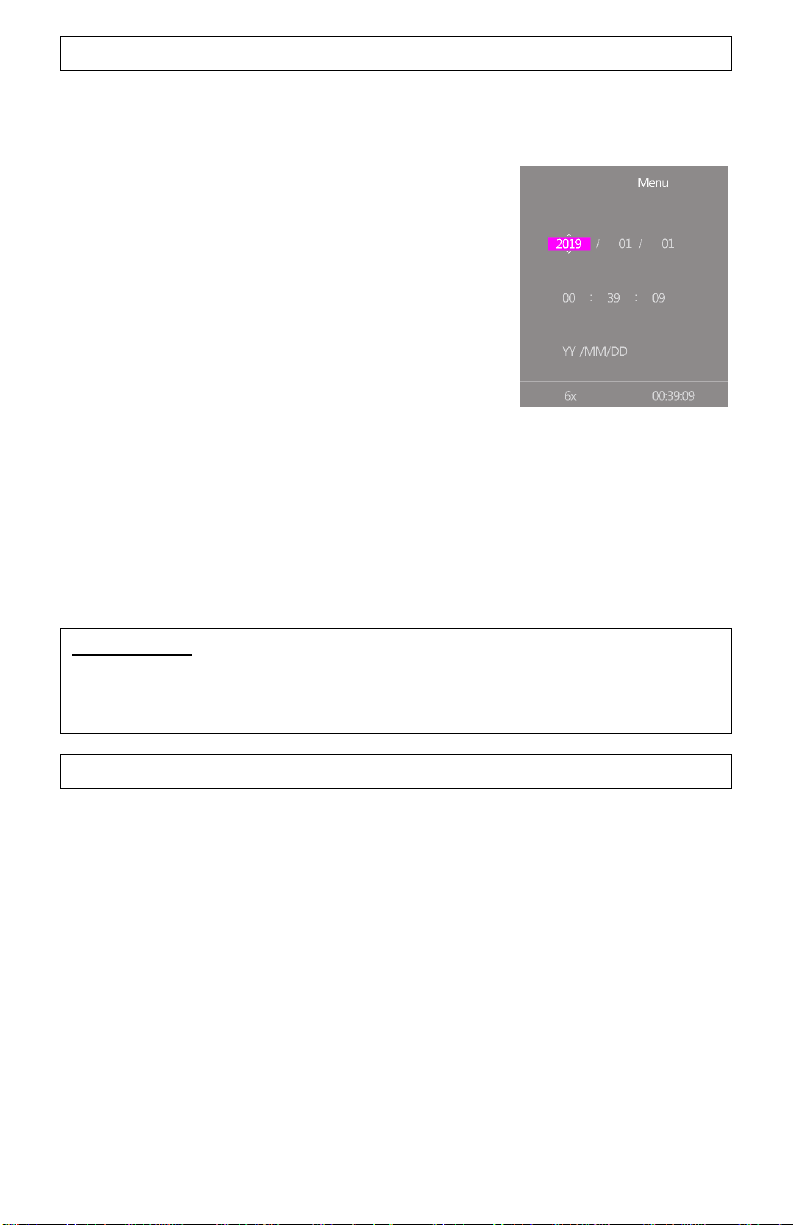
SETTING UP DATE AND TIME:
As your viewer has capability to take images and record video, time and date is
automatically stamped onto each image and video recording. To set the
correct date and time, please follow this procedure:
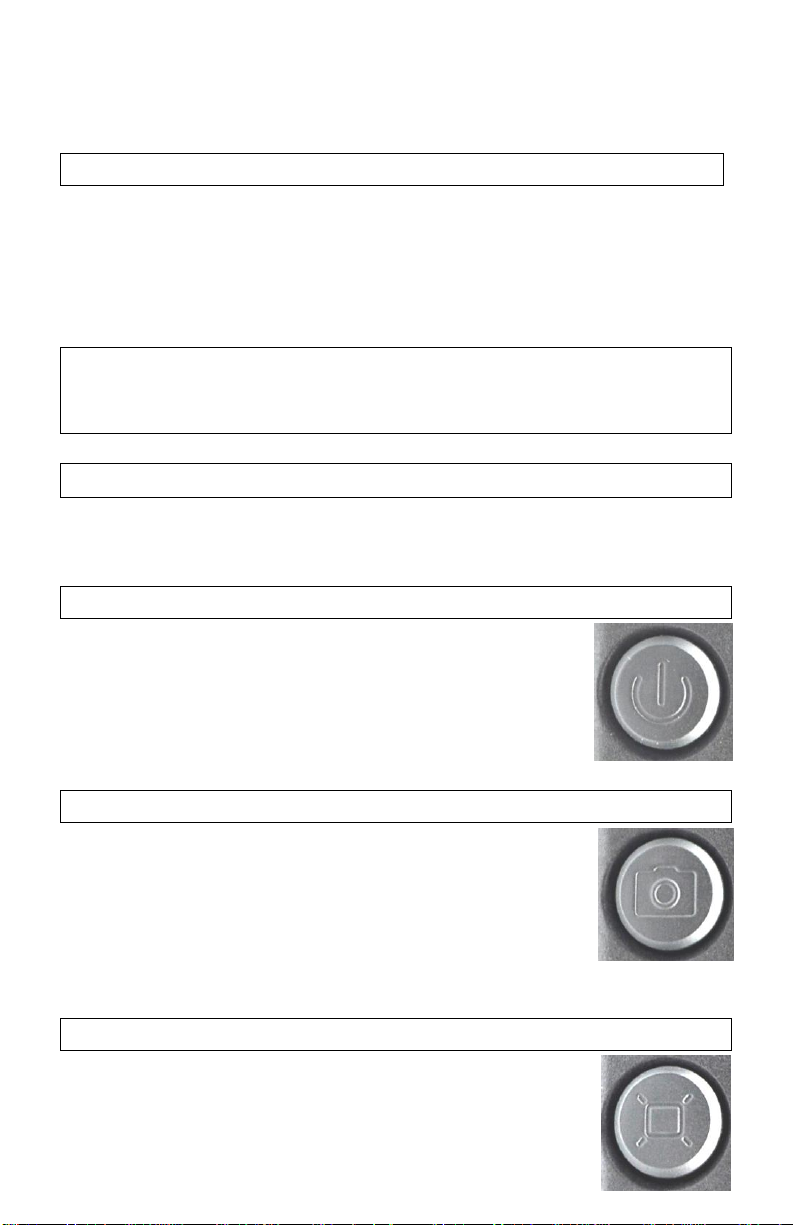
Turn the unit ON. After image appears, press onto
the Super Controller (9) and hold it for
approximately 2 seconds to activate the menu. Scroll
until Date/Time function by rotating the Super
Controller and select it by momentarily pressing
onto it. To adjust the numbers, rotate the Super
Controller in either direction. To switch between
numbers, press onto Super Controller momentarily.
After Date is set, adjust the time. Time is in 24hr
format, so 13:00 is 1pm; 17:30 is 5:30pm and so on. As with the date, changing
hours and minutes is done by rotating the Super Controller and moving
between hours and minutes is done by pressing onto it. Once the time is
adjusted you may choose to change the date format to MM/DD/YYYY or
YYYY/MM/DD according to your preference. Once you are finished setting date
and time, you can exit the menu by pressing Super Controller (9) for
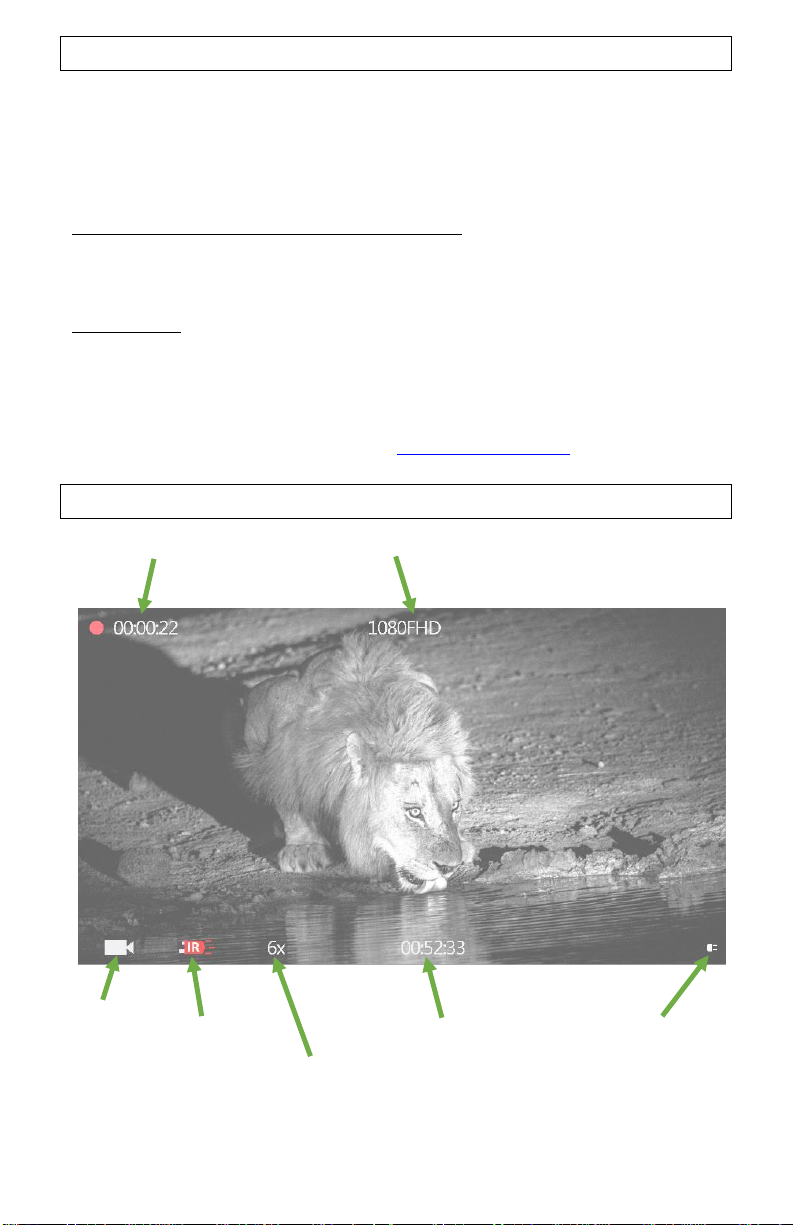
approximately 2 seconds. Once set, the time will be displayed on the bottom of
the OLED image display.
IMPORTANT: in order to preserve the set date/time do not remove the dead
batteries from the unit until you are ready to replace them with the new set,
then replace the old batteries with new set as quickly as possible and the
date/time will be preserved.
USING INFRARED ILLUMINATOR:
Your digital viewer is equipped with a built-in powerful Infrared illuminator
light (7). This light operates in a spectrum, which is normally invisible to a
human eye, however with the help of the Image Sensor, located inside the unit,
you will see a beam of light when looking though the ocular lens. Since the
Image Sensor does not actively amplify the available light, you will need to
utilize the IR illuminator often in the nighttime conditions.
To turn the Infrared illuminator ON, press the Infrared illuminator button (4)
momentarily –the IR icon on the bottom of the display will light in pink color
and red LED light indicator (10) located next to the eyepiece will light on,
indicating the IR illuminator is operating. The illuminator intensity can be
further increased by pressing the IR button (4) second and third time
(momentarily). The IR icon in the image display will change colors from pink to
orange to red, indicating the three different power levels. After the red level

10
(3rd and most powerful) the next momentary press on the IR button will turn
the IR off completely. The red LED light indicator (10) will disappear when the
IR illuminator is properly turned off.
When using the infrared illuminator it is important to remember that like a
flashlight, it is brightest when used in short distances. As the distance
increases, the intensity of the infrared light fades away.
Extended range IR illuminators are available (models LN-EIR850-2, LN-EIR940-2
or LN-ELIR-2), which can be mounted into the single (black) bottom accessory
mount socket. The thread is a standard ¼” type and will accept any accessory
with mounting screw of that size. If the black bottom mount is utilized for
tripod mounting, you can utilize any of the two gold sockets. Please note that
due to the monocular shape a special riser plate will be required to mount our
plate if your extended range illuminator did not come with it).
IMAGE COLOR OPTIONS:
IMAGE COLOR CAN BE QUICKLY CHANGED BY MOMENTARY PRESS
ONTO MENU CONTROLLER
-Normal mode displays images in full-color. This is preferred mode for
daytime use as well as when enough artificial light is present (inside a
well-lit room). If used during nighttime the overall sensitivity of the
image sensor will be significantly reduced.
-B&W mode displays images in black and white. This mode is
particularly useful during nighttime city setting when it might be
important to read the street signs or automobile plates or similar
situations where highest contrast between light and dark colors is
necessary.
-Green mode allows you to experience image as seen with traditional
“tube” night vision devices. This mode is best utilized at nighttime in
the field / forest settings
-Amber mode unique state-of-the-art color minimizes incoming light
glare and provides extra contrast allowing to perfectly see the smallest
details. Excellent for nighttime settings, but is also very useful in
daylight during both: bright sunshine or cloudy days where extra
contrast is desired
IMPORTANT: PLEASE READ!
Due to the inherited limitations of any digital image sensor, video refresh rate
will be significantly slower during nighttime, resulting in visible image lag/delay
when using your monocular in the dark. It is important to take the following

11
steps to minimize this effect and ensure the best possible image and video
recording quality:
-During nighttime and in any dark condition always activate built-in IR
illuminator –it will provide extra light needed for the image sensor to
“speed up” its refresh rate and image delay will be minimized.
-During nighttime you need to remove the daylight color enhancing
filter –it will block most of the Infrared light from the built-in IR
illuminator resulting in very dark image.
-Always try to utilize a quality tripod for any video recording done at
nighttime. This will ensure steady placement and will minimize image
delay when filming a moving object.
BRIGHTNESS ADJUSTMENT:
Your digital viewer is equipped with dual image brightness control. An
automatic picture optimization sensor adjusts the image according to the
available ambient and artificial light. In addition a manual Image Brightness
Button (2) allows you to fine-tune the image brightness to the most
comfortable level. Please note that during daylight you will need to tone the
brightness down to avoid image flickering and/or washout and to preserve the
battery life. During nighttime you could increase the brightness all the way up,
however when utilizing built-in or external IR illuminator, you may still need to
tone the brightness down. Each momentary press onto the IMAGE Button (2)
will increase brightness by one level until it reaches maximum level –then it
will reset to the lowest brightness setting.
TAKING PICTURES AND RECORDING VIDEOS:
WE STRONGLY RECOMMEND MOUNTING YOUR DEVICE ONTO A STEADY
TRIPOD WHEN RECORDING VIDEO OR TAKING STILL IMAGES –PARTICULARLY
WHEN WATCHING DISTANT OBJECTS AND/OR UTILIZING ZOOM FUNCTION
Your digital viewer has the ability to take High-Resolution pictures and record
HD videos onto the external Micro-SD card. 8GB card is included with your unit
and it is already installed into the SD-card slot. The Micro-SD card can be
upgraded up to 128GB, which is especially useful if you plan to record a lot of
videos See RE-FORMATTING 64 & 128GB CARDS TO FAT32 FORMAT on page-
14 for important instructions.
Your monocular has a multi-use CAMERA button (3). It can be used to record
video and capture still images. You can switch the function of this CAMERA
button by activating the Main Menu (long press onto Super Controller (9)) and
selecting Mode function and then select either Video for video recording or
Photo for still image capture. Please refer to Page-6 for instructions on how to
use Super Controller and Menu options.

12
To take a still image, focus the unit onto the object you are viewing and with a
steady hand firmly press the CAMERA button (3) once. The display will give a
countdown (2-1) in the upper left corner and then image is taken and is
automatically stored onto the SD card. All still images are taken at 4032x3024
resolution (12.2MP)
To record a video, focus the unit onto the object and press CAMERA button (3)
once. The system will start recording. To stop recording, press CAMERA
button once again. During recording it is still necessary to re-adjust the focus if
you wish to record different objects, located at different distances. There are 4
different video recording resolution options:
1. FULL-HD 1080P / 30FPS: Blue-Ray quality recording. Best for recording
in daylight with color filter on when highest video resolution is
necessary. Also good for recording at nighttime without the color
filter, when monocular is stationary on a tripod and no sudden
movements are expected
2. HD 720P / 60FPS: Excellent for daytime and nighttime recording.
3. HD 720P / 30FPS: Daytime and nighttime recording.
4. WVGA 480P / 60FPS: DVD quality recording, great for space saving
mode where large amount of video is expected
IMPORTANT: once your micro-SD card reaches its capacity, video recording
and still image taking will no longer be possible and “SD Card” will be
displayed, indicating it is time to either replace the card or empty your current
card. This feature acts as a safeguard to prevent accidental over-writing your
existing video and photo files.
IMPORTANT: If you see “Memory Error” message displayed, your micro-SD
card is either bad, or, if you have a 64GB or 128GB card, it is not operating in
FAT32 format. Please refer to page-14 for re-formatting instructions.
DATA VIEWING AND DATA TRANSFER OPTIONS:
It is possible to view the images and videos directly on the unit’s micro-display.
To do so, while the unit is operating access the main menu by pressing the
Super Controller for 2 seconds. Enter “Mode” menu and choose “Playback”. As
always, scrolling between functions is done by rotating the Super Controller
and function selection is done by short-pressing the Super Controller. Once in
the Playback Mode you will be able to switch between photos and videos by
rotating the Super Controller and short-pressing Super Controller will activate
any video file. To exit the Playback Mode simply press Super Controller for 2
seconds.

13
You can connect the unit directly to the computer via USB connection by
utilizing the micro-USB connector (11-b). To do so, connect the micro-USB part
to the unit, then connect the standard USB part to the computer. Device does
not need to be powered. It will power up once connected. Look through the
eyepiece –words MASS STORAGE will be displayed. Connection will start
automatically once the software download is finished (also done
automatically). Once download is done, you will be able to open and transfer
all of your SD-card files onto your computer.
Alternatively, you can remove the micro-SD card from the monocular and use it
in the included USB flash drive adapter to transfer data to your computer.
Carefully open the Connection Area (11) rubber cover by gently pulling it from
the left side outward and then swing it counterclockwise to the right and locate
the Micro-SD Card Slot (11-a). Gently push onto the micro-SD card and it will
pop out. If your computer has a direct micro-SD slot, you can insert the card
directly to the slot bypassing the above options. It is also possible to utilize the
full-size SD card adapter (not included with monocular). To replace the micro-
SD card gently push it into the slot (11-a) until it clicks and stays in it.
CONNECTING TO EXTERNAL VIDEO SOURCE:
You can connect your device to the HD source, such as HDTV or monitor via the
micro-HDMI cable (included with your device). Carefully open the Connection
Area (11) rubber cover by gently pulling it from the left side outward and then
swing it counterclockwise to the right and locate the Micro-HDMI output (11-c)
Connect the small end of the cable to the micro-HDMI Output and then
connect the large end of the cable to the HDMI input on your TV or monitor.
IMPORTANT: Please note that when device is connected via HDMI to any
video monitor or HDTV, it will be impossible to connect via Wi-Fi to the App
during active video recording. If you wish to connect to the Wi-Fi App, you will
need to discontinue video recording.
WI-FI LINK AND OPERATION INSTRUCTIONS:
1. Download “ROADCAM” App on your Android
phone/tablet or on iPhone/iPad. For Android users if
you have a problem finding the app in Google Play
Store, please scan the QR code below
2. Enter Main Menu via Super Controller (9) and scroll to
Wi-Fi selection. Turn the Wi-Fi ON. Now look
through the eyepiece and observe the Wi-Fi signal
name (typically M5) and Password (typically
12345678).

14
3. Find the device Wi-Fi signal on your phone (same as shown on the
unit’s display) and select it.
4. Enter password (second line of the unit’s OLED display) – NOTE: only
numbers after “:” are needed to be entered – typical default password
is 12345678.
5. Once connected make sure your phone is allowed to stay connected
to this Wi-Fi signal even though there is no internet available. This
will prevent automatic disconnect by your phone.
6. Now open the app and it will display the device name below the
orange cam symbol –simply touch the cam symbol and app will
connect to the device.
7. Follow on screen menu on your smart device to utilize the available
features of the app. NOTE: during Wi-Fi streaming the ZOOM function
is disabled and cannot be utilized!
8. During Wi-Fi streaming single press onto the Super Controller activates
either Video or Photo capture, depending on the selected mode.
Repeat press deactivates video.
9. If the App shuts down during normal use, please re-start it, or re-
install it on your mobile device if it happens more than twice.
RE-FORMATTING 64GB & 128GB MICRO-SD CARDS TO FAT32
FORMAT:
Any micro-SD card above 32GB needs to be re-formatted from EXFAT format to
FAT32 format, which is the format of the night vision monocular (and many
other consumer electronics). Please note that FAT32 is the most widely used
format and is also considered the most reliable format.
In order to re-format the card you must run it through a 3rd party provider. We
suggest using Disk Partition. While nearly all of the providers would want you
to buy their upgraded versions, you can just download their basic free version
and it would be sufficient to re-format the card. Disk Partition seems to be the
most simple and hassle-free provider we could find:
https://www.disk-partition.com/download.html
Download the “Standard Free” version and follow all the download
instructions.
Once downloaded, open the program and insert the micro-SD card
into the computer.
Highlight the correct disc by single-click and then choose on the
bottom left side of the menu to “Format Partition” (alternatively right-
click on the highlighted disc and choose the same function). A pop-up
window will appear. You can label your partition (such as “Luna Optics

15
Monocular” or any other name you desire (it’s optional) and then
make sure to select “FAT32” as the File System. Then click “OK”.
Once the format is finished, click on “Apply” located in the most upper
left corner. You must select “Apply” otherwise the formatting is not
finished.
You card is now formatted, but before you can use your 64/128GB
card in our digital night vision product you must also format the card
inside the product. To do so, insert the card into its slot (11-c), turn
your monocular on and through the menu find and select “Format”,
then select “OK”. Once the card is formatted inside the night vision
device it is now ready to use.
TROUBLESHOOTING:
1. Unit does not turn on and the light indicator is off:
a) please check if the batteries are inserted correctly
b) please make sure the batteries are fresh
2. The light indicator is working, but you cannot see the image:
You may be turning the unit on in a dark area without utilizing
the IR illuminator. Please also remove the Daytime Color Filter.
3. Unable to obtain sharp and clear image:
a) you may need to repeat the process of rotating the ocular and
objective lens several times until you get a good feel of it
b) You may be viewing an object that it too close –the minimum
focusing distance is approximately 80cm or 2.6ft
4. During image magnification adjustment Image Color changes or Main
Menu activates:
You have accidentally pressed onto the Super Controller. If
Menu appears, press onto the Controller again for
approximately 2 seconds and Menu will disappear.
5. I’m trying to turn the IR illuminator on and instead the unit shuts down:
You are holding the Power/IR button for more than 1 sec. In
order to turn the IR illuminator on, you must press the button
only momentarily.
6. I’d like to use a 64GB or a 128GB micro-SD card, but it’s not working or is
not recognized:
Your 64GB or 128GB micro-SD card must be re-formatted to
FAT32 format. Please refer to page-14 for re-formatting
instructions
WARNING! NEVER ATTEMPT THE FOLLOWING:
Never try to disassemble the unit by yourself or by
anyone who is not our authorized technician. Doing

16
so may result in injury and will void any warranty
claims
Never charge batteries included with the unit –they
are not rechargeable!
Never submerse the unit into water or use it during
heavy rain.
Never look directly at the sun through this device.
TECHNICAL SPECIFICATIONS:
Image Sensor Resolution / Sensitivity: _________ Full-HD 1920x1080 / 0.005lux
Image Display: __________________________ 0.38” HD AMOLED-Q 1280x720
Still Image resolution _________________________4032x3024 (12.2MP) JPEG
Video resolution (signal) __________________Full-HD 1080p AVI (NTSC / PAL)
Video Recording options ____________________ 1080p / 720p / WVGA / VGA
Image Magnification _________________________________________5x-30x
Objective Lens __________________________________________F1.0/44mm
Focusing Distance__________________________________ 80cm (2.6ft) - ∞
Viewing Distance (daylight, 5x) __________________________ 900m (980yds)
Viewing Distance (IR complete darkness) __________________ 200m (218yds)
Field Of View_________________________________________________ 12°
Memory _________________________________ Micro SD card (up to 128GB)
Wi-Fi _________________________________________________ Android/iOS
Battery Power__________________________________2 x 3V Lithium (CR123)
External Power _____________________________________ 5V/2A micro-USB
Operating Time (battery power) _______________________________3-3.5hrs
External outputs ______________________________ micro-HDMI / micro-USB
Dimensions_____________________165mm x 80mm x 63mm (6.5”x3.1”x2.5”)
Weight________________________________________________ 500g (17 Oz)
Warranty______________________________________________________1yr
----------------------------------------------------------------------------------------------------------
LUNA OPTICS, INC. 300 Hawthorn Dr., Fate, TX 75087 (USA)
E-mail: info@lunaoptics.com Web: www.lunaoptics.com © 2021
This manual suits for next models
1
Table of contents
Other LUNA OPTICS Monocular manuals