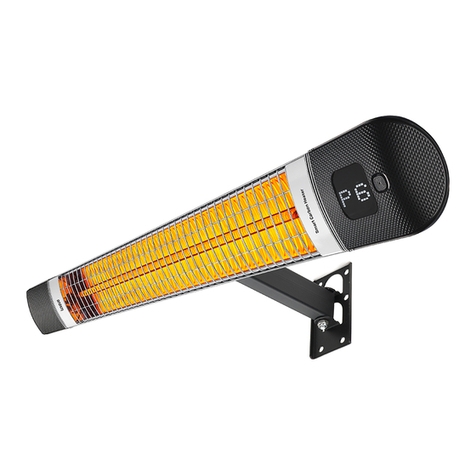
LUXEVA LXV2000-TS User manual

Instruction Manual GB

Contents
GB
Dear Customer,
Thank you for the confidence you placed in Luxeva products. Our goal is to ensure
that you use this product, which has been manufactured in our modern facilities in
precise working conditions, conforming to total quality idea and without harming
nature.
Werecommend that you read and carefully store the User Manual before you use
your heater,sothatitcanpreserveitsfeaturesforalongtimeandserveyoumost
efficiently.
NOTE:
ThisUser Manualis prepared formore thanone model. Some ofthefeatures stated in the
manualmaynotbefoundinyourdevice.Thesefeaturesaredenotedwith*
Our products are for domestical use, not for commercial use.
"READ THE INSTRUCTIONS BEFORE DEPLOYING OR USING THIS
DEVICE.”
This product is manufactured in
environment-friendly modern facilities
without harming the nature
"It complies with EEE Regulation."
Safety Instructions 3
Safe distances: high temperature, fire protection, wall mounting (* option) 7
Technical Features 8
Using your heater 10
Remote Control, Without remote control 12
Maintenance and Cleaning 13
Troubleshooting 14

Safety Instructions
3
This device is manufactured in compliance with safety regulations. Usage against the
rules causes harm to person and device.
Please read the User Manual carefully before operating the device. You will find
important informations inside the User Manual regarding mounting, safety, usage and
maintenance.Thusyouwillbothprotectyourselfandprevent thedevicefromcoming to
harm.
If the power cord is damaged, it must be replaced by the manufacturer or its service
agency or a personel qualified in the same degree to prevent a dangerous situation.
It must be checked whether there are breaks or deformations on the heating
element present on the device. If glass panels are damaged, the heater must not be
used. Authorized service must be called.
It must be ensured that the main power is 220-240V AC, 50-60 Hz and the power
line is connected to the fuse. Mains safety must be checked. Fuse must be 16
Amperes. Your device must be used with grounded socket and grounded socket
must be outside the heater area and the hot surface. Also, it must be checked
whether the socket is loose or damaged. Because loose sockets damage the device
and the power main.
Your device must not be used connected to the same power cable or fuse with
another device.
Power cord must not be left on the hot body of the device or near it.
Ifyourdevicewillnotbeusedforalongperiodof time, ifcleaningor maintenance willbe
conducted, the device must be unplugged. It must be ensured that the device has
cooleddown.
The device is not intended for use by persons (including children) with reduced
physical, sensory and mental capabilities or lack of experience and knowledge, unless
they have been given supervision or ınstruction concerning the use of the appliance by
apersonresponsiblefortheirsafety.

Safety Instructions
4
Definitely do not let your device come into contact with water.
The electrical connectionofthe device must beseparated from the mains during
mounting and maintenance or repair works. Device must be unplugged to be
separated from the mains.
Do not touch the metal terminals immediately after unplugging the appliance.
Ensure that the feed cable and the plug is clean and dust-free prior to use.
Never unplug the feed cable from the plug by tugging on the cable. Ensure that you
hold the plug correctly as you plug it into or take it out of the socket. Donot touch the
feed cable with wet hands.
Do not make a joint to thefeed cable. Otherwise, malfunction, electric shock or fire
may occur.
Do not passthe feed cable under heavy objects. Otherwise, electric shock or fire
risk may occur.
Do not turn off your heater only by unplugging it or shutting down the fuse, always turn
off by using the heater tube functionbutton.
Fire risk exists if the heater is covered by or positioned close to curtains or other
combustible materials.
The flame protector ofthis heater is for preventing direct access to heater elements
and must be in place while the heater is inuse.
Do not use your device outside its intended purpose.(Do not use it for drying
clothes or keeping animals or plants warm.)
Never try to clean the device with solvents or flammable liquids.(It may cause
electric shock or fire)

Safety Instructions
5
Do not cover the dust protection cover while the device is
operating or hot.
Children of less than 3 age should be kept away unless
continuously supervised.
Do not use this heater in the vicinity of the bath,
shower or swimming pool.
The heater must not be used if the glass heating elements
are damaged.
CAUTION —Some parts of this product can become very
hot and cause burns. Particular attention has to be given where
children and vulnerable people are present.
For the safety of children under 8 years of age, the
appliance must be operated out of reach, following the
specified safety instructions and checking all connections.
When out of use, place the heater in a safe place and keep
the electrical connection cables (plugs) away from the
sockets.
The expected life of this product is ten years.
WARNING: This heater is not equipped with a device to
control the room temperature. The heater must be used by
an experienced person in the presence of children, physical
disabilities persons, persons with insufficient experience
and inadequate knowledge. Do not use this heater in small
rooms when they are occupied by persons not capable of
leaving the room on their own, unless constant supervision
is provided.

Safety Instructions
6
Do not operate the device while sleeping or while away from where the device is
located.
Refrain from using extending cord, it might cause fire due to overheating. If you
have to use an extending cord, the cable cross section must be at least 2 mm2
(14AWG).
The device must be on a level and smooth surface during use. Do not operate your
device on unstable or unsafe surfaces.
Do not try to disassemble or repair the heater. Never shake the heater.
A faint smoke and smell might form during the first use of your device. This is
normal. Do not touch the device while running or right after operation.
Device must be unplugged before cleaning. Do not clean your device with vapor
cleaners.
Children should be supervised to ensure that they do not play with the appliance..
Flame protector does not provide a full protection for small children and
handicapped people.
Store your device in dry and enclosed locations.
Do not cover your heater in order to prevent excessive heating.Do not close the
ventilation ducts and the wire part.
This appliance can be used by children aged from 8 years and above and persons
with reduced physical, sensory or mental capabilities or lack of experience and
knowledge if they have been given supervision or instruction concerning use of the
appliance in a safe way and understand the hazards involved
Children shall not play with the appliance
Cleaning and user maintenance shall not be made
by children without supervision

7
Minimum 0,75 meter distance must be present between the device and the ceiling.
Min. 1.8 meter distance must be between the device and the floor for wall mounting.
Min. 1 meter distance must be between the device and curtains, wood, cardboard
fabric etc. Materials, living things and other devices.
Fingers or other object must not be protruded into the protective cage wire.
The heater must not be located in front of a socket-outlet.
Do not move the device while running. Always shut off the device before touching
and wait for it to cool down. This heater should not be equipped with a device for
controlling the room temperature. Unless constant control is ensured, do not use this
heater in small rooms used by people who cannot leave their rooms.
Do not operate within 7 meters 60 centimeters distance of flammable materials (gas,
alcohol etc.) or do not place near motor devices that are not expected to run. Heater
place solvent, thinner and similar flammable materials on or near the working
surfaces of the heating devices or do not place near electrical house appliances.
WARNING: To reduce the risk of fire, keep textiles, curtains, or any other
flammable material a minimum distance of 1m from the air outlet.
1 2 3
Safe distances: high temperature, fire protection, wall mounting
(* option)
0,5 0,5 0,5
1 2 3
Cm

Technical Features
8
Device Hardware (Portable Type)
1-
APPLIANCE BODY
2-
ENERGY CABLE
3-
FIXED REAR LEG
4-
FIXED FRONT LEG
5-
ENERGY CABLE FIXING PLASTIC
6-
ENERGY CABLE FIXING PLASTIC
FITTING SCREW
7-
BASE FITTING SCREW
8-
CONTROL PROBE
9-
CR-NI WIRE GRATE
10-
CARBON FILAMENT
Model
Height
(B)
Width
(A)
Depth
(C)
Total
Power
(W)
Feed
(V/Hz)
Drawing
Current
(A)
Protection
Degree
Device
class
LXV2000-TS
LXV2000-VR
LXV1800
LXV2000
960 mm
405 mm
357 mm
2000 W
220-240V~
50/60 Hz
8.1 A
IP20
ı
LXV2500-VR
LXV2200
960 mm
405 mm
357 mm
2500 W
220-240V~
50/60 Hz
11.3 A
IP20
ı
LXV1500-VR
650 mm
405 mm
357 mm
1500 W
110V~
50/60 Hz
13.6 A
IP20
ı
LXV 1200-TS
LXV 1200
650 mm
405 mm
357 mm
1200 W
220-240V~
50/60 Hz
5.5 A
IP20
ı
Model
1. Level
2. Level
3. Level
Thermostat
Remote
Control
Control
Panel
LXV2000-TS
1000 W
2000 W
MECHANICAL
LXV2000-VR
650 W
1300 W
2000 W
ELECTRONICS
LXV2500-TS
1250 W
2500 W
MECHANICAL
LXV2500-VR
850 W
1700 W
2500 W
ELECTRONICS
LXV 1800
LXV 2000
2000 W
MECHANICAL
LXV 2200
2500 W
MECHANICAL
LXV 1200
1200 W
MECHANICAL
LXV 1200-TS
600 W
1200 W
MECHANICAL
LXV 1500-VR
500 W
1000 W
1500 W
ELECTRONICS

Technical Features
9
Device Hardware (Wall Type)
Plastic grid
Carbon flament
(heating element)
Protective cage wire
A
Function knob
Model
Height
(A)
Width
(B)
Depth
(C)
Total
Power
(W)
Feed
(V/Hz)
Drawing
Current
(A)
Protection
Degree
Device
class
LXV 2000-HR
LXV 2000-HRS
LXV 2000-H
185 mm
810 mm
110 mm
2000 W
220-240V ~,
50/60 Hz
8.1 A
IP20
ı
LXV 2500-HR
LXV 2500-HRS
LXV 2500-H
185 mm
810 mm
110 mm
2500 W
220-240V ~,
50/60 Hz
11.3 A
IP20
ı
LXV 1500-HR
LXV 1500-HRS
185 mm
810 mm
110 mm
1500 W
110V ~,
50/60 Hz
13.6 A
IP20
ı
Model
1. Level
2. Level
3. Level
Thermostat
Remote
Control
Control
Panel
LXV 2000-HR
LXV2000-HRS
650 W
1300 W
2000 W
ELECTRONICS
LXV 2500-HR
LXV2500-HRS
850 W
1700 W
2500 W
ELECTRONICS
LXV 1500-HR
LXV 1500-HRS
500 W
1000 W
1500 W
ELECTRONICS
B
C

Using Of Your Heater
10
Plug the device in an appropriate grounding receptacle.
Bring the on/off switch in working position.
Attention ! Do not touch the metal terminals on the plug immediately after unplugging it.
Attention: The device has a safety system. In case of overturning, the safety system will
engage and cut off the power.
Control Panel

Using Of Your Heater
11
Plug the device in an appropriate grounding receptacle.
Bring the on/off switch in working position.
Attention ! Do not touch the metal terminals on the plug immediately after unplugging it.
Control Panel
A
LCD display
B
on / off function button
A
B
Wall type products can be used in
horizontal and vertical positions by
loosening the pivot screw as well. The
pivot screw must be tightened again after
the desired working position is set.
WARNING: If the heater is used
vertically, the digital display should
remain on the bottom.
Off
On
Maximum Level
min. 0.75 m
min.1 m
min.1 m
min.1.8 m

Remote Control (* Option)
12
Installing and Replacing Remote Control Batteries
As it can be seen in Figure 1 below, the tabs are pushed in the direction shown by the arrow, it
is simultaneously pulled in the direction shown by the arrow in the second figure and the battery
is replaced. A new battery is installed using the same method. Only Cr2025 batteries must be
used.NOTE: Remove the gelatin from the battery compartment before using the remote for the
first time. If the gelatin is not removed, the remote control will not operate .
Standby: Indicates that the product is ready for operation.
The button used for turning on and off the product.
Used to decrease the level(option), heat and timing values.
Used to increase the level(option), heat and timing values.
Heating level adjustment: shifts to power control mode. This button is used to make level
adjustment between levels 0 and 3. In each step, L1, L2, L3 are appear respectively.
After selecting the desired stage, the product runs in the selected stage.
Thermometer button: shifts to heat adjustment mode.
and
buttons are
used to
make heat adjustment between 20 and 40 degrees. Press the thermometer button or wait
5 seconds to save the set temperature. The point on the middle of the screen flashes
when the thermometer of the product is active. To cancel the thermometer, simply press
the Level key.
Timer button: It shifts to the timing mode and "0H” appears on the screen. Timing up to
9hours is carried out with and buttons ( "0H,1H,..9H” appears on the screen).
After the timer is set, wait 5 seconds or press the timer button to save the timer. To switch
off the schedule, enter the program again and select (0H).
Note: The point on the right of the screen flashes when the timer of the product is ready.
When the time expires, the device switches off and rings an alarm for 1 second.
1L, 2L, 3L : Show the power level of the heater.
1H, 2H, 3H,...9H : Heater timer indicator (programming up to 9 hours is possible)
E1: Overheating: If the device overheats in conditions other than the standard operating
conditions, it rings an alarm for 10 sec as a warning and stops the heating function.
E2: After 12 hours of operation, The alarm sounds for 10 seconds and device turns off.
E3: Error indicator; it indicates that the device is not balanced.
Without Remote Control
Function Button: It controls the heat level adjustment and timer adjustment of the heater.
The heat level is increased one level with each pressing. After (L3), it switches to standby
mode by pressing the function key again. This button is pressed for 3 sec to perform timer
adjustment. The desired time zone in the timer menu is selected by incrementing the 1 step
each time the function key is pressed(0H…9H). After waiting 5 sec, the set time zone is
active and the light flashes in the lower right corner of the display. To cancel the timer, set
the (0H) option from the schedule program, wait 5s. Then timer turns off.

13
Maintenance
It is very important to perform careful and regular maintenance of the device in accordance with
the recommendations made in this manual so that it can run efficiently for a long time.
1. The cleanliness of the reflector (reflecting mirror) and tubes must be checked at least once a
month by the user. The cleaning and maintenance instruction must be applied if dirty.
2. According to the amount of dust in the place of use, the said checks should be performed
more often.
3. Power cable and plug must be checked while cleaning the device. If there is a deformation in
the power cord or the plug, it must be taken to the authorized service.
4. Reflector, wire and body deformation must be visually inspected while cleaning the device. If
there is a deformation, authorized service must be called for things to do.
5. It is recommended that the reflector is changed every two years for the device to run more
efficiently. Reflector must be changed by the authorized service.
A clean reflector ensures the maximum level of heating efficiency.
Cleaning
Attention! Regular and careful cleaning performed by the user will ensure that your device will
run more efficiently and prolong its life.
1. Your device must be turned off before starting to clean, its power cord must be unplugged
from the socket for safety and you must wait until it cools down.
2. If the reflector (reflecting mirror) and carbon flament tube is dirty, it must be cleaned from the
outside with dry air without opening the protective cage wire of the device, if possible.
3.The outer surface of the device must be cleaned with a soft cotton cloth or a soft brush.
4.Never use corrosive or melting liquids to clean the heater. These materials may damage the
plastic parts.
5. Do not clean your device using vapor cleaners.
Maintenance and Cleaning

14
Troubleshooting
Please check the points below before calling the technical service about the problems you might
encounter with your device.
Problems
Device does not run.
Solutions
Check whether the plug is plugged into the socket
correctly.
Ensurethedeviceisinbalancedposition.(Yourdevicehas
balancesafety.)
Ensure that the running switch and the thermostat of the
device are in correct, open position.
Check whether there is a problem in the house's electrical
installation.
Ensure you follow the using instructions.
If the problem persists, contact the nearest Luxeva
authorized service.
Troubleshooting

This manual suits for next models
17
Other LUXEVA Heater manuals