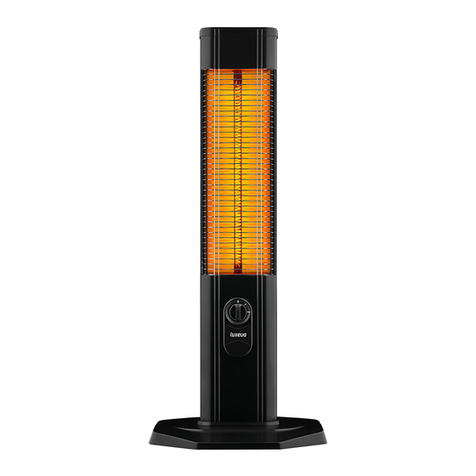
LUXEVA SMARTY - WL User manual

� LUXEV

EN
3
Dear Customers,
Congratulations on purchasing this equipment. Please read this user guide
carefullyandpayattentiontothetipsbelowtoavoiddamage.Malfunctions
causedbyignoringthepointstobeconsideredinthe user guideandtheitems
listedarenotcoveredbyourwarrantyandarenotourresponsibility.
Ouraimis toensurethatyou use this product, whichhasbeen producedinour
modern facilities in accordance with the total quality understanding, in a
meticulousworkingenvironment,withoutharmingthenature,withthebest
efficiency.
We recommend that you read the user manual carefully before using your heater
and keep it permanently so that the heater you have bought can preserve its first
dayfeaturesforalongtimeandserveyouinthemostefficientway.
NOTE:
Thisuserguidehasbeenarrangedformorethanonemodel.Somefeatures
describedinthe user guide may not be included inyour device. Pay attentionto
these features.
CONTENTS
SafetyInstructions
Technical Features
InstallationInstructions
Assembly Instructions
Overview
Remote Controland Functions
Heater Functions
Heater Control with Smart Phone (Option)
Cleaning and Care
Tips About Disposing
Solutions for Problems
PRODUCER
Luxeva Ev Gereçleri San. Tic. Ltd. Şti.
4
7
8
9
13
14
17
18
21
22
22

SAFETY INSTRUCTIONS
THESE INSTRUCTIONS MUST BE REA D CAREFULLY AND STORED FOR REFERENCE
WHEN
NECESSARY.
No responsibility is accepted for any damages that may occur as a result of not following the
instructions in this user manual.
When using electrical appliances, basic safety precautions should always be followed, including the
following instructions, to reduce the risk of fire, electric shock, and personal injury:
•
Use this heater only as described in this manual. Other uses not recommended by the
producer may cause fire, electric shock, or personal injury.
•
Heater is always hot during use. Forthis reason, no part ofthe heater should
be
touched
during use. Also, the heater should not be left unattended during use.
•
CAUTION: If your heater is controlled by the mobile application and the heater is not within
sight, please do not control it from the mobile application. Otherwise, you may causedanger
insituationsthatarenotvisibletotheeye(falloftheheater, the approachofa flammable object,
etc.).
•
CAUTION: Use of the heater without itbeing within sight is dangerous and prohibited.
•
CAUTION: If your heater is controlled by the mobile application, a warning text will appear
on the mobile application when the heater has fallen. In this text, it is mentioned that the
heater has fallen and poses a danger in terms of use. When you encounter this warning,be
suretocheck yourheater.Tostartyourheater,youmustunplugthe power cord and plug it
backin.
•
CAUTION:Sincethisheaterwillbeextremelyhotduringuseorimmediatelyafteritis
turnedoff,itmaycauseunwantedburns.Particularattentionshouldbepaidtoplaces where
children, people with psychological disorders, and people with understanding disorders are
present.
•
Curtains,furniture, wood, cardboard, paper,clothes,fabrics, pillows, beds,blankets and
any flammable materials, living things, and other devices should
be
at a
minimum
distance of
1.5 meters from the heater.
•
This heater is not intended for use by persons (including children) with physical, sensory,
ormentaldisabilitiesorinexperienceand/or
lack
ofexperience.Thesepeoplecanonly use
thisheaterunderthesupervisionofapersonresponsible
for
theirsafetyorifthey have been
instructed on how
to
operate the heater.
•
Power cord should always be unplugged if the heater is not
being
used.
•
Checkthe power cord and plugregularlyfor abrasion ordamage.Donotoperate the heater
with a damaged power cord or loose plug. Never operate if the heater is malfunctioning,
dropped, or damaged in any way. Consult your dealer.
•
Do not move the heater while it is being used.
•
Do not change and/or try to change any parts of this heater.
•
This heater is not designed to be used in bathrooms, laundry areas, and similar places.
•
Theheatershouldnot
be
installedaboveabathtuboraplacefullofwateritmightfall into.
•
Theheatershould notbe exposed
to
outsideweatherconditions fora longtime.
•
Do not touch the power cord or the plug head with wet or damp hands.
•
Do not pass or cover the heater cable under materials such as carpets, rugs. Do not run
the
cable under furniture or appliances. Place the cable where nobody can trip, keep it away
fromcrowds.
•
Do not wrap the power cord around the heater.
•
Avoidusingextension cordstopreventoverheating.Otherwise,itmay cause a fire. Ifyou
need
to
use extension cords,make sure
it
is suitable for the heater.
•
It is recommended to use the heater in installations with leakage current and over current
relays.
EN
4

EN
5
SAFETY INSTRUCTIONS
•
Make sure the heater is properly grounded throughout the main network. Use only
properly groundedoutlets.
•
To unplug the power cord of the heater, turn off the heater, grasp the plug and unplug it
from theoutlet. Do not pull on the heater cable.When turning the heater off, use the off button, then
unplug theplug.
•
Do not allow foreign objects to enter ventilation openings as they may cause electric
shock or fire or damage the heater.
•
Never reach out your hand or any object from the body of the heater to the inside of the
heating element. Do not touch the heater and plug immediately after use. It may a cause
burn, fire, or electricshock.
•
WARNING:Toreduce the risk of fire,
keep
textileproducts, curtains, or other flammable materials
at least 1 meter away from the air outlet.
•
Toprevent potentialfire,donotblocktheairintake.Donotcovertheheaterasitmay cause
overheating. Do not use the heater for drying clothing, etc. Do not use the heatertowarm up
animals,plants, oranyobject.Donotusethe heateronsoftsurfaces that may block the
openings (pillows, beds, etc.).
•
There are parts inside the heater that can release heat, arc, or sparks. Do not use in areas where
gasoline, paint, or flammable liquid, flammable dust is used or stored.
•
Alwaysplugheatersdirectlyintoawalloutlet.Neveruseanextensioncordoramovable power
connection (socket / multiple sockets).
•
Do not place the heater under a socket. Otherwise, you may cause the socket-outlet to
become hot and cause a fire.
•
Before turning on the heater, check whether the voltage indicated on the product label is
suitable for the local grid voltage.
•
Make surethat the heater is always plugged into a tested outlet that is suitable for
outdoor use.
•
Theheatermustbeinstalledbyanauthorizedpersonsothatswitchesandothercontrols cannot be
touched.
•
This heater is intended for home use only and should not be used commercially for
contractual
purposes.
•
Any alternative use not recommended by the manufacturer may cause fire, electric shock, or
personalinjury.
•
Be careful not to make any additional material (cable, plug, etc.) on the heater.
•
Youshouldnotcontroltheheaterwithaprogrammer,timer,separateremote-control system,
or any other device that automatically turns on the heater. If the heater is toppled, covered,
or improperly placed when used remotely, it may cause a risk offire.
•
Do not install the heater directly below a fixed socket or junction box.
•
CAUTION: The body and front cover of the heater may overheat during use. Do not move the
heater during use. First, wait until the heater has completely cooled down. Make sure the power
cord is not plugged in. Then move it.
•
Heating element should not be turned upwards while the heater is operating. It should
always
be
facing the area to
be
heated.
•
Makesurethatflammablematerialssuchastents,flags,curtains,plasticfoils, etc.do not get
close to the heater due to wind or other environmental elements.
•
CAUTION: Do not touch the heater while it is being used. It may cause some burns.
•
Incaseofimproperuse,thereisariskofelectricshockand/orfirehazard.Insuchcases, the
heater should be turned offand thepower plug should be removed immediately.
•
Use the heater in well-ventilated areas where electrical outlets are easily accessible.
•
PlugthePowercableintoa220-240Vsocketwiththe groundterminal.Iftheheaterissuitable for
110V,connect theheater plug to a 110Vsocket withthe ground terminal.

SAFETY INSTRUCTIONS
•
Beforestartingtoadjustitspositionorworkonit,unplugtheheaterfromthe outlet
andwaitforittocoolbeforecleaning.Cleaningandusercarecanbe done by adults
and consciouspeople.
•
Keep
the heater out of the reach of children. To protect children from the
dangers of electrical appliances never leave them alone with the heater. When
choosingaplaceforyourheater,set it so thatchildren donot have access to the
machine. Prevent children from playing with the heater. Keep pets away from the
heater.
•
Theprotectivecagedoesnotcompletelyprotectchildrenorpeoplewithout
resistance. Check it carefully.
•
Ifyouarenotsureaboutthesafetyofyourheater,orifyouaresleeping, never
use theheater.
•
In case of thunder or lightning, turn off the heater and unplug the power cord.
•
Donot operate theheater if any damage or signs of malfunctionoccur
spontaneously.
•
Donotattempt torepairor adjustany electricalormechanical functiononthis
heater.Theheaterdoesnotcontainanyuser-serviceableparts.Pleasecontact the
service agent or a qualified electrician for maintenance and repair.
•
CAUTION:Ifyourheateriscontrolledby Wi-Fiorremotecontrol,thefall
safetyoftheheaterdetectsallX-Y-Zaxes.Tousetheheaterbyadjustingthe angle
you want, you
need
to adjust the angle while the power cord is not plugged
in
and
then plug the power cord into the outlet. When the power cord is plugged
in,
the
heater (regardless of the angle) accepts its location as the starting (zero) point.
•
Ifthe starting (zero) point of the heater is set incorrectly,remove the plug
from the socket and readjust the position and angle of the heater. Then just plug
it back in.
•
CAUTION:Thereis a risk if you are notwithyour heater andyour heater is
connectedtoelectricity.Insuchacase,iftheheateristoppled,instantlossof
electricitywill causetheheatertodetectitscurrentpositionas a starting(zero)
point.
Afterthat,startingtheheaterwithyourphonewillcreatearisk.When you are not
with the heater, a flammable object (living or not) may come in front or near the
heater. If you are not sure that your heater is in a safe condition, do not control it
remotely.
Notes About Repair
•
Repairsshould be doneby authorizedexperts, thusensuring electricalsafety.
•
Whenrepairisrequired,contacttheserviceagentorasuitableelectrical
representativecontact.
•
Improperrepairscan endangerthe user.
•
Malfunctions/damages on the heater caused by alteration, accident, misuse,
abuse, negligence, or improper maintenance are not covered by the warranty.
•
Inlinewith ourpolicyof continuousproduct development,wereserve theright
tochangethetechnicalspecificationsoftheproductanddocumentationwithout prior
notice.
6
EN

EN
7
TECHNICAL FEATURES
WALL MODEL
FREESTANDING MODEL
Dimensions(mm) Voltage/ Frequency Protection Degree
SMARTY - WL 940x129x73 2500 W 220-240 V ~ / 50-60 Hz IP 65
SMARTY - WL
(for 110V) 940x129x73 1500 W 110 V ~ / 50-60 Hz IP 65
PRO - WL 940x129x73940x129x73 2500 W2500 W 220-220-240 V ~ / 50-60 Hz 240 V ~ / 50-60 Hz IP 65IP 65
PRO - WL
(for 110V) 940x129x73940x129x73 1500 W1500 W 110 V ~ / 50-60 Hz 110 V ~ / 50-60 Hz IP 65IP 65
Control
Wi-Fi & Remote
Control
Max. Power Value
Wi-Fi & Remote
Control
Remote Control
Remote Control
SMART - FR SMART - FR
(for 110V)
PRO - FR
(for 110V)
PRO - FR
Dimensions(mm)
Max. Power
Value
Control
1410x350x280 1410x350x280 1410x350x280 1410x350x280
2500 W 2500 W1500 W 1500 W
110 V ~ /
50-60 Hz
110 V ~ /
50-60 Hz
IP 65 IP 65 IP 65 IP 65
220-240 V ~ /
50-60 Hz
220-240 V ~ /
50-60 Hz
Voltage /
Frequency
Protection
Degree
Wi-Fi & Remote
Control
Wi-Fi & Remote
Control Remote Control Remote Control

INSTALLATION INSTRUCTIONS
CAUTION:Ifyourheateriscontrolledwithamobileapplication,itshouldbeused in
places with high Wi-Fi signal strength.
8
•
Thisheatermustbeinstalledbyaqualifiedelectrician.Thesuitabilityofallconnections and
electrical wiring must be checked. Attention should be paid to the relevant regulationsof power
supplycompanies and regionalconstruction regulations.
•
Before and during installation,make sure the heater is unplugged.
•
Theheatercanbemountedhorizontallyorvertically.Whenmountedvertically,thedigital display
should remain at thebottom.
•
Wheninstalling onthe wallor ceiling, the heater should
be
ata
minimum
height of1.8 meters
from thefloor.
•
Whenmountingtheheaterhorizontallyonthewallorceiling,donotplaceitatanangle ofmore
than 90 degrees or less than 45 degrees.
•
Iftheinstallationangleoftheheaterisverticalorclosetovertical,thepowercordshould always
be
below the heater.
•
Duringtheuseoftheheater,thereis acertaintemperatureincreaseintheheaterbody.
Therefore,neverletthepowercordtouchtheheaterbody.Keepthepowercordaway from the
heater.
•
Do not install the heater on the surface of flammable materials.
•
When installing the heater, the distance between the heater and the surface ofthe
flammablematerialshouldalwaysbeatasafelevel.Itshouldnotgobelowthesafe distance.
•
The location of theheater must
be
at least 0,5
m
away from the ceiling and the adjacent wall.
Theremust
be
atleast 0,5
m
distancebetweentheheaterandthewallorany object from both
sides.
•
Check the electrical connections of your heater periodically.
•
In the area where the heater will be installed, make sure there are no cables or water pipes
inside the surface before drilling thesurface.
•
The heater must bemounted on the mounting apparatus provided by the manufacturer.
Other mounting apparatus should not be used.
•
Remove all packagingmaterial. Check the heater's powercord and plug for signs of damage.
•
Payattentiontothemountinglocationand allmountingmaterials(dowels, screws, etc.). Make
sure that they are suitable andsturdy enough for the heater tobemounted and permanently
held.
•
Before installation, the
minimum
safe mounting distances, and inclination angles shown
in
the figures (in this booklet) must
be
strictly followed.
•
Be careful not to add excessive load in the installation of the heater.
•
First,fixthemountingbrackettoasafeandsolidwall.Makesurethattheinstallation location and
materials are sturdy and intact.
•
Set the desired angle and tighten all screws securely. Check the connection of the screws
regularly.Mechanicalpressureoroscillationduetowindorraincancauselooseningin the screws.
•
Plug in the power cord and run the heater with the remote control. Then check if the
heater is working smoothly in the first 10-15 minutes.
•
If your heatercan becontrolled withthe mobile application, youcan control it via Wi-Fi
by watching the installation steps ofthe mobile application.
WARNING: Fire Hazard
Do not install the heater close to objects such as curtains, wood,
fabric, furniture, flammable materials, etc...
EN

EN
ASSEMBLY INSTRUCTIONS
9
Wall Model Assembly
2
3
Removethe2mountingbarsfromthe mountingkit.Mountit on thehangingbracket
as
shownin the
figure,makesureitissolid. Removedowelsandscrewsfromthemountingkit,
drillfour
holesinthe
wall,
mountthebrackettothe
wall.
Makesurethehangingbracketissecurelymounte
d.
4
5
Remove screws and nuts from the mounting kit,
keep them
ready to connect to the heater.
Connect the wall mounted hanging bracket to the heater as shown
in
the figure.
DESCRIPTION:This mountingapparatusisdesignedto turnright-leftandup-down. Withthisfeature, you can
use your heater at your desired angle. The screws must be loosened to set the desired angle. Tighten the
screws after setting your desired angle. However, you must comply with thespecifiedsafetydistances(against
walls,ceilings, andobjects) also for angled use.
1
Remove 2 mounting bars from
the mounting kit. Mount it to the
hanging apparatus as shown in
the figure, make sure that it is
solid.

ASSEMBLY INSTRUCTIONS
10
Wall Model Usage
EN
≥1800 mm
Ceiling
Wall
≥500 mm
≥500 mm
Floor
Wall
≥1800 mm
Ceiling
≥500 mm
Wall
≥500 mm
Wall
≥1800 mm
≥500 mm
Floor Floor

EN
ASSEMBLY INSTRUCTIONS
Portable Model Assembly
1 2
Remove the 6 silicone plugs from the mounting kit. Insert
the silicone plugs into the empty holes as shown in the
figure. In this way, the heater will sit more firmly on the
floor.
Remove the 2 screws from the mounting kit and the
aluminum foot tube in the box. Insert the aluminum foot
tube into the foot plate. Then insert the 2 screws into the
holes in the figure. After tightening the screws, make sure
the assembly is secure.
3 4 5
Remove the 2 plastic mounts
from the mounting kit. Prepare to
assemble as shown in the figure.
The striped surface of the plastic
part inserted into the foot pipe
should be mounted towards the
heater body.
Attach the relevant plastic part to
the
aluminum pipe. Then thread the
mounting screw on the heater body
through the aluminum tube.
Tighten the screw through the
aluminum tube with a plastic nut.
Then check the stability and security
of the assembly.
DESCRIPTION: This mounting apparatus hasan adjustable feature. The angle adjustment should
be made
properly, andthe angle and screw should
be checked
at certain times. While mounting, the digital display
and cable should be mounted so that they stay atthe bottom.
1
1

ASSEMBLY INSTRUCTIONS
12
Portable Model Usage
1.
Alwaysleaveat least 0.5
m
offree spaceto theleft andright ofthe heater.
2.
There must
be
at least 1.8m of open space above the heater.
3.
Donotputanyobstaclecloserthan1.8meterstothefrontpartofthe heater.
4.
Installtheheaterwherethebaseissolidandflat.(theproductcannot work
onslopes)
5.
Install the heater where people can seeit.
6.
For safety, observe the heateroften.
7.
Installthe heaterwhere users are present atall times andmake sure that a fire
extinguisher isavailable.
8.
Do not install or use the heater in places with high temperatures.
9.
Usetheheater inplaces whereoutletsareeasily accessibleand withgood air
circulation.
EN
Ceiling
≥1800 mm
≥500 mm≥500 mm
Floor
≥1800 mm
≥500 mm
ObjectObject

EN
13
OVERVIEW
DISPLAY
1
2 3
1- Digital Display:
It is the screen that indicates the values and warning signs on the program, thermostat, and timer screens.
2- Timer Icon:
Itistheiconthatwarns byturningon a bluelight when thetimer isactivated.Theblue light isnot lit when the timer is
inactive. In addition, the timer icon blinks until the process is completed while the wi-fi reset is performed. When
the process is finished, the timer icon turnsoff.
3- Thermostat Icon:
Itisthe iconthat lightsup redwhenthe thermostatisactivatedandgivesawarning.Whenthethermostat is passive,
the red light does not light up.
CAUTION: The thermostat icon will light up for 5 seconds from the moment the heater is plugged in. This
situationstatesthat"Wi-fican
be
resetuntiltheredlightturnson,oncethelightturnsoff,thewi-fi cannot
be
reset."
WARNING NOTIFICATIONS
The heater has overheating safety. In case of overheating, the heating level will first
drop to P1. If the overheating continues again, the heater will warn andturn itself off.
In the meantime, error information (E1) will bedisplayed onthe heater screen. Ifitis
controlled byamobile application, a warning text will appear on the application
screen. Insuch cases, definitely check the heater. Never control the heater remotely.
You will
need
to unplug the power cord and plug itback into restart the heater.
Iftheheateroperatescontinuouslyfor12hours,warninginformation (E2)will appearon
theheater'sdisplayandtheheaterwillturnitself off. In such cases, check your heater.
Never control the heater remotely.Youwill needto unplugthepower cord andplug it
backin to restart theheater.
When the heater istoppled orshaken, warning information (E3) will bedisplayed on
the heater screen andthe heater will beturned off. If itiscontrolled bya mobile
application, a warning text will appear on the application screen. In such cases,
definitely check the heater. Never control the heater remotely. You will
need
to
unplug the power cord andplug itback
in
to restart the heater.

REMOTE CONTROL AND FUNCTIONS
14
Overview
(6) Timer
(1)
Standby,On/Off
(2)
DirectUpward
(3)
Confirm
(4)
Direct Downward
(5)
Program
(7) Thermostat
(8) Maximum-Minimum Value
Battery Section
•Turnthe remote towards the display while using it.
•The remote control may not work remotely when there is strong
illumination orsunlight. In this case, use the remote control near
the heater.
•Whenyou choose a function with theremote control,
be
near the heater.
•When the remote control isnot used for a long time, please
remove the battery to avoid leakage and damage.
•Donotallowwaterorliquidtoentertheremotecontrol.
•Use 2 AAA sizebatteries in the remote control.
EN

EN
15
REMOTE CONTROL AND FUNCTIONS
(1)
Standby, On/Off
This button allows the heater to turn on and off (in all conditions).
(2)
Direct Upward
This button increases the value
to
be set on the main screen,
timerscreen,andthermostatscreen(witheachpress)
1
step up.
(3)
Direct Downward
Thisbuttondecreasesthevalue
to
besetonthemainscreen,
timerscreen, and thermostatscreen(witheachpress)
1
step
down.
(4)
Confirm
Thisbuttonallowsyoutoconfirmthedesiredvaluetobe
selected on the thermostat and timerscreens.
(5)
Program
Thisbuttonallowsyoutoswitchtotheprogramscreen.You can
adjustthetemperaturelevelbetweenP1-P2-P3-P4-P5-P6 by
using the up-down arrow keys on the programscreen.

REMOTE CONTROL AND FUNCTIONS
16
(6)
Timer
This button moves the heater to the timer screen. When it is
entered for the first time, "0H" is written on the screen.
The timer can
be
set between 0H-1H -...- 9H values
with
the
"OK" button with the up-down arrow keys. When the timer is
active, a blue light will light on the screen. When you enter the
timer screen again, the remaining time will appear
in
hours. In
order to
make
a new adjustment, one of the up-down direction
keys should
be
pressed, the desired hour value should
be
selected, and the "OK" button should
be
pressed. When the set
time has elapsed, the heater turns itself offand gives awarning
sound.Tocancelthe timer,you
have to confirm the "0H" option.
(7)
Thermostat
This button moves the heater to the thermostat screen. When
you enter this screen for the first
time,
the
number
"24"will
appear.Thisisatemperaturevalue.Thankstothe up-downarrow
keys,atemperature valuebetween18-37°C can
be
set with the
"OK" button. It will try to adjust the temperature of the
environment where the heater is located
in
line with the set
value. When the thermostat is active, a red light will light on the
display. When the thermostat is active, a program setting can
also
be made.
When your heater reaches the set temperature
value, it turns itself down.
Whenthetemperaturefalls2°Cbelowthesetvalue,itwill
continue to operate at the same program level. When the
thermostatis active,thesetvalueisdisplayedonthescreen when
it is entered. Again, a different value can be set with theup-
downarrowkeys.Tocanceltheactivethermostat,it issufficientto
selectthe"XX"valuebeforethe"18"orafter the "37"value.
(8)
Maximum-Minimum Value
These buttons allow reaching the
maximum
or
minimum
value on each screen. When the "MAX" key is pressed, it
reaches the highest value on the screen. When the “MIN"
key is pressed, it reaches the lowest value on the screen.
This function provides extra ease of use.
EN

EN
HEATER FUNCTIONS
1.
Tostarttheheater,firstadjustthebodyangleanditspositionproperly.The moment
the heater is powered, it accepts the position it’s in as the 0 (zero) point.According
tothat,thefallingsafetyturnsonafteracertainangle.To adjusttheheater's0(zero)
point,unplugthepowercord.Afterthat,whenyou have adjusted the proper position,
plug the power cord back in. That way, the heatercanworkinproper positionsand
canturnitsfallingsafetyonwhenit’s in improper positions.
2.
Youcanturnthe heateronwiththefunctionbuttonon it orwiththeremote control.
Toturntheheateronoroffwiththeremote,pressingthe''On/Off'' button is enough.
3.
Whenyoufirstopenit, thescreenwilldisplay''P1''.Thismeans''1.heatinglevel''.
This screen is also named the ''Program'' section. The ''P'' button on the remote
directs you to the ''Program'' section. While on this screen, you can choose from
heating levels P1 to P6 with up and down buttons.
4.
With the timer function, you can make adjustments to the timer for 1-9 hours. When
the set time has expired, the heater will turn itself off and give a warning sound.
When you enter the timer screen while the timer is active, you will first see the
remainingtime.
5.
Theheater can be usedin thermostatmode byentering a temperature value
between
18-37 °
with the thermostat function. When the relevant temperature
value is reached, the heater operates
itself at
P1.
After
the temperature has
dropped by
2
°, a
cycle
is entered
to
reach the
old
value
again.Whilethe
thermostatisactive,thelastrecordedtemperaturevaluewill
appear when youenter
the thermostatscreen
for
the
first
time.
6.
Theheaterhas falling protection. Beforeconnectingtheheater'spowercable tothe
outlet,adjustthepositionandangleoftheheaterbodywell.Because fromthe
moment
youplugtheplugintothesocket,itwillacceptitslocation andangleasthe
startingpoint.To
redefine
thestarting pointofthe heater, you will
need
to unplug it
and plug it back
in.
7.
When you don't have the remote control, you can operatethe heater via the
function button on the body. When the heater has turned on, with each press of
thefunction button,the heatinglevel willincreaseby one.Whenyou press the
functionbuttonafterreachingheatinglevelP6,theheaterwillturnitself off.
8.
The heater has overheating protection. In case of overheating, the heating level
willdropdowntoP1.Ifoverheatingstillcontinues,theheaterwillgivea warning and
turnitself off. To turn the heateronagain, youmustunplug the plug and plug it in
again.
9.
Iftheheatercontinuouslyoperatesfor12hours,itwillautomaticallyturnitself
off and give
a warning sound. To turn the heater on again, you must unplug
the plug and plug itin again. 17
This heater is not equipped with a room temperature
control device. Do not use this heater in areas where
people who are not able to leave the room on their own,
unless there is constant supervision.

18
HEATER CONTROL WITH SMART PHONE
IfyouintegrateyourheaterintotheclosestWi-Ficonnection,youcancomfortably startand
useitwiththecorresponding"Luxeva"application."Luxeva"appallows youtocontrolthe
heaterremotelyviayoursmartphone.Italsogivesyouaccessto extrainformation.Follow
thesestepstoconnectyoursmartphonetoyourheater:
Application Installation
1.
On your smart phone via the "App
Store" or "Play Store" install the
application called
"Luxeva".Youcan
alsoaccessthe
application by
scanning the QR code on your
smart phone.
2.
Make sure your phone is on the
sameWi-Ficonnectionthatyour
heater will be connectedto.
3.
Open the "Luxeva"application.
4.
If you have a registered account
already, use the log in option, if
not,continuewiththe''Register''
option.
5.
After creating your user
information,keepaholdof
them.
6.
Complete the installation by
followingtheinstructionsstepby
step
in the application.
Adding Heater
1.
Aftercompletingtheapplicationinstallation,youwillseethe"AddHeater" screen.
You can proceed from this screen by clicking the "Add Heater" button.
2.
Ifyouareinstallingtheheaterforthefirst time, theWi-Fifeaturewill
be
turned on
automatically. Therefore, you do not
need
to consider the instructions
in
step1.
Youcanproceedwiththe"Next"button.However,if the heater is not installed
for the first time, you
need
to turn on the heater's Wi-Fifeature by followingthe
instructions
in
step1.
Theinstructionsforstep1areonthescreen.Afterfollowingthe instructions,
youcan proceed with the "Next" button.
3.
Inthefollowingsteps,you will be asked to have the cellulardataofyour
mobile phone turned off and Wi-Fi and location services turned on.
Otherwise, you cannot proceed to the other stages.
4.
Youwill
need
toconnecttothenetwork
named
"LUXEVASmartHeater" from
the Wi-Fi networkscreen.
5.
After the connection is established, you can connect by selecting the Wi-Fi
networkyouwanttoconnecttheheatertofrom theWi-Finetworkscreen that will
appear on yourscreen.
6.
Aftertheconnectionismade,you
will
beable
tostart
usingyourheaterby being
directed
to
the mainscreen.
EN
iOS & Android

EN
19
HEATER CONTROL WITH SMART PHONE
Wi-Fi Resetting
1.
When the heater is installed for the first time, the Wi-Fi feature will be turned on as soonas
itispluggedin.Afterthefirstuserconnects,theWi-Fifeatureturnsoff.AWi-Fi reset is required
for a new user to connect to the same heater. Again, a Wi-Fi reset is required tochange the
Wi-Finetwork your heater was previously connectedto.
2.
ToresettheWi-Fi, pressandholdthebuttonontheheaterfor5secondsassoonasyou
connecttheheatertothesocket(within5seconds).Bluelightwillflashontheheater screen. At
the
end
ofthe 5th second, theblue light willturn on completely. If you then take your finger off
the button, the Wi-Fi reset process will
be
completed.
"My Devices" Screen
1.
You can see and manage the heaters you have added from this screen.
2.
You can add a new heater by touching the "+" icon on this screen.
3.
Youcancheck andmanage youraccount by touchingthe"My Account" icon on
thisscreen.
4.
Youcanreachthe usermanualof yourheatersbytouchingthebooklet icon on
this screen.
5.
The names, power levels, networkconnection status of the heaterscan be
followed on thisscreen.
"My Account" Screen
1.
Thisscreencontainsinformationaboutyourself.Youcanchange your
name, surname, region, and accountpassword.
2.
Youcanpreventpossibledangersandrisksby activatingthechild lock
feature.
3.
You can also check the privacy agreement and application version.
4.
Ifyouwish,youcanlogoutfromthis screen.Ifloggedout,anew login
will
be
required.
Heater Control Screen
1.
It is the screen that helps you gain control by going into any registered heater.
2.
From this screen, you can set the heater's power, timer, and thermostat. Youcan turn your
heater on and off by touching the power icon.
3.
You can observe the network connections of your heater with "Wi-Fi" and "Cloud" icons.
4.
Youcanget informationabouttheusageoftheapplicationbytouchingtheinformation icon.
5.
You can edit the settings related to the respective heater by touching the settings icon.
"Heater Settings" Screen
1.
You can change the heater name from this screen.
2.
You can check or change the Wi-Fi network your heater is connected to. You will
need
to reset the heater whenchanging the Wi-Fi network.You can do this bygoing
tothe "AddWi-Fi" screen and followingthe relevant steps.
3.
Youcansharetheheatersothatitcanbecontrolledbyotherusers.Todothis, simply
tap the "Share Heater" button and follow the steps.
4.
Youcan deleteyour heaterwiththe "DeleteHeater" button. A new heater
addition must be performed to reload the deletedheater.

20
EN
HEATER CONTROL WITH SMART PHONE
Warning Texts
1.
If your heater istoppled or shaken,
awarning text will besent toyour
mobile application. In such acase,
you
need
to check yourheaterfor
safety.However, never remotely
control the heater. To use your
heater, you must unplug the power
cord and plug itback
in.
2.
If your heater overheats, a
warning textwillbesenttoyour
mobile application. In such acase,
you
need
to check your heaterfor
safety.However,never remotely
control the heater. To useyour
heater,you must unplug the power
cord and plug itback
in.
Solving Connection Problems
If your heater is not found in WLAN, check the steps below:
1.
Check if the device is plugged in or not.
2.
Is your smartphone's Wi-Fi feature enabled? If not, enable it.
3.
Isyour heater's Wi-Fifunctionenabled? Ifit is not enabled,try anew
installationthroughtheapp.(Followtheinstructionsintheapp)
4.
IstheWLANpasswordenteredcorrectly?Ifitisnotenteredcorrectly,try changing
the Wi-Fi network to which the heater is connected in the Wi-Fi networkchange
section.Iftheproblempersists,resetyourheatertostarta new setup.
5.
Is the Wireless
Modem
(Internet signal) nearby during the heater and
smartphone connection attempt? If not, you should try at close range.
(Ideally, it should
be
no
more
than 5
m
apart.)
6.
If you have disabled the 2.4 GHz band
in
your wireless
modem
(Wi-Fi)
settings, enable your
modem
(Wi-Fi) settings.
NOTE: If you experience connection problems while the application is open or
closed, you may need to check and renew your network connections. It is
recommended to check regularly. For more help, follow the instructions in the
app while setting up the connection.

21
EN
CLEANING AND CARE
•
Disconnecttheheater fromthepowersupply. Toprevent burns, donot clean before
cooling the heater! Make sure that the heating main body is clean and dry.
•
The only thing that needs to
be
cleaned is the outer surface of the heater.
•
Donotusestrongabrasivesorsolventcleanerswhencleaningtheheater,as this
may damage plastic parts. Wipe the outside of the heater with a damp cloth.
•
If dust or dirt has accumulated inside the heater or around the elements, have
the heater cleaned by an authorized service agent. Do not operate the heater in this
situation.
•
When not in use, remove it from the mounting position and carefully store the
heaterin asafe,dry place out ofthe reach of children.Ifyou arenot goingto use the
heater for a long time in humid environments (such as seaside) or areas withhigh
airsalinity,clean, dry andstoreitina safe package.Cleanthe heater completely after
long periods ofstorage.
•
Do not touch the heating element with your fingers, as fingerprints can affect
the life of the heating element. If you touch it accidentally, wipe the fingerprints with a
soft cloth with alcohol and dry them.
•
Do not attempt to repair or adjust any electrical or mechanical function on this
heater. There are no parts inside the heater that can be serviced by the
customer.
•
The heater does not contain parts that can
be
serviced by the user. If the
product is damaged or defective, it must be returned to the manufacturer or its
representative.
•
Reflector (reflective mirror) and resistance should be checked for contamination
by the user at least once a month. If it is dirty, cleaning and maintenance
instructions should be followed.
•
Depending on the dust content in the usage environment, the mentioned
checks should be done more frequently.
•
Power cord and plug should be checked while cleaning the device. If there is any
deformation in the power cord or plug, it should be taken to the authorized service.
•
While the device is being cleaned, deformation of the reflector, wire, and body
should be checked visually. If there is deformation, the authorized service should be
called to find out what to do.
•
It is recommended to change the reflector every two years in order for the
device to work more efficiently. The reflector should be replaced by an authorized
service.Thecleannessofthe reflectorensures that theheating efficiency of the
device is at the maximumlevel.
•
If the reflector (reflective mirror) and resistance are dirty, the device should be
cleaned with dry air from outside the protective mesh wire, if possible.
•
The outer surface of the device should
be
cleaned with a soft cotton cloth or soft
brush.
•
Do not clean your device using steam cleaners.
•
Keep the power cord away from water for protection against electric shock and life-
threateninghazards.Donotletwateroranyotherliquidcomeintocontact with the plug
or any part of the appliance.
This manual suits for next models
3
Table of contents
Languages:
Other LUXEVA Heater manuals