manuals.online logo
Brands
  1. Home
  2. •
  3. Brands
  4. •
  5. LUXOMAT
  6. •
  7. Security Sensor
  8. •
  9. LUXOMAT PD3-2C-FC Micro User guide

LUXOMAT PD3-2C-FC Micro User guide

68 mm
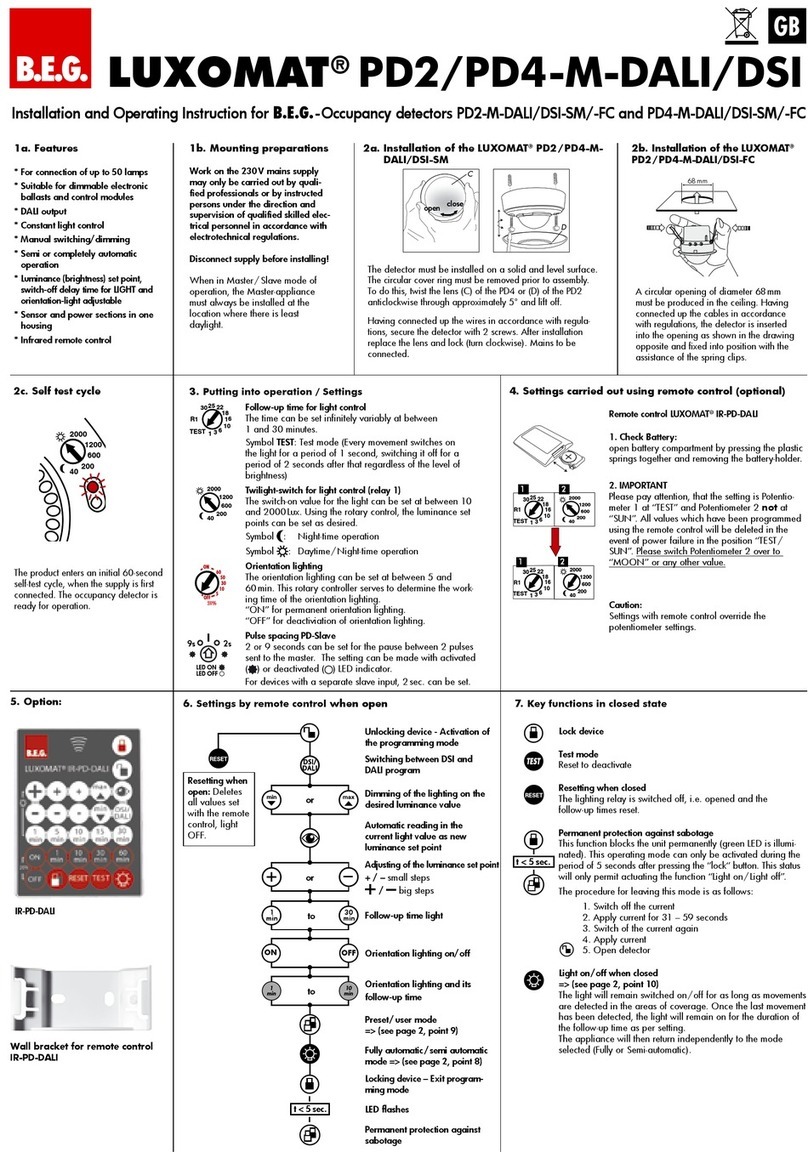
Installation and Operating Instruction for B.E.G. - Motion detectors PD3-2C-FC Micro
LUXOMAT®PD3-2C Micro
2.
Installation of the
LUXOMAT®
PD3-2C-FC Micro
Sensor and power supply in one case
Power supply: 230 V~ ±10 %
Power consumption: < 1W
Ambient temperature: -25°C to +50°C
Degree of protection/class: IP20, with accessory IP23 / II
Settings: locally
Area of coverage: circular 360°
Range of coverage Ø H 2.50 m / T = 18°C:
seated 4m / tangential 10 m / radial 6m
Recommended height for mounting: 2 - 3 m
Lux values - Potentiometer: 10 - 2000 Lux
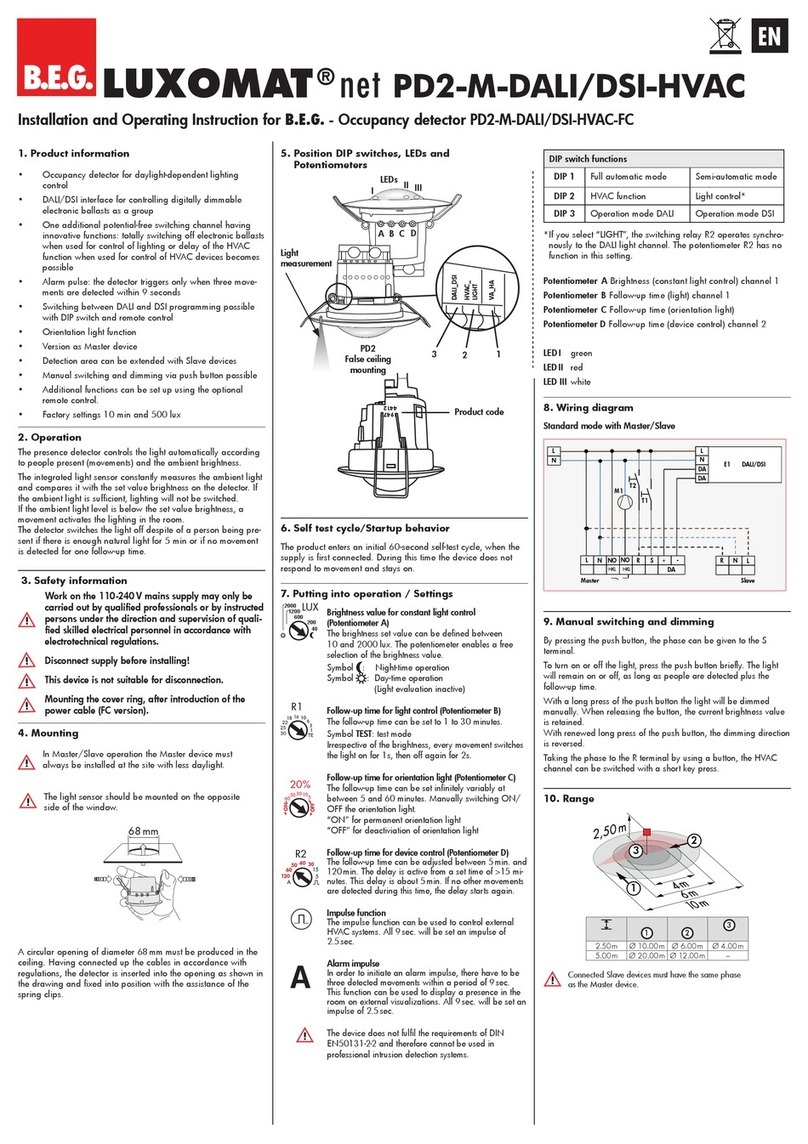
• Channel 1 for light-connection
Type of contact: NOC/with pretravel tungsten contact
Contact load: 2300 W, 230V~, cosϕ=1 /
1150 VA cos ϕ= 0.5
Time-settings: 15 sec. - 30 min. / Test
• Channel 2 for HVAC
Contact load: 230 V~, 3 A cos ϕ=1
Time-settings: 5 min. - 120 min. with time delay of 5 - 10 min.
for follow-up time > 60min.
Dimensions H x Ø [mm] 84x 80
Visible portion when built into ceiling: 18 x 80mm
Declaration of Conformity: The product complies with
the low voltage recommendation 2006/95/EC and the
EMV recommendation 2004/108/EC.
6.
Technical data
PD3-2C
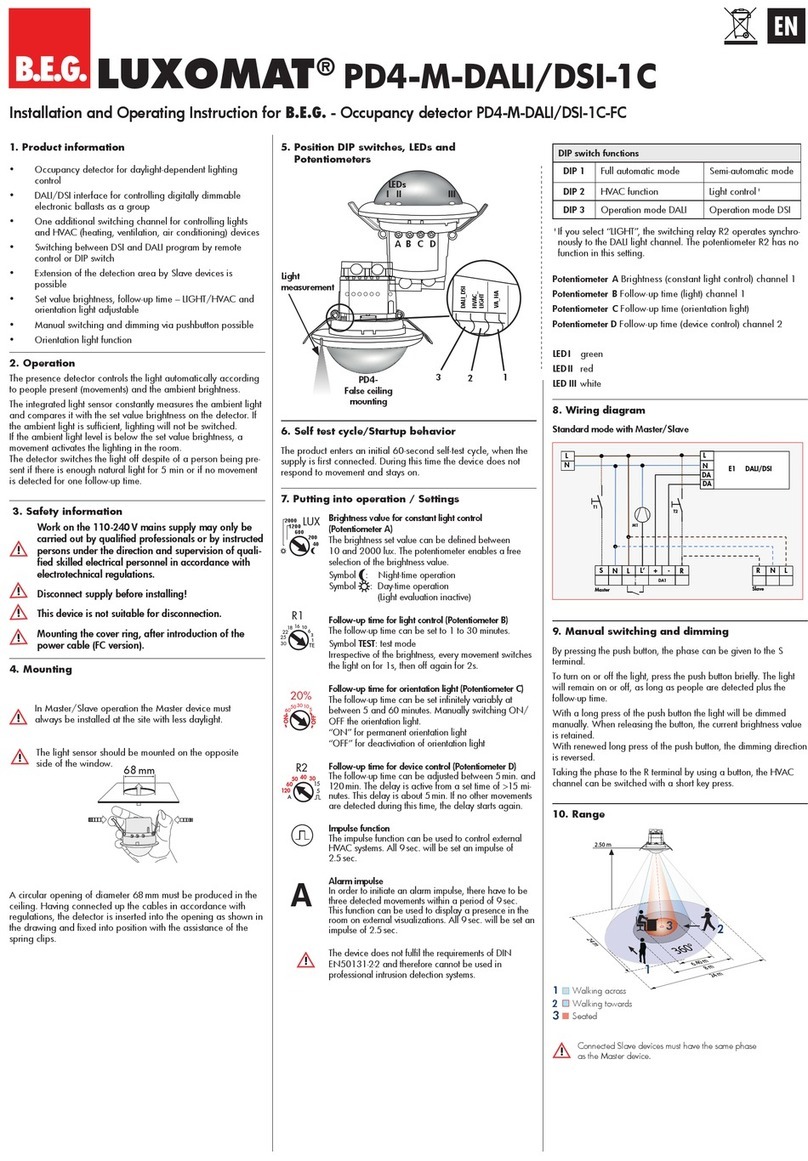
7. Trouble shooting
1. Lamp does not light up
Lamp may be defect:
Replace lamps
No mains connection/power:
Check connection and mains fuse by qualied electrician
Incorrect setting of CDS twilight threshold:
Correct setting of CDS threshold
Lens of sensor unit obstructed by dirt or other objects:
Clean lens, remove objects
2. Lamp turns ON too late or detection range too small
LUXOMAT® PD3 is mounted too high:
See table of mounting heights.
Correct mounting if required.
3. Lamp stays ON continuously
Continuous thermal activity detected ie fan, central heat-
ing ducts, animals within detection area:
Remove heatsource. Check proper function of LUXOMAT®
PD3 by covering the fresnel-lens. After expiry of delay
timer, PD3 has to turn OFF lighting.
LUXOMAT® PD3 connected in parallel to a manual over-
ride switch:
Connect switch correctly
4. Unintended switching of light
Movement of heat source within detection area:
Check on presence of animals, fans or heaters
1. Mounting preparations
Work on the 230 V mains supply
may only be carried out by qualified
professionals or by instructed persons
under the direction and supervision
of qualified skilled electrical person-
nel in accordance with electrotechni-
cal regulations.
Disconnect supply before installing!
The detector has
been designed
and developed
specifically for instal-
lation in suspended
ceilings.
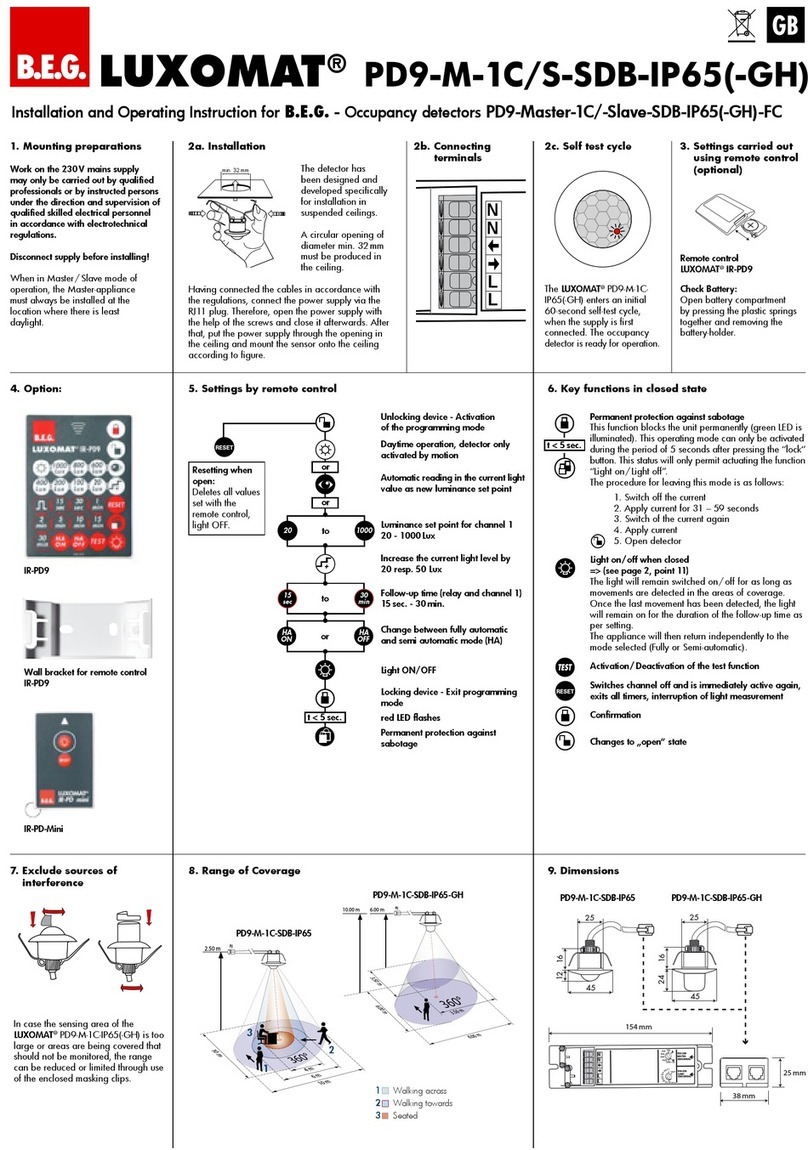
A circular opening of
diameter 68 mm must
be cut into ceiling.
Having connected up the cables in accor-
dance with regulations, the detector is
inserted into the opening as shown in the
drawing above and fixed into position with
the assistance of the spring clips.
AUS
Type FC
PD3-2C Micro 96510
Accessory:
BSK Ball basket guard 92199
FC-Covering IP23 92206
9. Article / Part nr. / Accessory
8. Range of Coverage
quer zum Melder gehen
frontal zum Melder gehen
Unterkriechschutz
walking across
walking towards
seated
1
2
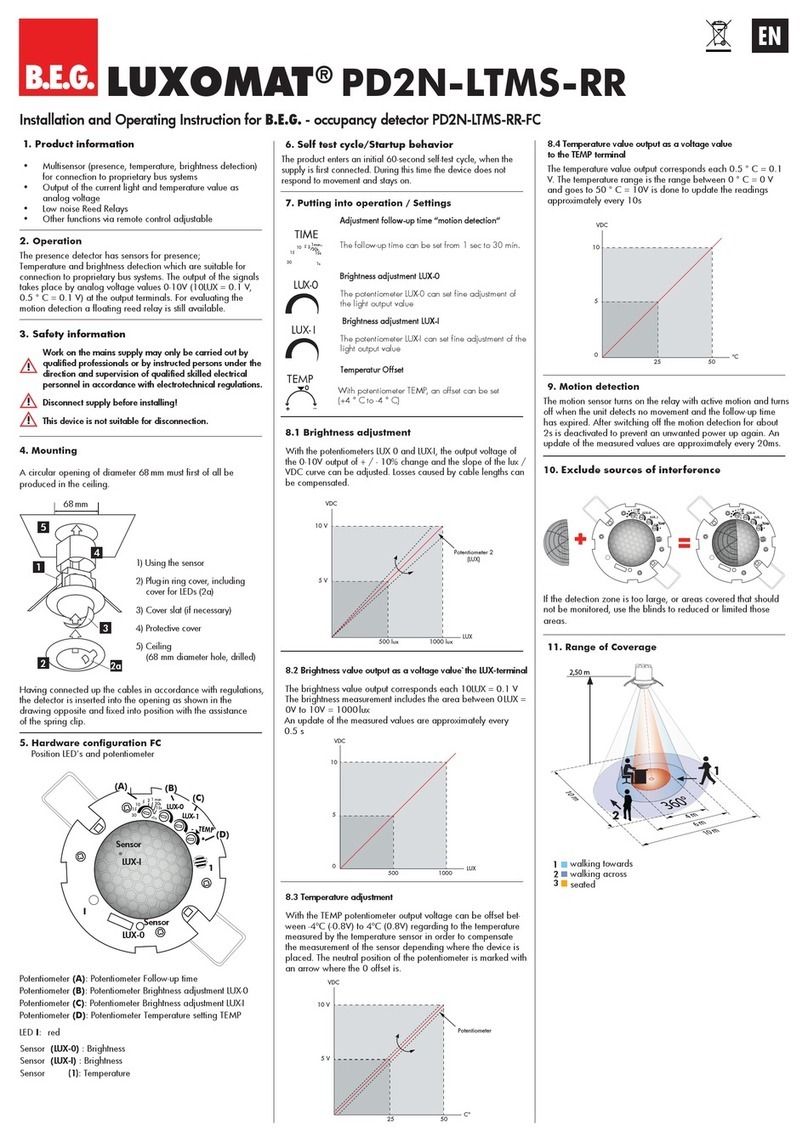
5. Putting into operation / Settings
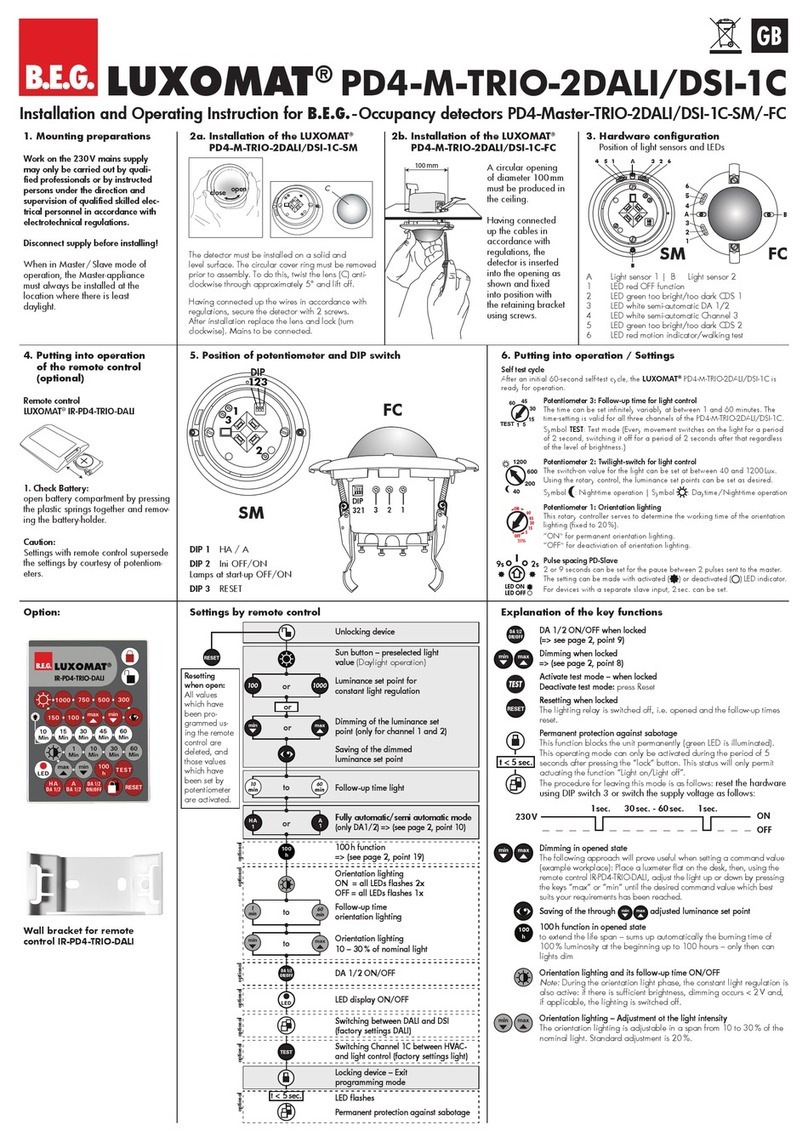
Potentiometer 1 - Follow-up time for light control
The time can be set infinitely variably at between
15 seconds and 30 minutes.
Symbol TEST: Test mode
(Every movement switches on the light for a period of
1 second, switching it off for a period of 2 seconds
after that regardless of the level of brightness.)
Potentiometer 2 - Adjusting range sensitivity
For sensitivity adjustment of the detector, both in the
interior and the exterior range, the PD3-2C-FC Micro
is equipped with an additional knob (see pictures)
for excluding sources of interference, e.g. bad
weather conditions or draught air.
Max: for interior use
(recognition of the slightest movements)
Min: for exterior use
(exclusion of sources of interference)
Potentiometer 3 - Follow-up time for HVAC
The time can be set infinitely variably at between
5 and 120 minutes. There is a period of delay prior
to switch-on at between 5 - 10 minutes for times set
in excess of 60 minutes.
Potentiometer 4 - Twilight-switch for light control
The switch-on value for the light can be set at
between 10 and 2000 Lux. Using the rotary control,
the luminance set points can be set as desired.
Symbol : Night-time operation
Symbol : Daytime/Night-time operation
Potentiometer 5 - Adjusting sound sensitivity
Max: highest sensitivity
Min: microphone switched off
Intermediate values to be adjusted accordingly to
local conditions. Lighting of the LED means the noise- Lighting of the LED means the noise-Lighting of the LED means the noise-
detector is functioning and triggers the timer again.
The microphone is active for 9 seconds after the last
movement and time delay completed.
120 6050
40
30
15
10
A
16 10 5
2
1
30
15
TEST
2000
1200
600
200
40
5
max.
min.
max.
min.
5
10
20 30
30s
1
TEST
15s
40
50
60
90
120 5
30
10
15
Potentiometer
1 Time channel 1
2 Range
3 Time channel 2
4 Lux channel 1
5 Sound sensitivity
1
4
2 3
5
3. Hardware configuration
Position potentiometers
4. Connections
N R L‘ L
230VAC ±10% 50-60Hz
R2: 3A NO
10 m
6 m
4.00 m
10 m
360°
2.50 m
1
2
3
~6 m
6 m 7 m
18 m
6 m
~6 m
6 m
12 m
6 m
6 m
4 m
6 m
10. Wiring diagrams
MAN 6891– 090511-1
12. PD3 - Dimensions 13. Installation examples
645 5
15
R L' N L L NO NO
3A
230VAC
50-60Hz
Slave /
Remote
84.5
74
Standard mode with slave device








 

L
N
NOL΄
΄΄
΄LN
C1
N LR
R NO
C2
T1
E1
M1
PD3-2C Micro Slave
optional
T1 = Light ON/OFF (see point 14 also)
Slave for enlargement of detection area
11.
LED function displays
2000 Lux
1200
600
200
40
1 2
LED’s
1 - Red flashes on each detected sound
2 - Red
- flashes 60 sec. during initialisation period
- flashes on each detected movement
- flashes quickly, if duration “ON” active by terminal R
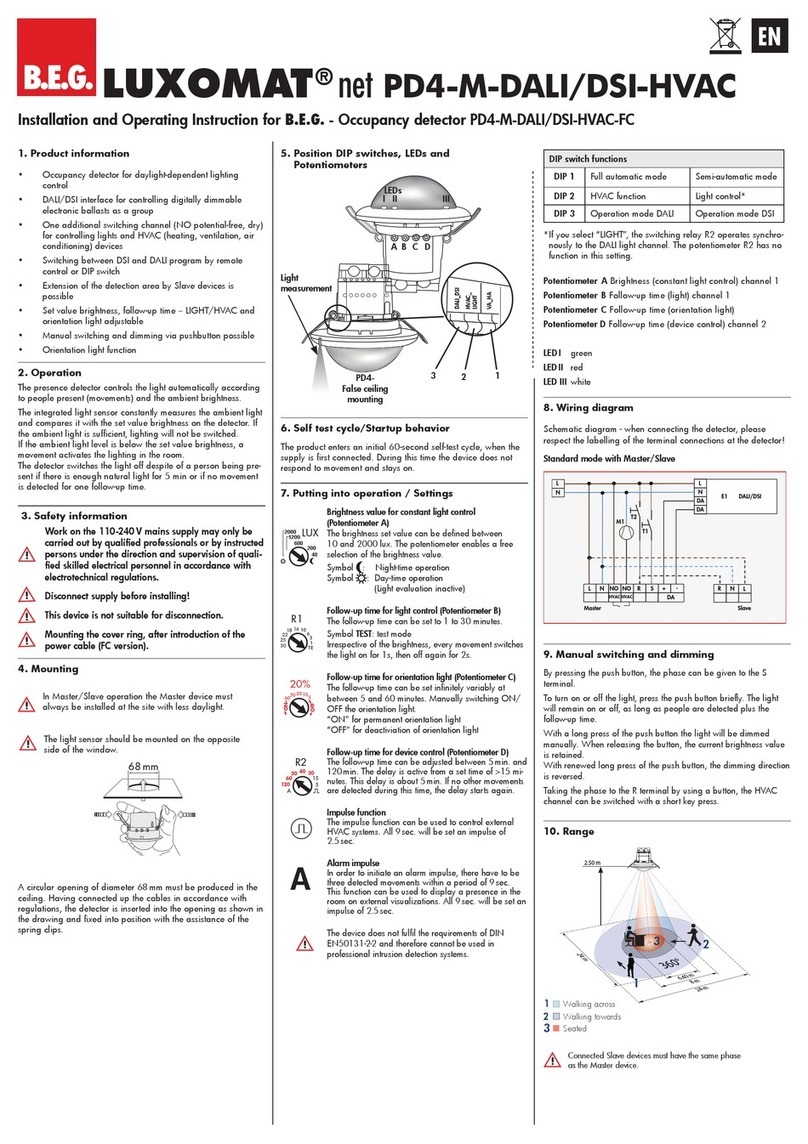
14.
Functions of pushbutton
The table below shows the logical behavior of both channels (light + HVAC).
Brightness-state 230 VAC on Terminal R Channel 1 for light-connection Channel 2 for HVAC
bright
no change no change
0-1 sec. or 2-10 sec.
OFF -> ON or ON -> OFF
(as long as motion + Follow-up time )
no change
1-2 sec.
(slave signal) no change OFF -> ON
getting dark
release button
> 10 sec.
OFF -> OFF
OFF -> ON
will stay-on (as long as motion +
Follow-up time)
OFF -> ON
will stay-on (as long as
motion + Follow-up time)
dark
no change no change
0-1 sec. or 2-10 sec.
OFF -> ON or ON -> OFF
(as long as motion + Follow-up time )
no change
1-2 sec.
(slave signal) OFF -> ON OFF -> ON
Release button
> 10 sec.
OFF -> ON
will stay-on (as long as motion +
Follow-up time)
OFF -> ON
will stay-on (as long as
motion + Follow-up time)
When a channel or slave-hold (pushbutton > 10 sec.) gets deactivated, it is possible to reactivate the channel
by sound/motion for 10sec. This possibility is independent of brightness-state. So even if the lightchannel is in
bright condition. (light level > setpoint)

Other LUXOMAT Security Sensor manuals

LUXOMAT PD4-M-DALI/DSI-1C-FC User guide

LUXOMAT

LUXOMAT PD4-M-DALI/DSI-1C-FC User guide

LUXOMAT PD2N-LTMS-RR User guide

LUXOMAT

LUXOMAT PD2N-LTMS-RR User guide

LUXOMAT PD4-M-1C-C-PS User guide

LUXOMAT

LUXOMAT PD4-M-1C-C-PS User guide

LUXOMAT PD2-M-DALI/DSI-SM User manual

LUXOMAT

LUXOMAT PD2-M-DALI/DSI-SM User manual

LUXOMAT PD9-M-1C-SDB-IP65 Supplement

LUXOMAT

LUXOMAT PD9-M-1C-SDB-IP65 Supplement

LUXOMAT PD2-M-DALI/DSI-HVAC User guide

LUXOMAT

LUXOMAT PD2-M-DALI/DSI-HVAC User guide

LUXOMAT LUXOMAT net PD4-M-DALI User guide

LUXOMAT

LUXOMAT LUXOMAT net PD4-M-DALI User guide

LUXOMAT PD4-M-TRIO-2DALI/DSI-1C-SM User guide

LUXOMAT

LUXOMAT PD4-M-TRIO-2DALI/DSI-1C-SM User guide

Popular Security Sensor manuals by other brands

EDS FL 20BA Technical manual

EDS

EDS FL 20BA Technical manual

iPec PD-SG Series quick start guide

iPec

iPec PD-SG Series quick start guide

Trotec BG40 operating manual

Trotec

Trotec BG40 operating manual

Trotec SL3000 manual

Trotec

Trotec SL3000 manual

Data Harvest 1207 manual

Data Harvest

Data Harvest 1207 manual

Guardian Halo Big Block SRL instruction manual

Guardian

Guardian Halo Big Block SRL instruction manual

System Sensor 4451HT Installation and maintenance instructions

System Sensor

System Sensor 4451HT Installation and maintenance instructions

AVIRE E-MOTIVE EPS installation guide

AVIRE

AVIRE E-MOTIVE EPS installation guide

Clare Controls ClareOne Rate-Of-Rise installation manual

Clare Controls

Clare Controls ClareOne Rate-Of-Rise installation manual

FM Electronics 4195-GB quick start guide

FM Electronics

FM Electronics 4195-GB quick start guide

Optek AF16 instruction manual

Optek

Optek AF16 instruction manual

Radio Shack 49-426 owner's manual

Radio Shack

Radio Shack 49-426 owner's manual

Inficon XL3000flex Translation of the original operating instructions

Inficon

Inficon XL3000flex Translation of the original operating instructions

ektor EV-MERCURY-III-40M installation instructions

ektor

ektor EV-MERCURY-III-40M installation instructions

FIBARO Motion Sensor quick start guide

FIBARO

FIBARO Motion Sensor quick start guide

Bircher Reglomat RK 31C-PWH operating instructions

Bircher Reglomat

Bircher Reglomat RK 31C-PWH operating instructions

Pilz PSEN 2.1p-21 operating manual

Pilz

Pilz PSEN 2.1p-21 operating manual

Honeywell Friedland FGGA03 Series Quick installation guide

Honeywell

Honeywell Friedland FGGA03 Series Quick installation guide

manuals.online logo
manuals.online logoBrands
  • About & Mission
  • Contact us
  • Privacy Policy
  • Terms and Conditions

Copyright 2025 Manuals.Online. All Rights Reserved.