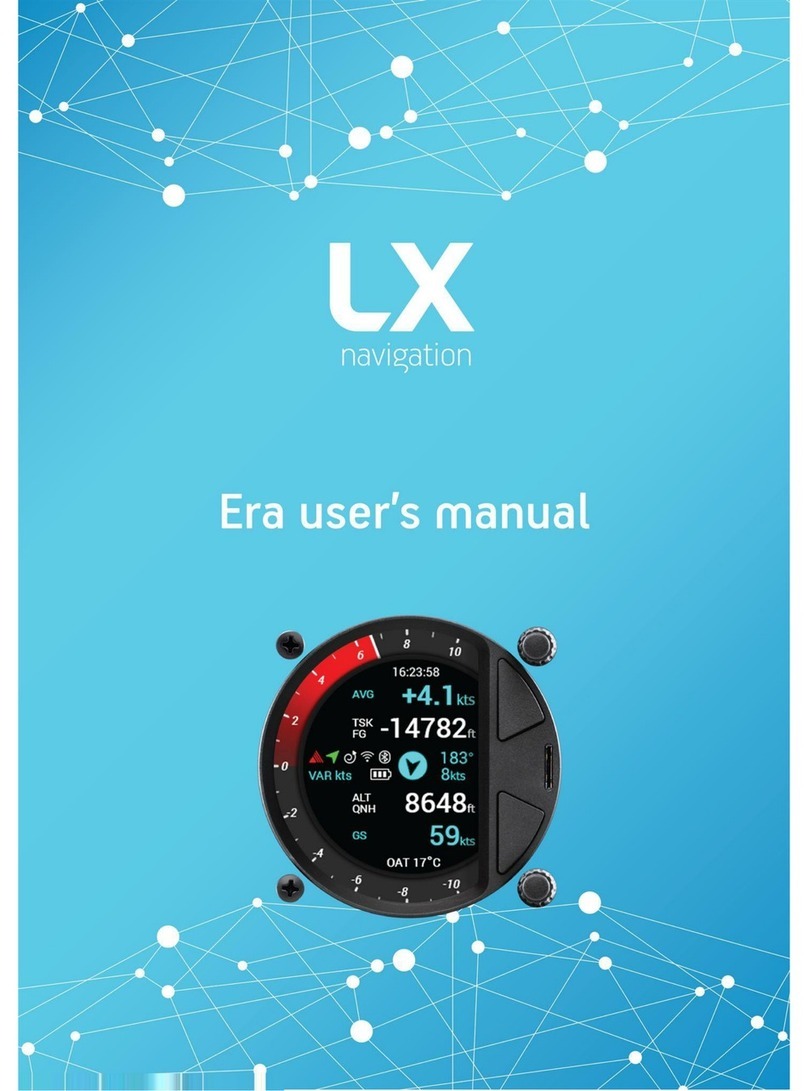
LX Navigation Era Series User manual


LX Era
Document information
Document name: LX EUM
Document revision: R1
Document information
0.1 Abstract
This document represents the user manual for the LX Era variometer. The installation manual,
dataport and additional info can be found on www.lxnavigation.com.
0.2 List of applicable products
Device Version
LX Era 57 V1.6
LX Era 80 V1.6
0.3 Revision history
Document Document SW Revised Approved
name revision version Date by by Notes
LX EUM R1 1.6 22.5.2020 L.R. N.S. Manual written
Device manual Public 3

LX Era
CONTENTS
Document name: LX EUM
Document revision: R1
Contents
0 Document information 3
0.1 Abstract.......................................... 3
0.2 List of applicable products . . . . . . . . . . . . . . . . . . . . . . . . . . . . . . . 3
0.3 Revisionhistory ..................................... 3
1 Important notices 8
1.1 Usingthismanual .................................... 8
1.2 Deviceoperatinglimits ................................. 8
1.3 Limitedwarranty..................................... 8
1.4 Sunburneddisplay.................................... 9
1.5 Disclaimer/EULA..................................... 9
2 Getting started 10
2.1 Devicehardwareoverview ............................... 10
3 Basic operation 13
3.1 TurningtheEraon.................................... 13
3.2 Deviceinterface ..................................... 14
3.3 Userinput......................................... 15
3.3.1 Bottom push-rotary knob (PAGES) . . . . . . . . . . . . . . . . . . . . . . . 15
3.3.2 Top push-rotary knob (ZOOM) . . . . . . . . . . . . . . . . . . . . . . . . . 15
3.3.3 Bottom push button (VOL) . . . . . . . . . . . . . . . . . . . . . . . . . . . 15
3.3.4 Toppushbutton(MC).............................. 15
3.4 Performinganupdate.................................. 15
3.5 TurningtheEraoff.................................... 16
3.6 A word on internal battery and flight mode . . . . . . . . . . . . . . . . . . . . . . 17
4 Advanced operation 18
4.1 Mainpage ........................................ 19
4.1.1 Digitalneedlescale ............................... 19
4.1.2 Digital numeric indicators . . . . . . . . . . . . . . . . . . . . . . . . . . . 20
4.1.3 Flarmstatus ................................... 21
4.1.4 CurrenttimeandOAT.............................. 21
4.1.5 Connectivitystatus ............................... 22
4.1.6 GPSstatus.................................... 22
4.1.7 Flightmode ................................... 22
4.1.8 Batterystatus .................................. 23
4.1.9 Windindicator.................................. 23
4.1.10 Volumesub-page ................................ 24
4.2 Thermalassistantpage................................. 25
4.3 Flarmradarpage..................................... 27
Device manual Public 4

LX Era
CONTENTS
Document name: LX EUM
Document revision: R1
4.4 Turnpointnavigationpage ............................... 30
4.5 Airportnavigationpage................................. 33
4.6 Tasknavigationpage .................................. 35
4.7 Nearest landable navigation page . . . . . . . . . . . . . . . . . . . . . . . . . . . 40
4.8 G-forcepage ....................................... 41
4.9 AHRSpage........................................ 43
4.10Infopage ......................................... 45
4.11 Logbook/Flight statistics page . . . . . . . . . . . . . . . . . . . . . . . . . . . . . 46
4.11.1 Logbook ..................................... 46
4.11.2 Flightstatistics ................................. 47
4.12Airspacepage ...................................... 49
4.13Setuppage........................................ 50
5 Device setup 51
5.1 Usersettings....................................... 51
5.1.1 Pilot........................................ 51
5.1.2 Vario/SC ..................................... 53
5.1.3 Task........................................ 54
5.1.4 Indicators..................................... 54
5.1.5 Voice ....................................... 57
5.1.6 Pages....................................... 57
5.1.7 Graphics ..................................... 57
5.1.7.1 Airspace................................ 58
5.1.7.2 Map .................................. 58
5.1.7.3 Task .................................. 58
5.1.7.4 Theme ................................. 59
5.1.8 Warnings..................................... 60
5.1.9 Logger ...................................... 61
5.2 Systemsettings ..................................... 63
5.2.1 Glider....................................... 63
5.2.2 Units ....................................... 64
5.2.3 NMEA....................................... 65
5.2.4 Inputs....................................... 66
5.2.5 Transfer ..................................... 67
5.2.5.1 Turnpoints............................... 68
5.2.5.2 Airports ................................ 68
5.2.5.3 Airspace................................ 69
5.2.5.4 Loadtask ............................... 69
5.2.5.5 FlarmNET............................... 69
5.2.6 Network ..................................... 70
5.2.7 Localisation ................................... 71
5.2.8 Synchronisation................................. 71
5.2.9 Service ...................................... 72
5.2.9.1 Clubmode............................... 73
5.2.10Shutdown .................................... 73
Device manual Public 5

LX Era
CONTENTS
Document name: LX EUM
Document revision: R1
6 Connectivity 74
6.1 WiFiconnectivity..................................... 74
6.1.1 Flighttransfer .................................. 74
6.1.1.1 Setting up an email address . . . . . . . . . . . . . . . . . . . . . 74
6.1.1.2 Establishing a WiFi connection . . . . . . . . . . . . . . . . . . . 74
6.1.1.3 Sendingtheflight........................... 75
6.2 Bluetoothconnectivity.................................. 75
6.2.1 Connecting an Android device (XC soar) . . . . . . . . . . . . . . . . . . . 75
6.2.1.1 Establishing a Bluetooth connection . . . . . . . . . . . . . . . . 76
6.2.1.2 SettinguptheEra........................... 76
6.2.1.3 Setting up XC Soar . . . . . . . . . . . . . . . . . . . . . . . . . . 76
6.2.2 Connecting an Oudie or other PNA/PDA device . . . . . . . . . . . . . . . 76
6.2.2.1 Establishing a Bluetooth connection . . . . . . . . . . . . . . . . 77
6.2.2.2 SettinguptheEra........................... 77
6.3 Userportconnectivity.................................. 78
6.3.1 ConnectinganOudie .............................. 78
6.3.2 ConnectingaRadio ............................... 78
7 LX Joy 79
8 Taking care of your Era 81
8.1 Theinternalbattery ................................... 81
8.2 Pressuresensors .................................... 82
8.3 Display .......................................... 82
8.4 Devicehousing...................................... 82
8.5 RJconnectors ...................................... 83
8.6 MicroSDcardreader................................... 83
8.7 Reversepolarityonpower................................ 83
9 When connected to the Zeus 84
10 Release notes 86
10.1 1.6.110/6453 (2020-06-08) . . . . . . . . . . . . . . . . . . . . . . . . . . . . . . . 86
10.2 1.6.102/6446 (2020-06-02) . . . . . . . . . . . . . . . . . . . . . . . . . . . . . . . 86
10.3 1.6.100/6441 (2020-06-02) . . . . . . . . . . . . . . . . . . . . . . . . . . . . . . . 86
10.41.6.90/6423(2020-05-27)................................ 86
10.51.6.86/6410(2020-05-25)................................ 86
10.6 1.6.70/6381 (2020-05-12) . . . . . . . . . . . . . . . . . . . . . . . . . . . . . . . . 86
10.7 1.6.57/6367 (2020-05-07) . . . . . . . . . . . . . . . . . . . . . . . . . . . . . . . . 87
10.8 1.4.32/6345 (2020-04-28) . . . . . . . . . . . . . . . . . . . . . . . . . . . . . . . . 87
10.9 Automated builds (from 2020-04-06 to 2019-01-25) . . . . . . . . . . . . . . . . . 87
10.101.3(2019-01-25) ..................................... 89
10.11 1.2(2018-07-18)..................................... 90
10.121.1(2018-07-12)..................................... 91
10.131.0RC3(2018-05-29).................................. 91
10.141.0RC2(2018-05-23).................................. 91
Device manual Public 6

LX Era
CONTENTS
Document name: LX EUM
Document revision: R1
10.151.0RC1(2018-04-26).................................. 91
10.160.9l(2018-04-06).................................... 91
10.170.9k(2018-03-17).................................... 91
10.180.9j(2018-02-05).................................... 92
10.190.9i(2018-02-02).................................... 92
10.200.9h(2017-12-19).................................... 92
10.210.9f............................................ 92
10.220.9d ........................................... 93
10.230.9b/c .......................................... 93
10.240.9a ........................................... 94
10.250.9 ............................................ 94
10.260.8 ............................................ 94
10.270.7 ............................................ 95
11 Contact 96
Device manual Public 7

LX Era
Important notices
Document name: LX EUM
Document revision: R1
Important notices
1.1 Using this manual
This manual has been created in L
A
T
EX, giving us the possibility of linking up everything we find
linkable. You will find references to other parts of the manual, to other manuals, webpages,
etc. throughout the manual.
Linkable content will be bold and underlined, i.e. you can find additional info on how to take
care of your Era in the Taking care of your Era section of this manual (click on the underlined
text).
NOTE
The most recent version of this manual will always be available at
http://lxnavigation.com/downloads/manuals/Eos/LX-Era-fresh.pdf
1.2 Device operating limits
This instrument may be used under VFR (Visual flight rules) only! Any navigational information
is provided for reference only. The pilot takes all responsibility and risk associated with the
use of this device.
Have a nice flight.
1.3 Limited warranty
This device is warranted to be free from defects in materials or workmanship for two years
from the date of purchase. Within this period, LX navigation will, at its sole discretion, repair or
replace any components that fail in normal use. Such repairs or replacements will be made
at no charge to the customer for parts and labour, the customer shall be responsible for any
transportation cost. This warranty does not cover failures due to abuse, misuse, accident, or
unauthorized alterations or repairs.
THE WARRANTIES AND REMEDIES CONTAINED HEREIN ARE EXCLUSIVE AND IN LIEU OF ALL
OTHER WARRANTIES EXPRESSED OR IMPLIED OR STATUTORY, INCLUDING ANY LIABILITY
ARISING UNDER ANY WARRANTY OF MERCHANTABILITY OR FITNESS FOR A PARTICULAR
PURPOSE, STATUTORY OR OTHERWISE. THIS WARRANTY GIVES YOU SPECIFIC LEGAL
Device manual Public 8

LX Era
Important notices
Document name: LX EUM
Document revision: R1
RIGHTS, WHICH MAY VARY FROM COUNTRY TO COUNTRY.IN NO EVENT SHALL LX NAVIGA-
TION BE LIABLE FOR ANY INCIDENTAL, SPECIAL, INDIRECT OR CONSEQUENTIAL DAMAGES,
WHETHER RESULTING FROM THE USE, MISUSE, OR INABILITY TO USE THIS PRODUCT OR
FROM DEFECTS IN THE PRODUCT.
Some countries do not allow the exclusion of incidental or consequential damages, so the
above limitations may not apply to you. LX navigation retains the exclusive right to repair or
replace the unit or software, or to offer a full refund of the purchase price, at its sole discretion.
SUCH REMEDY SHALL BE YOUR SOLE AND EXCLUSIVE REMEDY FOR ANY BREACH OF
WARRANTY. To obtain warranty service, contact your local LX navigation dealer or contact LX
navigation directly.
1.4 Sunburned display
Damages to the device, especially the display part, are not covered by the warranty and will be
considered as misuse of the device. To learn how to take care of your display and device in
whole, check the Taking care of your Era section of this manual.
1.5 Disclaimer/EULA
LX navigation reserves all rights to this document and the information contained herein.
Products, names, logos and designs described herein may in whole or in part be subject to
intellectual property rights. Reproduction, use, modification or disclosure to third parties of
this document or any part thereof without the express permission of LX navigation is strictly
prohibited. The information contained herein is provided ”as is” and LX navigation assumes
no liability for the use of the information. No warranty, either express or implied, is given,
including but not limited, with respect to the accuracy, correctness, reliability and fitness for
a particular purpose of the information. This document may be revised by LX navigation
at any time. For most recent documents, please visit www.lxnavigation.com or contact
[email protected]. Copyright ©2020, LX navigation d.o.o.
Device manual Public 9

LX Era
Getting started
Document name: LX EUM
Document revision: R1
Getting started
2.1 Device hardware overview
The Era is a digital electronic variometer. It is a highest level IGC certified logger with ENL
capability and is expandable to MOP as well (if the MOP IGC logger is connected). You can
find the IGC approval here.
The Era was envisioned to be easy and intuitive to use, with four command inputs (two
push-rotary knobs and two push buttons).
It provides the pilot with four dedicated navigation pages, enabling simultaneous navigation to
aTurnpoint,Airport,Task or the Nearest landable point. Each page offers the pilot information
of his position on a map, with Turnpoints, Airports and Airspaces graphically shown on the map.
The Era has a built-in voice module, offering the pilot voice warnings, voice pronounced airport
frequencies and similar.
The Era features an internal battery, capable of powering the device for three to five hours,
depending on the brightness level, sound level, use of connectivity features and similar. More
info can be found in A word on internal battery and flight mode sub-section.
All Eras have a built-in connectivity module, providing both Bluetooth and WiFi connectivity to
the user.
The Bluetooth is mainly used for connecting 3rd party devices, like PDA/PNAs, Android
phones, etc. The connection to these devices enables bi-directional communication. This
communication includes sending of task declarations from third party devices to the Era,
communicating the MC, Ballast and Bugs parameters between the two devices, as well as the
Era sharing it’s information (includes but is not limited to: accurate GPS, altitude, vario value,
Flarm, IAS, G-force, AHRS data, etc.) to the 3rd party device. Additional info on Bluetooth
connectivity can be found in the Bluetooth connectivity section of this manual.
The WiFi is mainly used for giving the Era access to the internet. This can be done by con-
necting it to a mobile hot-spot or regular WiFi network. The Era has the capability of sending
flights over emails and other functions, depicted in the WiFi connectivity section of this manual.
The Era has a dedicated Flarm port on the back of the device, providing the pilot the capability
of connecting any Flarm device. The Era will use the data acquired from the Flarm device
Device manual Public 10

LX Era
Getting started
Document name: LX EUM
Document revision: R1
in two ways. Firstly, it will show the pilot all surrounding aircraft on the Flarm radar sceen.
Secondly, it will warn the pilots of upcoming threats with the Flarm warning screen. More info
on this subject can be found in the Flarm radar page sub-section of this manual.
The Era has a dedicated User port on the back, used for providing bi-directional cabled com-
munication to a 3rd party device using the RS232 communication protocol. More information
on this subject can be found in the Connectivity section of this manual.
The Era has a dedicated Inputs port, intended for the Inputs interface, used for connecting
up to 5 external micro-switches for triggering different functions in the Era. More info on this
subject can be found in the Inputs sub-section of this manual.
The Era features an OAT (outside air temperature probe), a 3.5 mm audio-put jack and two
antennae connectors, for both the GPS and connectivity module.
The Era features high-precision digital sensors based on the latest MEMS technology for
attitude, vario, speed, 3-axis gyros, 3-axis accelerometers. All sensors are sampled with at
least 100Hz.
On the back side of the Era, we can see the three pressure connectors, for connecting PT O T ,
PS T and T E /PS T pressures. The Era also has a separate, internal altitude pressure, used for
logging flights.
The Era comes in two sizes, fitting the standard 80mm (3 1/8inch) and 57mm (2 1/4inch)
aviation instrument holes. The larger Era uses a transflective technology display.
NOTE
Find out more about transflective technology displays and why this technology is
so important in air navigation in our Whitepaper on transflective technology.
The Era has an internal memory capacity of at least 8GB, used for storing flights, settings and
database files.
LX Era can be used in two different configurations:
•Standalone configuration - LX Era represents vario navigation system and has all options
active. Unit will turn on when enter push/rotary knob is pressed.
•Zeus configuration - LX Era serves as vario system controlled from LX Zeus. Unit will
turn on automatically when main switch (Zeus) is turned on. Flarm radar settings and
thermal assistant settings are set on LX Era while all other settings are controlled by
settings on the LX Zeus. Some options are disabled on the LX Era (setup, task edit) but
all options become active when backup mode is detected.
Device manual Public 11

LX Era
Getting started
Document name: LX EUM
Document revision: R1
The unit has the capability of being updated to any later firmware release free of charge. When
paired with a Zeus, the Zeus will automatically update the Era. For information on how to
update a standalone Era, check the next sub-section.
You can find a list of functions listed below:
•3.5 inch transflective technology display - in the 80mm version
•2.5 inch display - in the 57mm version
•IGC certified with ENL
•WiFi module
•Bluetooth module
•Integrated G-meter - G-force recorder
•3-axis gyroscopes
•3-axis accelerometers
•50ch GNSS receiver
•User defined inputs - for micro-switches
•Internal beeper
•Voice module
•Rotary button and push-rotary knobs
•At least 8GB - of internal memory
•Flarm port
•User port
•CAN bus
•Front-facing microSD card reader
•Standalone or Zeus version
•Built-in rechargeable battery
•Pre-loaded polar database
•TE electronic or TE probe compensation
•Speed to fly function
•Final glide calculator - on all navigation pages
•Flarm radar screen - with Flarm warnings
•Thermal assistant
•LX Joy operation
•Logbook
•Flight information with an altitude graph
•Multi-pilot support
•Wind calculation in both circling and straight flight
•User warnings
Device manual Public 12

LX Era
Basic operation
Document name: LX EUM
Document revision: R1
Basic operation
We will go through the basic gestures and what they do on all pages of the Era variometer.
One important thing to keep in mind is that there are usually multiple ways of doing something
on an Era and, although we will go through all of the possibilities, the Era is envisioned to
be used single-handedly and almost all operations are accessible with the lower push-rotary
knob. Bearing this in mind and getting used to doing all operations with the lower push-rotary
knob will greatly elevate your user experience.
3.1 Turning the Era on
There are two different hardware versions of the Era. A standalone and Zeus version.
The standalone version of the device is turned on by pressing and holding the lower push-
rotary knob (PAGES) until the screen flashes. The Zeus version of the Era is being turned on
automatically when the Zeus is powered on, or more precisely, when it receives power through
the CAN port. Once the device is turned on, a sequence of screens will appear in the following
order:
•LX navigation greeting screen
•Second screen stating the device type, serial number, IGC number and firmware version
•The initial setup page will appear, where basic information is selected:
– Select pilot, where a pilot profile should be selected, from which all user settings
shall be imported
– Set elevation, where the elevation of the take-off location should be selected
– Set QNH, where the QNH pressure should be set for take-off location
WARNING
When the device is turning on, three types of warnings may appear, indicating
limited operation capability to the pilot. In first two cases, recording is disabled
and you should contact LX support as soon as possible.
•Seal not valid - indicates the internal IGC seal of the device has been lost.
Explained in detail in section The internal battery.
•Internal memory error - there is an issue with the internal memory of the de-
vice. Flights will not be saved and settings will not be loaded, but the device
will operate.
•Network module error - indicating an issue with the internal network module.
Device manual Public 13

LX Era
Basic operation
Document name: LX EUM
Document revision: R1
3.2 Device interface
The Era features two push buttons and two push-rotary knobs for pilot-device communication.
The front side of the device, represented by figure 1, shows the Era’s user interface. An example
page shows how the first page on the Era looks in-flight, as well as the buttons a pilot can use
for device manipulation.
Figure 1. Era front plate interface
On the main screen, we can see the following software items:
1. Digital needle scale
3. MacCready pointer
4. Battery status indicator
5. Circling/straight flight indicator
6. GPS status indicator
7. Connectivity mode indicator
8. Flarm indicator
9. Digital needle indicator
10. Digital needle units
11. Wind direction relative to heading
12. Outside air temperature indicator
14. Speed to fly indicator
16. Current time
17. Top numeric indicator
19. Wind direction relative to North
21. Wind speed and unit
22. Numeric indicator units
23. Numeric indicator value
24. Numeric indicator chosen
As well as the following hardware items:
2. and 13. M4x6 Phillips head screw
15. Top right push-rotary (ZOOM) knob
18. Top push button (MC)
20. microSD card reader
25. Bottom push button (VOL)
26. Bottom push-rotary (PAGES) knob
We will name the two main push buttons and two main push-rotary buttons by their function
(ZOOM,MC,VOL,PAGES).
Device manual Public 14

LX Era
Basic operation
Document name: LX EUM
Document revision: R1
3.3 User input
The Era was envisioned to be simple and intuitive to use. There are two buttons and two
push-rotary buttons mentioned in the previous sub-section.
The Era can also be commanded by an LX Joy. Learn more in the LX Joy section of this manual.
3.3.1 Bottom push-rotary knob (PAGES)
The bottom push-rotary is used for the following functions:
•Scrolling, turn clockwise for moving down, right or for choosing larger values, counter-
clockwise for moving up, left or choosing smaller values.
•Turning while being pressed, acts as noted above, by 10-fold.
•Pressing, acts as ’Confirm’, ’Enter’
3.3.2 Top push-rotary knob (ZOOM)
The top push-rotary is used for the following functions:
•Setting volume, on all primary pages, as well as opening the MC menu
•Zooming, turn clockwise for zooming in, counterclockwise for zooming out
•Scrolling, moving down, right or for choosing larger values, counterclockwise for moving
down, left or choosing smaller values, by 10-fold
•Pressing, acts as ’Cancel’, ’Exit’
•Turning while being pressed, acts as noted above, by 100-fold.
3.3.3 Bottom push button (VOL)
The bottom push is used for opening the Volume adjust page, while in any primary page.
3.3.4 Top push button (MC)
The bottom push-rotary is used for opening the MacCready,Ballast,Bugs and QNH setup
page, while in any primary page.
3.4 Performing an update
In order to be on track with the latest software releases, be sure to regularly follow our
Database webpage. Once you find an update, contact LX navigation support via the following
you’d like to update to and the serial number of your device, and the support staff will provide
you with an update code.
Device manual Public 15

LX Era
Basic operation
Document name: LX EUM
Document revision: R1
Once you have received the update code, follow these steps:
1. Copy the desired software update to the root of the microSD card. The update file should
have the word Era within its name and an extension of .lxu
2. Turn the device on and insert the microSD card
3. Go to Setup >Service >Software update
4. Select the desired update file
5. When prompted, type in the update code supplied by LX support
6. The device will copy the file to the internal memory and perform the update. It may restart
a couple of times.
7. Once the update has finished, verify that the update has been successful by going to
Setup >Service >Device info and checking that the SW version has changed to the
desired one
NOTE
While the Zeus version of the Era will restart automatically, a standalone Era
requires the bottom push-rotary knob to be pressed in order to turn them on, after
the file has been copied, for the updating process to proceed.
WARNING
Once the Era has been updated, it will update all CAN-compatible devices (LX
Joy, second seat device, etc). For this reason, the Era should be left ON for at
least five minutes after the main unit has been successfully updated. If the
update of CAN units is ongoing, an infobox will appear, notifying the pilot.
WARNING
Great care should be taken not to turn the device off while the updating process
is running. Data corruption may occur. If something similar happens, contact LX
support immediately, in order to recover you unit.
3.5 Turning the Era off
The Era can be turned off in different ways, depending on the configuration you have.
All units will start the shutdown process once the power supply is cut from the main power
lines or the CAN bus, the latter representing a shutdown of the Zeus, unless in flight mode.
There is a possibility of a manual shutdown by going to Setup >Shutdown and confirming by
choosing ’Yes’.
In case a device requires a force shutdown, there is a possibility of performing a hard
shutdown by pressing and holding the PAGES push-rotary knob for 10 seconds.
Device manual Public 16

LX Era
Basic operation
Document name: LX EUM
Document revision: R1
3.6 A word on internal battery and flight mode
All Era devices have a built-in reserve battery, intended for supplying the unit with power in
case your aircraft losses its main power supply. The reserve battery is not intended for use on
the ground, which is why the device can not be turned on, on reserve battery alone.
Flight mode is a term describing a state in which the Era is, when the device detects it is flying.
For getting into flight mode, one of the following parameters must be met:
•GPS lock is present, and
•GPS speed is above 10 m/s, or
•airspeed larger than 10 m/s is present, or
•significant movement in vertical speed
Once in flight mode, the Era will not turn off if the main power supply is cut, but continue
operating as long as there is internal power, or until the main power supply is reestablished.
The internal battery powers all of the internal features of the Era, which means everything
described in the manual. The Era will continue logging, with IGC seal intact, it will continue
providing you vario information, sound warnings, complete navigation, etc.
External modules, such as Flarm, Flap sensor, Joy, etc. will not work, as they require the main
power supply.
If you wish to turn the Era off, while in flight mode, you will have to exit the flight mode by going
to Logbook/Flight statistics page, pressing the lower push-rotary (PAGES) knob and confirm
the ’Finish flight’ question. The Era will check the integrity and seal the flight and turn off, if no
external power is present.
A sure way of knowing if the Era is in flight mode is to go to the Statistics/Logbook page. If the
Statistics page is present, with the barograph present, the Era is in flight mode.
You can simulate flight mode, while on the ground, by receiving a GPS lock and applying slight
dynamic pressure to the PT O T pressure port (or front entrance of Pitot tube), so the IAS is
above 10 m/s for about 5 seconds. You can keep the Era in flight mode by then disconnecting
the GPS antenna, or by keeping the IAS constantly above 10 m/s.
For notes on how to take care of your Era’s reserve battery, check the Taking care of your Era
section of this manual.
WARNING
Great caution should be exercised when applying pressure for IAS simulation, as
the internal pressure sensor of the Era, and other avionics, may get damaged if
excessive pressure is applied, water is present in the Pitot-static system, or
similar. LX navigation is in no case liable for any damages that may appear when
simulating and strongly discourages simulating flight mode while grounded.
However, if a simulation has to be done, the steps above are the safest.
Device manual Public 17

LX Era
Advanced operation
Document name: LX EUM
Document revision: R1
Advanced operation
Primary pages overview This section will cover the complete specter of operations possible
on Era’s primary pages.
There are 13 primary pages on the Era. You can scroll between these pages by using the lower
push-rotary knob (PAGES). The pages are listed as follows:
1. Main page
2. Thermal assistant page
3. Flarm radar page
4. Turnpoint navigation page
5. Airport navigation page
6. Task navigation page
7. Nearest landable navigation page
8. G-force page
9. AHRS page
10. Info page
11. Logbook/Flight statistics page
12. Airspace page
13. Setup page
Device manual Public 18

LX Era
Advanced operation
Document name: LX EUM
Document revision: R1
4.1 Main page
The main page holds primary flight information. It consists of the digital needle scale, the
only feature shared across all Era screens and pages, a clock, either two or four user settable
indicators, status indicators, a wind indicator and OAT indicator.
Figure 2. Main page overview
4.1.1 Digital needle scale
The Era does not use a needle-type pointer for showing values on the circular scale, but rather
a solid colour.
Positive values are shown with a solid red arc, ranging from 0 to the actual value. Negative
values are shown with a solid blue, ranging from 0 to the actual value. The solid arcs and their
large surface and potent colours help show the desired values in a very clear attention-drawing
manner. The impact of solid area digital needles is shown with the two figures below.
The digital needle scale can be set in the Indicators menu to shown one of the following flight
parameters:
•Vario
•SC
•Netto
•Relative
•G-force
For more information on how to set the digital needle, check the Indicators part of the manual.
Device manual Public 19

LX Era
Advanced operation
Document name: LX EUM
Document revision: R1
Figure 3. Red digital needle scale Figure 4. Blue digital needle scale
The value, which is being shown by the digital needle, is shown with three letters bellow the
status indicators, shown as ’VAR’ on figure 2.
If the the -5 to +5 m/s vario scale is chosen, and you experience a lift larger than 5 m/s, the
vario needle will go up to the number 5, but the number 5 on the scale will change to the exact
vario value, you are experiencing at that moment, as shown by the two figures above.
The digital needle scale shows two additional parameters: Speed to fly and MacCready value
set.
The first is represented with a thin green line, which moves along the inner edge of the digital
needle scale. The idea is that the green arc should always be on zero. If it is showing a negative
value, it means you are flying to slow for the current vertical speed value and MacCready value
set, and that you should speed up. Similarly, if the green arc is showing a positive value, it
means you are flying too fast and you should slow down. When abiding to Speed-To-Fly rules
in your flight, in ideal conditions, the green arc is not visible.
The latter shows the current MacCready value set and is represented with a yellow dot with
black outline. If the dot is positioned on the 2 m/s value, it means your current MacCready
value is set to 2 m/s.
4.1.2 Digital numeric indicators
The Era’s main page features either two or four numerical indicators. If two indicators are
chosen, the info shown is twice as large, which is why this setting is recommended with pilots
who have short-sightedness issues.
Each of these indicators is formatted in the same way. On the far-left, the name of the indicator
is displayed, noting which flight parameter the indicator is showing. Next, with larger fonts,
the actual value is shown, with the value unit to the right of the shown value. These indicators
Device manual Public 20
This manual suits for next models
2
Table of contents
Other LX Navigation Measuring Instrument manuals
Popular Measuring Instrument manuals by other brands

Union Instruments
Union Instruments CWD2005 SPC Original operating instructions

NDT James Instruments
NDT James Instruments Aquameter T-M-170 Operator's manual

Fluid Components Intl
Fluid Components Intl AF Series Installation, operation and maintenance manual

Reely
Reely 1082712 operating instructions

PCE Instruments
PCE Instruments PCE-VT 1000 manual

GR
GR 1214-A operating instructions