3DOUBLE CARPORT
CYCLONIC
STEP 5 - laying out the beams
Using the drawing, lay the beams close to
the point where they will be assembled.
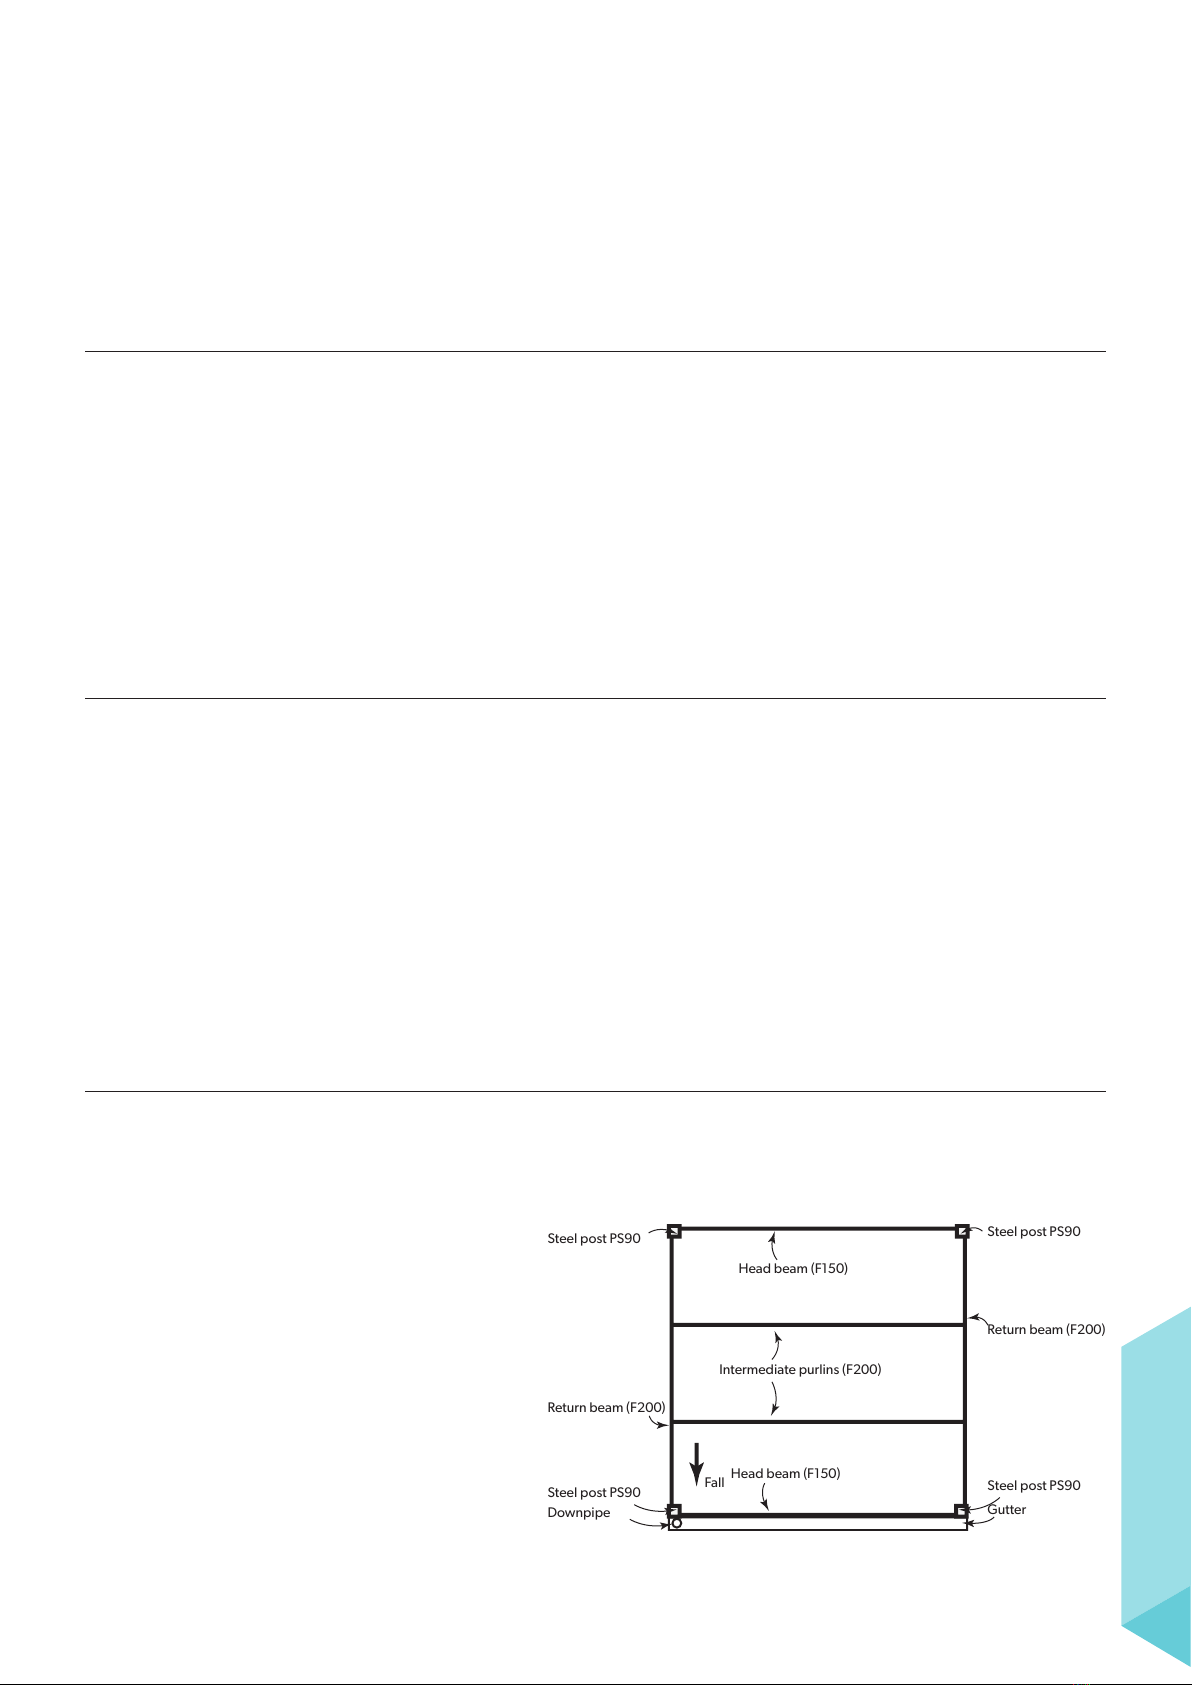
INTERMEDIATE PURLIN
You will have two FIRMLOK®F200 beams
that are the shortest – these are your
intermediate purlins.
HEAD BEAMS
You will have to received two FIRMLOK®F150
beams – these are your head beams.
RETURN BEAMS
You will have received two FIRMLOK®F200
beams that are the longest in length – these
are your return beams.
Steel post PS90
Steel post PS90
Steel post PS90
Steel post PS90
Head beam (F150)
Head beam (F150)
Intermediate purlins (F200)
FRAME ASSEMBLY
STEP 3 - before you start!
It is recommended that all LYSAGHT®carports are assembled and
installed under the supervision and direction of a person with some
level of building experience.
Safety is of utmost importance at all times. Always make sure that
even basic construction tasks are done utilising safe building
practices.
It is very important to read both the installation instructions and
the supplied construction drawing. They should both be referred
to in preparation for the installation and at every step during the
construction process.
Every dimension, hole location and level should be double
checked for good measure before cutting, fixing, screwing or
bolting to any structural component.
Your carport is designed to resist wind uplift and the footing size
is based on the wind classification. If in doubt, go to the Lysaght
website (www.lysaght.com) and use the wind classification system
to check the design wind speed or seek expert advice to ensure
correct wind classification is selected.
If you do not have the necessary tools or know-how, please
contact your local Lysaght branch for guidance.
STEP 4 - marking out the carport position
Use in-ground stakes and tie up string lines to position the steel
post locations referring to the construction drawing. Check
diagonals are equal for a square shape.
FIRMLOK®beams and SPANDEK®sheeting lengths are reliant upon
these measures being 100% accurate.
Check depth and width of the footing according to the
construction drawing and remove soil.
Mark and cut posts to length and prepare the bottom of
the posts as per the construction drawing with intersecting
fixings and add the connectors to the top of the posts.
Ensure the footings holes are aligned and the final intended
locations of posts correct in accordance with the construction
drawing. Slopes of the ground will need to be taken into
consideration to ensure holes are dug to appropriate depth
and posts are subsequently aligned in terms of height.
Once the digging is complete, simply place bricks/pavers squarely
in the bottom of each hole so the posts can be positioned on solid
ground.
Place the posts in the holes and clamp off in position and brace
with a fall towards the end at which the gutter system will be
positioned. The fall needs to be a minimum 30mm for every 1m in
length.
STEP 2 - what tools & materials do you need?
• Step ladder
• Hack saw
• Tape measure
• Pliers and tin snips
• Angle grinder
• Spirit or laser level
• Rivet gun
• Post hole digger or shovel
• PVC downpipe & strap
• Electrical lead
• PVC downpipe elbow
• Silicone gun & clear silicone
• String line/ stakes
• Ratchet wrench
• Safety equipment (PPE)
• Adjustable stands (props)
and clamps
• Adjustable spanner
• Bags of concrete
• Drill & adaptors
• Saw horses and planks