Hotline: +49 5251 688865-99Hotline: +49 5251 688865-99
Hotline: +49 5251 688865-99Hotline: +49 5251 688865-99
Hotline: +49 5251 688865-99 .Operating Manual grandMA Version 5.4
77
77
7
2
3
458
9
10
11
12
13 14
16
17 18 21
24
22 25
23
20
19
14
15
6
7
11
11
1
Differences to theDifferences to the
Differences to theDifferences to the
Differences to the
grandMAgrandMA
grandMAgrandMA
grandMA
ThesoftwareforthegrandMAlightand ultra-light and the grandMA is nearly
identical.
Theproductwillnotbedelivered with a hardware keyboard and an external
mouse.An additional external keyboardand a mouse,however, can be
connected on the rear of the unit.
UsingtheKEYBOARDkey on the TFT display,a Soft Keyboard can be brought up
thatcanbeoperatedvia the touch screen. The SoftKeyboardwill only appear,if
entriesarepossible.
Ifthetrackballis switched to mouse function(LEDinthe PAN / TILT key isoff),
youcanperformmousefunctionsusingthetrackballortheLEFT-MIDDLE-RIGHT
keys.Thereare some limitations for the MICRO.
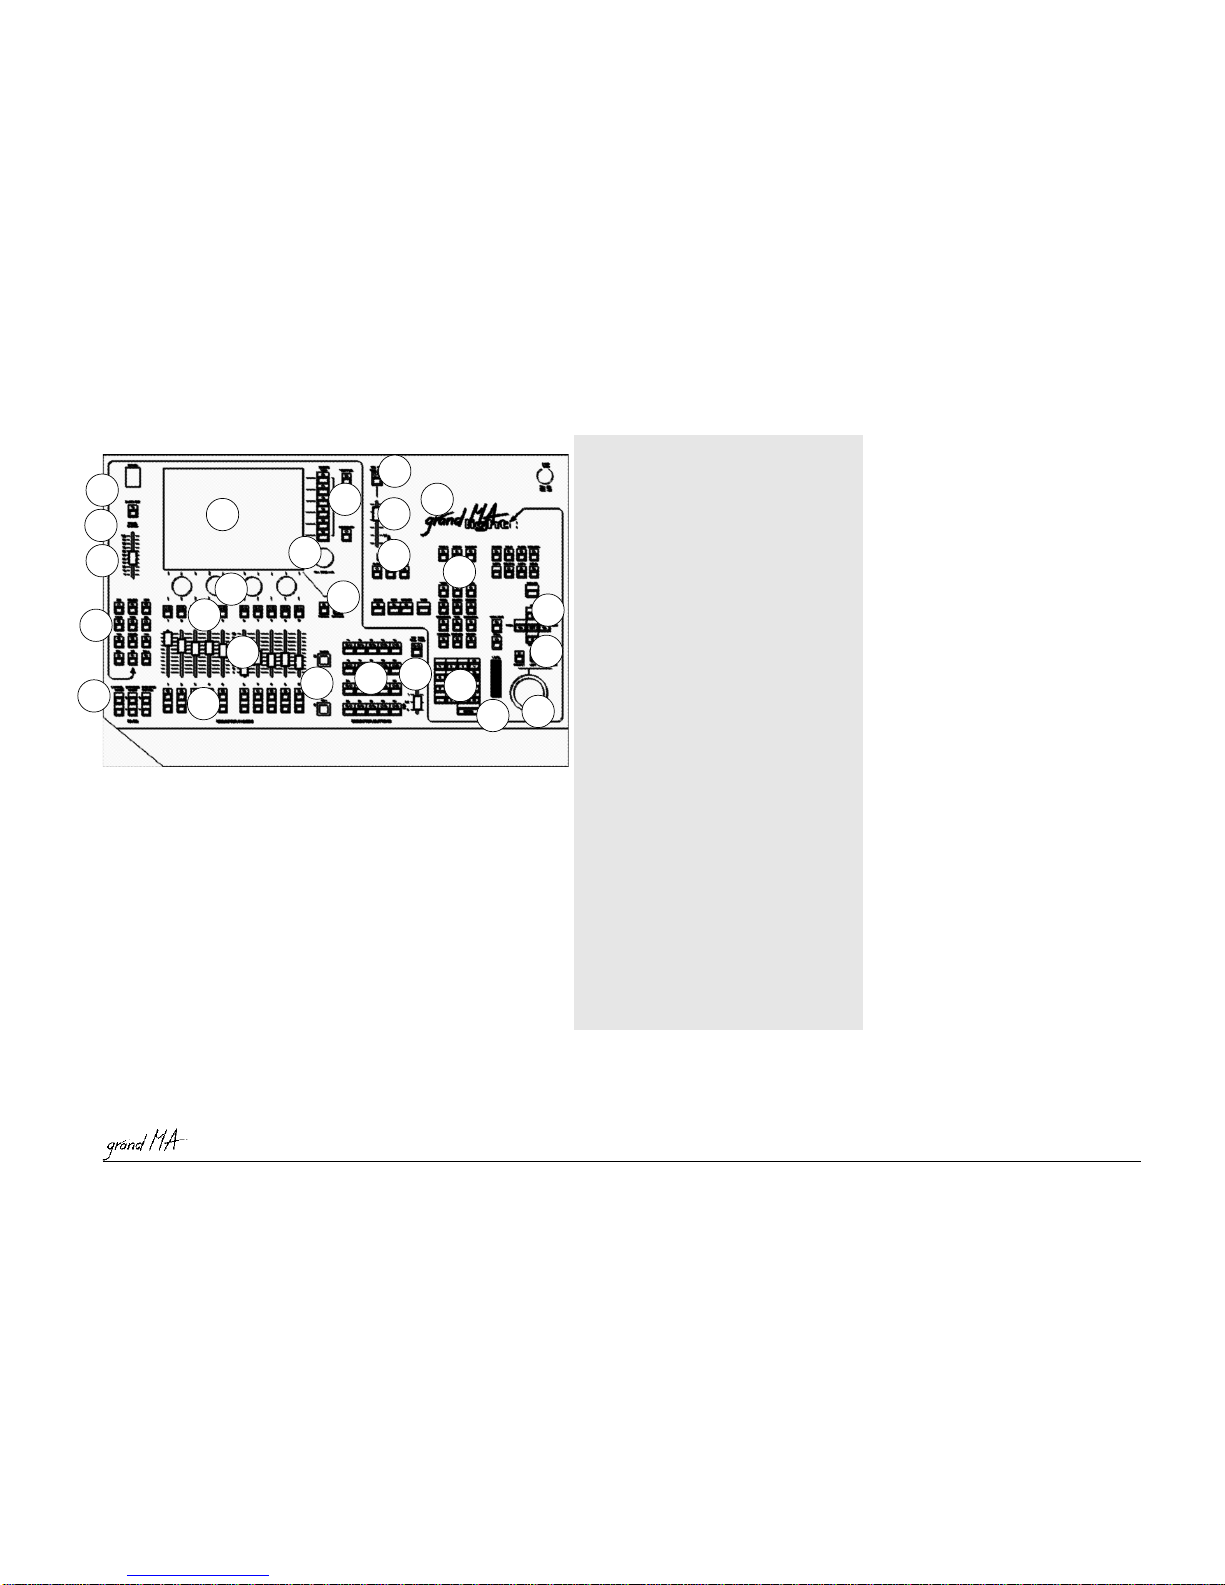
1Power switchPower switch
Power switchPower switch
Power switch
2Blackout keyBlackout key
Blackout keyBlackout key
Blackout key for Dimmer channels
3Grand MasterGrand Master
Grand MasterGrand Master
Grand Master for Dimmer channels
4TFT DisplayTFT Display
TFT DisplayTFT Display
TFT Display touch screen
5VieVie
VieVie
View/w/
w/w/
w/Macro keysMacro keys
Macro keysMacro keys
Macro keys
6EncoderEncoder
EncoderEncoder
Encoder for moving / scrolling the respective
windowcontents
7Viewpool keyViewpool key
Viewpool keyViewpool key
Viewpool key for opening a window on the
TFT display with all the created VIEWS in the
show. These canthen be recalledup directly by
selectingtherequiredview.
8Background keyBackground key
Background keyBackground key
Background key - If on the TFT display, Views
are being overlayed by a menu (ASSIGN, EDIT,
….),youcanusethiskeytobring up or hide the
menu.
9Keyboard keyKeyboard key
Keyboard keyKeyboard key
Keyboard key to bring up the Soft Keyboard
ontheTFTdisplay.
10 Manual setting of timeManual setting of time
Manual setting of timeManual setting of time
Manual setting of time for Presets
11 EncoderEncoder
EncoderEncoder
Encoder for setting the attribute values (e.g.
Gobo,Pan/Tilt,times,etc.)
12 KeysKeys
KeysKeys
KeystodirectlyexecutefunctionslikeGo+,Go-
,etc. for arbitrary executors,locking executors,
SELECTkey
13 PP
PP
Page flippingage flipping
age flippingage flipping
age flipping for Channel fader, Executor fa-
derandExecutorbuttons
14 Playback buttonsPlayback buttons
Playback buttonsPlayback buttons
Playback buttons can also be defined as e.g.
Go, Go-, Pause, Flash, etc..
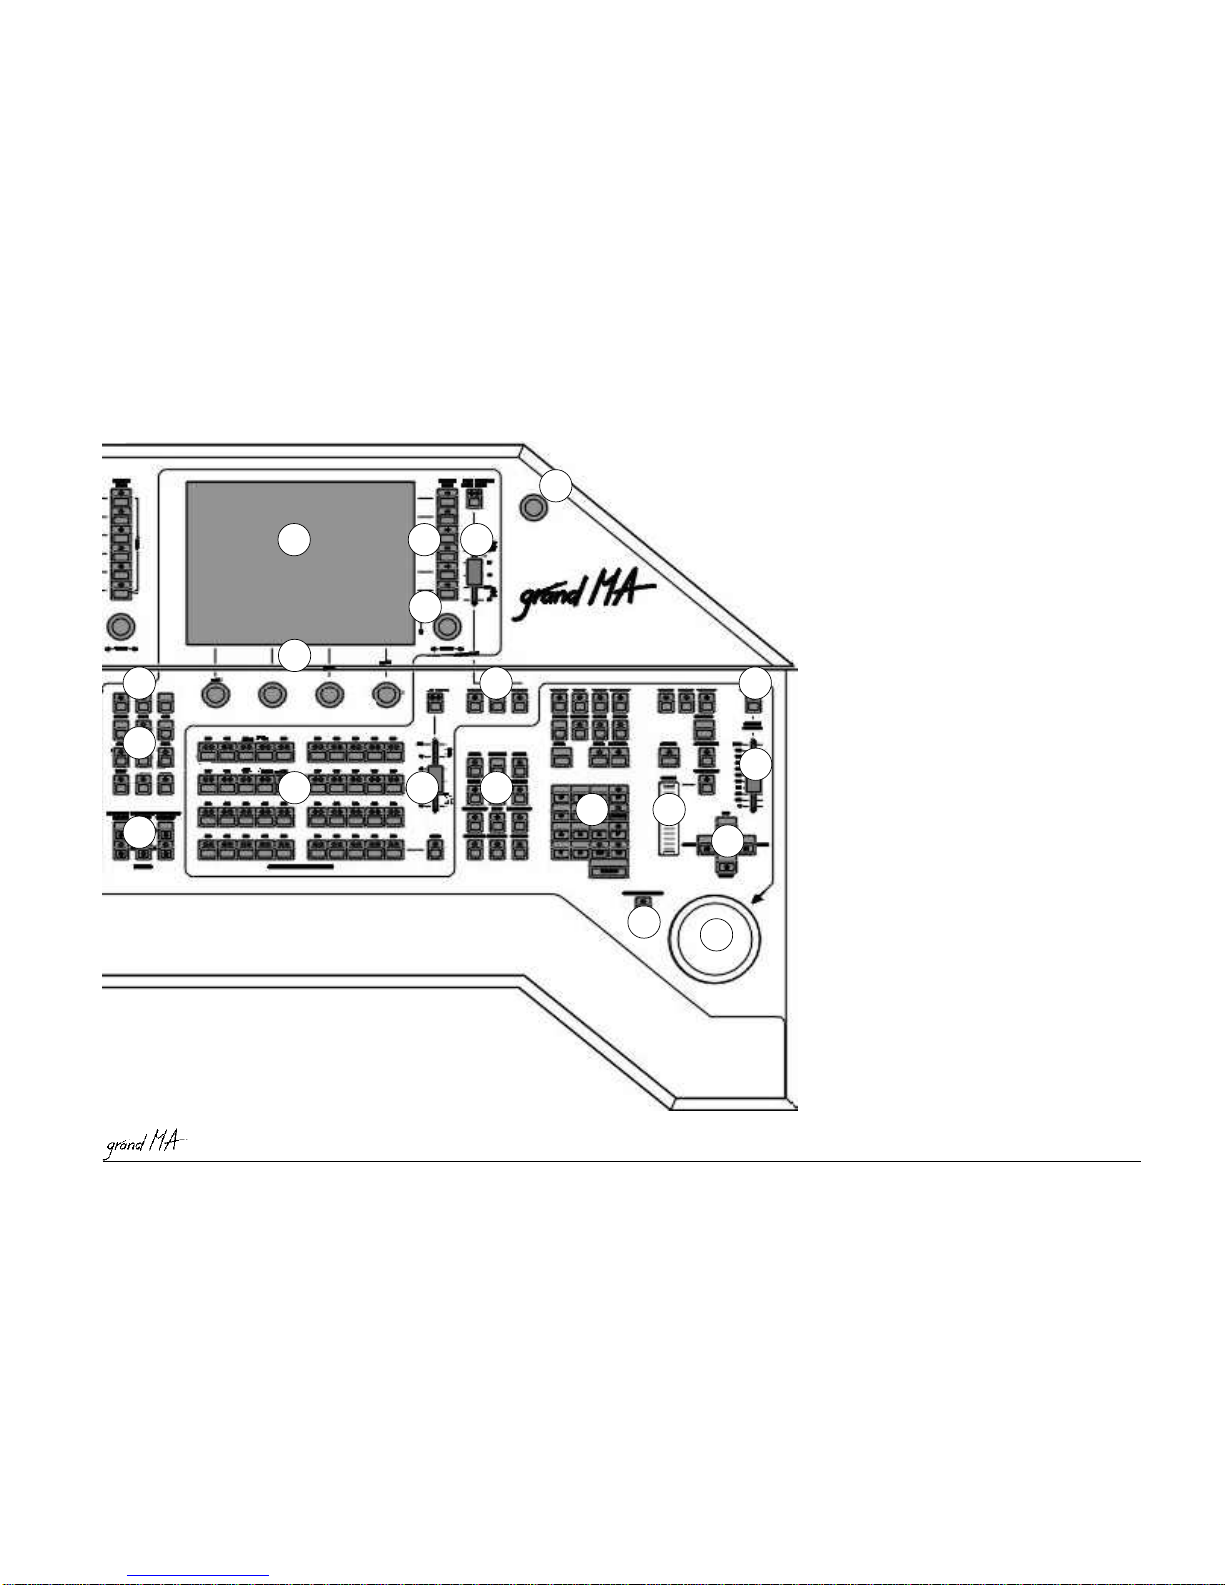
15 Executor fadersExecutor faders
Executor fadersExecutor faders
Executor faders can also be defined e.g. as
Master,SwapMaster,X-Fader,etc..
16 List keysList keys
List keysList keys
List keys
Faders:Faders:
Faders:Faders:
Faders: will bring up small Executor
windows for the EXECUTOR
FADERS.
Buttons:Buttons:
Buttons:Buttons:
Buttons: will bring up small Executor
windows for the EXECUTOR
BUTTONS.
17 Go+, Go–, Pause buttonGo+, Go–, Pause button
Go+, Go–, Pause buttonGo+, Go–, Pause button
Go+, Go–, Pause button – Will only
effect the default sequence. A default
sequence can be assigned by using the
Select keySelect key
Select keySelect key
Select key
(indicated by the green title
barinthesmallEXECUTORwindowdisplayed
above).
18 Executor buttonsExecutor buttons
Executor buttonsExecutor buttons
Executor buttons can also be defined
as e.g. Go, Go-, Pause, Flash, etc..
19 Manual setting of timesManual setting of times
Manual setting of timesManual setting of times
Manual setting of times for Executor
buttons
20 ChoosingChoosing
ChoosingChoosing
Choosing Groups, Executors, etc. in
combinationusingthenumeric keypad
21 Numeric keypadNumeric keypad
Numeric keypadNumeric keypad
Numeric keypad
22 Intensity wheel*Intensity wheel*
Intensity wheel*Intensity wheel*
Intensity wheel*
23 Cursor keysCursor keys
Cursor keysCursor keys
Cursor keysNEXT,PREV.GroupwiseCalling
upofscannerordimmerchannelsoneafter
theother.
24 PP
PP
PAN / TILAN / TIL
AN / TILAN / TIL
AN / TILT keyT key
T keyT key
T key,,
,,
, changing over the
functionofthetrackballtomousefunctions
(LEDoff)ortoPan/Tiltfunctions(LEDon)
Left / Middle / Right keyLeft / Middle / Right key
Left / Middle / Right keyLeft / Middle / Right key
Left / Middle / Right key for Mouse
functions
25 TrackballTrackball
TrackballTrackball
Trackball for Mouse or Pan/Tilt functions
26 Socket for console lampSocket for console lamp
Socket for console lampSocket for console lamp
Socket for console lamp 12V/5W
1.7.11.7.1
1.7.11.7.1
1.7.1
Layout and ControlsLayout and Controls
Layout and ControlsLayout and Controls
Layout and Controls
grandMAgrandMA
grandMAgrandMA
grandMA
lightlight
lightlight
light
grandMAultra-light: Items 77
77
7and1717
1717
17do notapply (keys inexistent). Item 22 (Wheel) does notapply, canbe controlled by Trackball(item 25) and Wheelkey(item 24).